|
TOP MERCEDITAS
ENGLISH VERSION
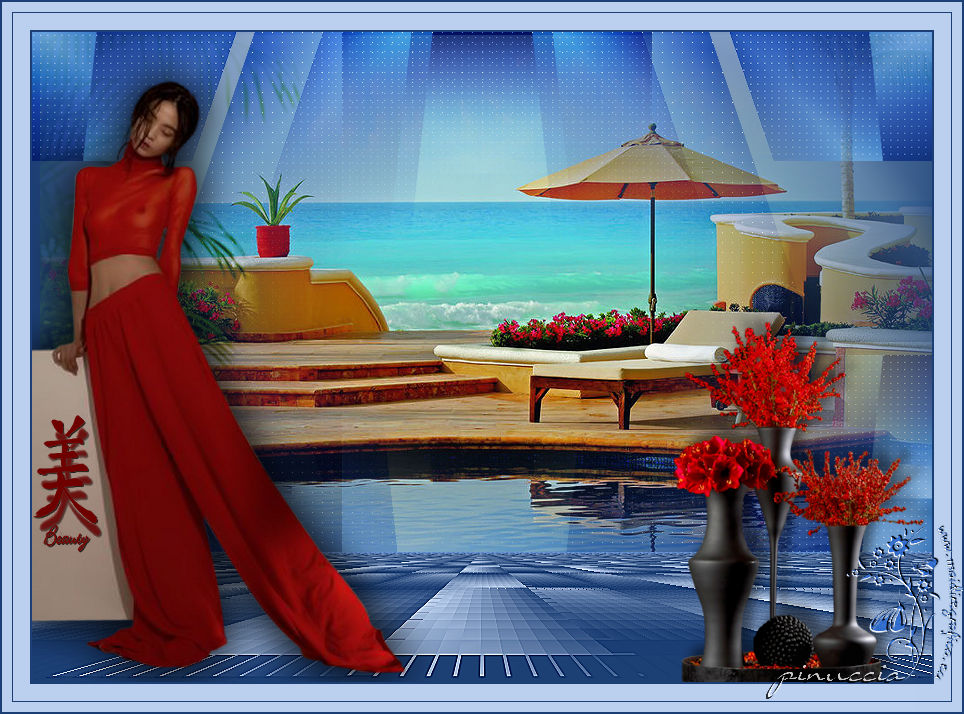
Here you find the original of this tutorial:

This tutorial was translated with PSPX3 but it can also be made using other versions of PSP.
Since version PSP X4, Image>Mirror was replaced with Image>Flip Horizontal,
and Image>Flip with Image>Flip Vertical, there are some variables.
In versions X5 and X6, the functions have been improved by making available the Objects menu.
In the latest version X7 command Image>Mirror and Image>Flip returned, but with new differences.
See my schedule here
French translation here
Your versions here
For this tutorial, you will need:
Material here
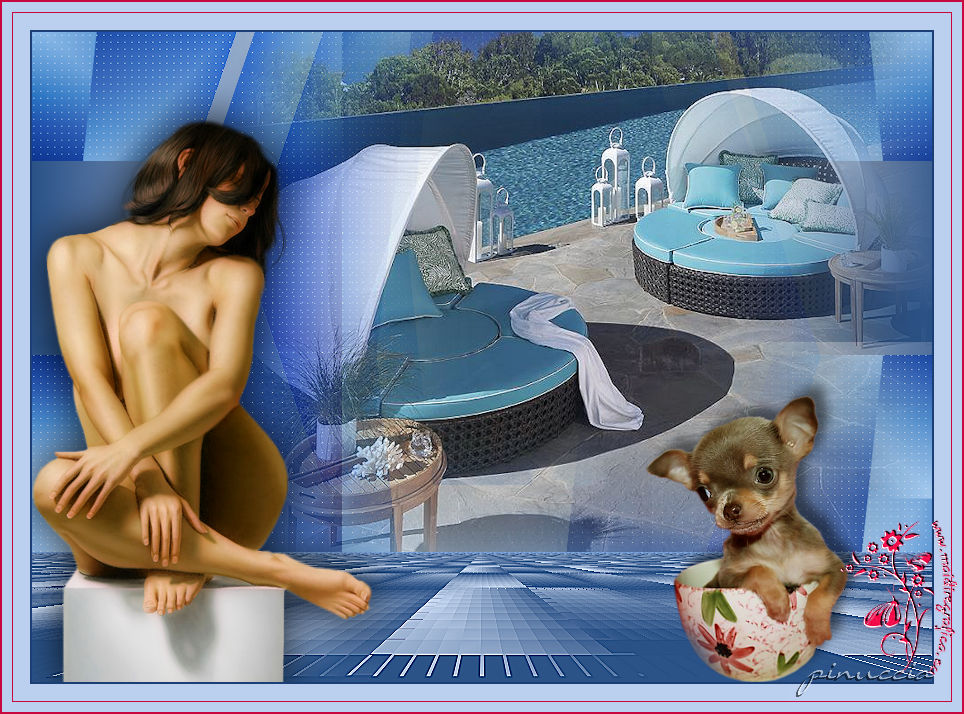
Tube 2575-woman-LB TUBES
Mist_lunapaisagem4138 by Luna
Tube Gabryfiori67 by Gabry
Texto_chino_Beauty_nines
Plugins
consult, if necessary, my filter section here
Freeware - Flipper (in the material)
Simple - Top Left Mirror here
AP Lines - Lines SilverLining here
Mura's Meister - Perspective Tiling here
Filters Unlimited 2.0 here
Filters Simple can be used alone or imported into Filters Unlimited.
(How do, you see here)
If a plugin supplied appears with this icon  it must necessarily be imported into Unlimited it must necessarily be imported into Unlimited

You can change Blend Modes according to your colors.
In the newest versions of PSP, you don't find the foreground/background gradient (Corel_06_029).
You can use the gradients of the older versions.
The Gradient of CorelX here
1. Open a new transparent image 900 x 650 pixels.
2. Set your foreground color to #1b3e74,
and your background color to #bbd0ee.
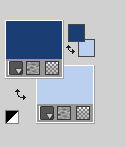
Set your foreground color to a Foreground/Background gradient, style Rectangular.
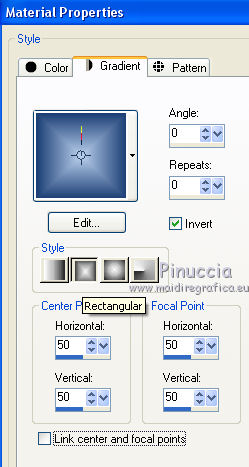
Flood Fill  the transparent image with your Gradient. the transparent image with your Gradient.
3. Effects>Plugins>Freeware - Flipper.
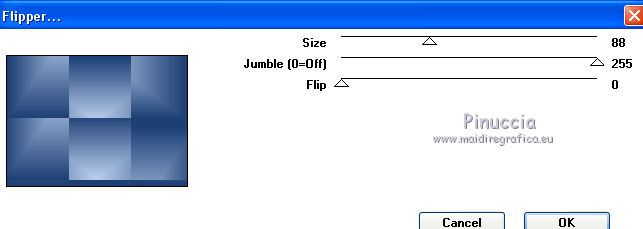
4. Layers>Duplicate - 2 times.
5. Close the layer of the second copy,
and activate the layer below of the first copy.
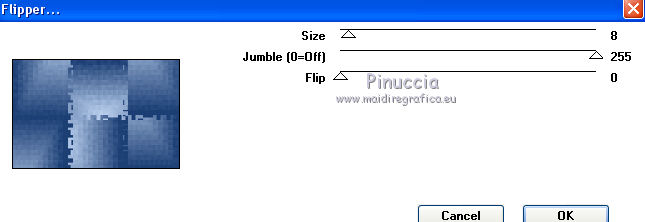
6. Effects>Plugins>Freeware - Flipper, Size to 8 and ok.
7. Adjust>Sharpness>Sharpen More.
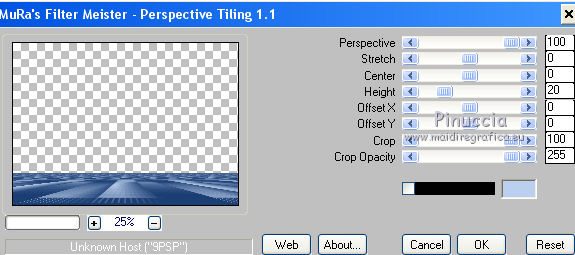
8. Effects>Plugins>Mura's Meister - Perspective Tiling.
9. Adjust>Sharpness>Sharpen More.
10. Open and activate the layer above of the second copy.
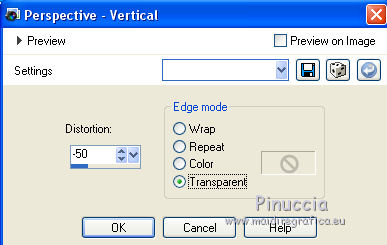
11. Effects>Geometric Effects>Perspective vertical.
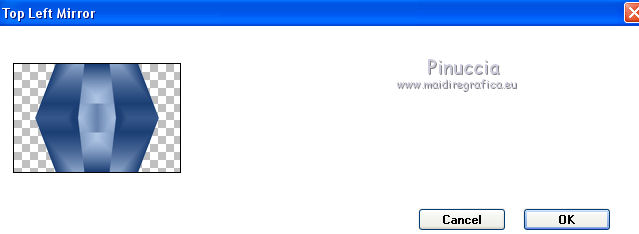
12. Effects>Plugins>Simple - Top Left Mirror.
13. Effets>Plugins>AP Lines - Lines SilverLining.
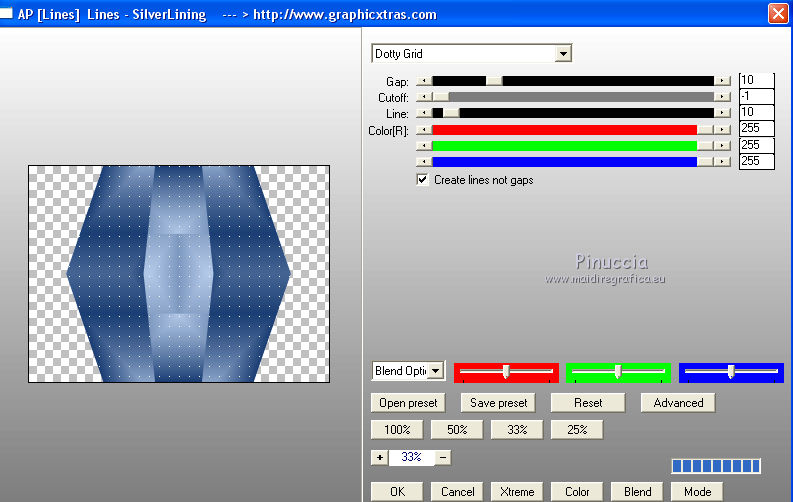
Change the Blend Mode of this layer to Hard Light.
14. Layers>Duplicate.
Image>Resize, to 70%, resize all layers not checked.
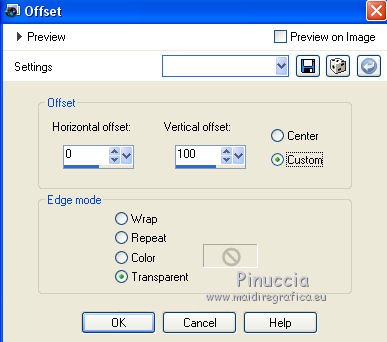
15. Effects>Image Effects>Seamless Tiling, default settings.

16. Effects>Image Effects>Offset.
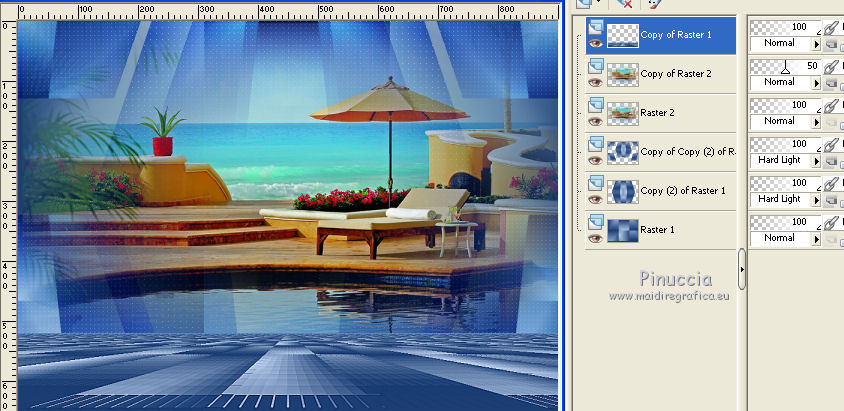
17. Open the tube lunapaisagem4138 - Edit>Copy.
Go back to your work and go to Edit>Paste as new layer.
Move  the tube at the top, see my example. the tube at the top, see my example.
18. Layers>Duplicate.
Reduce the opacity of this layer to 50%.
Activate the layer Copy 1 of Raster 1.
Layers>Arrange>Bring to top.
19. Open the tube Gabryfiori 67 - Edit>Copy.
Go back to your work and go to Edit>Paste as new layer.
Image>Resize, to 70%, resize all layers not checked.
20. Effects>3D Effects>Drop Shadow, color black.

Move  the tube at the bottom right. the tube at the bottom right.
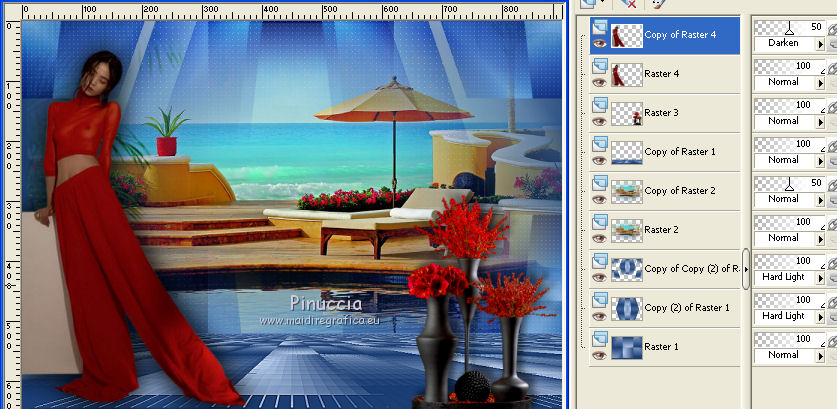
21. Open the tube 2575- woman-LB TUBES - Edit>Copy.
Go back to your work and go to Edit>Paste as new layer.
Image>Resize, to 90%, resize all layers not checked.
Move  the tube to the left side. the tube to the left side.
22. Effects>3D Effects>Drop Shadow, color black.

23. Layers>Duplicate.
Change the Blend mode of this layer to Darken and reduce the opacity to 50.
24. Layers>Merge>Merge All.
25. Image>Add borders, 2 pixels, symmetric, foreground color #1b3e74.
Image>Add borders, 30 pixels, symmetric, background color #bbd0ee.
26. Selections>Select All.
Layers>New Raster Layer.
Set your foreground color to Color.
Flood Fill  the layer with your foreground color #1b3e74. the layer with your foreground color #1b3e74.
27. Selections>Modify>Contract - 2 pixels.
Press CANC on the keyboard 
28. Selections>Modify>Contract - 10 pixels.
Flood Fill  with your foreground color #1b3e74. with your foreground color #1b3e74.
29. Selections>Modify>Contract - 1 pixel.
Press CANC on the keyboard.
Selections>Select None.
30. Open Texto_chino_Beauty_nines - Edit>Copy.
Go back to your work and go to Edit>Paste as new layer.
Move  the tube at the bottom left. the tube at the bottom left.
31. Sign your work.
Layers>Merge>Merge All and save as jpg.
The tubes of this versions are by Gabry and Mina

If you have problems or doubts, or you find a not worked link, or only for tell me that you enjoyed this tutorial, write to me.
7 June 2017
|

