|
TOP MOMOA
 ENGLISH VERSION ENGLISH VERSION
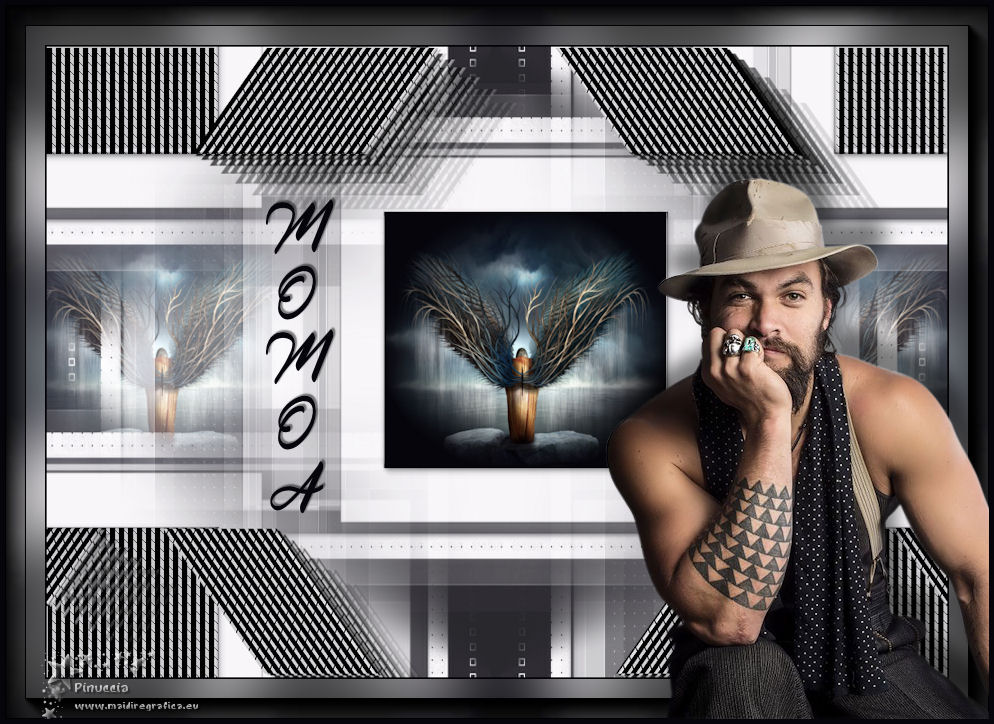
Here you find the original of this tutorial:

This tutorial was translated with PSPX7 but it can also be made using other versions of PSP.
Since version PSP X4, Image>Mirror was replaced with Image>Flip Horizontal,
and Image>Flip with Image>Flip Vertical, there are some variables.
In versions X5 and X6, the functions have been improved by making available the Objects menu.
In the latest version X7 command Image>Mirror and Image>Flip returned, but with new differences.
See my schedule here
French translation here
Your versions ici
For this tutorial, you will need:
Material here
Tube 2997-jason-momoa-LB TUBES
Renee_tube_dark_metamorphosis
Maskj_Geometric_01_GB_2019
Texto_Momoa_nines
selecciones sel.momoa.nines and sel.momoa2.nines
(here the links of the authors' sites)
Plugins
consult, if necessary, my filter section here
AP Lines - Lines Silverlining here
Mura's Meister - Copies here
AAA Frames - Foto Frame here

You can change Blend Modes according to your colors.
Copy the selections in the Selections Folder.
Open the mask in PSP and minimize it with the rest of the material.
1. Open a new transparent image 1000 x 700 pixels.
2. Set your foreground color to #05050b,
and your background color to #f8f5f9.
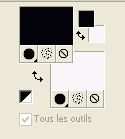
Flood Fill  the transparent image with your Foreground Color. the transparent image with your Foreground Color.
3. Layers>New Raster Layer.
Flood Fill  with your background color. with your background color.
4. Layers>New Mask layer>From image
Open the menu under the source window and you'll see all the files open.
Select the mask Maskj_Geometric_01_GB_2019.
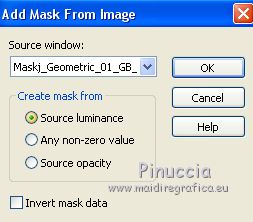
Layers>Merge>Merge Group.
5. Effects>Image Effects>Seamless Tiling, default settings.

6. Layers>Merge>Merge visible.
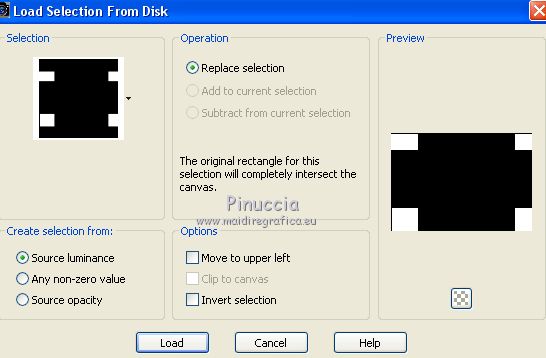
7. Selections>Load/Save Selection>Load Selection from disk.
Look for and load the selection sel.momoa.nines.
8. Effects>Plugins>AP Lines - Lines Silverlining.
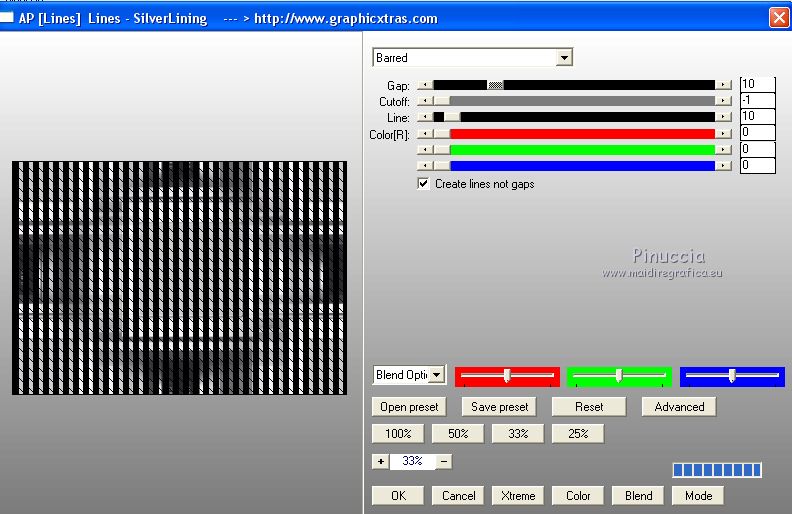
9. Selections>Promote Selection to layer.
Selections>Select None.
10. Effects>Geometric Effects>Skew.
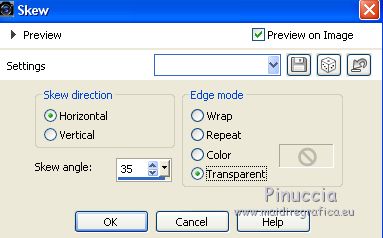
11. Layers>Duplicate.
Image>Mirror.
Layers>Merge>Merge Down.
12. Effects>Plugins>Mura's Meister - Copies.
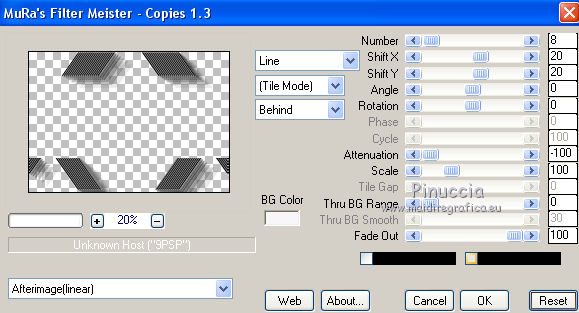
13. Activate the layer below
Selections>Load/Save Selection>Load Selection from disk.
Look for and load the selection sel.momoa2.nines.
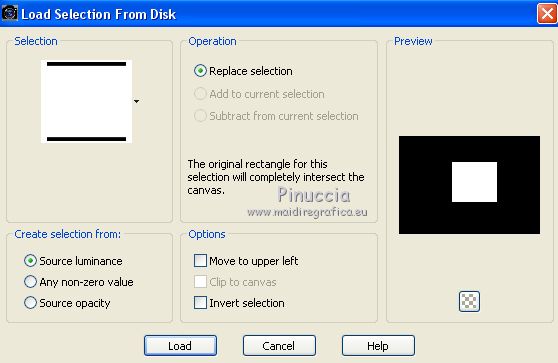
14. Layers>New Raster Layer.
Flood Fill  with your foreground color #06050b. with your foreground color #06050b.
15. Open the tube Renee_tube_dark_metamorphosis and go to Edit>Copy.
Go back to your work and go to Edit>Paste into selection.
Selections>Select None.
16. Layers>Duplicate.
Effects>Image Effects>Offset
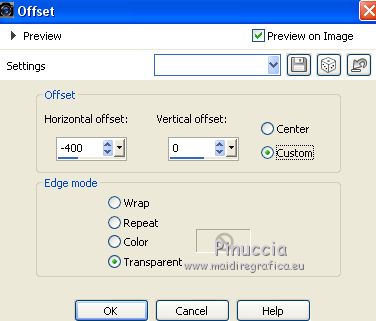
Change the Blend Mode of this layer to Screen.
17. Layers>Duplicate.
Image>Mirror.
18. Layers>Merge>Merge All.
19. Image>Add borders, 2 pixels, symmetric, foreground color #06050b.
20. Image>Resize, to 90%, resize all layers chechéd.
21. Edit>Copy.
22. Image>Add borders, 40 pixels, symmetric, background color #f8f6f9.
Activate your Magic Wand Tool 
and clic on this border to select it
Edit>Paste into Selection.
23. Adjust>Blur>Gaussian Blur - radius 30

24. Effects>Plugins>AAA Frames - Foto Frame - 2 times with these settings

Selections>Select None.
25. Open the tube 2997-jason-momoa-LB TUBES and go to Edit>Copy.
Go back to your work and go to Edit>Paste as new layer.
Image>Resize, to 80%, resize all layers not checked.
Erase the watermark.
Move  the tube at the bottom right. the tube at the bottom right.
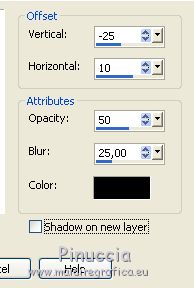
26. Effects>3D Effects>Drop Shadow, color black
27. Open Texto_Momoa_nines and go to Edit>Copy.
Go back to your work and go to Edit>Paste as new layer.
Move  the text to the left side. the text to the left side.
28. Layers>Merge>Merge All.
29. Image>Add borders, 5 pixels, symmetric, foreground color #06050b.
30. Sign your work and save as jpg.
Your versions here

If you have problems or doubts, or you find a not worked link, or only for tell me that you enjoyed this tutorial, write to me.
21 February 2019
|
 ENGLISH VERSION

 ENGLISH VERSION
