|
TOP MYLÈNE
 ENGLISH VERSION ENGLISH VERSION
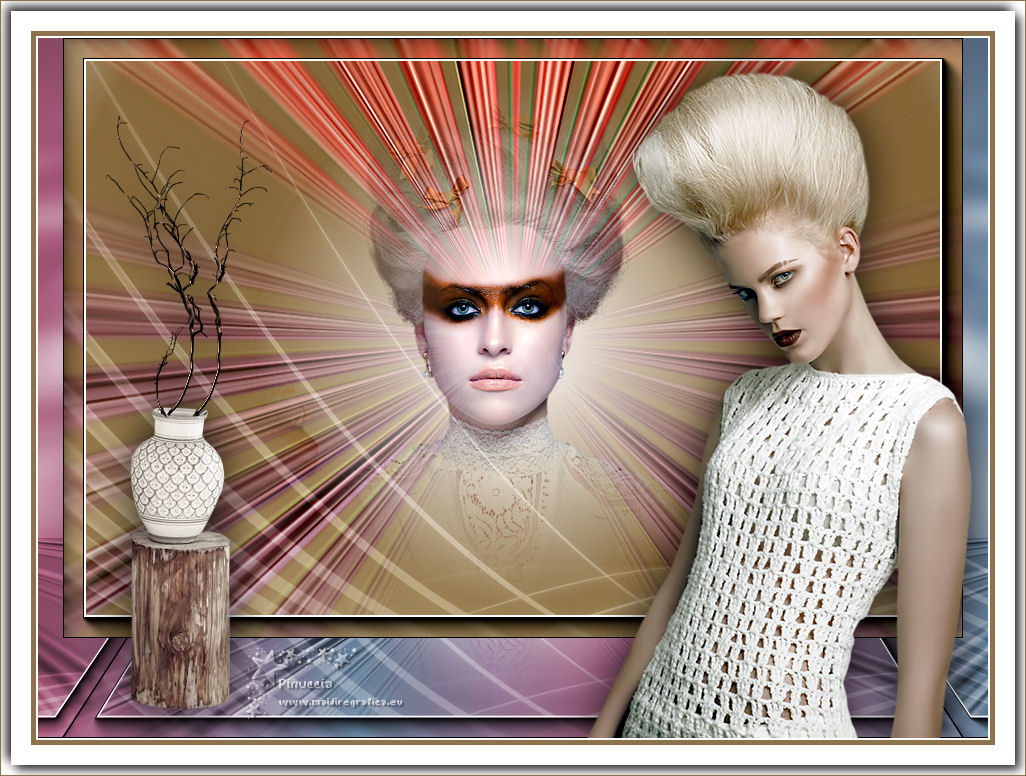
Here you find the original of this tutorial:

This tutorial was translated with PSPX7 but it can also be made using other versions of PSP.
Since version PSP X4, Image>Mirror was replaced with Image>Flip Horizontal,
and Image>Flip with Image>Flip Vertical, there are some variables.
In versions X5 and X6, the functions have been improved by making available the Objects menu.
In the latest version X7 command Image>Mirror and Image>Flip returned, but with new differences.
See my schedule here
French translation here
Your versions ici
For this tutorial, you will need:
Material here
Tube Femme 570 by Lily
Tube Femme 568 by Lily
Tube calguisdeco15032018
IS_glitrerdots_cbj
Adorno_Forma 10_Nines
(you find here the links to the material authors' sites)
Plugins
consult, if necessary, my filter section here
Filters Unlimited 2.0 here
Simple - Top Left Mirror here
Mura's Meister - Perspective Tiling here
Mura's Meister Pole Transform here
AAA Frames - Foto Frame here
Nik Software - Color Efe Pro zip
Filters Simple can be used alone or imported into Filters Unlimited.
(How do, you see here)
If a plugin supplied appears with this icon  it must necessarily be imported into Unlimited it must necessarily be imported into Unlimited

You can change Blend Modes according to your colors.
In the newest versions of PSP, you don't find the foreground/background gradient (Corel_06_029).
You can use the gradients of the older versions.
The Gradient of CorelX here
Copy the preset Emboss 3 in the Presets Folder.
1. Open a new transparent image 900 x 600 pixels.
2. Set your foreground color to #8d734b.
Flood Fill  the transparent image with your foreground color. the transparent image with your foreground color.
3. Selections>Select All.
Open the tube IS_glitterdots_cbj - Edit>Copy.
Go back to your work and go to Edit>Paste into Selection.
Selections>Select None.
4. Effects>Image Effects>Seamless Tiling, default settings.

5. Effects>Plugins>Filters Unlimited 2.0 - Simple - Top Left Mirror.

6. Effects>Plugins>Mura's Meister - Pole Transform.
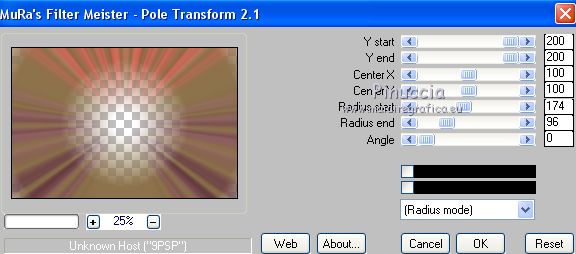
7. Effects>User Defined Filter - select the preset Emboss 3 and ok.

8. Set your foreground color to #e2d9d1.
Layers>New Raster Layer.
Layers>Arrange>Send to Bottom.
Flood Fill  the layer with your foreground color #e2d9d1. the layer with your foreground color #e2d9d1.
9. Keep this layer selected.
Open the tube Femme 568 by Lily, erase the watermark and go to Edit>Copy.
Go back to your work and go to Edit>Paste as new layer.
Place  rightly the tube. rightly the tube.
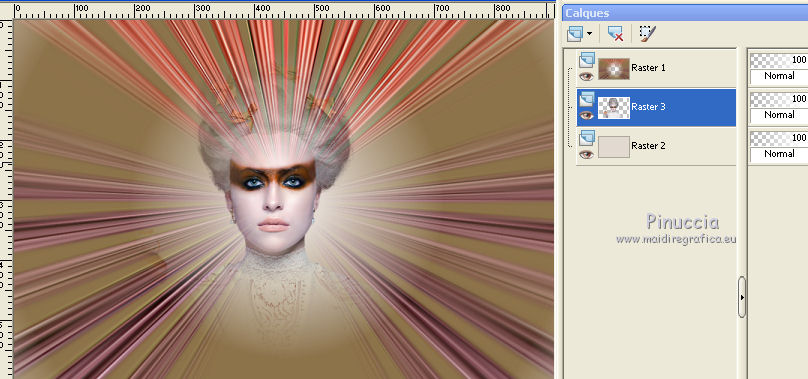
10. Activate the top layer.
Open the tube Adorno_Forma 10_Nines, erase the watermark and go to Edit>Copy.
Go back to your work and go to Edit>Paste as new layer.
Change the Blend Mode of this layer to Soft Light.
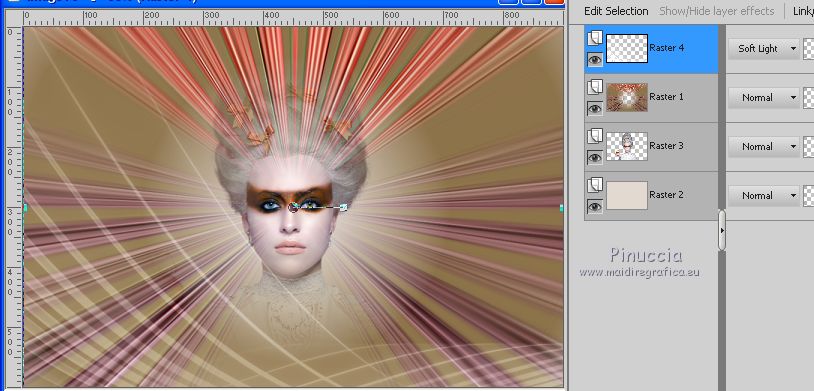
11. Layers>Merge>Merge visible.
12. Effects>Plugins>AAA Frames - Foto Frame.
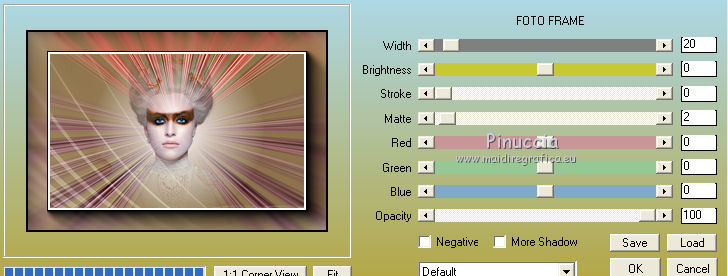
13. Layers>Duplicate.
14. Image>Canvas Size - 950 x 700 pixels.
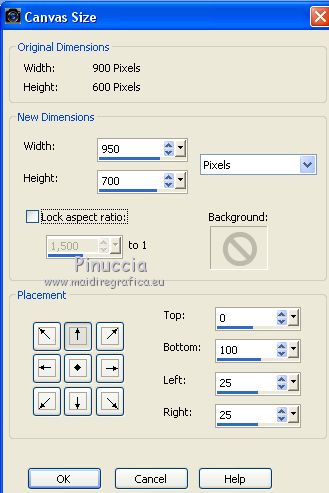
15. Effects>Plugins>Mura's Meister - Perspective Tiling.
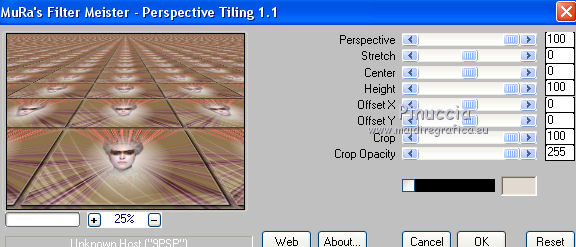
16. Selection Tool 
(no matter the type of selection, because with the custom selection your always get a rectangle)
clic on the Custom Selection 
and set the following settings.
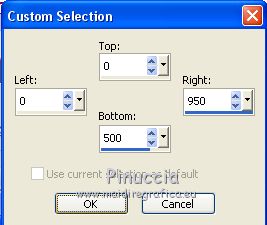
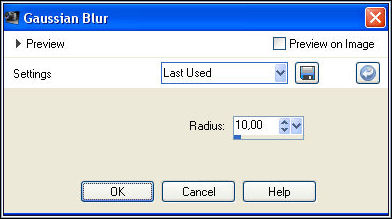
17. Adjust>Blur>Gaussian Blur - radius 10.
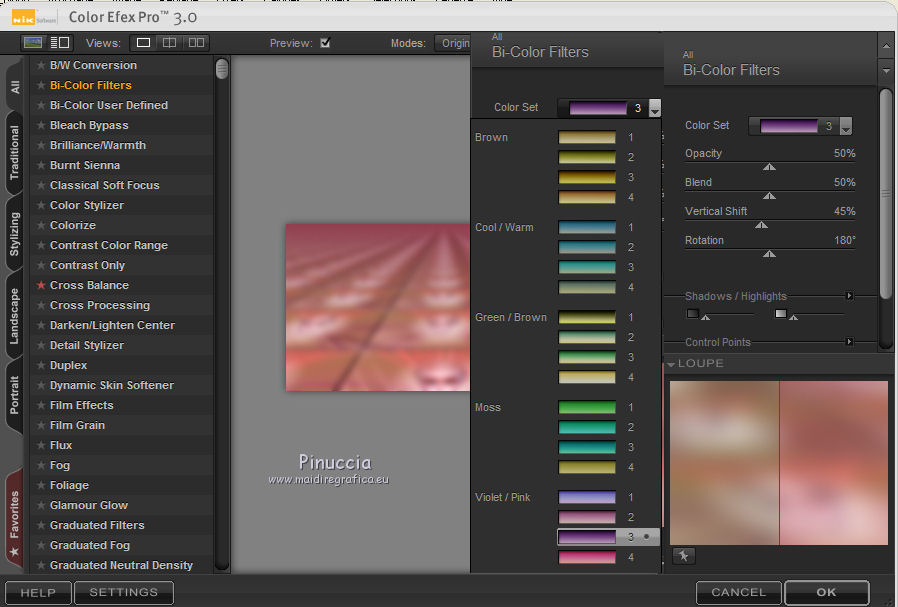
18. Effects>Plugins>Nik Software - Color Efex Pro
Bi-color filter - Color Set Pink/Violet 3.
Selections>Select None.
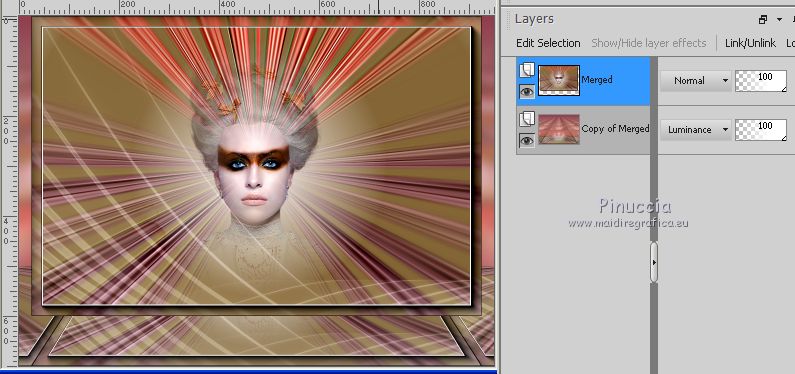
19. Change the Blend Mode of this layer to Luminance.
20. Activate the layer Merged.
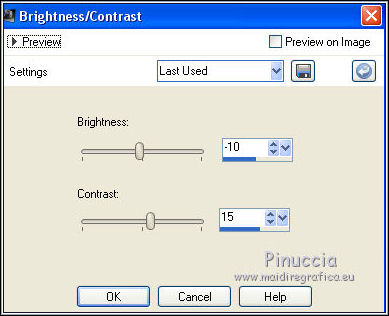
Adjust>Brightness and Contrast>Brightness and Contrast.
Layers>Arrange>Bring To Top.
21. Set your foreground color to #2f3d49
and your background color to #6d394f.
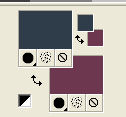
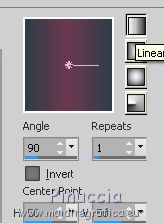
Set your foreground color to a Foreground/Background Gradient, style Linear.
22. Layers>New Raster Layer.
Layers>Arrange>Send to Bottom.
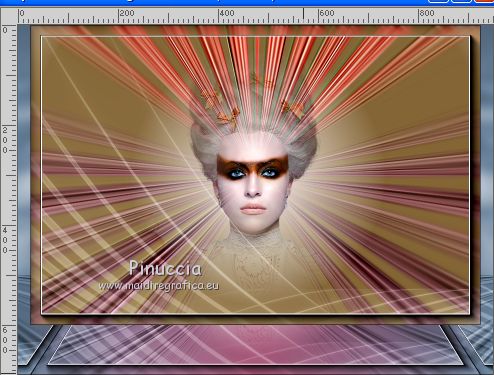
Flood Fill  the layer with your gradient. the layer with your gradient.
Result
Pour ma versions, j'ai fait Repeats 2 Invert checked
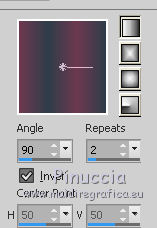
with this result
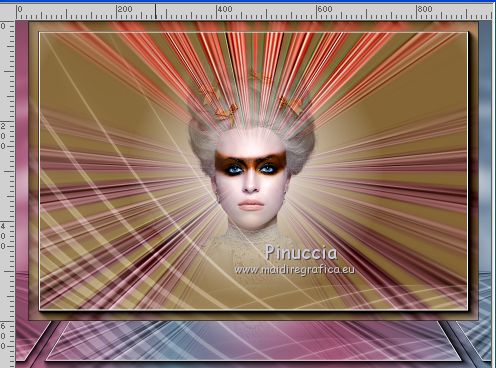
To you to decide and adapt the settings to your liking.
23. Open the tube Femme 570 by Lily, erase the watermark and go to Edit>Copy.
Go back to your work and go to Edit>Paste as new layer.
Move  the tube to the right side. the tube to the right side.
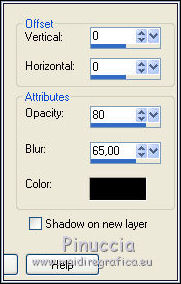
24. Effects>3D Effects>Drop Shadow, color black.
25. Open the tube calguisdeco15032018, erase the watermark and go to Edit>Copy.
Go back to your work and go to Edit>Paste as new layer.
Move  the tube to the left side. the tube to the left side.
Effects>3D Effects>Drop Shadow, same settings.
26. Layers>Merge>Merge All.
27. Image>Add borders, 2 pixels, symmetric, color white.
Image>Add borders, 5 pixels, symmetric, color #8d734b.
Image>Add borders, 30 pixels, symmetric, color white.
28. Selections>Select All.
Selections>Modify>Contract - 10 pixels.
29. Effects>3D Effects>Drop Shadow, color black.
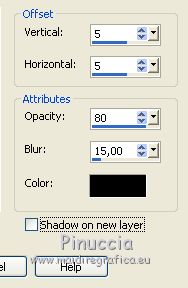
Repeat Drop Shadow, but vertical and horizontal -5.
Selections>Select None.
30. Image>Add borders, 1 pixel, symmetric, color #8d734b.
31. Sign your work and save as jpg.
Vos versions here

If you have problems or doubts, or you find a not worked link, or only for tell me that you enjoyed this tutorial, write to me.
23 Octobre 2018
|
 ENGLISH VERSION

 ENGLISH VERSION
