|
TOP NENA SILVA

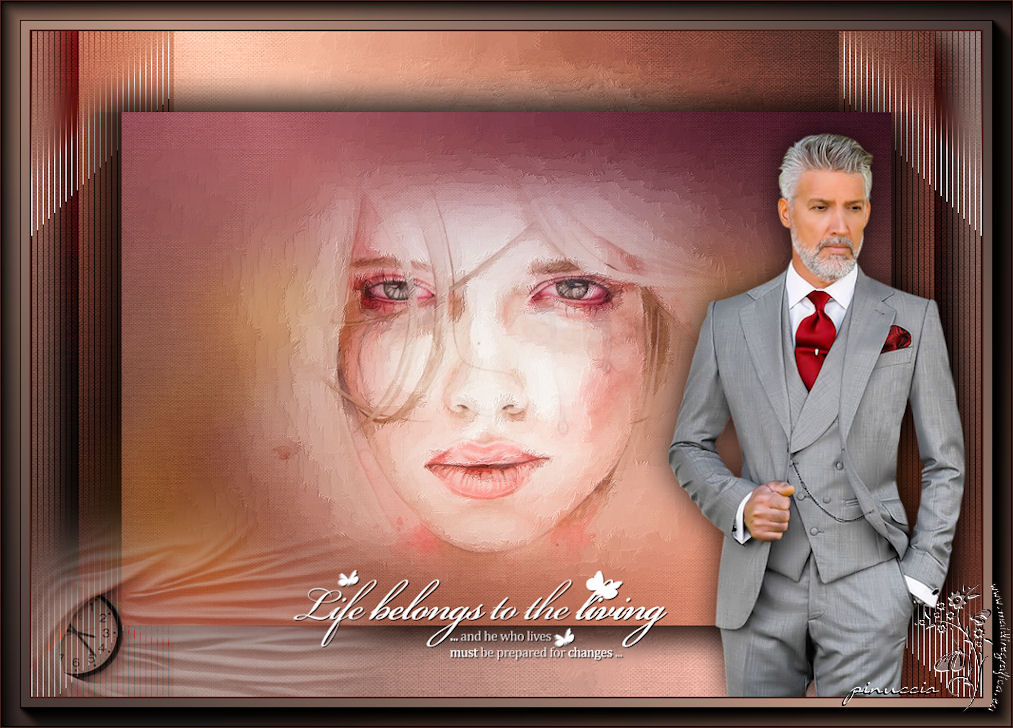
Here you find the original of this tutorial:

This tutorial was translated with PSPX3 but it can also be made using other versions of PSP.
Since version PSP X4, Image>Mirror was replaced with Image>Flip Horizontal,
and Image>Flip with Image>Flip Vertical, there are some variables.
In versions X5 and X6, the functions have been improved by making available the Objects menu.
In the latest version X7 command Image>Mirror and Image>Flip returned, but with new differences.
See my schedule here
French translation here
Your versions here
For this tutorial, you will need:
Material here
Tube 2609-man-LB TUBES
Misted calguismistedfacesadness13102014 by Guismo
Tube DEC0004 by Isa
text0_79fd
Plugins
consult, if necessary, my filter section here
Filters Unlimited 2.0 here
Tramages - Tow the line here
Sandflower Special "v" - Colorize Septia (to import Unlimited) here
Nik Software - Color Efex Pro here
AAA Frames - Foto Frame here

You can change Blend Modes according to your colors.
In the newest versions of PSP, you don't find the foreground/background gradient (Corel_06_029).
You can use the gradients of the older versions.
The Gradient of CorelX here
1. Open a new transparent image 900 x 600 pixels.
2. Set your foreground color to #ba9482,
and your background color to #403331.
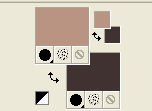
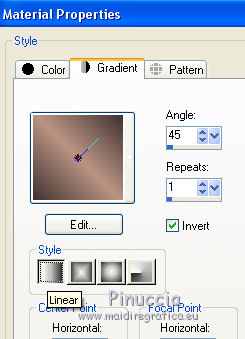
Set your foreground color to a Foreground/Background Gradient, style Linear.
Flood Fill  the transparent image with your Gradient. the transparent image with your Gradient.
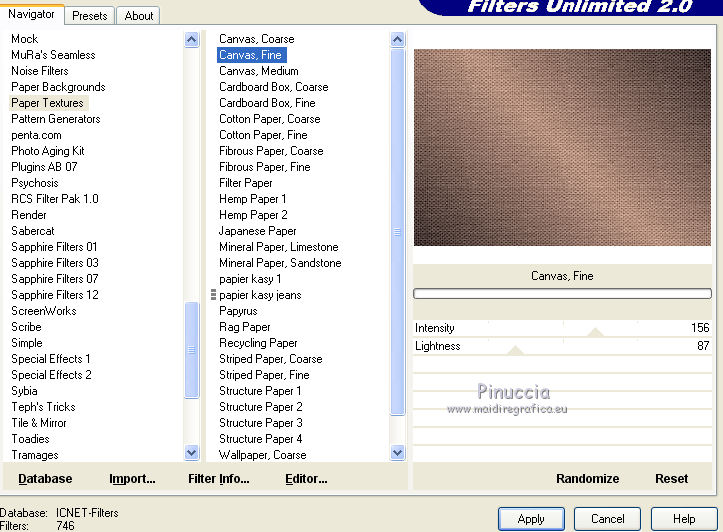
3. Effects>Plugins>Filters Unlimited 2.0 - Paper Texture - Canvas Fine.
4. Open the tube calguismistedfacesadness13102014 - Edit>Copy.
Go back to your work and go to Edit>Paste as new layer.
5. Layers>Merge>Merge down.
6. Layers>Duplicate.
Close this layer for a moment.
7. Activate the layer below of the original.
Effects>Art Media Effects>Brush Strokes - color #505050.
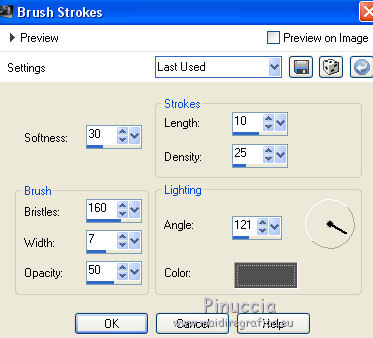
8. Re-open and activate the layer above.
Reduce the opacity of this layer to 50%.
9. Activate the Eraser Tool 
and erase the parts, about as below.
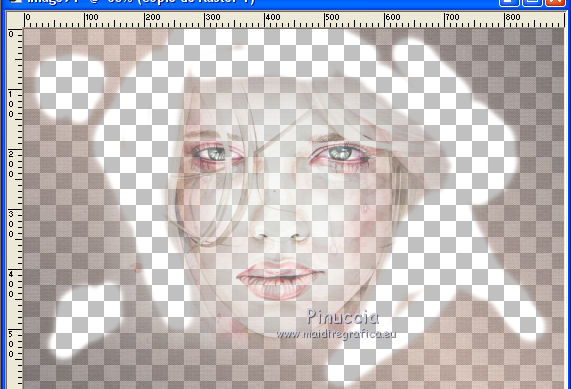
10. Layers>Merge>Merge visible.
11. Edit>Copy.
12. Image>Canvas Size - 1000 x 700 pixels.
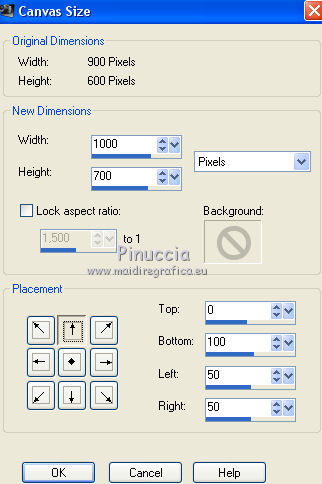
13. Selections>Select All.
Layers>New Raster Layer.
Layers>Arrange>Send to Bottom.
Edit>Paste into Selection.
Selections>Select None.
14. Activate the layer Merged.
Layers>Duplicate.
Image>Resize, to 90%, resize all layers not checked.
15. Effects>Image Effects>Offset.
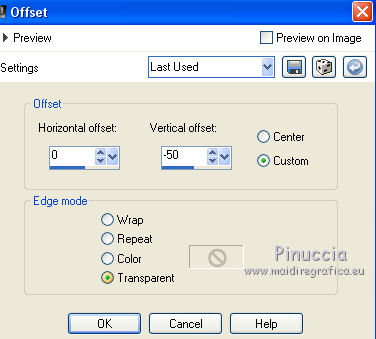
16. Effects>3D Effects>Drop Shadow, color black.
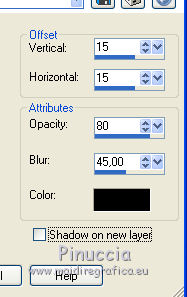
Repeat Drop Shadow, but vertical and horizontal -15.
17. Activate the top layer.
Repeat Drop Shadow as step 16.
18. Activate the bottom layer.
Selection Tool 
(no matter the type of selection, because with the custom selection your always get a rectangle)
clic on the Custom Selection 
and set the following settings.
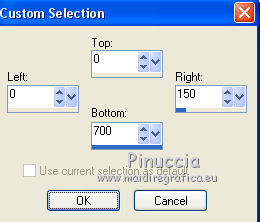
Selections>Promote Selection to layer.
19. Effects>Plugins>Tramages - Tow the line.
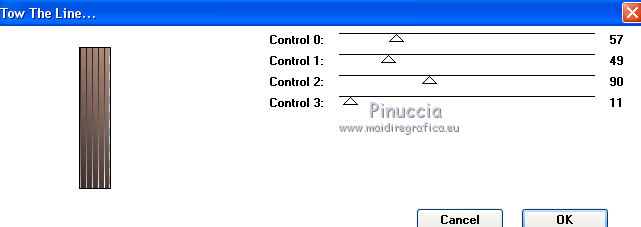
Selections>Select None.
Change the Blend Mode of this layer to Luminance (legacy).
20. Layers>Duplicate.
Image>Mirror.
21. Activate again the bottom layer.
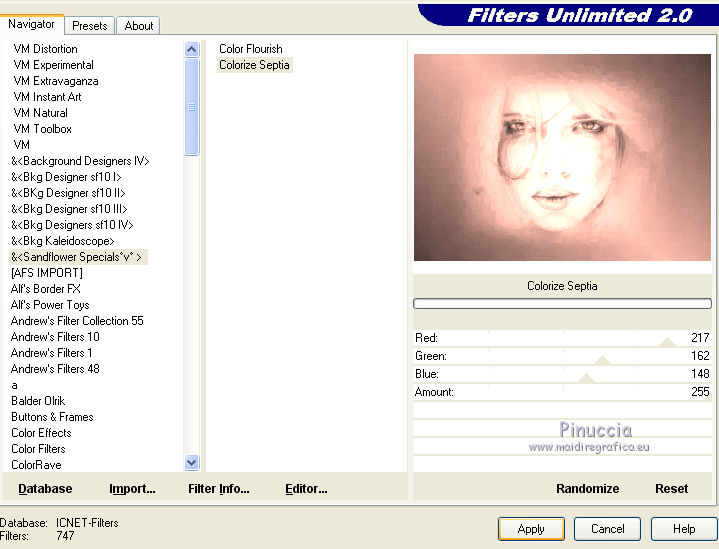
Effects>Plugins>Filters Unlimited 2.0 - Sandflower Special "v" - Colorize Septia, default settings.
22. Change the Blend mode of the layer Merged to Overlay.
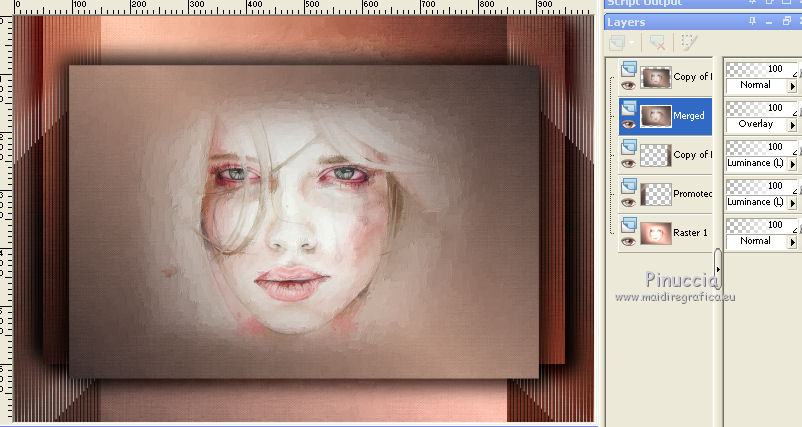
23. Activate the top layer.
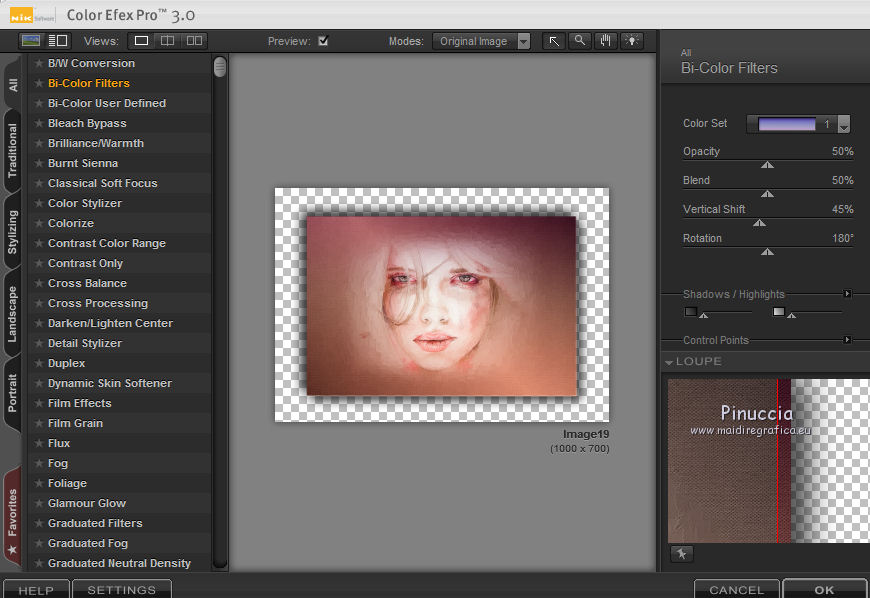
Effects>Plugins>Nik Software - Color Efex Pro
Bi color Filters - Color set Violet/Pink 1.
You should have this
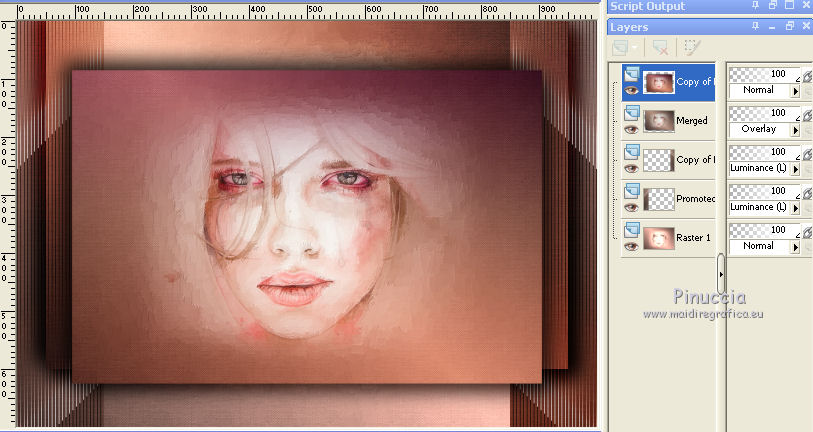
24. Open the tube DEC0004 by Isa - Edit>Copy.
Go back to your work and go to Edit>Paste as new layer.
Image>Resize, to 80%, resize all layers not checked.
25. Adjust>Blur>Gaussian Blur - radius 25.
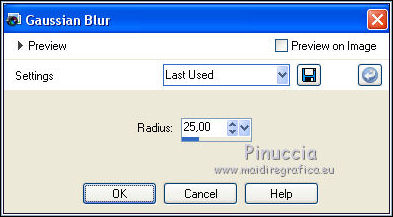
Change the Blend Mode of this layer to Soft Light and reduce the opacity to 70%.
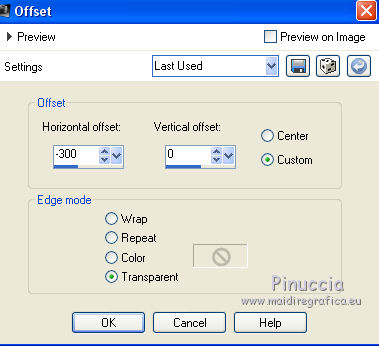
26. Effects>Image Effects>Offset.
27. Layers>Duplicate.
Image>Mirror.
28. Open the tube 2609-man-LB TUBES - Edit>Copy.
Go back to your work and go to Edit>Paste as new layer.
Image>Resize, to 90%, resize all layers not checked.
Move  the tube to the right side. the tube to the right side.
29. Effects>3D Effects>Drop Shadow, color black.

30. Open the tube nicole-mist-deco2-2017 - Edit>Copy.
Go back to your work and go to Edit>Paste as new layer.
31. Effects>Image Effects>Offset.
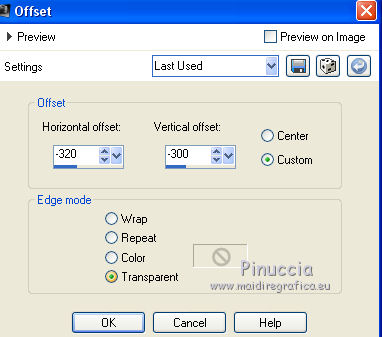
Change the Blend Mode of this layer to Luminance and reduce the opacity to 70%.
32. Open the text text0_79fd - Edit>Copy.
Go back to your work and go to Edit>Paste as new layer.
Move  the text down in the middle. the text down in the middle.
33. Layers>Merge>Merge All.
34. Image>Add borders, 2 pixels, symmetric, #4a201a.
Image>Add borders, 30 pixels, symmetric, #f4eee7.
35. Activate the Magic Wand Tool 
and click on the 30 pixels border to select it.
Flood Fill  the selection with your Gradient. the selection with your Gradient.
36. Effects>Plugins>AAA Frames - Foto Frame - 2 times
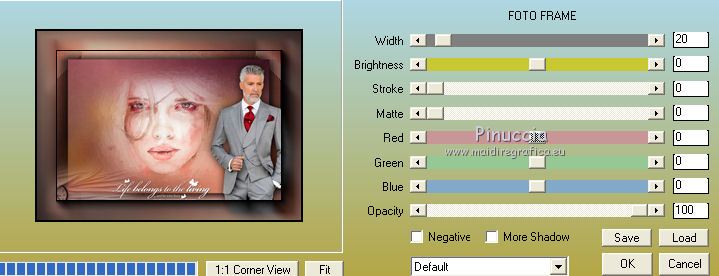
Selections>Select None.
37. Image>Add borders, 1 pixel, symmetric, color #4a201a.
38. Image>Resize, to 95%, resize all layers checked.
39. Sign your work and save as jpg.
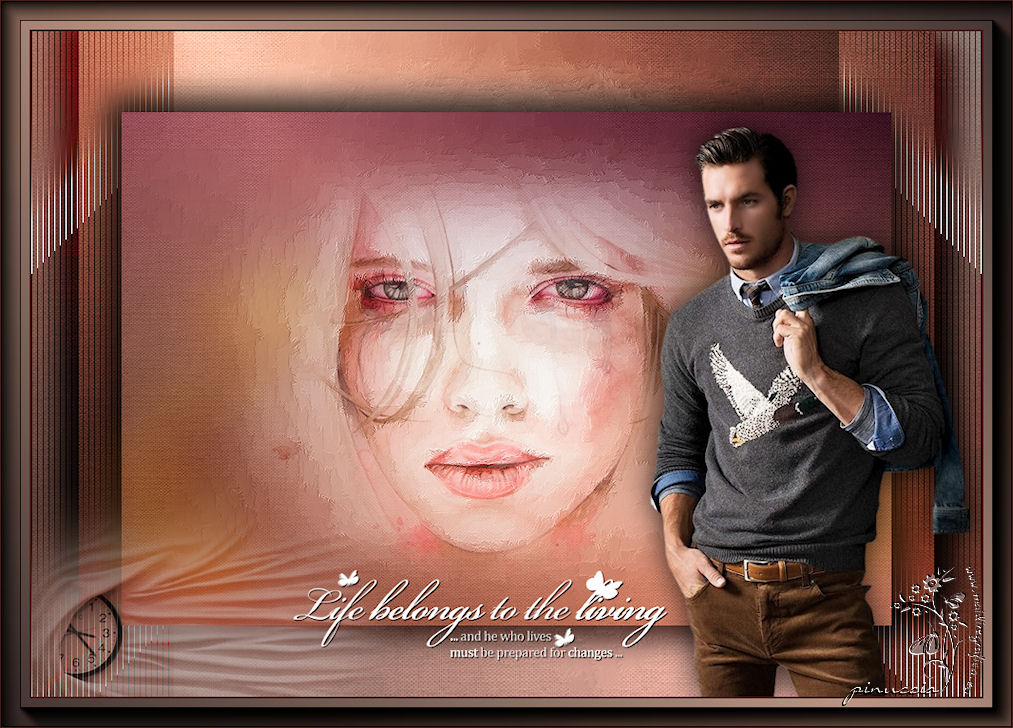
The man tube of this version is by Mina.

If you have problems or doubts, or you find a not worked link, or only for tell me that you enjoyed this tutorial, write to me.
16 October 2017
|


