|
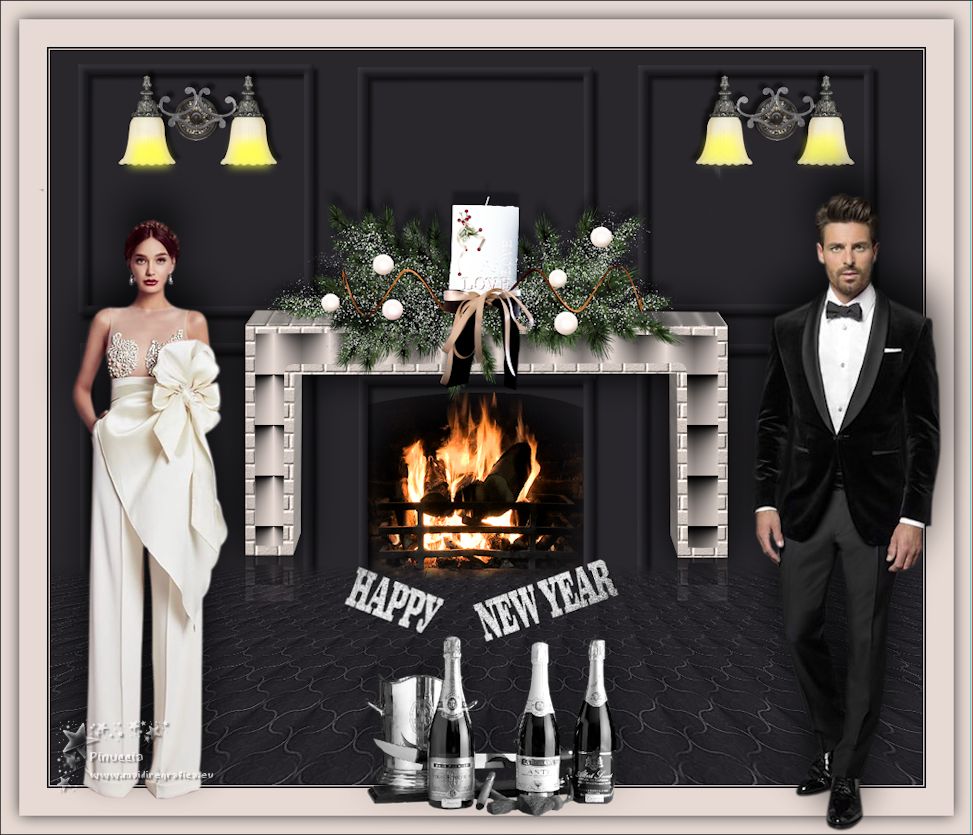
TOP NEW YEAR 2019
 ENGLISH VERSION ENGLISH VERSION
Here you find the original of this tutorial:

This tutorial was translated with PSPX7 but it can also be made using other versions of PSP.
Since version PSP X4, Image>Mirror was replaced with Image>Flip Horizontal,
and Image>Flip with Image>Flip Vertical, there are some variables.
In versions X5 and X6, the functions have been improved by making available the Objects menu.
In the latest version X7 command Image>Mirror and Image>Flip returned, but with new differences.
See my schedule here

French translation here
Your versions here
For this tutorial, you will need:
Material here
Tube man-LB TUBES
Tube 2961-woman - LB TUBES
Tube wall_light04_msr
Tube mou_champagne
Adorno Luz_nines
(you find here the links to the material authors' sites)
Plugins
consult, if necessary, my filter section here
Filters Unlimited 2.0 here
VM Instant Art - Origami Folder here
Mura's Meister - Perspective Tiling here
Alien Skin Eye Candy 5 Impact - Extrude here
Filters VM Instant Art can be used alone or imported into Filters Unlimited.
(How do, you see here)
If a plugin supplied appears with this icon  it must necessarily be imported into Unlimited it must necessarily be imported into Unlimited

You can change Blend Modes according to your colors.
Copy the selections in the Selections Folder.
Copy the texture ladrillo in the Textures Folder.
Open the pattern Patron2pared in PSP and minimized it with the rest of the material.
1. Set your foreground color to #2d2b30,
and your background color to #dbcec8.
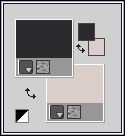
Open a new transparent image 950 x 600 pixels.
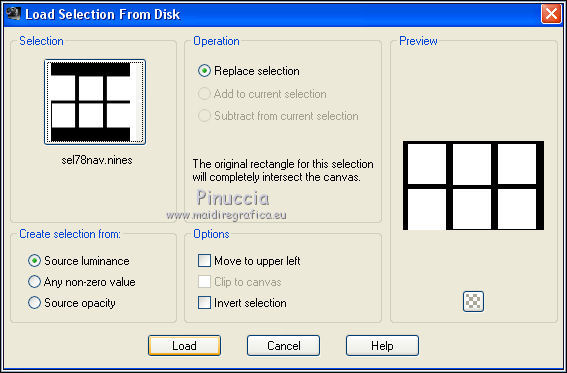
2. Selections>Load/Save Selection>Load Selection from Disk.
Look for and load the selection sel78nav.nines.
3. Flood Fill  the selection with your foreground color #2d2b30. the selection with your foreground color #2d2b30.
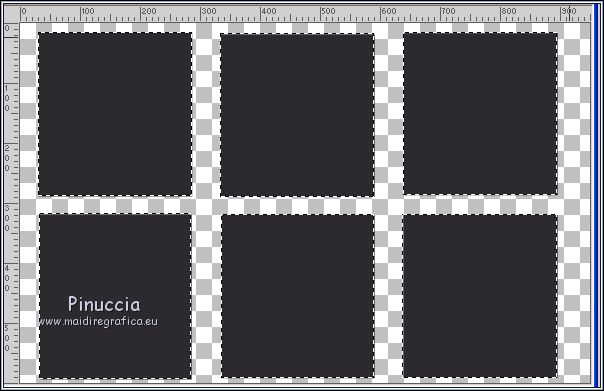
Selections>Select None.
4. Layers>New Raster Layer.
Flood Fill  the layer with your foreground color #2d2b30. the layer with your foreground color #2d2b30.
5. Selections>Load/Save Selection>Load Selection from Disk.
Load again the selection sel.78nav.nines

Press CANC on the keyboard 
You'll see nothing, but if you close the bottom layer, here is the result
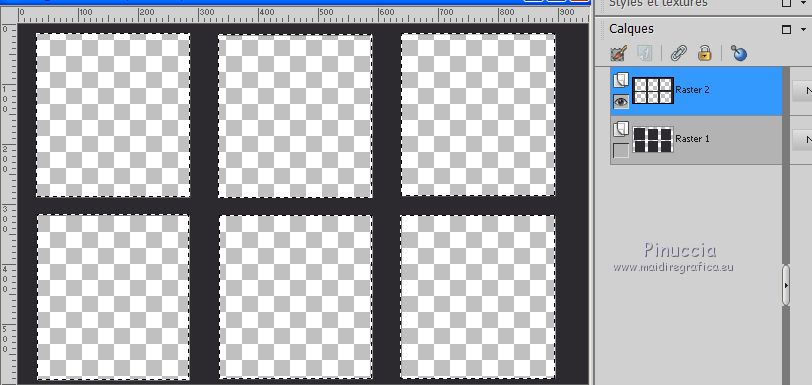
6. Selections>Modify>Select Selection Borders.
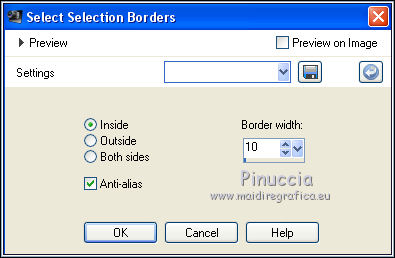
Keep selected.
7. Layers>New Raster Layer.
Flood Fill  with your foreground color #2d2b30. with your foreground color #2d2b30.
8. Effects>3D Effects>Inner Bevel.
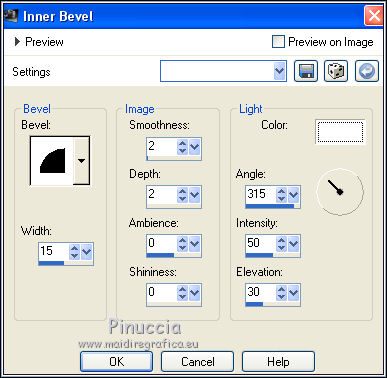
Selections>Select None.
9. Effects>3D Effects>Drop Shadow, color black.
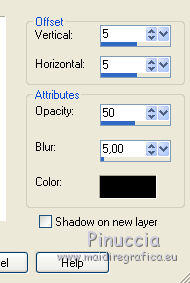
10. Selections>Load/Save Selection>Load Selection from Disk.
Look for and load the selection sel78nav2.nines

11. Layers>New Raster Layer.
Flood Fill  with your background color #dbcec8. with your background color #dbcec8.
12. Effects>Plugins>VM Instant Art - Origami Folder.
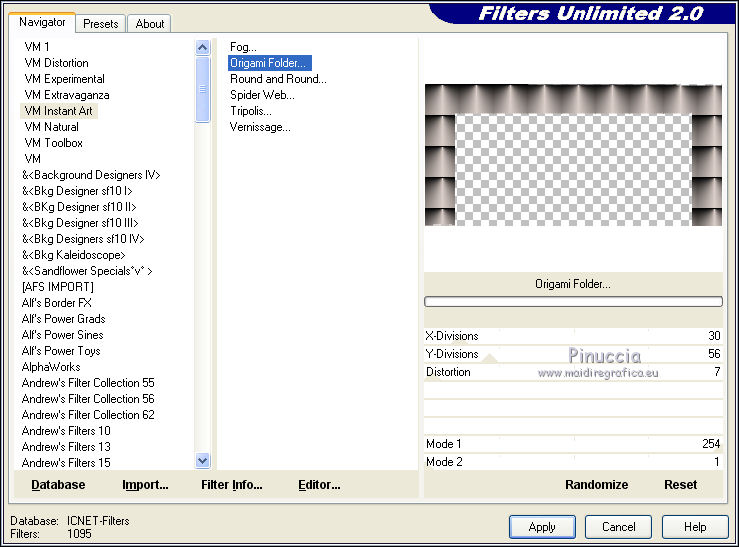
Keep selected.
13. Selections>Modify>Select Selection Borders, same settings.

Keep still selected.
14. Layers>New Raster Layer.
Flood Fill  with your background color #dbcec8. with your background color #dbcec8.
15. Effects>Texture Effects>Texture - select the texture ladrillo with these settings.
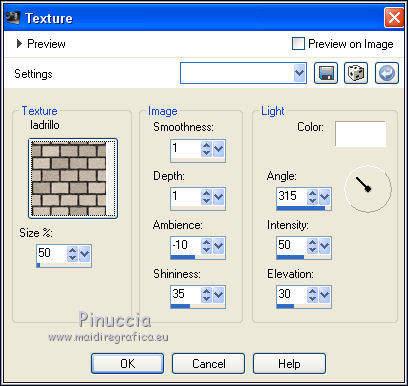
Selections>Select None.
16. Layers>Merge>Merge Down.
17. Effects>Plugins>Alien Skin Eye Candy 5 Impact - Extrude.
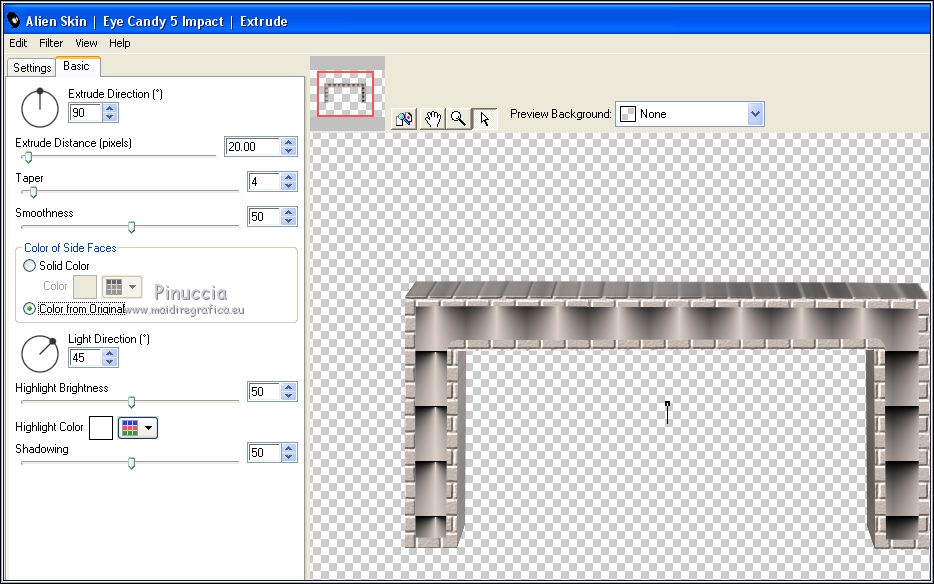
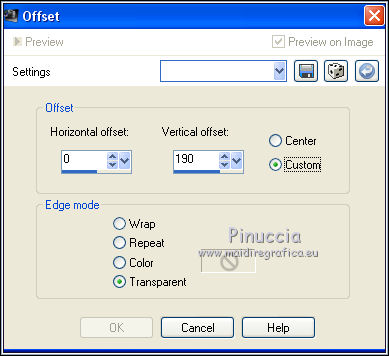
18. Effects>Image Effec>Offset.
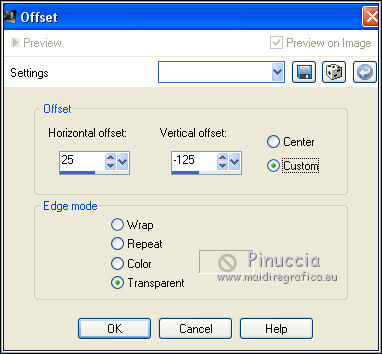
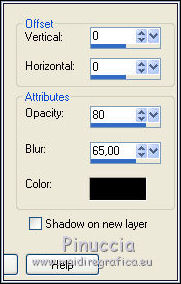
19. Effects>3D Effects>Drop Shadow, color black.
20. Layers>Duplicate.
Image>Flip.
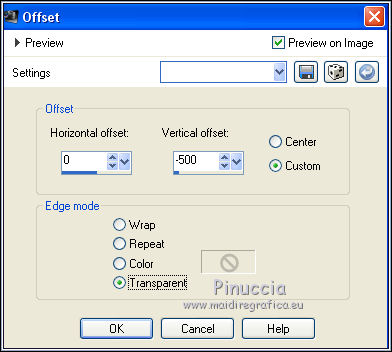
21. Effects>Image Effects>Offset.
22. Change the Blend Mode of this layer to Hard Light,
and reduce the opacity to 10%.
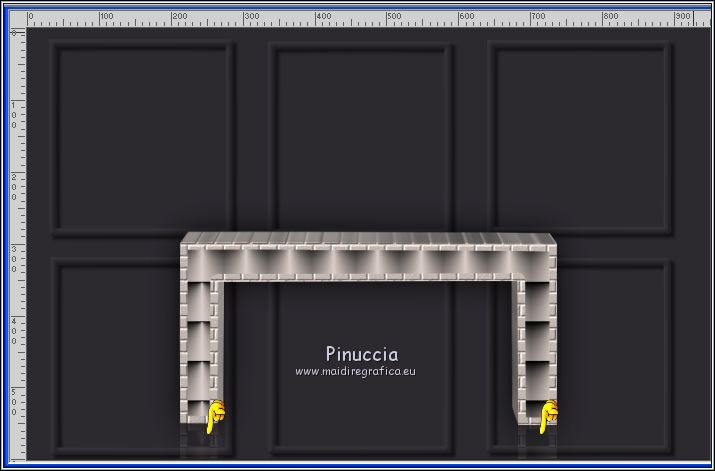
Close this layer for a moment.
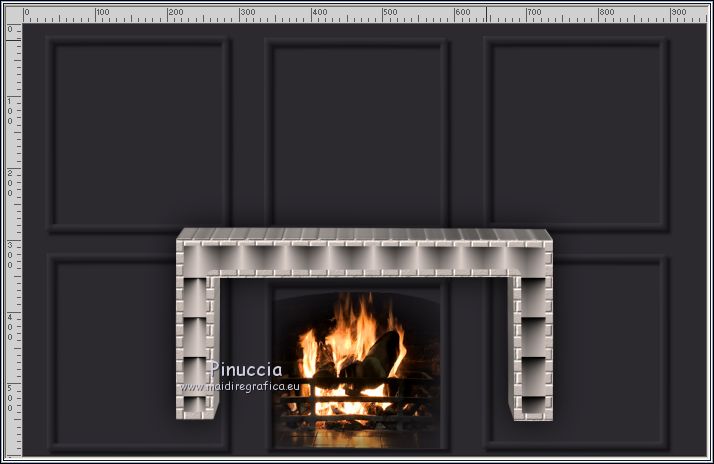
23. Open the tube Chimenea_nines - Edit>Copy.
Go back to your work and go to Edit>Paste as new layer.
24. Effects>Image Effects>Offset.

25. Layers>Arrange>Move Down (2 times) under the layer of the deco)
26. Open wall_light04_msr - Edit>Copy.
Go back to your work and go to Edit>Paste as new layer.
Image>Resize, to 50%, resize all layers not checked.
Move  the tube at the upper left. the tube at the upper left.
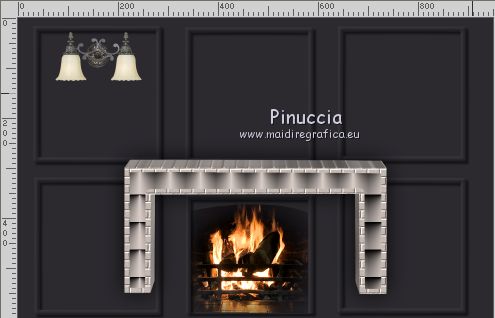
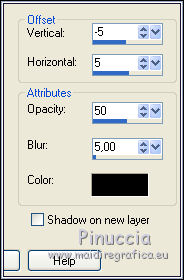
27. Effects>3D Effects>Drop Shadow, color black.
28. Layers>Duplicate.
Image>Mirror.
29. Open Adorno Luz_nines - Edit>Copy.
Go back to your work and go to Edit>Paste as new layer.
30. Effects>Image Effects>Offset.
31. Layers>Merge>Merge visible (keep the layer of step 22 closed).
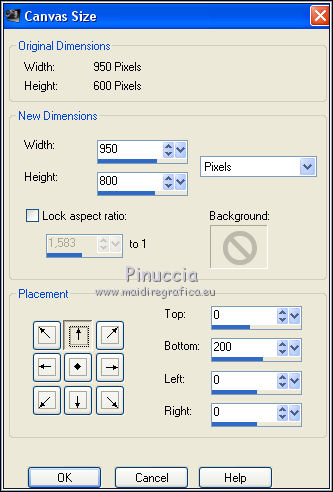
32. Image>Canvas Size - 950 x 800 pixels.
33. Layers>New Raster Layer.
Flood Fill  with your foreground color #2d2b30. with your foreground color #2d2b30.
34. Set your foreground color to Pattern and select the pattern patron2pared.
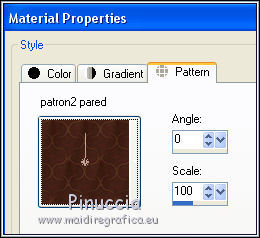
35. Layers>New Raster Layer.
Flood Fill  the layer with the pattern. the layer with the pattern.
36. Change the Blend Mode of this layer to Luminance (legacy).
Layers>Merge>Merge Down.
37. Effects>Plugins>Mura's Meister - Perspective Tiling.
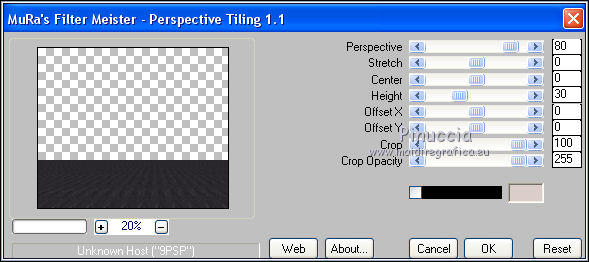
38. Activate the Magic Wand Tool  , feather 20, , feather 20,

and click on the transparent zone to select it.
Press 4 times CANC on the keyboard 
Selections>Select None.
39. Adjust>Sharpness>Sharpen More.
40. Open and activate the closed layer.
It must be at the top of the layers.
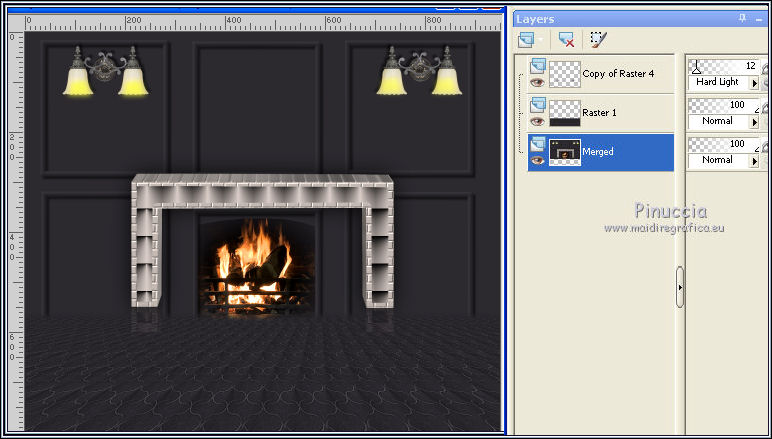
41. Open MagicalReality_Designs_TimeOfWonder_KIT_E16 - Edit>Copy.
Go back to your work and go to Edit>Paste as new layer.
Image>Resize, to 60%, resize all layers not checked.
Place  rightly the tube, see my example rightly the tube, see my example
42. Adjust>Brightness and Contrast>Brightness and Contrast.
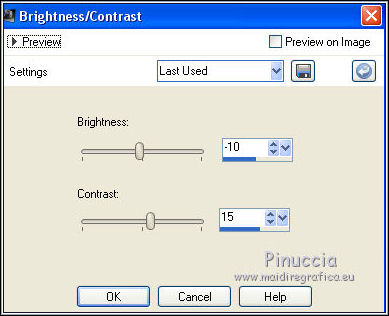
43. Effects>3D Effects>Drop Shadow, color black.
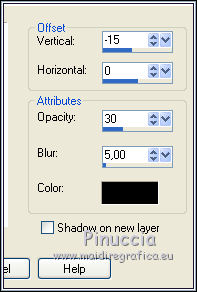
44. Open Texto Happy New Year_nines - Edit>Copy.
Go back to your work and go to Edit>Paste as new layer.
Move  the text at the bottom. the text at the bottom.

45. Layers>Merge>Merge All.
46. Image>Add borders, 1 pixel, symmetric, background color #dbcec8.
Image>Add borders, 2 pixels, symmetric, foreground color #2d2b30.
Image>Add borders, 50 pixels, symmetric, background color #dbcec8.
47. Selections>Select All.
Selections>Modify>Contract - 20 pixels.
48. Effects>3D Effects>Drop Shadow, color black.
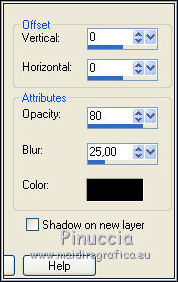
Selections>Select None.
49. Image>Add borders, 1 pixel, symmetric, foreground color #2d2b30.
50. Adjust>Brightness and Contrast>Brightness and Contrast.
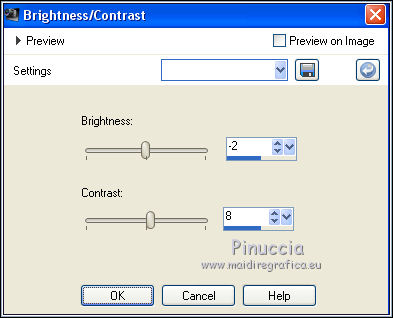
51. Open the tube man-LB TUBES, erase the watermark - Edit>Copy.
Go back to your work and go to Edit>Paste as new layer.
Image>Resize, to 110%, resize all layers not checked.
Move  the tube to the right side. the tube to the right side.
52. Effects>3D Effects>Drop Shadow.
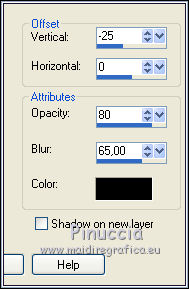
53. Open the tube 2961-woman-LB TUBES, erase the watermark - Edit>Copy.
Go back to your work and go to Edit>Paste as new layer.
Image>Resize, to 95%, resize all layers not checked.
Move  the tube to the left side. the tube to the left side.
Effects>3D Effects>Drop Shadow, same settings.
54. Open the tube mou_champagne - Edit>Copy.
Go back to your work and go to Edit>Paste as new layer.
Image>Resize, to 70%, resize all layers not checked.
Move  the tube at the bottom, in the middle. the tube at the bottom, in the middle.
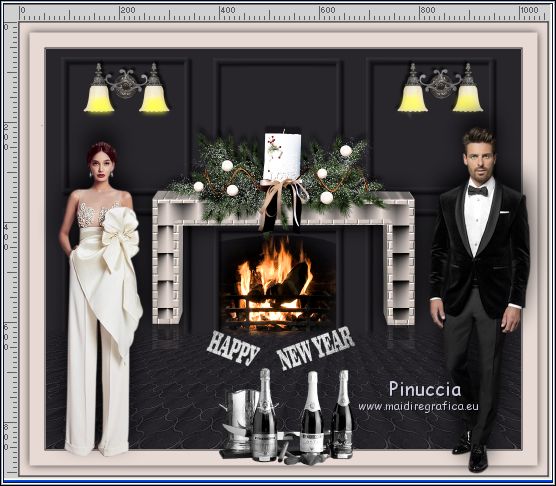
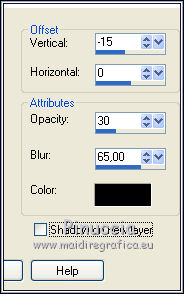
55. Effects>3D Effects>Drop Shadow, color black.
56. Layers>Merge>Merge All.
57. Image>Resize, to 92%, resize all layers checked.
58. Sign your work and save as jpg.
Your versions here

If you have problems or doubts, or you find a not worked link, or only for tell me that you enjoyed this tutorial, write to me.
21 November 2018
|
 ENGLISH VERSION

 ENGLISH VERSION
