|
TOP NICOLE
 ENGLISH VERSION ENGLISH VERSION
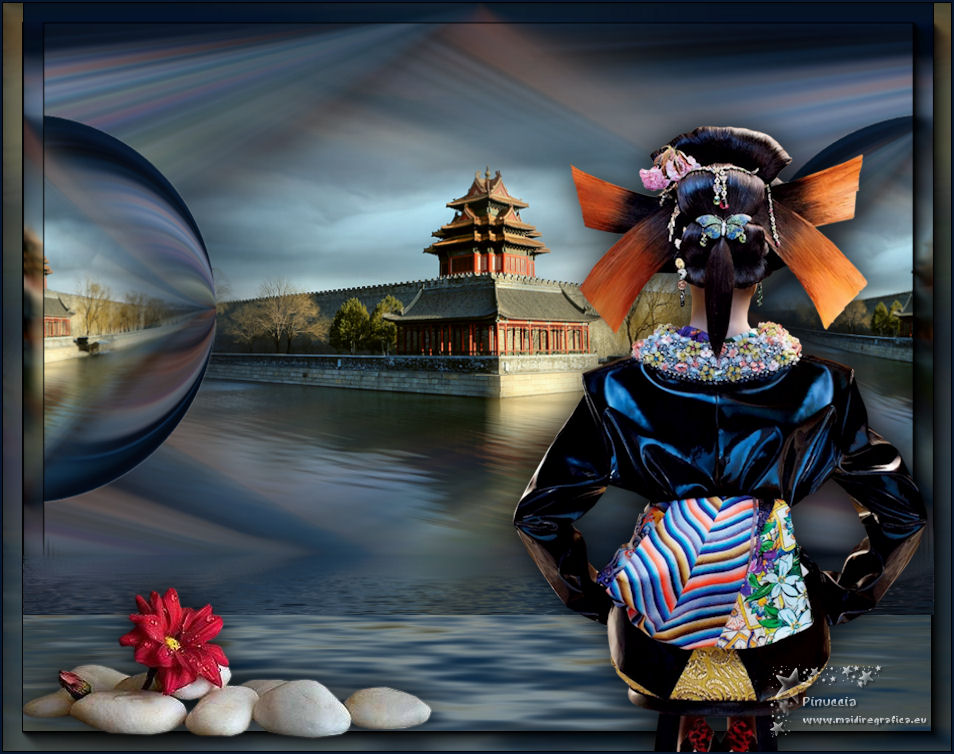
Here you find the original of this tutorial:

This tutorial was translated with PSPX7 but it can also be made using other versions of PSP.
Since version PSP X4, Image>Mirror was replaced with Image>Flip Horizontal,
and Image>Flip with Image>Flip Vertical, there are some variables.
In versions X5 and X6, the functions have been improved by making available the Objects menu.
In the latest version X7 command Image>Mirror and Image>Flip returned, but with new differences.
See my schedule here
French translation here
Your versions ici
For this tutorial, you will need:
Material here
Tube calguisjapon08092018 by Guismo
Mist 320_paysage_p3_animabelle
calguiszendeco29042014 by Guismo
(you find here the links to the material authors' sites)
Plugins
consult, if necessary, my filter section here
Filters Unlimited 2.0 here
Simple - Left Right Wrap (bonus) here
AAA Frames - Foto Frame here
Flaming Pear - Flood here
Filters Simple can be used alone or imported into Filters Unlimited.
(How do, you see here)
If a plugin supplied appears with this icon  it must necessarily be imported into Unlimited it must necessarily be imported into Unlimited

In the newest versions of PSP, you don't find the foreground/background gradient (Corel_06_029).
You can use the gradients of the older versions.
The Gradient of CorelX here
1. Open a new transparent image 900 x 600 pixels.
2. Set your foreground color to #000002,
and your background color to #3b80bc.
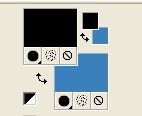
Set your foreground color to a Foreground/Background Gradient, style Linear.
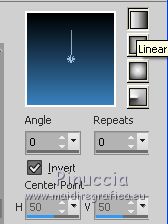
Flood Fill  the transparent image with your gradient. the transparent image with your gradient.
4. Selections>Select All.
Open the tube calguisjapon08092018, erase the watermark and go to Edit>Copy.
Minimize the tube.
Go back to your work and go to Edit>Paste into Seleciton.
Selections>Select None.
5. Adjust>Blur>Radial Blur.
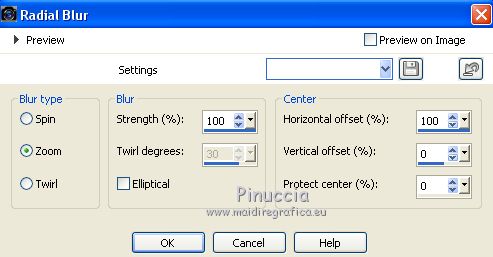
6. Effects>Image Effects>Seamless Tiling, default settings.

7. Open the tube 320_paysage_p3_animabelle and go to Edit>Copy.
Go back to your work and go to Edit>Paste as new layer.
8. Layers>Merge>Merge visible.
9. Layers>Duplicate.
10. Effects>Geometric Effects>Circle.

11. Image>Resize, 2 times to 80%, resize all layers not checked
12. Effects>Plugins>Filters Unlimited 2.0 - Simple - Left Right Wrap.
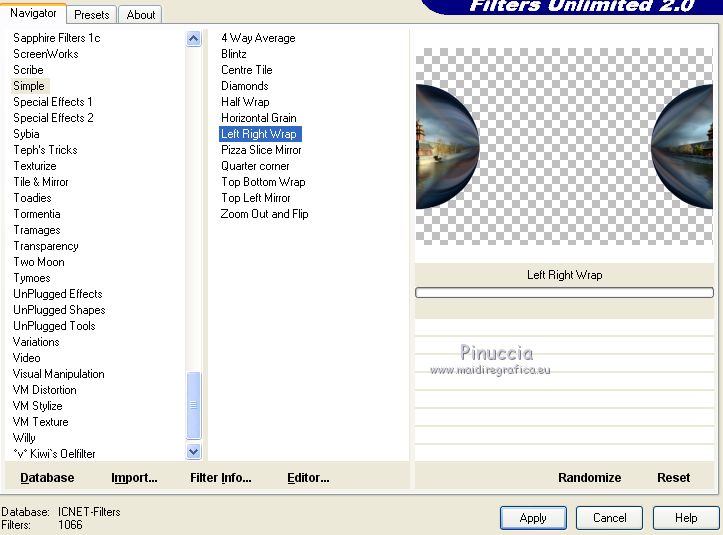
13. Layers>Merge>Merge visible.
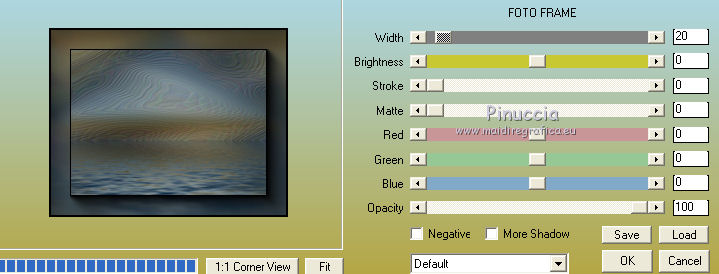
14. Effects>Plugins>AAA Frames - Foto Frame.
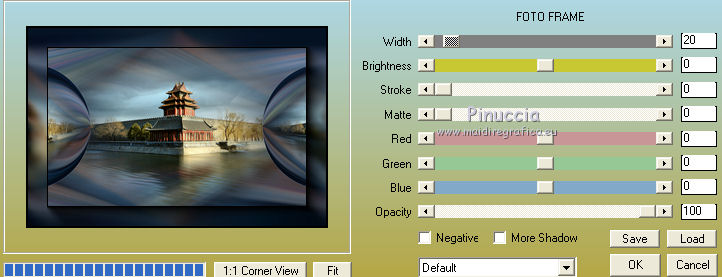
15. Edit>Copy.
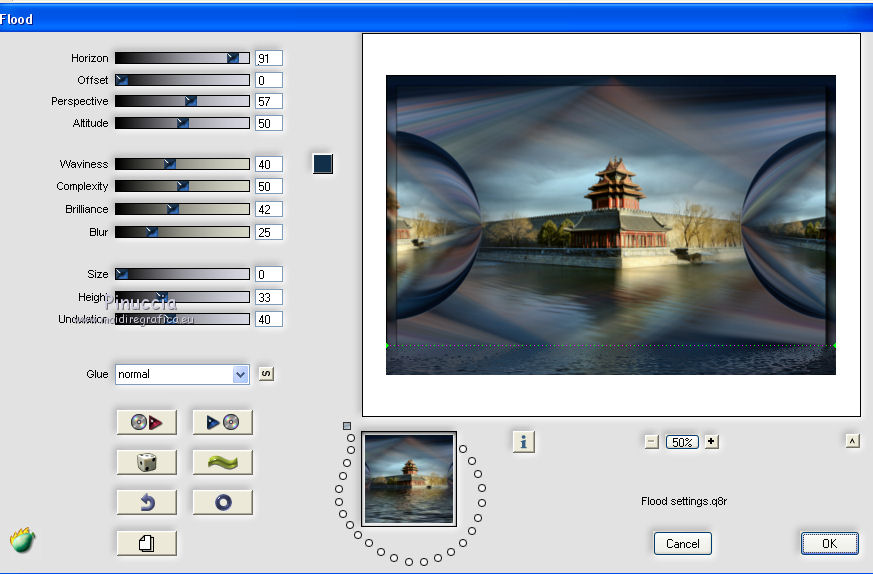
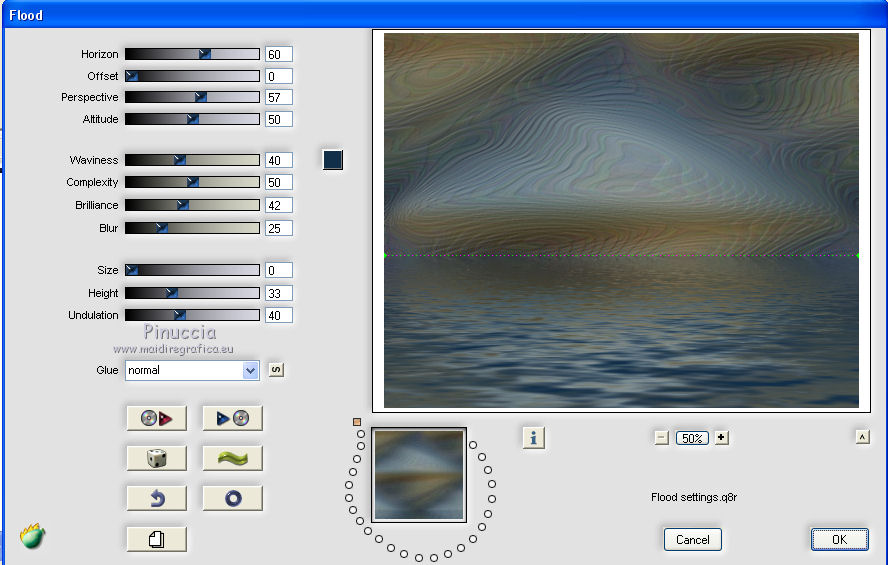
16. Effects>Plugins>Flaming Pear - Flood - color #122f49
17. Activate the Smudge Tool 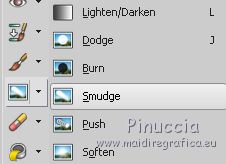 with these settings. with these settings.

pass it over the line of Flood to soften the wave.
18. Image>Canvas size - 950 x 750 pixels.
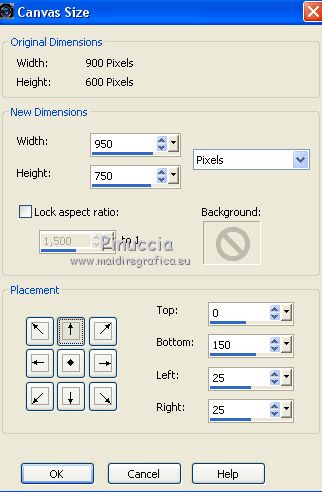
19. Layers>New Raster Layer.
Layers>Arrange>Send to Bottom.
Selections>Select All.
Edit>Paste into selection (the background in memory).
Selections>Select None.
20. Adjust>Blur>Radial Blur, same settings.

21. Effects>Image Effects>Seamless Tiling, default settings.

22. Effects>Artistic Effects>Enamel, color #ffffff.
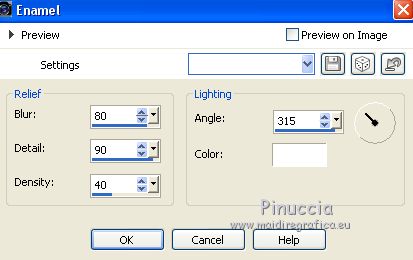
23. Effects>Plutins>Flaming Pear - Flood, horizon 60, color #122f49.
24. Effects>Plugins>AAA Frames - Foto Frame, same settings.
25. Activate the layer Merged.
K key to activate the Pick Tool 
pull a bit the nodes to match the small wave with the layer below
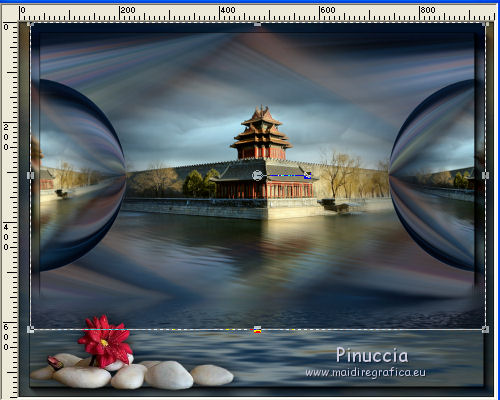
26. Open the tube calguiszendeco29042014 and go to Edit>Copy.
Go back to your work and go to Edit>Paste as new layer.
Erase the watermark.
Move  the tube at the bottom left. the tube at the bottom left.
27. Effects>3D Effects>Drop Shadow, color black.

28. Activate again the tube calguisjapon08092018 and go to Edit>Copy.
Go back to your work and go to Edit>Paste as new layer.
Image>Resize, 2 times to 80% and 1 time to 90%, resize all layers not checked.
Move  the tube to the right side. the tube to the right side.
29. Effects>3D Effects>Drop Shadow, same settings.
30. Layers>Merge>Merge All.
31. Image>Add borders, 2 pixels, symmetric, color #08172d.
32. Sign your work and save as jpg.
Vos versions here

If you have problems or doubts, or you find a not worked link, or only for tell me that you enjoyed this tutorial, write to me.
4 Octobre 2018
|
 ENGLISH VERSION

 ENGLISH VERSION
