|
TOP ROCK CHIC
 ENGLISH VERSION ENGLISH VERSION
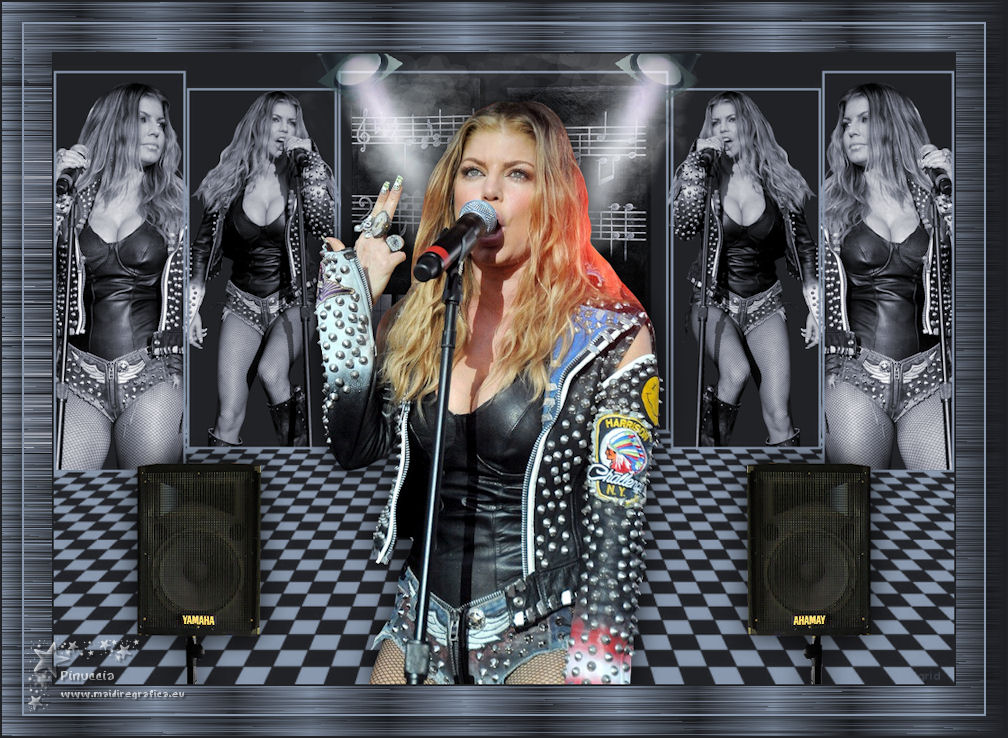
Here you find the original of this tutorial:

This tutorial was translated with PSPX7 but it can also be made using other versions of PSP.
Since version PSP X4, Image>Mirror was replaced with Image>Flip Horizontal,
and Image>Flip with Image>Flip Vertical, there are some variables.
In versions X5 and X6, the functions have been improved by making available the Objects menu.
In the latest version X7 command Image>Mirror and Image>Flip returned, but with new differences.
See my schedule here
French translation here
Le vostre versioni ici
For this tutorial, you will need:
Material here
Sepia Tube-Cool 0utfit-RockBikerChick-001
Sepia Tube-Cool 0utfit-RockBikerChick-002
Sepia Tube-Cool 0utfit-RockBikerChick-003
DBK AA Decor-259
DBK FURN-JUKEB-004
sportlight2_05_08 by Silvia
maske231_sigrid
(you find here the links to the material authors' sites)
Plugins
consult, if necessary, my filter section here
VM Toolbox - Blast here
Filters Unlimited 2.0 here
Filters VM Toolbox can be used alone or imported into Filters Unlimited.
(How do, you see here)
If a plugin supplied appears with this icon  it must necessarily be imported into Unlimited it must necessarily be imported into Unlimited

You can change Blend Modes according to your colors.
In the newest versions of PSP, you don't find the foreground/background gradient (Corel_06_029).
You can use the gradients of the older versions.
The Gradient of CorelX here
Open the mask in PSP and minimize it with the rest of the material.
1. Open a new transparent image 1000 x 700 pixels.
2. Set your foreground color to #212226,
and your background color to #8998ad.
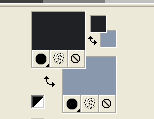
Flood Fill  the transparent image with your foreground color #212226. the transparent image with your foreground color #212226.
2. Layers>New Raster Layer.
Flood Fill  with your background color #8998ad with your background color #8998ad
3. Layers>New Mask layer>From image
Open the menu under the source window and you'll see all the files open.
Select the mask maske231_sigrid.
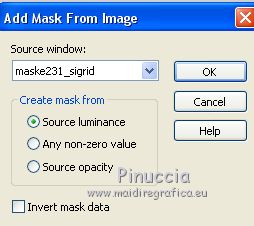
Layers>Merge>Merge group
4. Activate the Magic Wand Tool 
and click on the left frame to select it
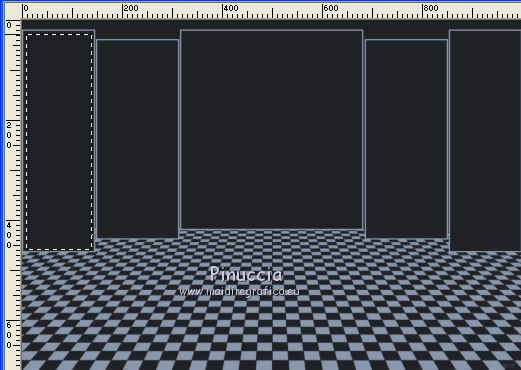
5. Selections>Modify>Expand - 10 pixels, and keep selected.
6. Open the tube Sepia Tube-Cool 0utfit-RockBikerChick-001 and go to Edit>Copy.
Go back to your work and go to Edit>Paste as new layer.
Image>Resize, to 50%, resize all layers not checked.
Move  the tube as below. the tube as below.
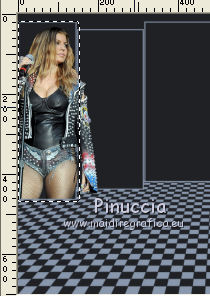
7. Selections>Invert.
Press CANC on the keyboard 
Change the Blend Mode of this layer to Luminance and move th layer under the mask layer.
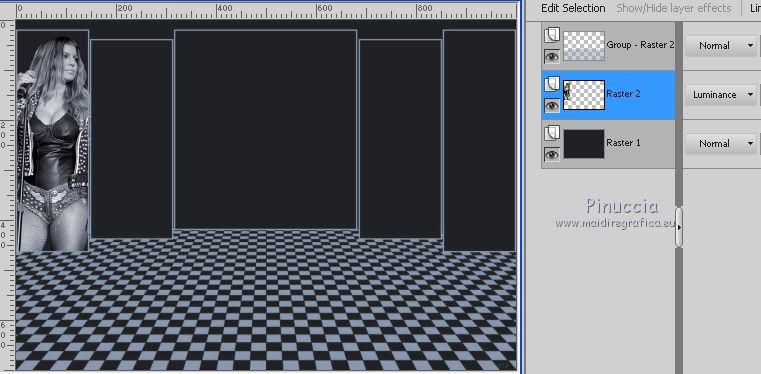
8. Layers>Duplicate.
Image>Mirror.
9. Activate again the mask layer.
Activate the Magic Wand Tool 
and click on the second left frame to select it.
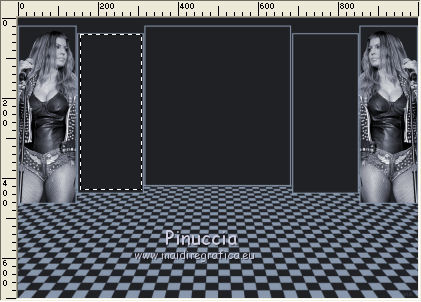
10. Selections>Modify>Expand - 10 pixels and keep selected.
11. Ouvrir le tube Sepia Tube-Cool 0utfit-RockBikerChick-002 and go to Edit>Copy.
Go back to your work and go to Edit>Paste as new layer.
Image>Resize, to 50%, resize all layers not checked.
Place  the tube as below. the tube as below.
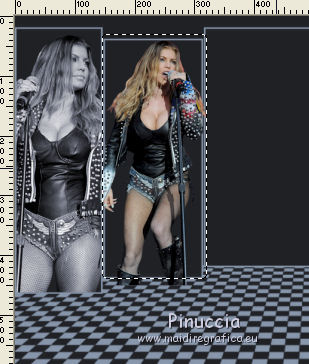
12. Selections>Invert.
Press CANC on the keyboard.
Change the Blend Mode of this layer to Luminance et move the layer under the mask layer.
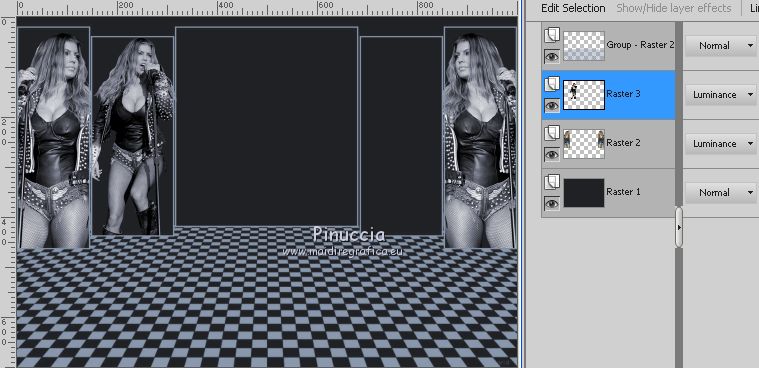
13. Layers>Duplicate.
Image>Mirror.
14. You should have this
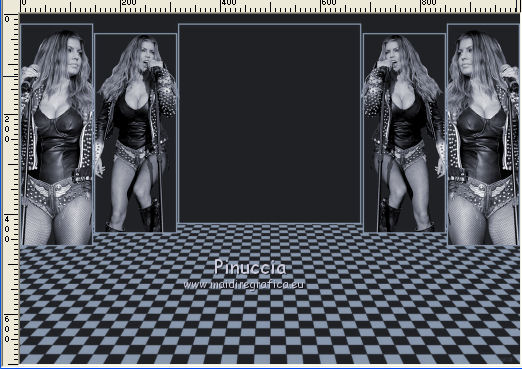
15. Activate the top layer.
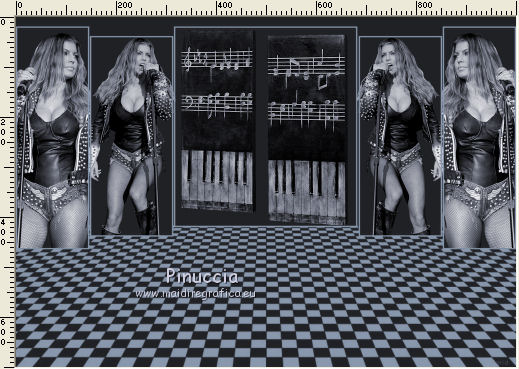
Open the tube DBK AA Decor-259, erase the watermark and go to Edit>Copy.
Go back to your work and go to Edit>Paste as new layer.
Image>Resize, 2 times to 80%, resize all layers not checked.
Place  the tube in the middle. the tube in the middle.
Change the Blend Mode of this layer to Luminance.
16. Open the tube sportlight2_05_08 and go to Edit>Copy.
Go back to your work and go to Edit>Paste as new layer.
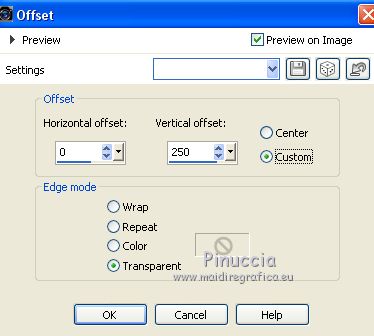
17. Effects>Image Effects>Offset.
18. Open the tube Sepia Tube-Cool 0utfit-RockBikerChick-003 and go to Edit>Copy.
Go back to your work and go to Edit>Paste as new layer.
Image>Resize, to 80%, resize all layers not checked.
Place  the tube down, over the border. the tube down, over the border.
19. Effects>3D Effects>Drop Shadow, colore black.

20. Open the tube DBK FURN-JUKEB-004 and go to Edit>Copy.
Go back to your work and go to Edit>Paste as new layer.
Move  the tube at the bottom left. the tube at the bottom left.
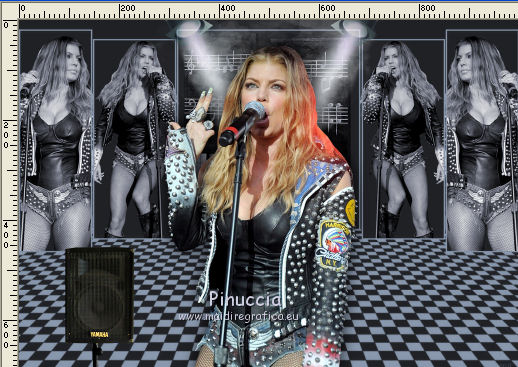
Effects>3D Effects>Drop Shadow, same settings.
21. Layers>Duplicate.
Image>Mirror.
22. Layers>Merge>Merge All.
23. Image>Add borders, 2 pixels, symmetric, color #212226.
24. Image>Resize, to 90%, resize all layers checked.
25. Selections>Select All.
Image>Add borders, 50 pixels, symmetric, foreground color #212226.
Selections>Invert.
Select this border with your Magic Wand Tool 
26. Set your foreground color to a Foreground/Background Gradient, style Linear.
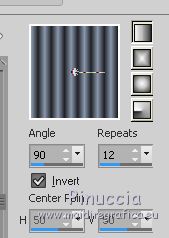
Flood Fill  the selection with your Gradient. the selection with your Gradient.
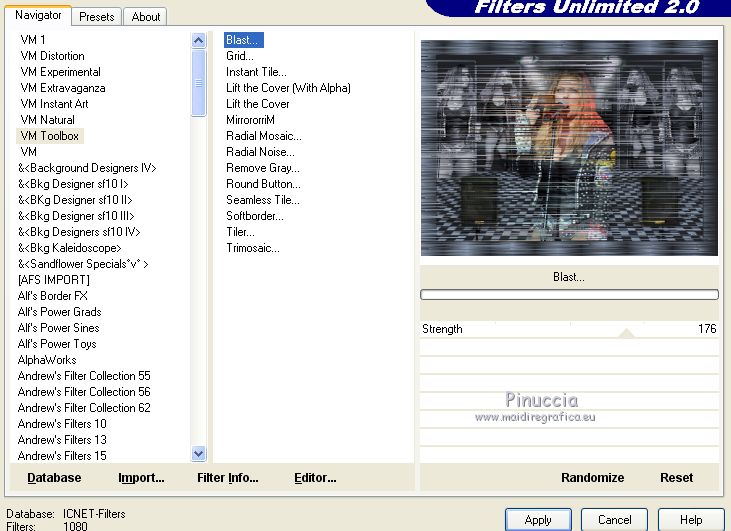
27. Effects>Plugins>Filters Unlimited 2.0 - VM Toolbox - Blast, default settings.
28. Selections>Select All.
Selections>Modify>Contract - 20 pixels.
29. Effects>3D Effects>Drop Shadow, color black.

Keep selected.
30. Layers>New Raster Layer.
Flood Fill  the layer with your background color #8998ad. the layer with your background color #8998ad.
31. Selections>Modify>Contract - 2 pixels.
Press CANC on the keyboard.
Selections>Select None.
32. Layers>Merge>Merge All.
33. Image>Add borders, 2 pixels, symmetric, foreground color #212226.
34. Sign your work and save as jpg.
Your versions here

If you have problems or doubts, or you find a not worked link, or only for tell me that you enjoyed this tutorial, write to me.
25 Octobre 2018
|
 ENGLISH VERSION

 ENGLISH VERSION
