|
TOP STAGE
ENGLISH VERSION
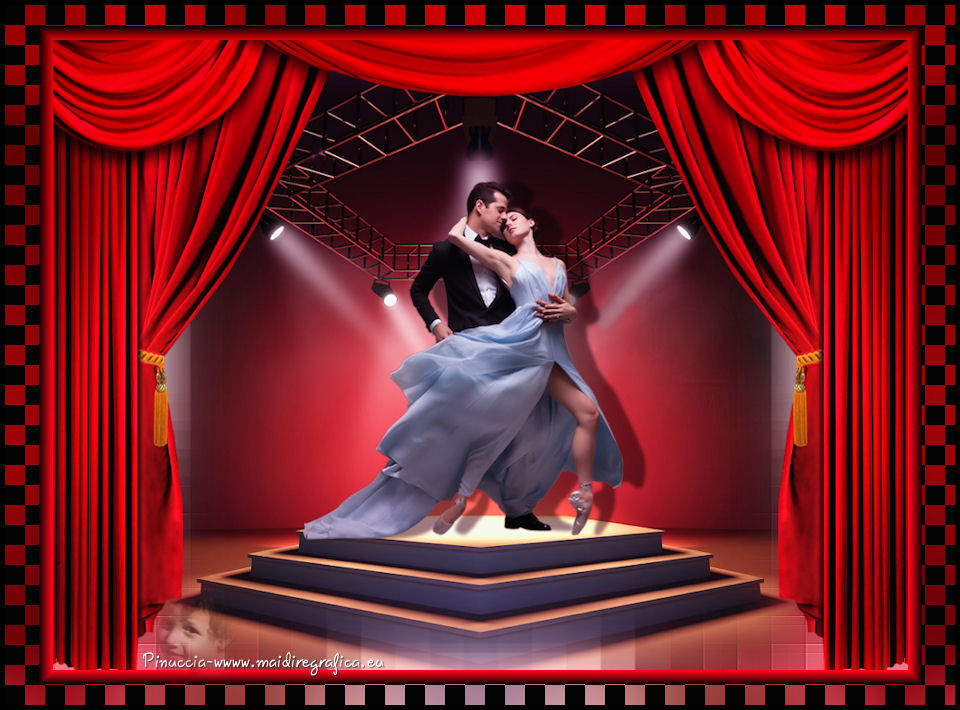
Here you find the original of this tutorial:

This tutorial was translated with PSPX3 but it can also be made using other versions of PSP.
Since version PSP X4, Image>Mirror was replaced with Image>Flip Horizontal,
and Image>Flip with Image>Flip Vertical, there are some variables.
In versions X5 and X6, the functions have been improved by making available the Objects menu.
In the latest version X7 command Image>Mirror and Image>Flip returned, but with new differences.
See my schedule here
French translation here
Your versions here
For this tutorial, you will need:
Material here
Tube 2371 couple LB Tubes
Mist DBK STAGE DECOR2 by Karine
Tube calguisrideau1804212 by Guismo
Plugins
consult, if necessary, my filter section here
Filters Unlimited 2.0 here
Simple - 4 Way Average here
L&K's - L&K's Pia here
Nik Software - Color Efex Pro here
Filters Simple can be used alone or imported into Filters Unlimited.
(How do, you see here)
If a plugin supplied appears with this icon  it must necessarily be imported into Unlimited it must necessarily be imported into Unlimited

1. Open a new transparent image 950 x 700 pixels.
2. Set your foreground color to white #ffffff.
Flood Fill  the transparent image with your foreground color white. the transparent image with your foreground color white.
3. Open the tube DBK STAGE DECOR2 - Edit>Copy.
Go back to your work and go to Edit>Paste as new layer.
Image>Resize, 90%, resize all layers not checked.
4. Effects>Image Effects>Seamless Tiling, default settings.

5. Adjust>Blur>Gaussian Blur - radius 30.

6. Effects>Texture Effects>Mosaic Antique.
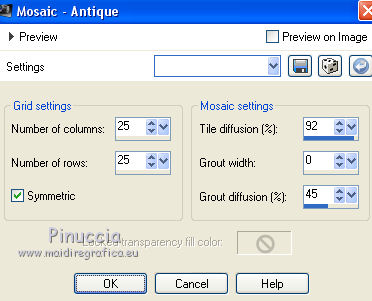
7. Effects>Edge Effects>Enhance More.
8. Effects>Plugins>Filters Unlimited 2.0 - Simple - 4 way Average.
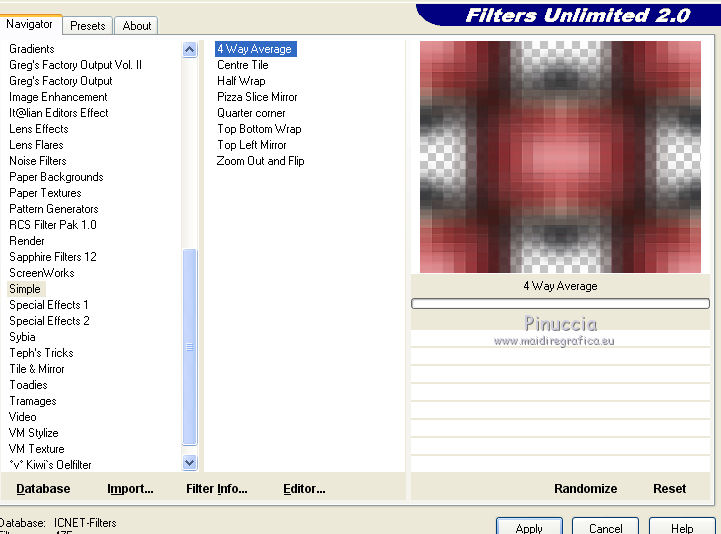
9. Edit>Paste as new layer (the tube DBK STAGE DECOR2 is still in memory).
Image>Resize, 90%, resize all layers not checked.
10. Open the tube calguisrideau1804212 - Edit>Copy.
Go back to your work and go to Edit>Paste as new layer.
11. Open the tube 2371 couple LB Tubes - Edit>Copy.
Go back to your work and go to Edit>Paste as new layer.
Image>Resize, 2 times to 80%, resize all layers not checked.
12. Effects>3D Effects>Drop Shadow, color black.
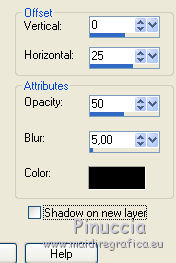
13. Layers>Merge>Merge visible.
14. Edit>Copy.
15. Image>Resize, to 90%, resize all layers not checked.
16. Activate the Magic Wand tool 
and click on the transparent zone to select it.
17. Edit>Paste into Selection.
18. Adjust>Blur>Gaussian Blur - radius 30.

19. Effects>Plugins>L&K's - L&K's Pia.
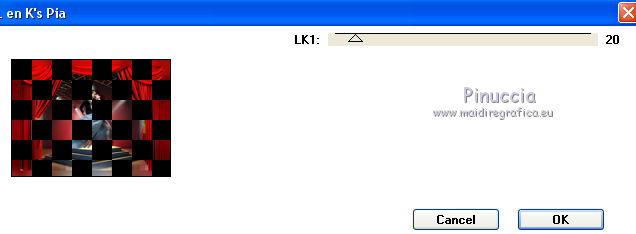
20. Selections>Invert.
21. Effects>3D Effects>Chisel, color #f60313.
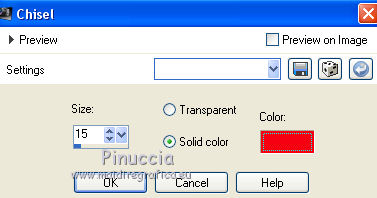
22. Selections>Select None.
23. Effects>Plugins>Nik Software - Color Efex Pro - Bi-Color Filters
select Color-set Violet/Pink 3 and ok.
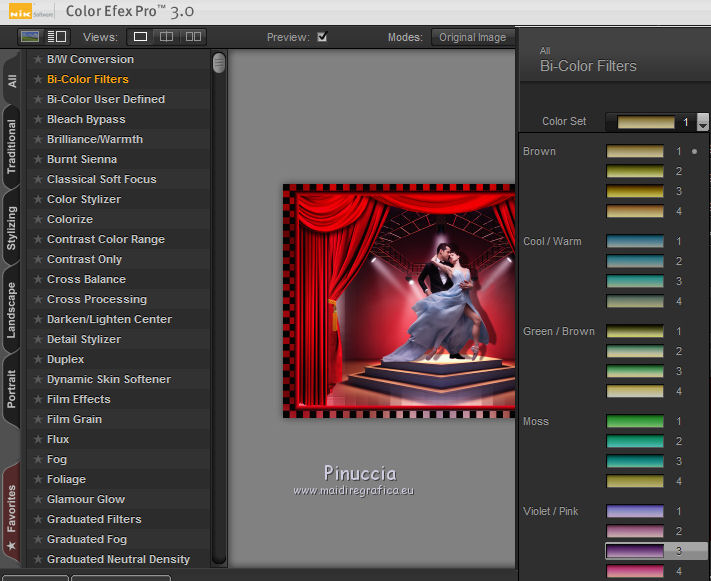
24. Layers>Merge>Merge All.
25. Image>Add borders, 5 pixels, symmetric, color black.
26. Sign your work and save as jpg.

If you have problems or doubts, or you find a not worked link, or only for tell me that you enjoyed this tutorial, write to me.
25 March 2017
|

