|
TOP ABSTRACT


This tutorial was translated with PSPX7 but it can also be made using other versions of PSP.
Since version PSP X4, Image>Mirror was replaced with Image>Flip Horizontal,
and Image>Flip with Image>Flip Vertical, there are some variables.
In versions X5 and X6, the functions have been improved by making available the Objects menu.
In the latest version X7 command Image>Mirror and Image>Flip returned, but with new differences.
See my schedule here
 French translation here French translation here
 Your versions ici Your versions ici
For this tutorial, you will need:
Material
here
Tube 30_tube_femme_p1_animabelle
Tube 9_abstrait_animabelle
Tube calguisbird19052014 by Guismo
13_masque_Animabelle
(you find here the links to the material authors' sites)
Plugins
consult, if necessary, my filter section here
Filters Unlimited 2.0 here
Tramages - Pool Shadow here
Andromeda - Techtures here
Filters Tramages can be used alone or imported into Filters Unlimited.
(How do, you see here)
If a plugin supplied appears with this icon  it must necessarily be imported into Unlimited it must necessarily be imported into Unlimited

You can change Blend Modes according to your colors.
In the newest versions of PSP, you don't find the foreground/background gradient (Corel_06_029).
You can use the gradients of the older versions.
The Gradient of CorelX here
Open the mask in PSP and minimize it with the rest of the material.
1. Set your foreground color to #238190,
and your background color to #e3e2e3.
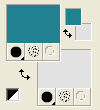
Set your foreground color to a Foreground/Background Gradient, style Linear.
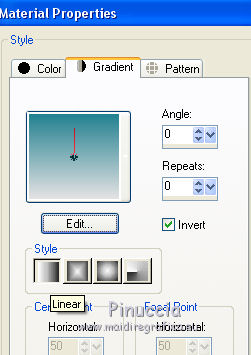
2. Open a new transparent image 1000 x 700 pixels.
Flood Fill  the transparent image with your background color #e3e2e3. the transparent image with your background color #e3e2e3.
3. Selections>Select All.
Selections>Modify>Contract - 2 pixels.
Press CANC on the keyboard 
Flood Fill  the selection with your Gradient. the selection with your Gradient.
4. Effects>Plugins>Andromeda Techtures (Textures), as below

The screen is that of Nines; if you have problems with the filter like I did,
copy/paste into selection the image "fondo texture Andromeda" added in the material.
5. Selections>Modify>Contract - 50 pixels.
Press CANC on the keyboard.
6. Flood Fill  the selection with your background color #e3e2e3. the selection with your background color #e3e2e3.
Selections>Modify>Contract - 2 pixels.
Press CANC on the keyboard
7. Change the settings of your Gradient.
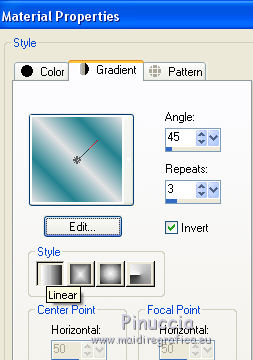
Flood Fill  the selection with your Gradient. the selection with your Gradient.
8. Effects>Plugins>Tramages - Pool Shadow, default settings.

9. Selections>Modify>Contract - 30 pixels.
Press CANC on the keyboard.
10. Flood Fill  the selection with your background color #e3e2e3. the selection with your background color #e3e2e3.
Selections>Modify>Contract - 2 pixels.
Press CANC on the keyboard
11. Set your foreground color to Color.
Flood Fill  with your foreground color #238190. with your foreground color #238190.
Keep selected.
12. Layers>New Raster Layer.
Flood Fill  with your background color #e3e2e3. with your background color #e3e2e3.
13. Layers>New Mask layer>From image
Open the menu under the source window and you'll see all the files open.
Select the mask 13_masque_Animabelle_page4.
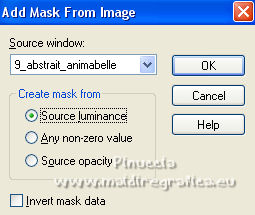
Layers>Merge>Merge Group.
Selections>Select None.
14. Layers>Duplicate.
Image>Mirror.
Layers>Arrange>Move Down.
Change the Blend Mode of this layer to Dissolve and reduce the opacity to 30%.
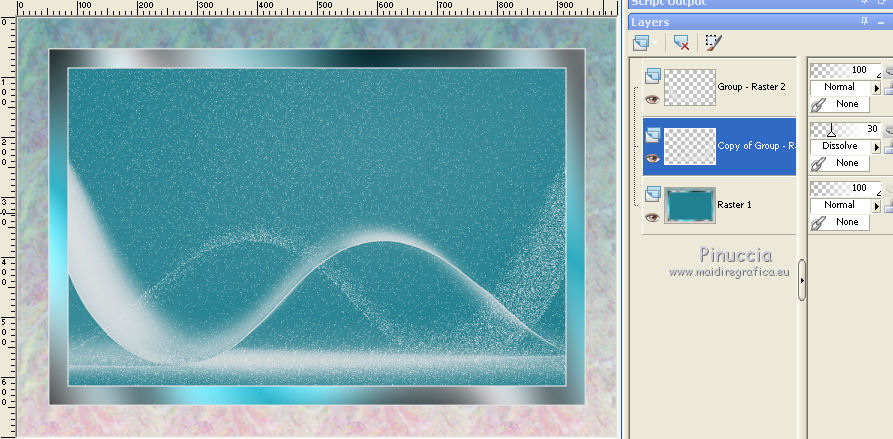
15. Selection Tool 
(no matter the type of selection, because with the custom selection your always get a rectangle)
clic on the Custom Selection 
and set the following settings.
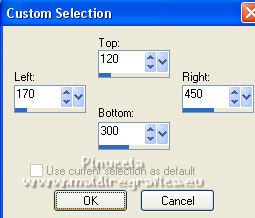
16. Layers>New Raster Layer.
Flood Fill  with your background color #e3e2e3. with your background color #e3e2e3.
Selections>Modify>Contract - 2 pixels.
Press CANC on the keyboard.
17. Open the tube 9_abstrait_animabelle and keep closed the layer of the watermark.
Edit>Copy Special>Copy Merged (to copy the 2 layers of the tube).
Go back to your work and go to Edit>Paste into Selection.
Selections>Select None.
18. Effects>3D Effects>Drop Shadow, color black.
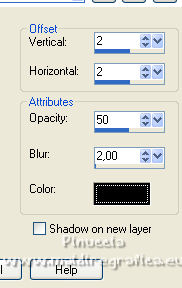
Repeat Drop Shadow, vertical and horizontal -2.
19. Adjust>Brightness and Contrast>Brightness and Contrast.
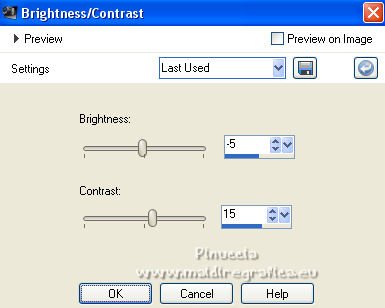
20. Layers>Duplicate.
Image>Mirror.
21. Open the tube 30_tube_femme_p1_animabelle and go to Edit>Copy.
Go back to your work and go to Edit>Paste as new layer.
Image>Resize, to 110%, resize all layers not checked.
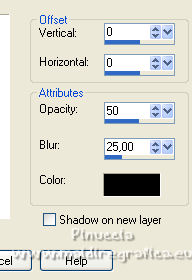
22. Effects>3D Effects>Drop Shadow, color black.
23. Open the tube calguisbrird19052014 and go to Edit>Copy.
Go back to your work and go to Edit>Paste as new layer.
Image>Resize, to 80%, resize all layers not checked.
Optional: Layers>New Mask layer>From image
Open the menu under the source window
and select the mask fade suave.
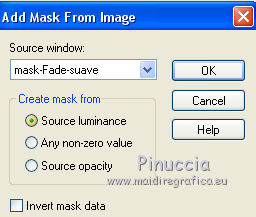
Layers>Merge>Merge Group.
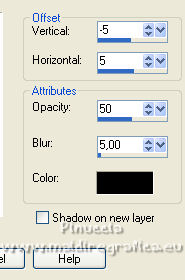
24. Effects>3D Effects>Drop Shadow, color black.
25. Image>Add borders, 2 pixels, symmetric, background color #e3e2e3.
Sign your work and save as jpg.
For the tube of this version thanks Karine

 Your versions here Your versions here

If you have problems or doubts, or you find a not worked link, or only for tell me that you enjoyed this tutorial, write to me.
18 January 2022

|


