|
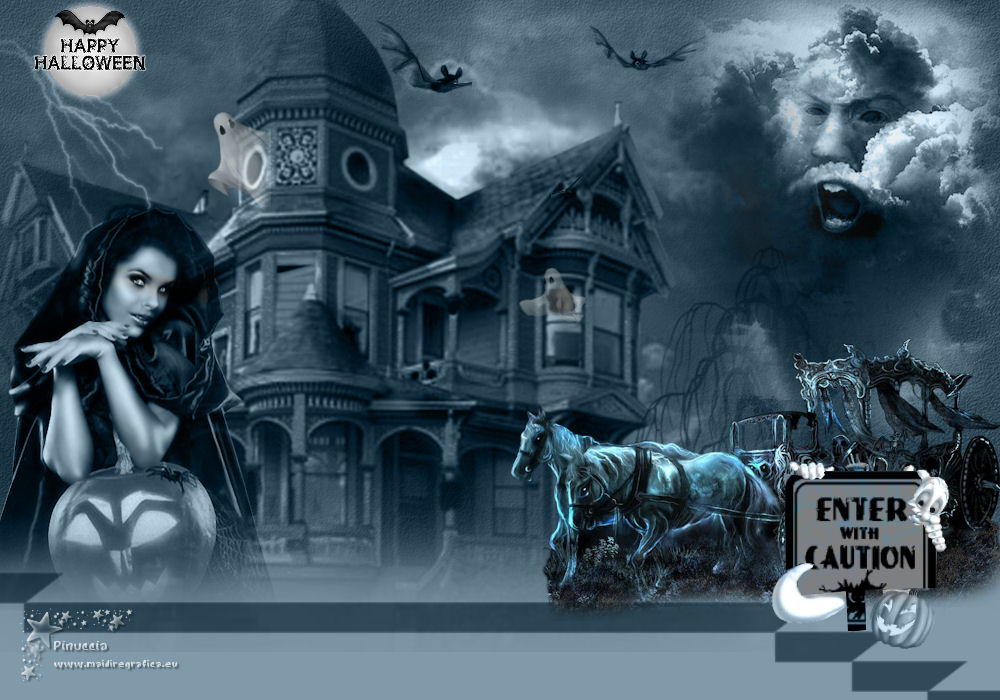
TOP TERROR


This tutorial was translated with PSPX7 but it can also be made using other versions of PSP.
Since version PSP X4, Image>Mirror was replaced with Image>Flip Horizontal,
and Image>Flip with Image>Flip Vertical, there are some variables.
In versions X5 and X6, the functions have been improved by making available the Objects menu.
In the latest version X7 command Image>Mirror and Image>Flip returned, but with new differences.
See my schedule here
 French translation here French translation here
 Your versions ici Your versions ici
For this tutorial, you will need:
Material
here
Tube calguisgost-71010 by Guismo
Tube calguishoussenhat-19 by Guismo
Tube calguismist4wulch-2299 by Guismo
Tube calguischaversouris-71010 by Guismo
Tube 1036008262010 by SusanNM
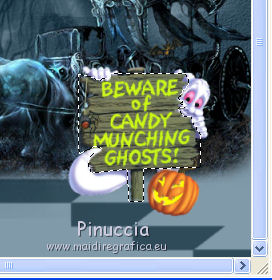
Tube CandyMunchingsShostsShirlSmall
Tube fantasma1
Tube fantasma 2
Tube Catel-ac
(you find here the links to the material authors' sites)
Plugins
consult, if necessary, my filter section here
Xero - Tekstya here

You can change Blend Modes according to your colors.
Open the masks in PSP and minimize them with the rest of the material.
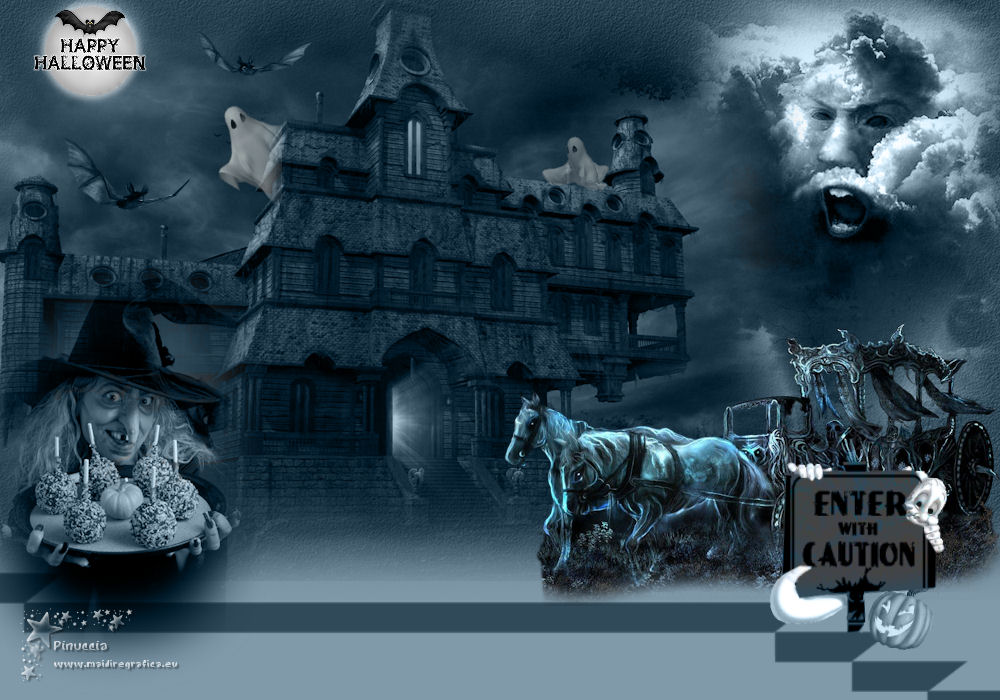
1. Open a new transparent image 1000 x 600 pixels.
2. Set your foreground color to #304a59,
and your background color to #809aaa.
Flood Fill  the transparent image with your foreground color #304a59. the transparent image with your foreground color #304a59.
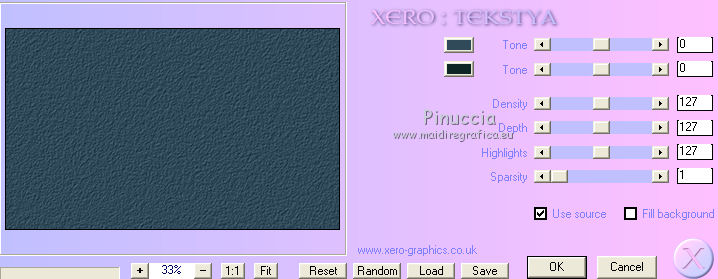
3. Effects>Plugins>Xero - Tekstya.
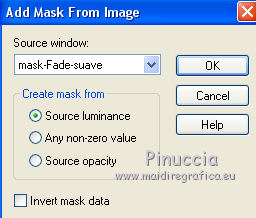
4. Layers>New Mask layer>From image
Open the menu under the source window and you'll see all the files open.
Select the mask mask-fadesuave.
Layers>Duplicate, to apply the mask 2 times.
Layers>Merge>Merge Group.
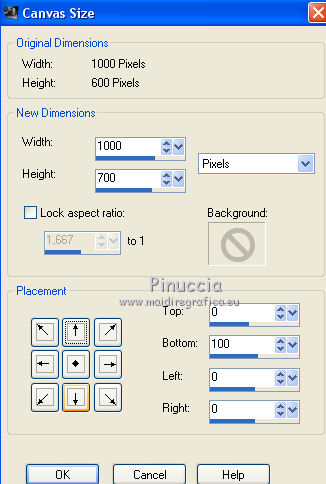
5. Image>Canvas Size - 1000 x 700 pixels.
6. Layers>New Raster Layer.
Layers>Arrange>Send to Bottom.
Flood Fill with your foreground color #304a59.
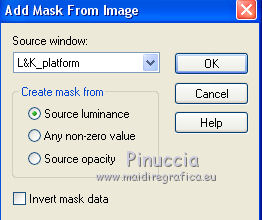
7. Layers>New Mask layer>From image
Open the menu under the source window
and select the mask L&K plataform .
Layers>Merge>Merge Group.
8. Layers>New Raster Layer.
Layers>Arrange>Send to Bottom
Flood Fill the layer with your background color #809aaa.
9. Activate your top layer.
Open the tube calguisgost-71010 and go to Edit>Copy.
Go back to your work and go to Edit>Paste as new layer.
Image>Resize, 2 or 3 times to 80% (for me 2 times), resize all layers not checked.
Image>Mirror.
Move  the tube at the upper right. the tube at the upper right.
Change the Blend Mode of this layer to Luminance (legacy).
10. Open the tube calguishousenhant-19 and go to Edit>Copy.
Go back to your work and go to Edit>PAste as new layer.
Image>Resize, to 80%, resize all layers not checked.
Move the tube to the left side.
Change the Blend Mode of this layer to Luminance (legacy).
11. Open the tube calguismist4witch2299 and go to Edit>Copy.
Go back to your work and go to Edit>PAste as new layer.
Image>Mirror.
Image>Resize, 1 times to 50% and 1 time to 80%, resize all layers not checked.
Move the tube at the bottom left.
Change the Blend Mode of this layer to Luminance (legacy).
12. Open the tube by Susan NM and go to Edit>Copy.
Go back to your work and go to Edit>Paste as new layer.
Image>Resize, to 50%, resize all layers not checked.
Move the tube at the bottom right.
Change the Blend Mode of this layer to Luminance (legacy).
13. Open the wordart Happy Halloween and go to Edit>Copy.
Go back to your work and go to Edit>Paste as new layer.
Move the tube at the upper left, on the moon.
14. Open the birds tube and to to Edit>Copy.
Go back to your work and go to Edit>Paste as new layer.
Image>Resize, to 80%, resize all layers not checked.
Move the tube at the upper left.
Change the Blend Mode of this layer to Luminance (legacy).
15. Copy/Paste as new layer the two ghosts
and place them to your liking.
For me
16. Open the image CandyMuching and go to Edit>Copy.
Go back to your work and go to Edit>Paste as new layer.
Image>Rotation libre - 4 degrés à droite.
Activate your Freehand Selection tool  , point to point , point to point
and select the sign, being careful not to erase the ghost's fingers and tail.
17. Layers>New Raster Layer.
Flood Fill the selection with your foreground color #304159,
Keep selected.
Layers>Merge>Merge Down.
18. Open the tube cartel-ac and go to Edit>Copy.
Go back to your work and go to Edit>Paste into Selection.

19. Selections>Select None.
Layers>Merge>Merge Down.
Change the Blend Mode of this layer to Luminance (legacy).
19. Sign your work on a new layer.
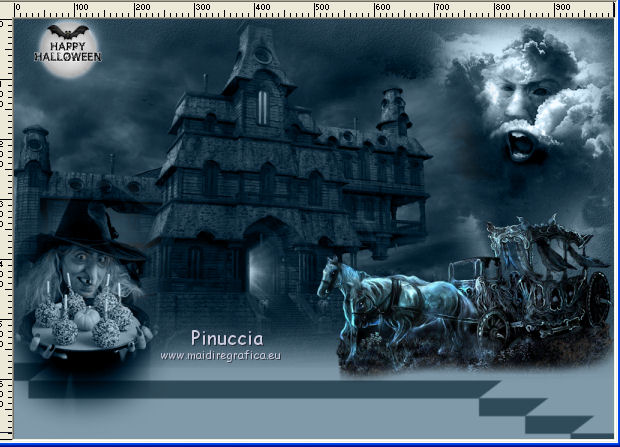
Layers>Merge>Merge All and save as jpg.
Version with tube by Criss
Your versions here

If you have problems or doubts, or you find a not worked link, or only for tell me that you enjoyed this tutorial, write to me.
9 Septembre 2021

|