|
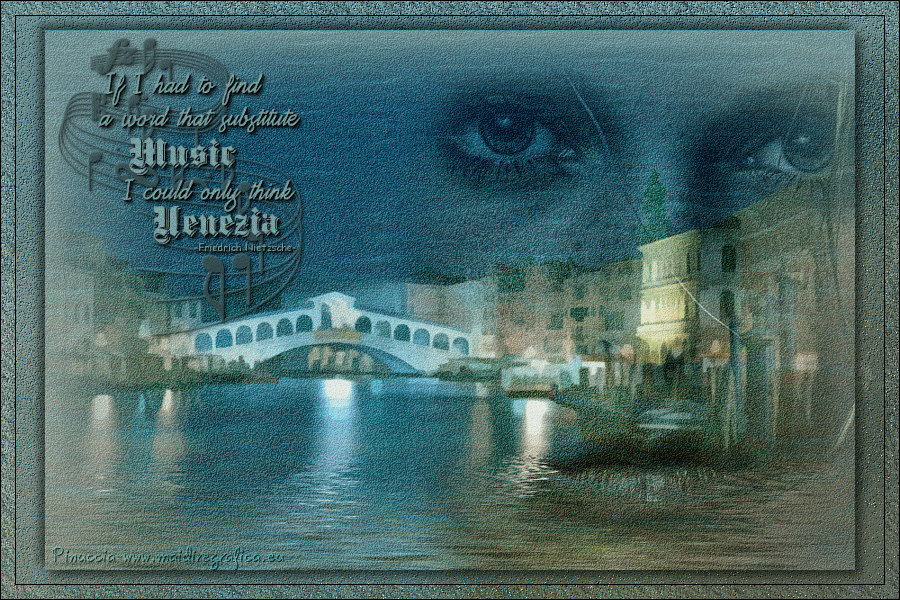
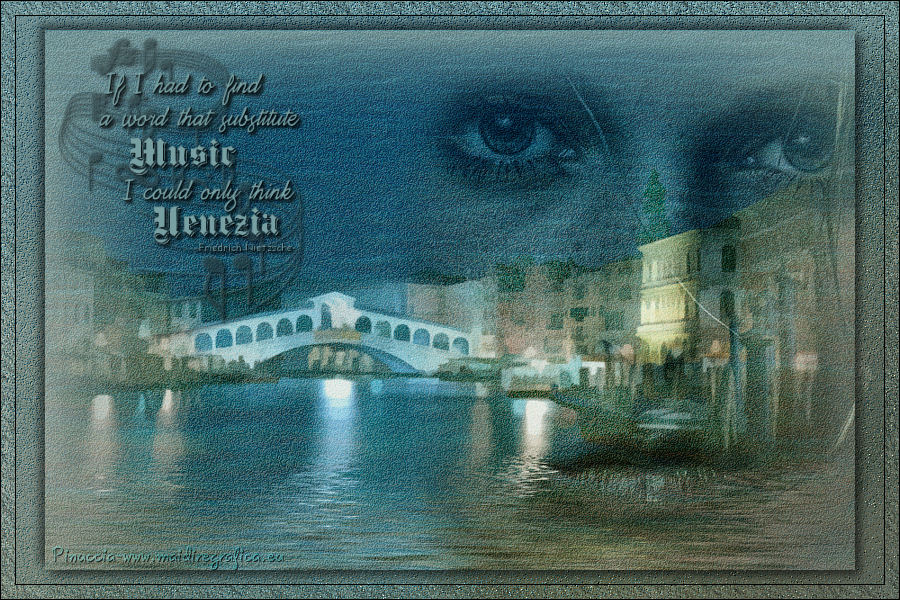
VENEZIA
 english version english version
This tutorial was created using PSP X but it may be esecuted using other versions of PSP.
Traduction française here
The original italian here
 Your versions here Your versions here
For this tutorial, you will need:
Material here
The brush en english here
For the tubes, thanks to Beatriz.
Filtres:
if you have a doubt about plugins, see my section plugins here
AAA Frames - Texture Frame qui
Redfield - Craquelure 3D qui
Redfield - Fine Touch qui
Filters Unlimited 2.0 qui
&<Background Designer sf10II> qui
VanDerLee Unplugged X qui
FM Tile Tools - Blend Emboss qui
Distort - Ocean Ripple qui

Place the brush in Brush folder. Attention, please, the brush is composed by two files, you must place both the files in the folder.
See my notes about Brushes here
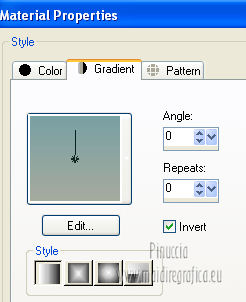
1. Set the Foreground color on #78a0a3,
and the Background color on #a6aa9e.
Set Foreground color up Gradient, Linear.
2. Open a new transparent image 900 x 600 pixels.
Flood fill  the transparent image with gradient. the transparent image with gradient.
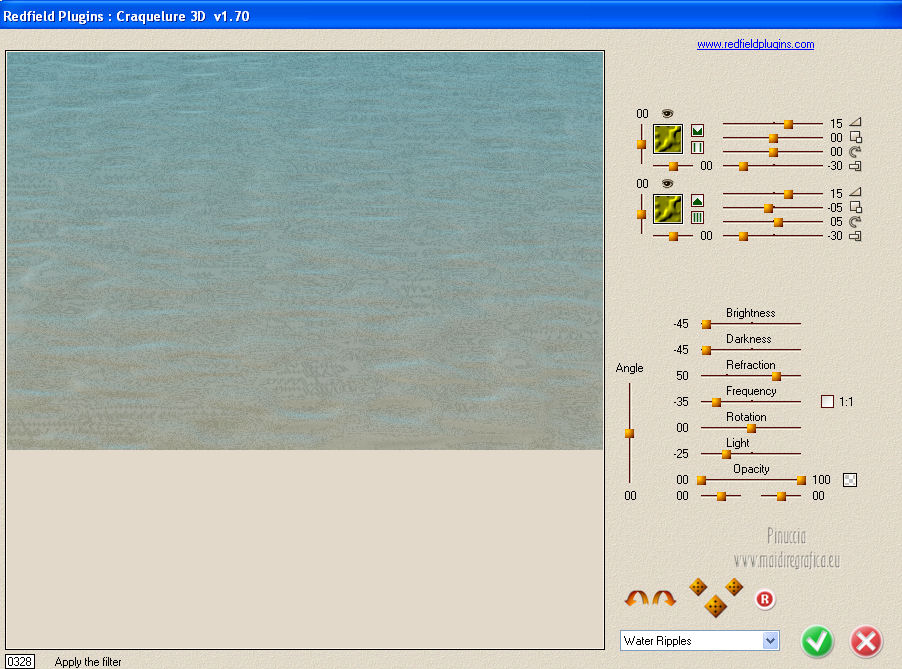
3. Effects>Plugins>Redfield - Craquelure 3D
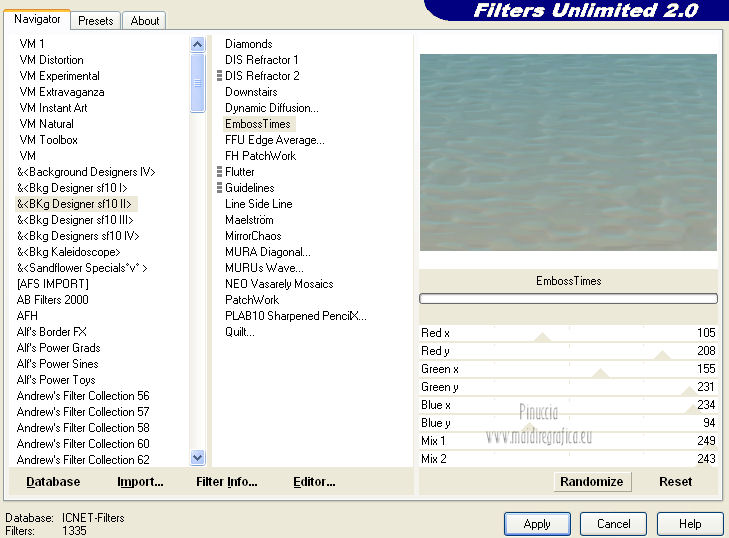
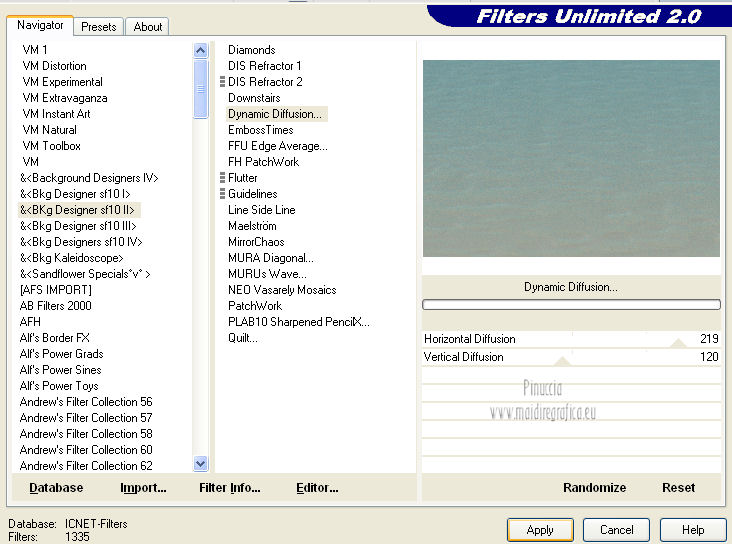
4. Effects>Plugins>Filtes Unlimited 2.0 - Bkg Designer sf10II - Emboss Time
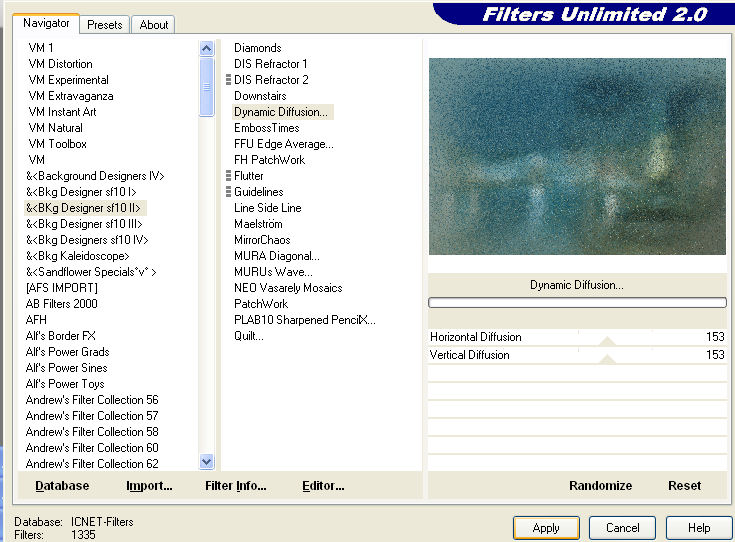
5. Effects>Plugins>Filtes Unlimited 2.0 - Bkg Designer sf10II - Dynamic diffusion.
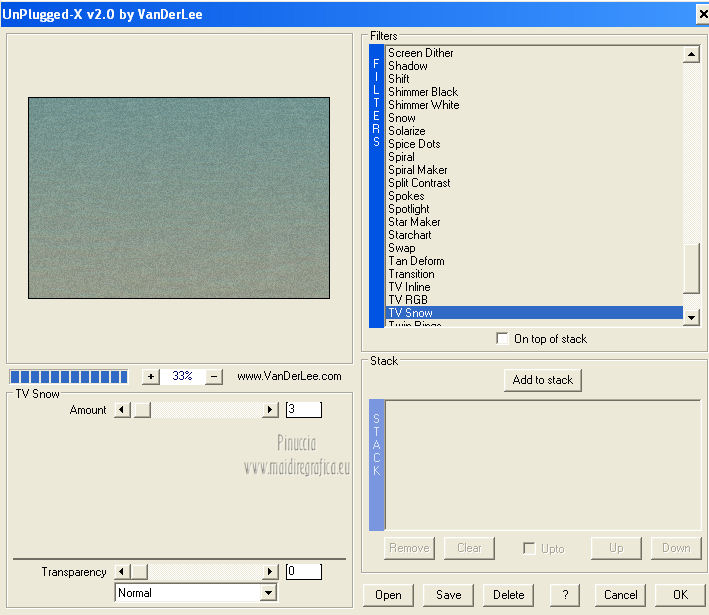
6. Effects>Plugins>VanDerLee - Unplugged X - Tv Snow.
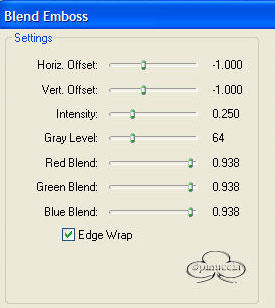
7. Effects>Plugins>FM Tile Tools - Blend Emboss, standard.
8. Layers>New Raster Layer.
Selections>Select all.
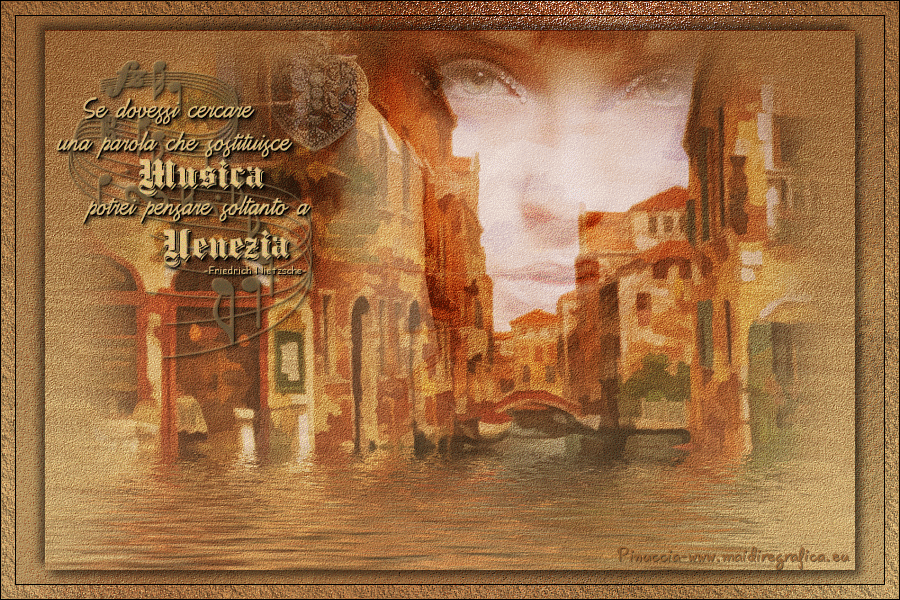
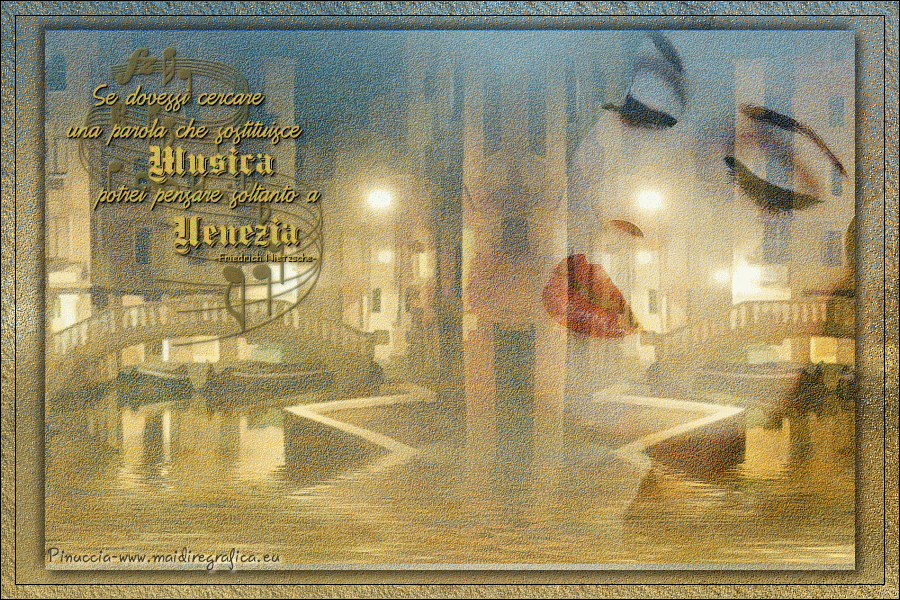
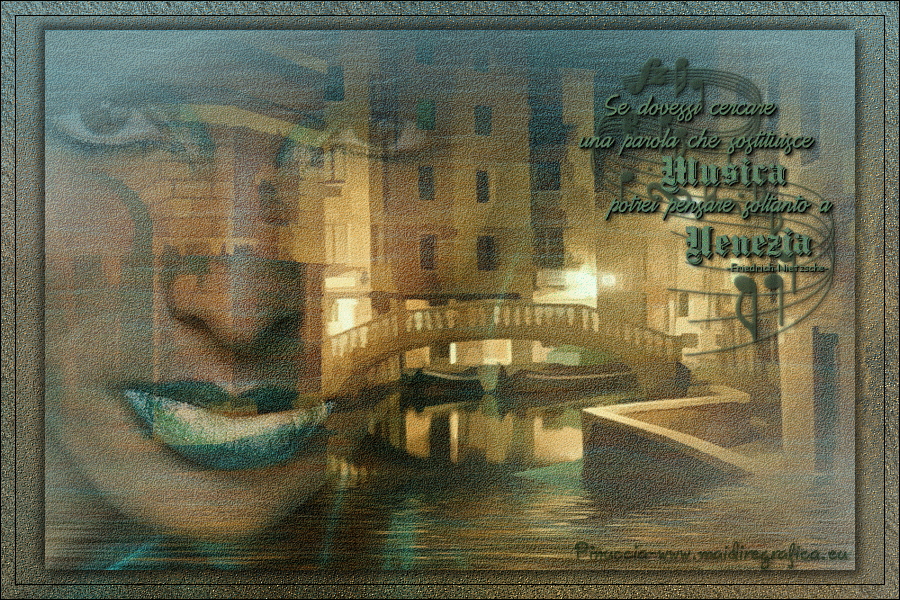
Open the tube "1042-Venezia-misted-LB TUBES", and go to Edit>Copy.
Back to your tag and Edit>Paste into Selection.
Selections>Select none.
Blend Mode on Overlay.
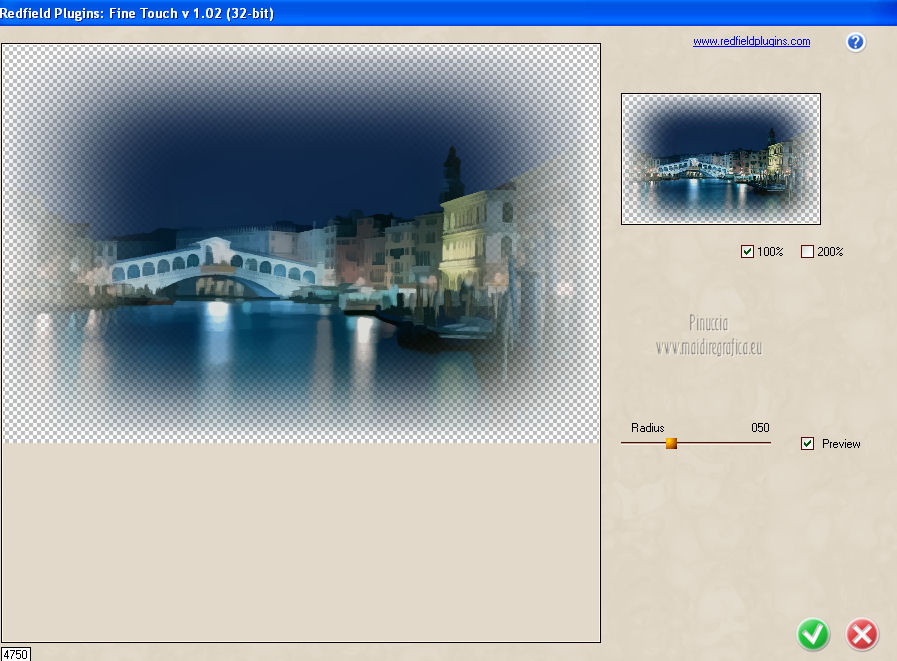
9. Effects>Plugins>Redfield - Fine touch.
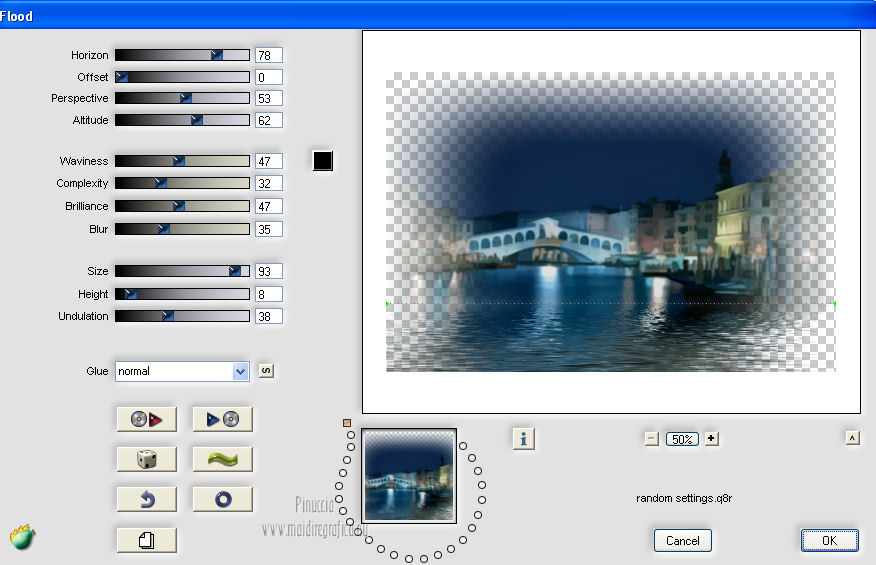
10. Effects>Plugins>Flaming Pear - Flood.
if you are using your own tube, keep in mind that:
 clicking on the dice, you can randomly change the settings, clicking on the dice, you can randomly change the settings,
stopping when you are satisfied with the result
 clicking on the green wave, you can change the appearance of the waves. clicking on the green wave, you can change the appearance of the waves.
 You can increase of decrease the horizon line (i.e. the height of the waves), You can increase of decrease the horizon line (i.e. the height of the waves),
playing with the setting of "horizon".
11. Open the tube "714-womanmist-LB TUBES", and go to Edit>Copy.
Back to your tag and go to Edit>Paste as new layer.
Move the tube on the right side.
Blend Mode on Soft Light.
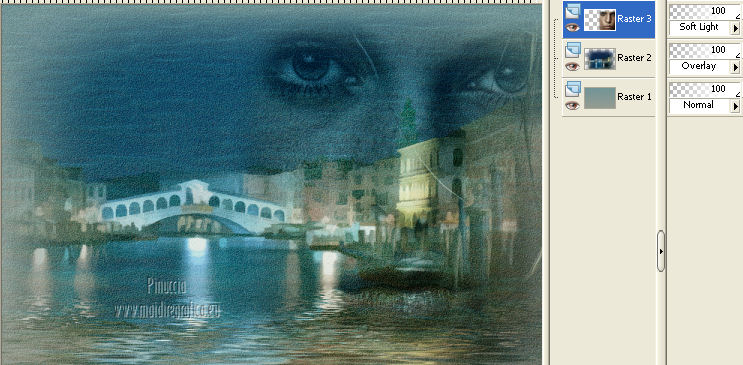
12. Layers>Merge>Merge visible.
13. Layers>Duplicate.
Image>Resize - 90%, all layers not selected.
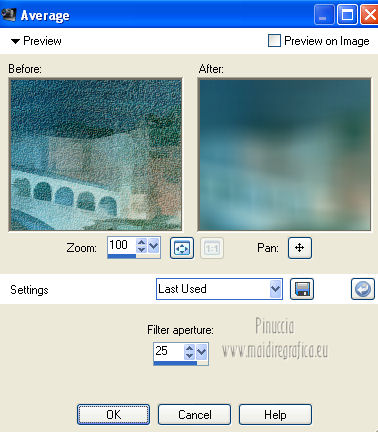
14. Activate the background layer - Merged.
Adjust>Blur>Average.
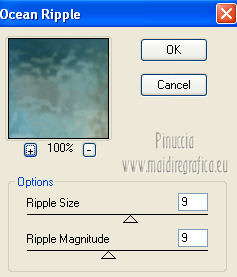
Effects>Plugins>Distort - Ocean Ripple.
Effects>Plugins>Filtes Unlimited 2.0 - Bkg Designer sf10II - Dynamic Diffusion, standard.
Effects>Plugins>FM Tile Tools - Blend Emboss, standard.
15. Activate top layer.
Effects>3D Effects>Drop Shadow, color black.
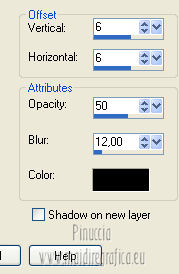
Repeat Drop Shadow, vertical and horizontal -6.
16. Layers>Merge>Merge visible.
17. Effects>Plugins>AAA Frames - Frame Texture.

18. Set foreground color with #78a0a3.
Layers>New Raster Layer.
Activate Brush tool 
select the brush "pinucciapennelloeng", size 300.

and apply the brush with foreground color.
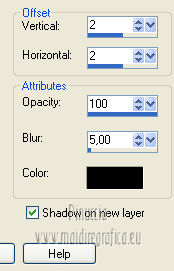
Effects>3D Effects>Drop Shadow, color black.
Effects>3D Effects>Drop Shadow, color black.
Shadow on new layer checked.
this serves to separate the brush from the shadow, for a better result of animation.
If you will not animate your work, you can deselect Shadow on new layer
19. Sign your work.
20. If you don't animate, Layers>Merge>Merge all and save as jpg.
21. Animation
Activate brush level.
Selections>Select all.
Selections>Float.
Selections>Defloat.
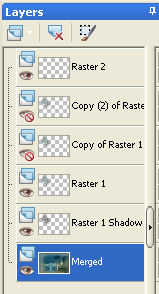
Layers>Duplicate - 2 times.
Activate the original level.
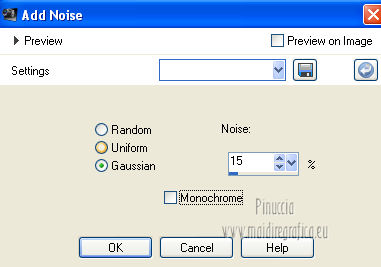
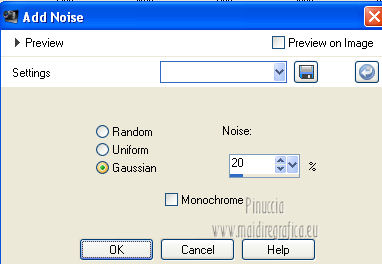
22. Adjust>Add/Remove Noise>Add Noise.
Activate the first copy level.
Adjust>Add/Remove Noise>Add Noise.
Close this level and activate the second copy level.
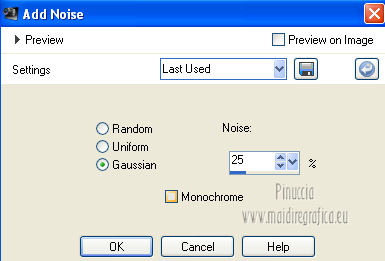
Adjust>Add/Remove Noise>Add Noise.
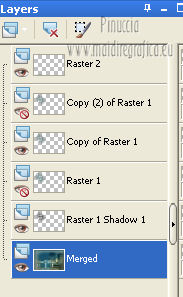
23. Close this level and activate the background level.
Edit>Copy Merged.
Open Animation Shop and go to Edit>Past as new animation.
Go back Psp.
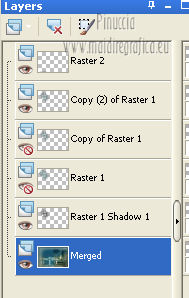
Close the brush level.
Open the Copy 1 level.
Edit>Copy Merged.
Go back to Animation Shop and go to Edit>Past after current frame.
Again in PSP.
Close the level of Copy 1 and open level of copy 2.
Edit>Copy Merged.
Go back to Animation Shop and go to Edit>Past after current frame.
Check your animation with Visualize  and save as gif. and save as gif.
For this version I used tubes of
Beatriz and Heartfelt Treasures.
Mary and Sarah

If you have problems or doubt, or you find a not worked link, or only for tell me that you enjoyed this tutorial, write to me.
10 January 2013
|