|
DE AARDE HUILT
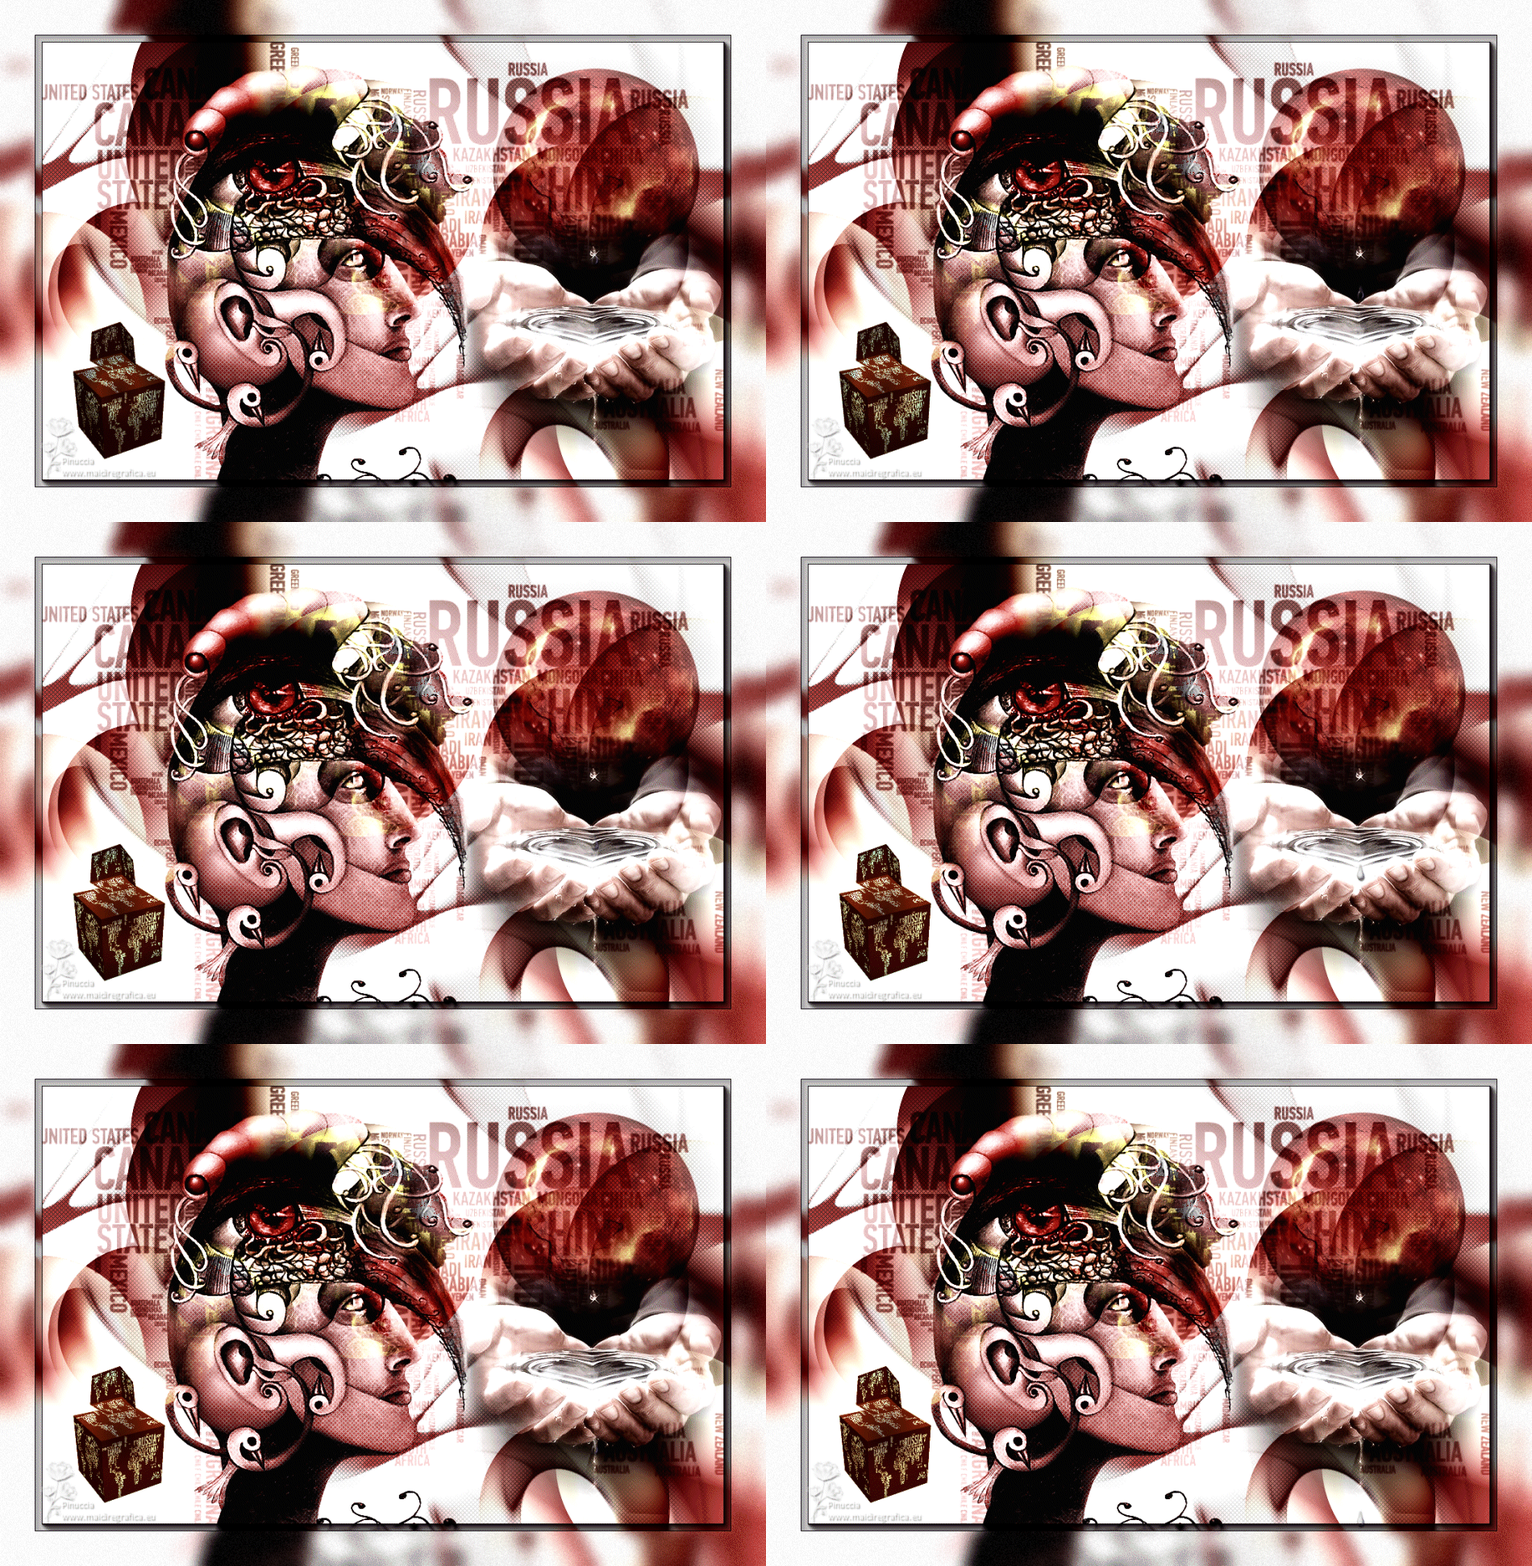
 THE EARTH IS CRYING THE EARTH IS CRYING
Thanks Gerrie for your invitation to translate your tutorials.

This tutorial was translated with PSP14 but it can also be made using other versions of PSP.
Since version PSP X4, Image>Mirror was replaced with Image>Flip Horizontal,
and Image>Flip with Image>Flip Vertical, there are some variables.
In versions X5 and X6, the functions have been improved by making available the Objects menu.
In the latest version X7 command Image>Mirror and Image>Flip returned, but with new differences.
See my schedule here
 Italian translation qui Italian translation qui
 French translation here French translation here
 Your versions ici Your versions ici
For this tutorial, you will need:
Material
here
Thanks for the tube Guismo and Animabelle.
(you find here the links to the material authors' sites)
Plugins
consult, if necessary, my filter section here
Filters Unlimited 2.0 here
Photo Aging Kit here
Nik Software - Color Efex Pro here
AAA Frames - Foto Frame here
AP (Lines) - Lines SilverLining here
Ulead Particle here
Vizros here

You can change Blend Modes according to your colors.

The gradient Duotone red - Corel_06_10 in the new versions - est standard in PSP.
If you don't find it in your PSP, copy the supplied gradient in the Gradients Folder.
Copy the selection Ger_sel27 in the Selection Folder.
Open the masks in PSP and minimize them with the rest of the material
(except the animation which you'll use in Animation Shop).
1. Open the tubes and on each of them:
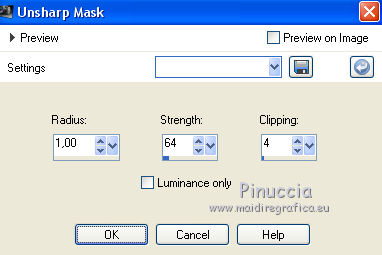
Adjust>Sharpness>Unsharp Mask
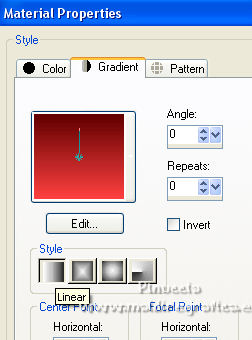
2. Set your foreground color to #72080a,
and your background color to #000000.

Set your foreground color to Gradient and select the gradient Duotone red (Corel_06_10), style Linear.
3. Open a new transparent image 1000 x 650 pixels.
Flood Fill  the transparent image with your Gradient. the transparent image with your Gradient.
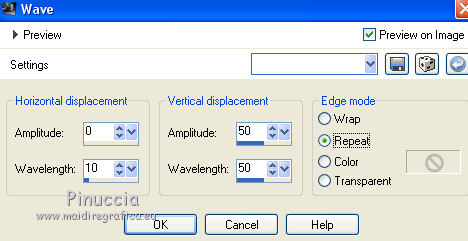
Effects>Distortion Effects>Wave.
4. Layers>New Raster Layer.
Set your foreground color to white #ffffff.
Flood Fill  the layer with color white. the layer with color white.
You must do it.
Layers>New Raster Layer.
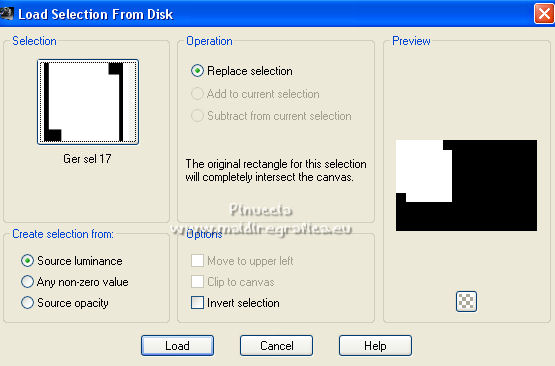
Selections>Load/Save Selection>Load Selection from Disk.
Look for and load the selection Ger sel 17.
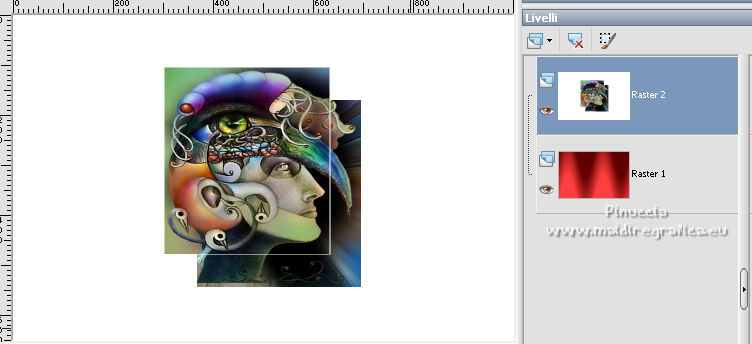
Open the image "plaatje Baroque" (the jpg image, not the tube).
Edit>Copy.
Go back to your work and go to Edit>Paste into Selection.
Selections>Select None.
Move  the image to the center. the image to the center.
To make sur the image is in the center:
Edit>Cut.
Edit>Paste as new layer.
To remove the empty layer: Layers>Merge>Merge Down.
To merge this layer with the white layer, repeat
Layers>Merge>Merge Down.
5. Effects>Plugins>Vizros - Box.
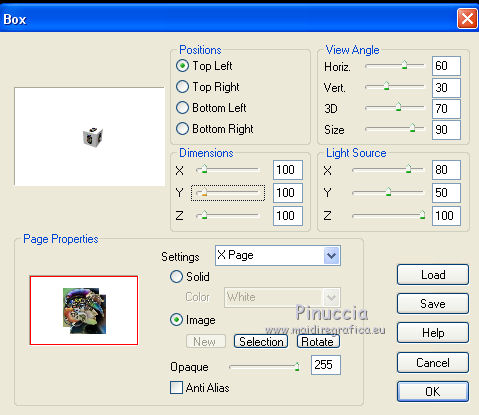
Do nothing. Just leave it like this.
Effects>Plugins>Ulead - Particle.
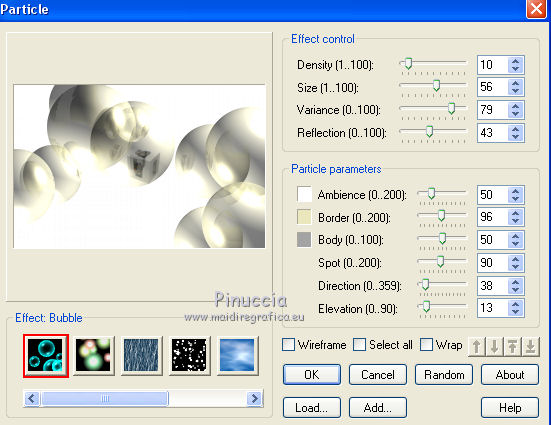
Change the Blend Mode of this layer to Hard Light.
Layers>Merge>Merge visible.
6. Set again your foreground color to the Gradient.

Layers>New Raster Layer.
Flood Fill  the layer with your Gradient. the layer with your Gradient.
7. Layers>New Mask layer>From image
Open the menu under the source window and you'll see all the files open.
Select the mask Narah_mask_Abstract174.
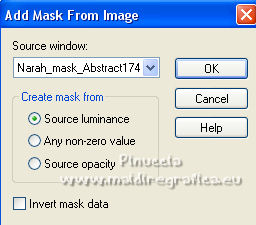
Layers>Merge>Merge Group.
Effects>Image Effects>Seamless Tiling, default settings.

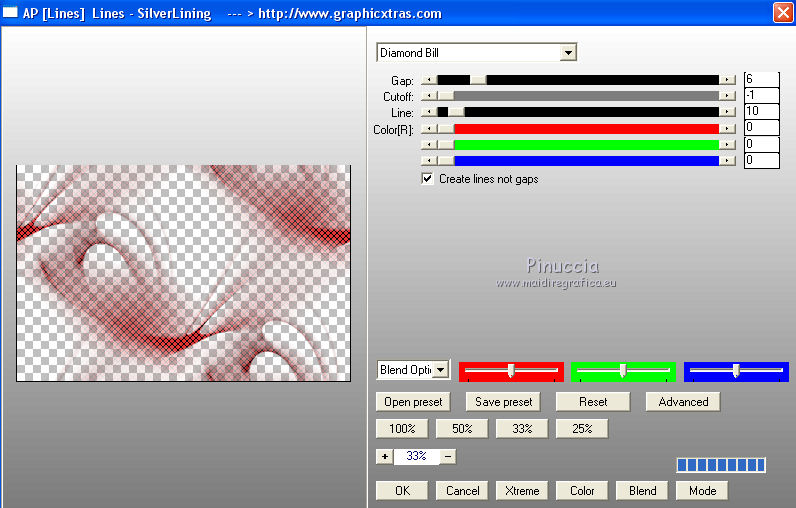
Effects>Plugins>AP Lines - Lines SilverLining - Diamond Bill.
7. Layers>New Raster Layer.
Flood Fill  the layer with your gradient. the layer with your gradient.
Layers>New Mask layer>From image
Open the menu under the source window
and select the mask mask_worldmap.
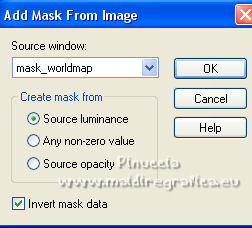
Layers>Merge>Merge Group.
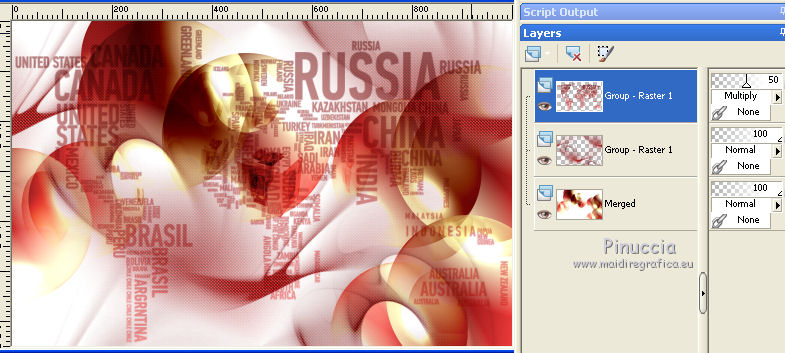
Change the Blend mode of this layer to Multiply and reduce the opacity to 50%.
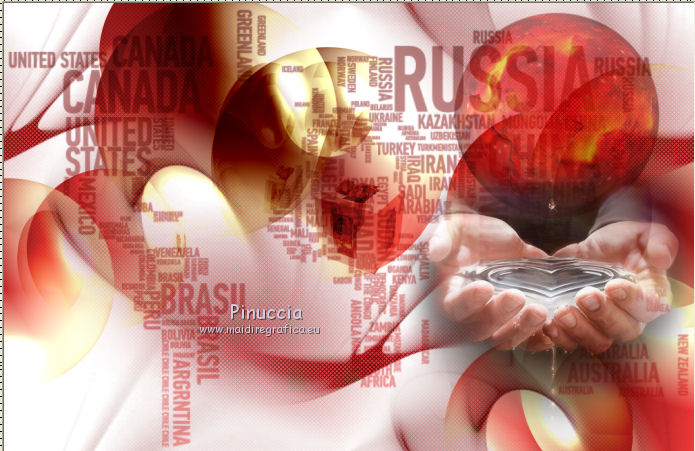
8. Open the tube PlaneFirey2 and go to Edit>Copy.
Go back to your work and go to Edit>Paste as new layer.
Move  the tube at the upper right. the tube at the upper right.
Reduce the opacity of this layer to 50%.
9. Open tube calguisloveandcrying51010 and go to Edit>Copy.
Go back to your work and go to Edit>Paste as new layer.
Move  this tube under the previous one. this tube under the previous one.
10. Open the tube 20_baroque_animabelle and go to Edit>Copy.
Go back to your work and go to Edit>Paste as new layer.
Image>Resize, to 80%, resize all layers not checked.
Move  to the top left corner. to the top left corner.
Change the Blend Mode of this layer to Luminance.
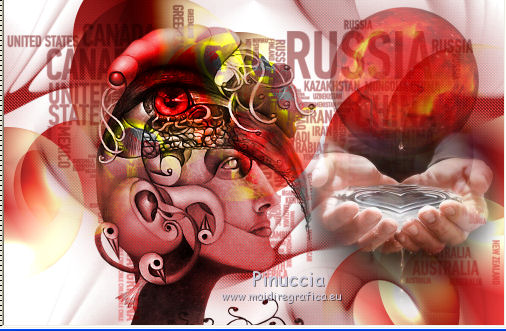
Layers>Merge>Merge visible.
Effects>Plugins>Nik Software - Color Efex Pro - Bleach Bypass, default settings.
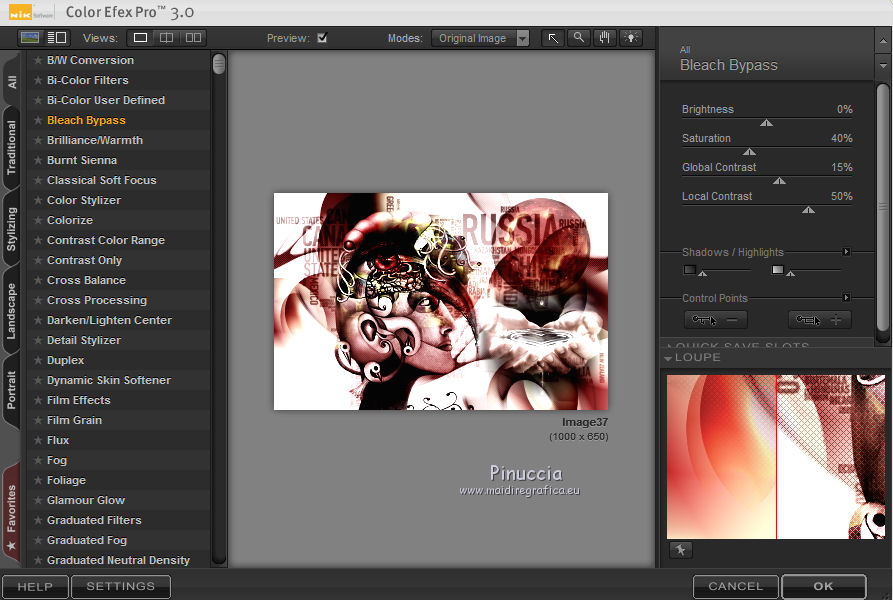
Edit>Copy.
11. Image>Add borders, 50 pixels, symmetric, color black #000000.
Activate your Magic Wand Tool 
and click on the black border to select it.
Edit>Paste into Selection.
Adjust>Blur>Gaussian Blur - radius 30.

Effects>Plugins>Filters Unlimited 2.0 - Photo Aging Kit - Film Grain.
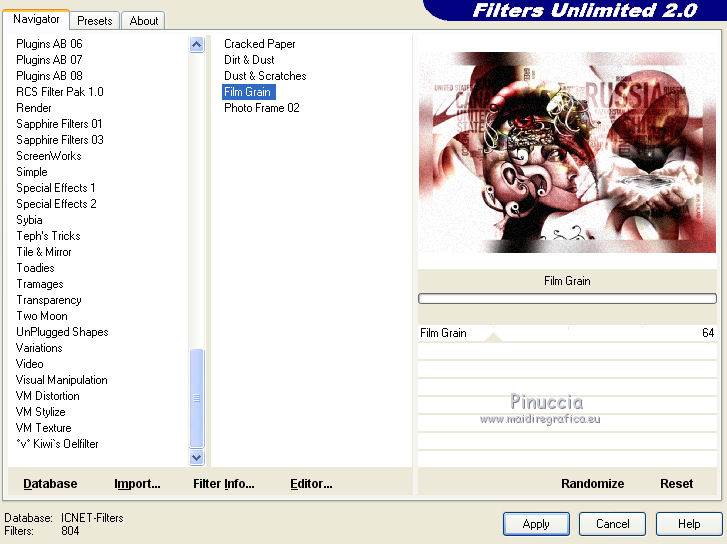
Selections>Invert.
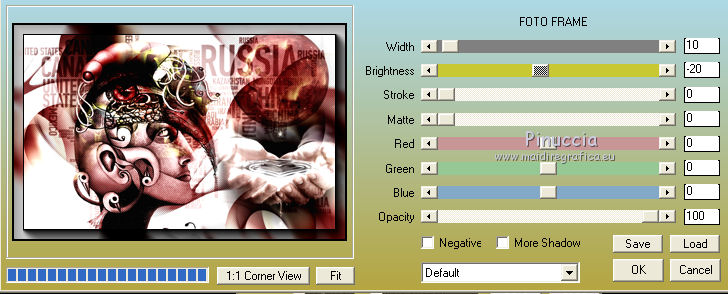
Effects>Plugins>AAA Frames - Foto Frame.
Selections>Select None.
Sign your work on a new layer.
12. Open the tube waterdruppels.
Activate your Selection Tool  , rectangle, , rectangle,

and select the third drop at the top
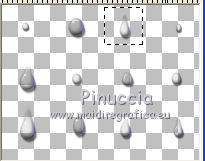
Edit>Copy.
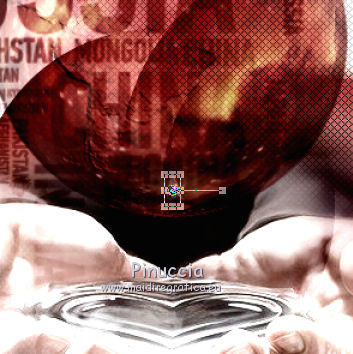
Go back to your work and go to Edit>Paste as new layer.
Place  the drop under the tear of the planet the drop under the tear of the planet
13. Edit>Copy Special>Copy Merged.
Open Animation Shop and go to Edit>Paste>Paste as new image.
14. Go back to PSP.
Move  the drop a little lower. the drop a little lower.
For correct movement, use the keyboard arrows.
Edit>Copy Special>Copy Merged.
Go back to Animation Shop and go to Edit>Paste>Paste after the current frame.
15. Again to PSP.
Move  the drop a little lower. the drop a little lower.
Edit>Copy Special>Copy Merged.
Go back to Animation Shop and go to Edit>Paste>Paste after the current frame.
Repeat until the drop is at the bottom edge.
And you should have an animation consisting of 15 frames.
Click on the first frame to select it.
Edit>Select All.
14. Open the animation "animatie_box_magnifique1", also this one consisting of 15 fotogrammi.
Edit>Select All.
Edit>Copy.
Activate your animation and go to Edit>Paste>Paste into selected frame.
Place the image in the lower left corner.
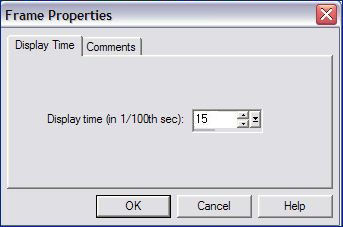
Animation>Frame Properties and set the Display time to 15.
Check your result clicking on View  and save as gif. and save as gif.
 Your versions here Your versions here

If you have problems or doubts, or you find a not worked link, or only for tell me that you enjoyed this tutorial, write to me.
24 March 2022

|
 THE EARTH IS CRYING

 THE EARTH IS CRYING
