|
ANTONIETTA LEMBO


Thanks Soxikibem for your invitation to translate your tutorials into english

This tutorial was written with Psp2022 and translated with PspX17, but it can also be made using other versions of PSP.
Since version PSP X4, Image>Mirror was replaced with Image>Flip Horizontal,
and Image>Flip with Image>Flip Vertical, there are some variables.
In versions X5 and X6, the functions have been improved by making available the Objects menu.
In the latest version X7 command Image>Mirror and Image>Flip returned, but with new differences.
See my schedule here
For this tutorial, you will need:

For the tube thanks PqnaAlice
The rest of the material is by Soxikibem.
(The links of the tubemakers here).

consult, if necessary, my filter section here
Mura's Meister - Copies here
Mura's Meister - Pole Transform here

You can change Blend Modes according to your colors.
In the newest versions of PSP, you don't find the foreground/background gradient (Corel_06_029).
You can use the gradients of the older versions.
The Gradient of CorelX here

Copy the selections in the Selections Folder
1. Choose 2 colors from your material.
Foreground color #3c1f21,
background color #f3889c
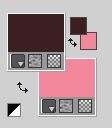
Set your foreground color to a Foreground/Background Gradient, style Radial
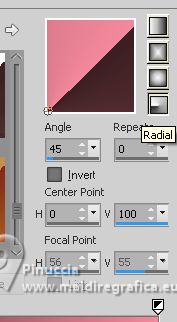
2. Open a new transparent image 900 x 700 pixels.
Flood Fill  the transparent image with your Gradient. the transparent image with your Gradient.
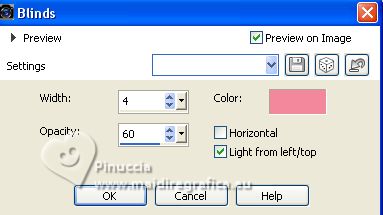
3. Effects>Texture Effects>Blinds - background color.
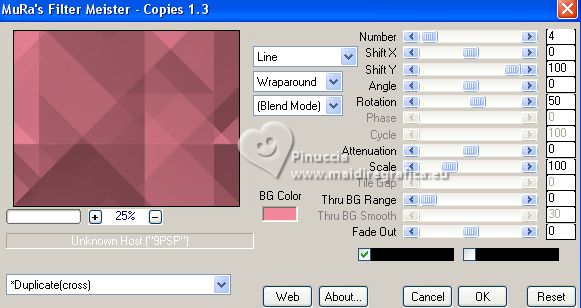
4. Effects>Plugins>Mura's Meister - Copies.
5. Selections>Select All.
Selections>Modify>Contract - 70 pixels.
Selections>Promote Selection to Layer.
6. Selections>Modify>Contract - 35 pixels.
Press CANC on the keyboard 
Selections>Select None.
7. Close the layer below Raster 1,
so we can see better the work we are going to do in the layer Promoted Selection.
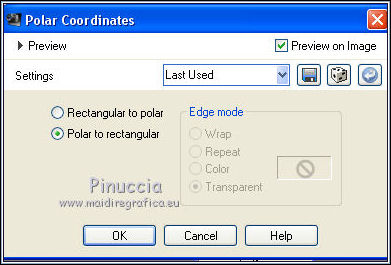
Effects>Distortion Effects>Polar Coordinates
Effects>Plugins>Mura's Meister - Pole Transform.
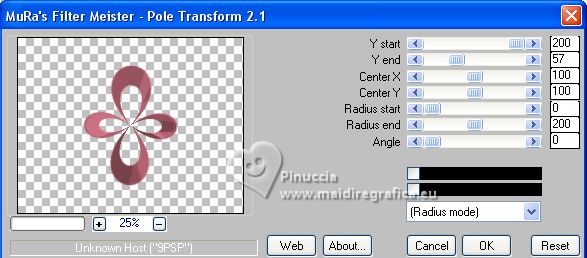
Close this layer (Promoted Selection).
8. Open and activate the layer below, Raster 1.
Layers>New Raster Layer.
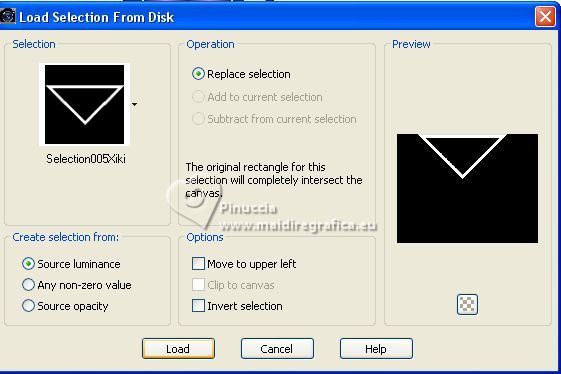
Selections>Load/Save Selection>Load Selection from Disk.
Look for and load the selection Selection005Xiki
Change the settings of your Gradient, style Linear
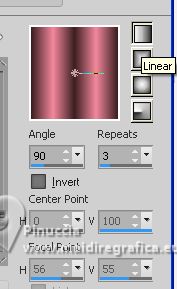
Flood Fill  the selection with your Gradient. the selection with your Gradient.
9. Effects>Texture Effects>Blinds - foreground color.
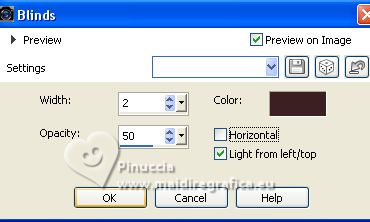
Selections>Select None.
10. Layers>Duplicate.
Activate your Magic Wand Tool  , tolerance and feather 0, , tolerance and feather 0,
and click in the triangle to select it.
Selections>Modify>Expand - 4 pixels.
Layers>New Raster Layer.
11. Change again the settings of your Gradient
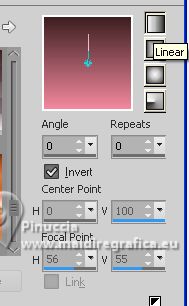
Reduce the opacity of your Flood Fill Tool to 70.
Flood Fill  the selection with your Gradient. the selection with your Gradient.
Set again the opacity of your Flood Fill to 100.
Selections>Select None.
Layers>Arrange>Move Down.
12. Activate the layer Copy of Raster 2.
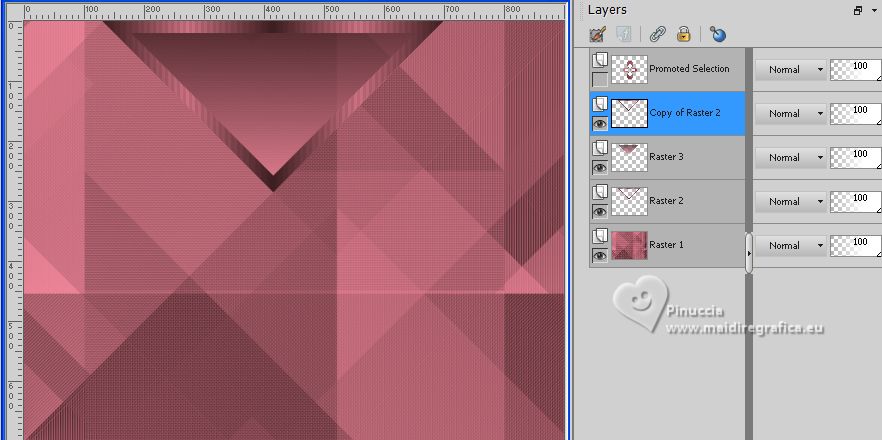
Effects>3D Effects>Drop Shadow, foreground color
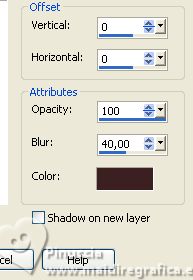
Layers>Merge>Merge Down.
13. Activate the layer below, Raster 2.
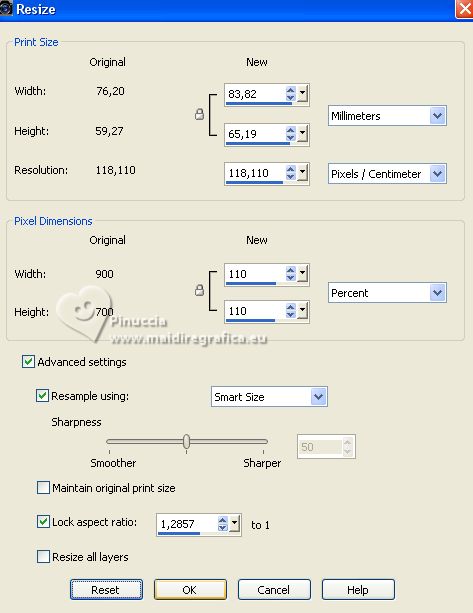
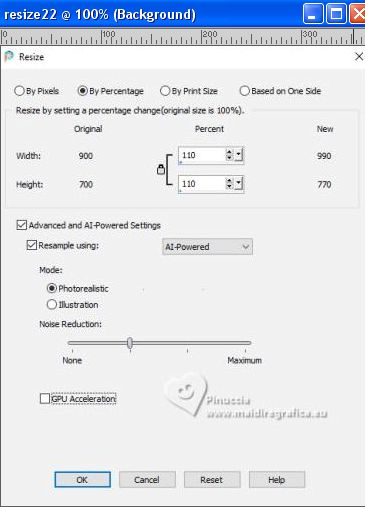
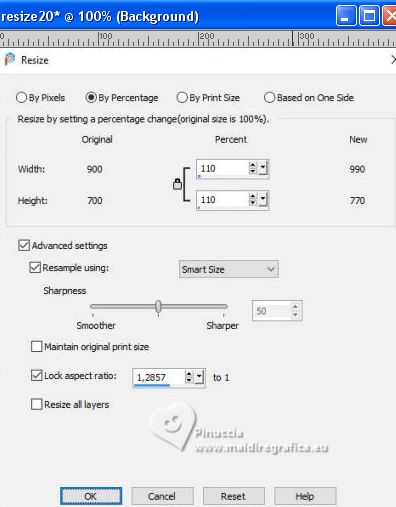
Image>Resize, 110%, resize all layers not checked.
K key to activate your Pick Tool 
and set Position X: -11,00 and Position Y: -67,00.

14. Layers>Duplicate.
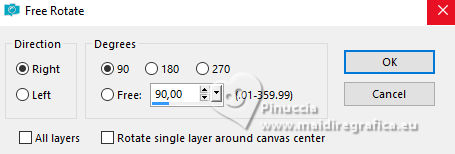
Image>Free Rotate - 90 degrees to right.
Pick Tool 
and set Position X: 384,00 and Position Y: -181,00.

Layers>Merge>Merge Down.
15. Activate your Crop Tool  , click on Merged opaque , click on Merged opaque
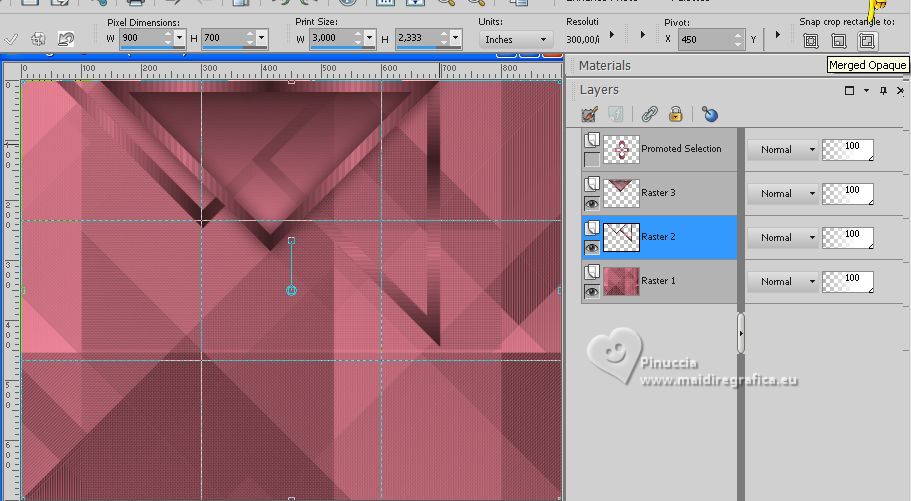
and click Apply 
if you have problems with this Tool, you can do:
Activate your bottom Layer.
Selections>Select All.
Image>Crop to selection
16. Activate the layer Raster 2.
Effects>Reflection Effects>Rotating Mirror.

17. Effects>Plugins>Mura's Meister - Copies.
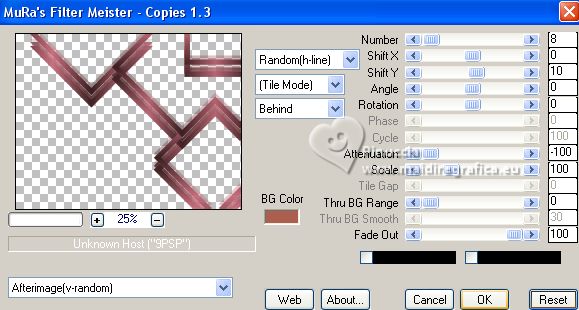
18. Effects>3D Effects>Drop Shadow, foreground color.
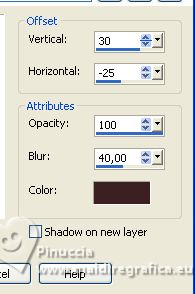
19. Open and activate the top layer, Promoted Selection.
Image>Resize, 50%, resize all layers not checked.
Pick Tool 
and set Position X: 591,00 and Position Y: 59,00.

20. Effects>3D Effects>Inner Bevel.
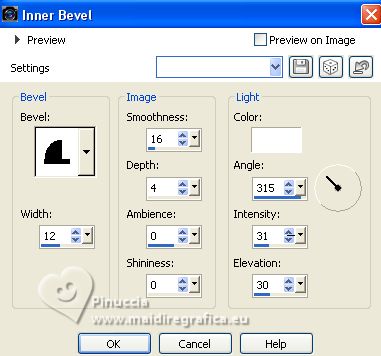
21. Selections>Load/Save Selection>Load Selection from Disk.
Look for and load the selection Selection006Xiki
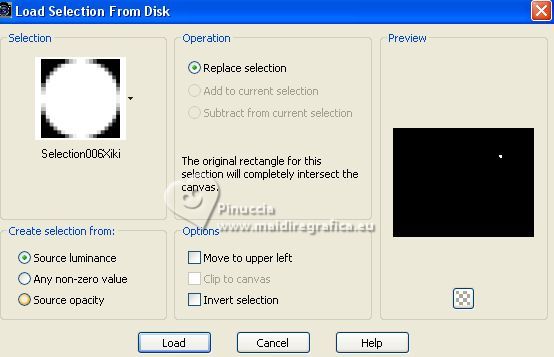
Set your Foreground color to Color.
Layers>New Raster Layer.
Flood Fill  the layer with your foreground color. the layer with your foreground color.
Effects>3D Effects>Inner Bevel, same settings.
Selections>Select None.
Layers>Merge>Merge Down.
22. Effects>Plugins>Mura's Meister - Copies
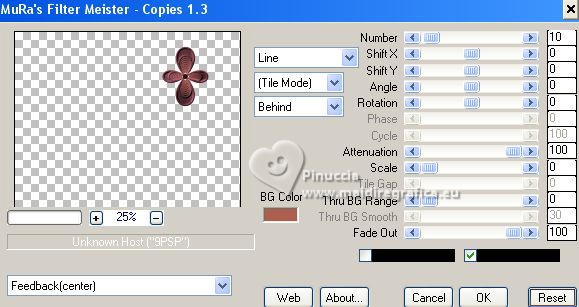
23. Again Effects>Plugins>Mura's Meister - Copies.
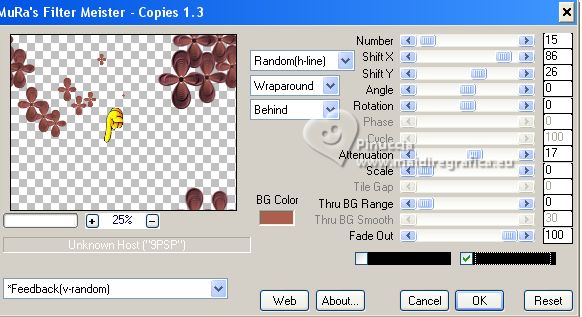
NOTA: The result of this Effect is "Random", that is casual,
for this reason it cannot be the same as mine;
if you want to change the result, click on the preview window until you see the result you like best.
24. Selections>Load/Save Selection>Load Selection from Disk.
Look for and load the selection Selection007Xiki
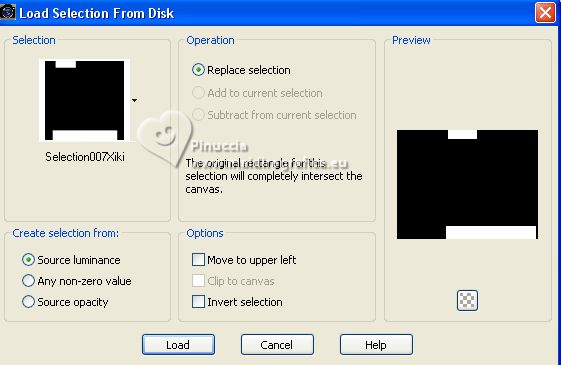
Press CANC on the keyboard 
Selections>Select None.
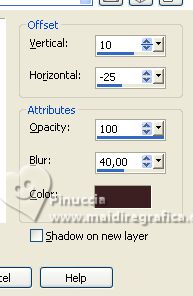
Effects>3D Effects>Drop Shadow, foreground color.
25. Apri DecoBySoxikibem 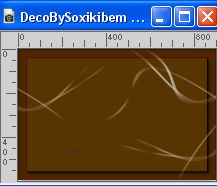
Edit>Copy.
Go back to your work and go to Edit>Paste as new layer.
Layers>Arrange>Move down.
Pick Tool 
keep Position X: 0,00 and set Position Y: 72,00.

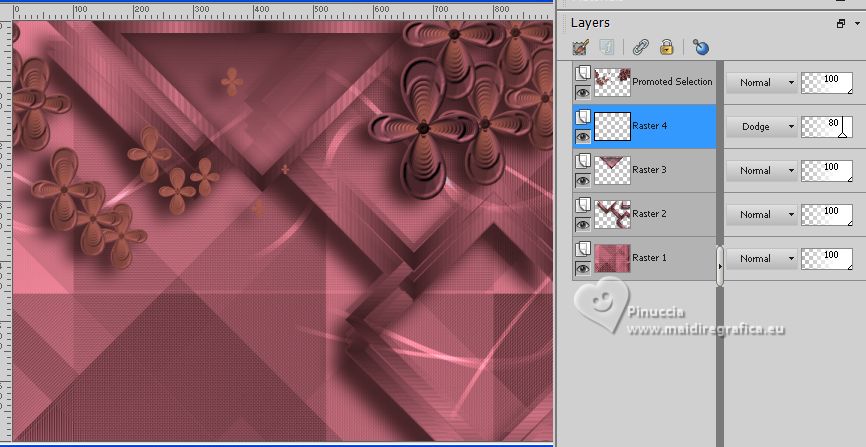
Change the Blend Mode of this layer to Dodge and keep the opacity to 80%.
26. Image>Add borders, 1 pixel, symmetric, foreground color.
Image>Add borders, 3 pixels, symmetric, background color.
Image>Add borders, 1 pixel, symmetric, foreground color.
Selections>Select All.
Image>Add borders, 15 pixels, symmetric, color white.
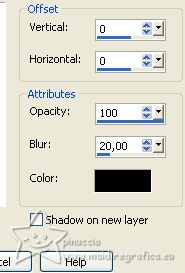
27. Effects>3D Effects>Drop Shadow, color black.
Selections>Select None.
28. Selections>Select All.
Image>Add borders, 20 pixels, symmetric, foreground color.
Selections>Invert.
Effects>Texture Effects>Blinds - background color.
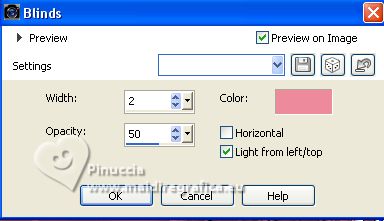
29. Effects>3D Effects>Inner Bevel.
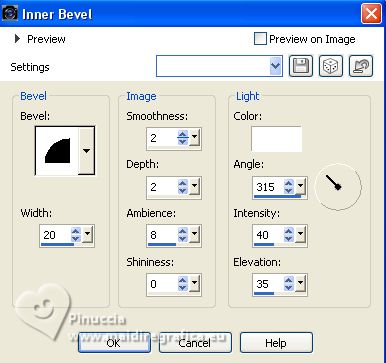
Selections>Select None.
30. Selections>Select All.
Image>Add borders, 30 pixels, symmetric, color white.
Effects>3D Effects>Drop Shadow, color black.
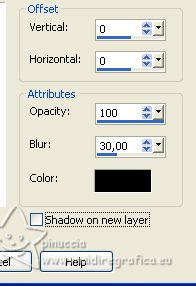
Selections>Select None.
31. Open the woman's tube 914MulherByPqnaAlice 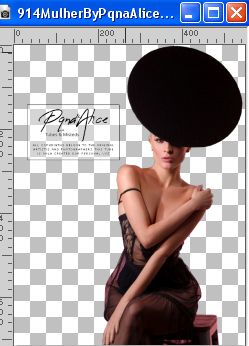
Edit>Copy.
Go back to your work and go to Edit>Paste as new layer.
Move  the tube to the left. the tube to the left.
Effects>3D Effects>Drop Shadow or an effect at your choice.
32. Open TituloBySoxikibem.pspimage 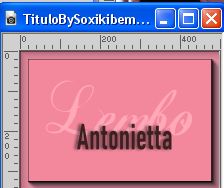
Activate the layer texto1 and go to Edit>Copy.
Go back to your work and go to Edit>Paste as new layer.
Pick Tool 
and set Position X: 289,00 and Position Y: 407,00,
or adapt the position according your tube's one.

Keep the Blend Mode of this layer to Luminance (L), Opacity 30.
33. Activate again the tube TituloBySoxikibem.pspimage
Activate the layer texto2 and go to Edit>Copy.
Go back to your work and go to Edit>Paste as new layer.
Set Position X: 353,00 and Position Y: 507,
but if you change the position of the previous text, place this text over it.

34. Image>Add borders, 1 pixel, symmetric, foreground color.
Image>Add borders, 1 pixel, symmetric, background color.
Image>Add borders, 1 pixel, symmetric, foreground color.
35. Resize your work, if you like.
Sign your work and save as jpg.
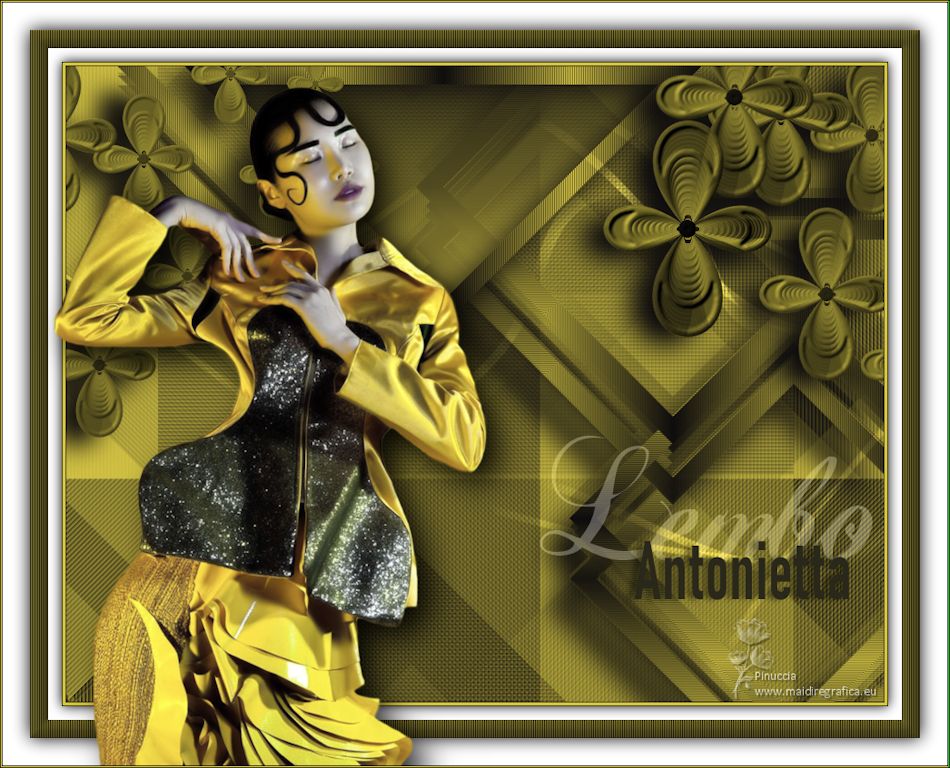
For the tube of this version thanks Suizabella


If you have problems or doubts, or you find a not worked link, or only for tell me that you enjoyed this tutorial, write to me.
1 July 2023

|


