|
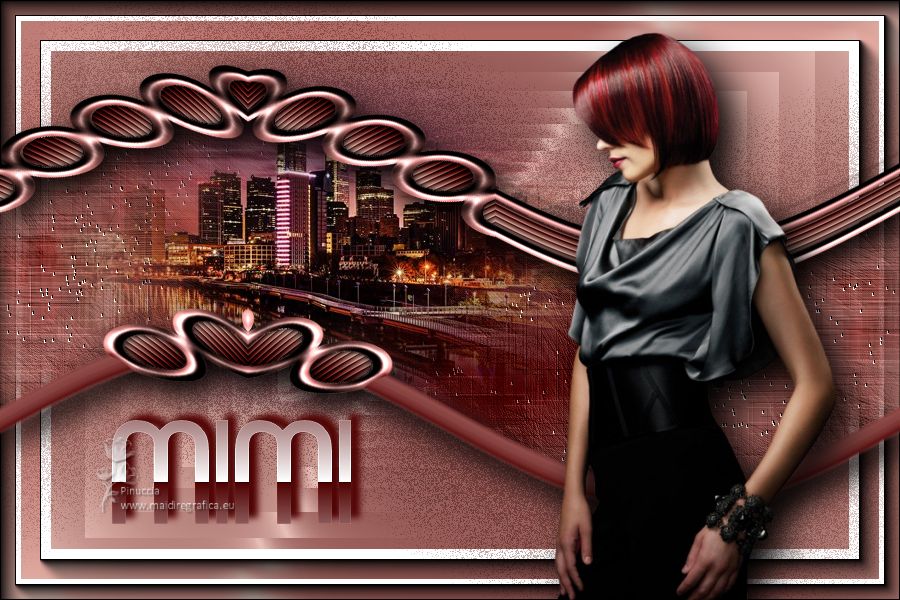
MIMI


Thanks Soxikibem for your invitation to translate your tutorials into english

This tutorial was written with Psp2022 and translated with PspX17, but it can also be made using other versions of PSP.
Since version PSP X4, Image>Mirror was replaced with Image>Flip Horizontal,
and Image>Flip with Image>Flip Vertical, there are some variables.
In versions X5 and X6, the functions have been improved by making available the Objects menu.
In the latest version X7 command Image>Mirror and Image>Flip returned, but with new differences.
See my schedule here
For this tutorial, you will need:

For the tubes thanks PqnaAlice.
The rest of the material is by Soxikibem.
(The links of the tubemakers here).

consult, if necessary, my filter section here
Filters Unlimited 2.0 here
Alf's Power Toys - Split Distortion here
Winnies006 - win053 (to import in Unlimited) - in the material
&<Bkg Designer sf10I> - Blur 'em (to import in Unlimited) here
Graphics Plus - Vertical Blinds here
Mura's Meister - Copies here
Filters Alf's Power Toys and Graphics Plus can be used alone or imported into Filters Unlimited.
(How do, you see here)
If a plugin supplied appears with this icon  it must necessarily be imported into Unlimited it must necessarily be imported into Unlimited

You can change Blend Modes according to your colors.
In the newest versions of PSP, you don't find the foreground/background gradient (Corel_06_029).
You can use the gradients of the older versions.
The Gradient of CorelX here

Copy the Selection in the Selection Folder.
1. Set your foreground color to #4f0000
and your background color to #e8c0b7
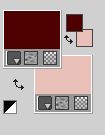
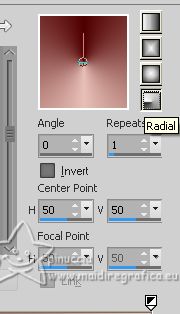
Set your foreground color to a Foreground/Background Gradient, style Radial
2. Open a new transparent image 900 x 600 pixels.
Flood Fill  the transparent image with your Gradient. the transparent image with your Gradient.
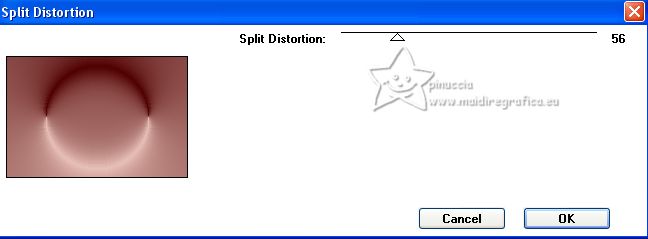
3. Effects>Plugins>Alf's Power Toy - Split Distortion.
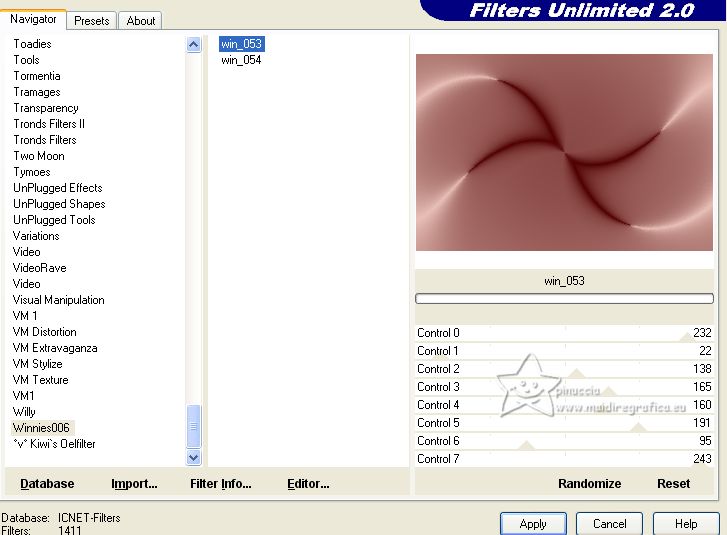
4. Effects>Plugins>Filters Unlimited 2.0 - Winnies006 - win_053.
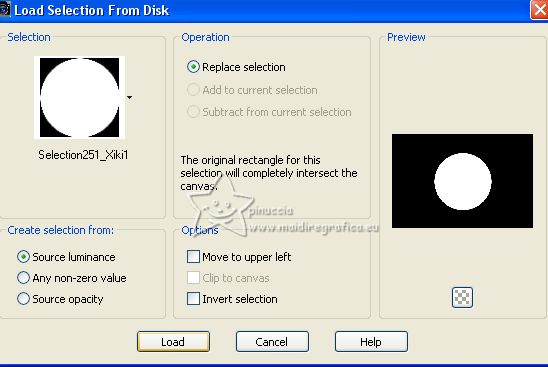
5. Selections>Load/Save Selection>Load Selection from Disk.
Look for and load the selection Selection251_Xiki1
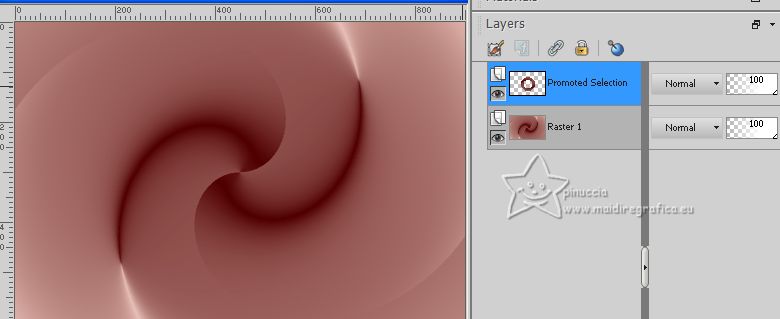
Selections>Promote selection to layer.
Selections>Modify>Contract - 70 pixels.
Press CANC on the keyboard 
Selections>Select None.
Don't worry if you see nothing; the circle is covered by the bottom layer
6. Image>Resize, to 20%, resize all layers not checked.
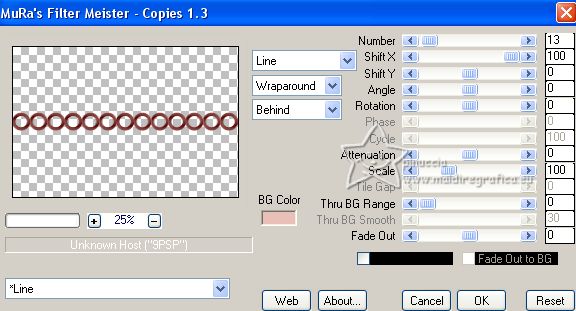
Effects>Plugins>Mura's Meister - Coipies.
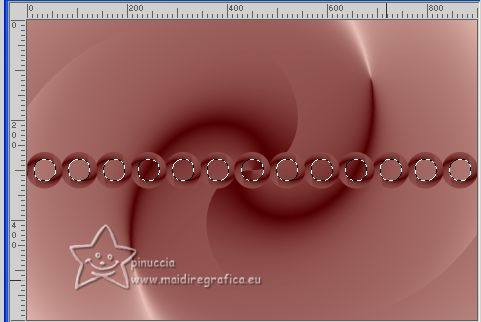
7. Activate your Magic Wand Tool  , tolerance and feather 0, , tolerance and feather 0,
and click in the circles to select it.
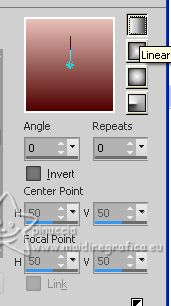
Change the setting of your Gradient, style Linear.
Layers>New Raster Layer.
Flood Fill  the selection with your Gradient. the selection with your Gradient.
Layers>Arrange>Move Down.
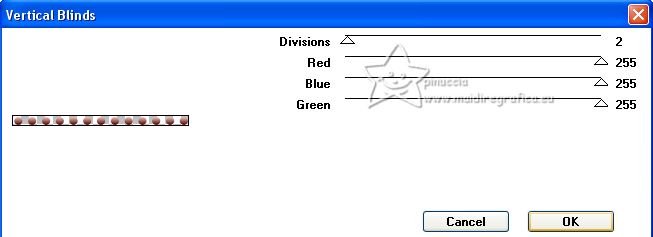
8. Effects>Plugins>Graphics Plus - Vertical Blinds.
9. Layers>New Raster Layer.
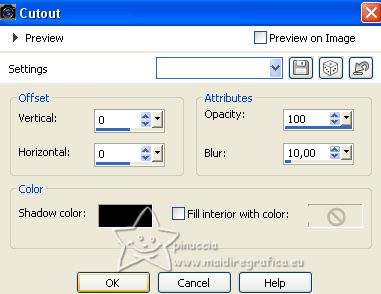
Effects>3D Effects>Cutout.
Selections>Select None.
10. Activate the top layer, Promoted Selection.
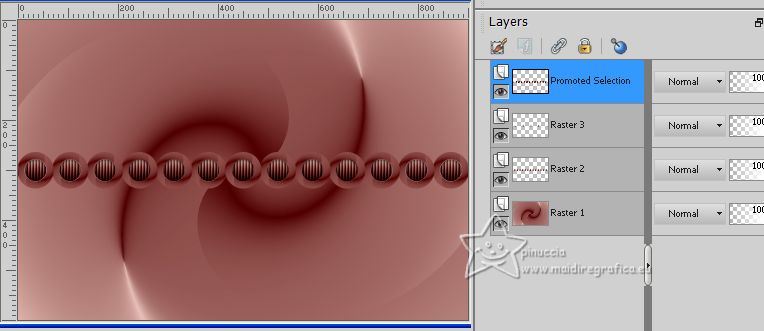
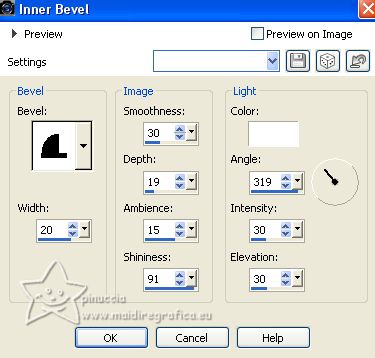
Effects>3D Effects>Inner Bevel.
Layers>Merge>Merge Down - 2 times.
11. Activate your Pick Tool 
keep Position X: 0,00 and set Position Y: 384,00.

Layers>Duplicate.
Image>Flip.
Layers>Merge>Merge Down.
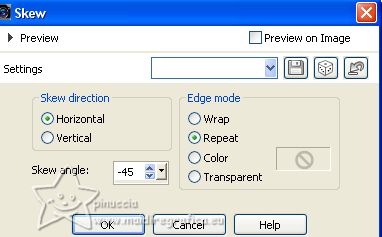
12. Effects>Geometric Effects>Skew.
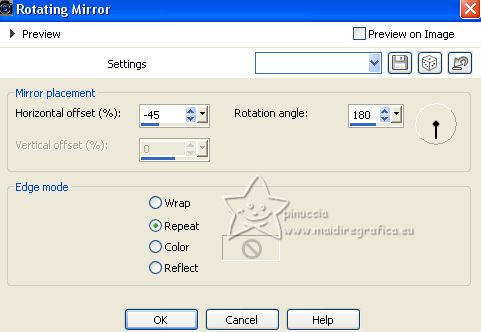
13. Effects>Reflection Effects>Rotating Mirror.
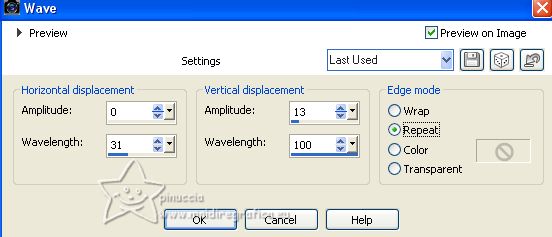
14. Effects>Distortion Effects>Wave.
15. Activate again your Magic Wand Tool  , tolerance and feather 0, , tolerance and feather 0,
and click in this effect to select it.
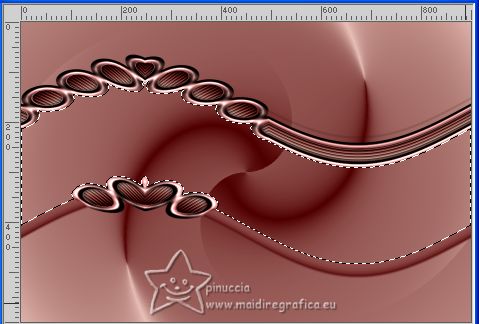
Selections>Modify>Expand - 10 pixels.
16. Activate the layer below, Raster 1.
Selections>Promote Selection To Layer.
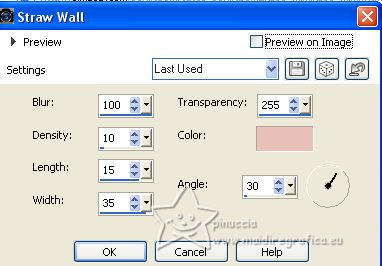
Effects>Texture Effects>Straw Wall, background color.
Selections>Select None.
17. Layers>Duplicate.
Activate the layer below of the original, Promoted Selection.
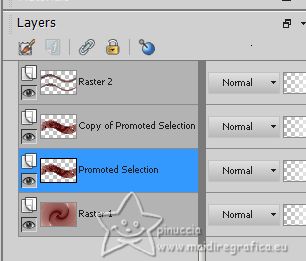
Effects>Plugins>Filters Unlimited 2.0 - &<Bkg Designer sf10I> - Blur 'em
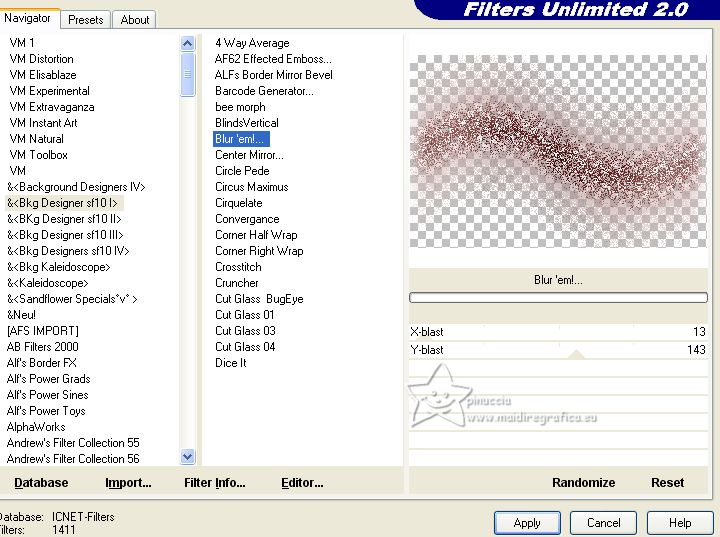
Change the Blend Mode of this layer to Multiply.
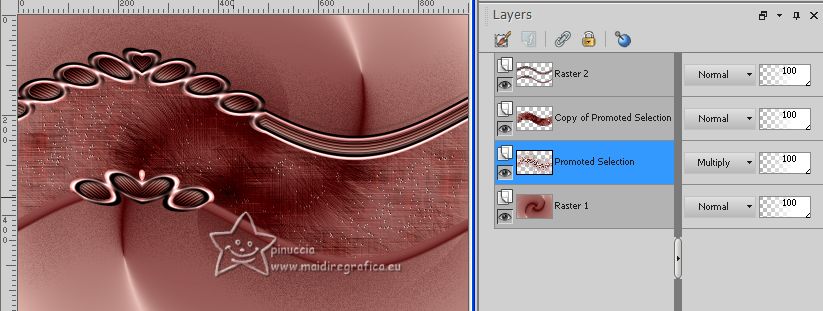
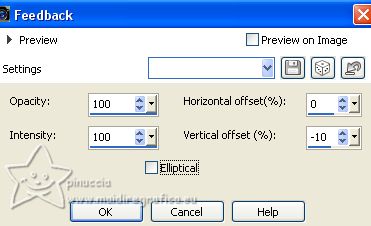
18. Activate again the layer Raster 1.
Effects>Reflection Effects>Feedback.
19. Effects>Plugins>AAA Frames - Foto Frame.
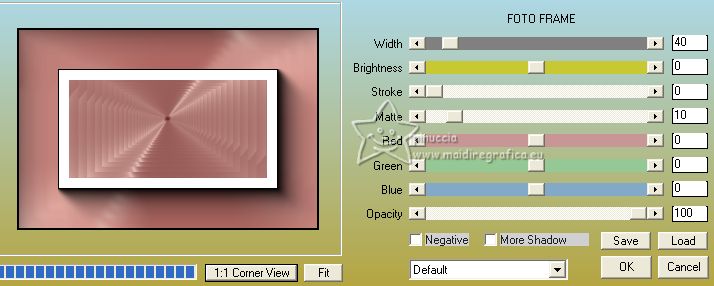
20. Effects>Plugins>AAA Frames - Foto Frame.
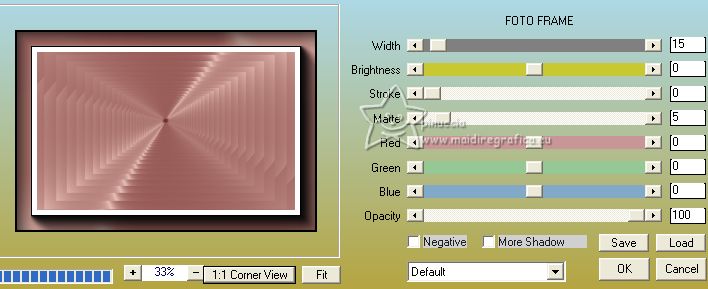
21. Activate the top layer, Raster 2.
Effects>3D Effects>Drop Shadow, color black.
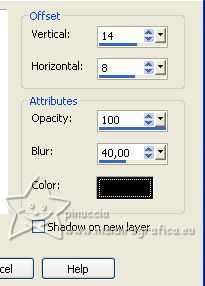
22. Open the landscape misted 01PaisagemByPqnaAlice 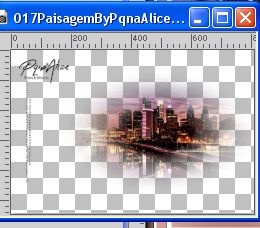
Erase the watermark and go to Edit>Copy.
Go back to your work and go to Edit>Paste as new layer.
Layers>Arrange>Move Down.
Move  the tube to the left, about as below the tube to the left, about as below
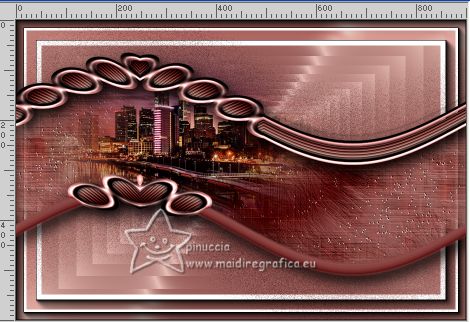
23. Activate your top layer.
Open the woman's tube 98MulherByPqnaAlice 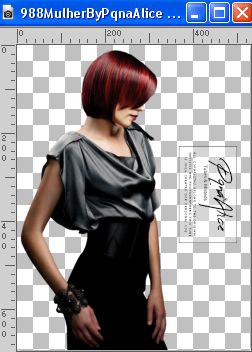
Erase the watermark and go to Edit>Copy.
Go back to your work and go to Edit>Paste as new layer.
For me: Image>Mirror.
Image>Resize, to 85%, resize all layers not checked.
Move  the tube to the right side. the tube to the right side.
Effects>3D Effects>Drop shadow, or an effect at your choice.
24. Ouvrir TituloMimiBySoxikibem 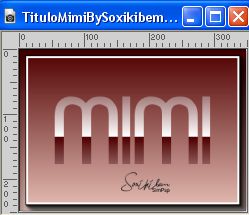
Edit>Copy.
Go back to your work and go to Edit>Paste as new layer.
Activate your Pick Tool 
and set Position X: 112,00 and Position Y: 420,00.

25. Colorize, according to your colors.
Effects>3D Effects>Drop Shadow, foreground color.
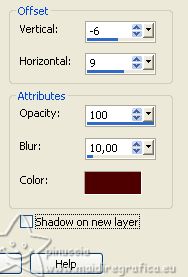
Adjust>Sharpness>Sharpen.
26. Image>Resize, if you want.
Sign your work and save as jpg.
For the tubes of this version thanks Silvie and AnaRidzi


Your versions. Thanks
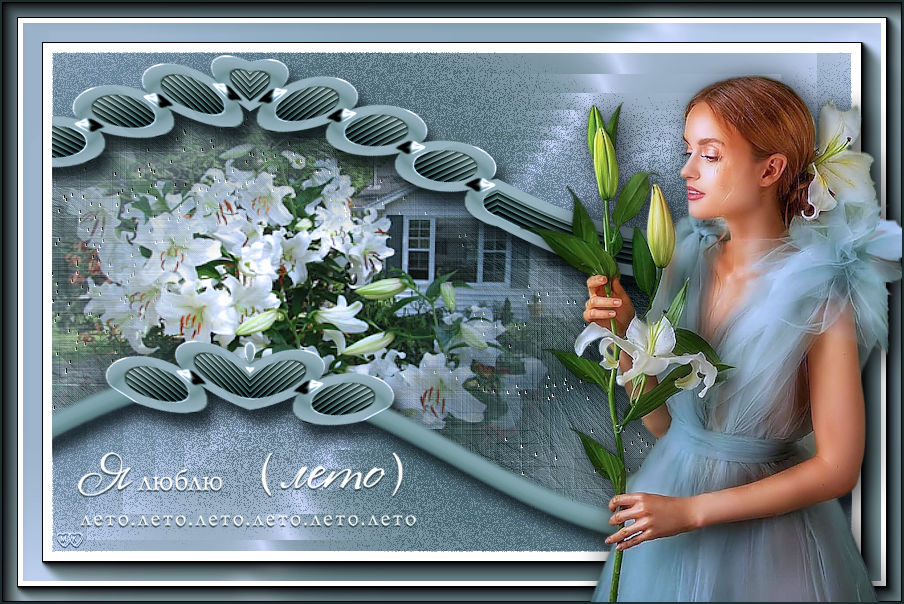
Kamelius


If you have problems or doubts, or you find a not worked link, or only for tell me that you enjoyed this tutorial, write to me.
1 July 2023

|

