|
NEW BEGINNINGS  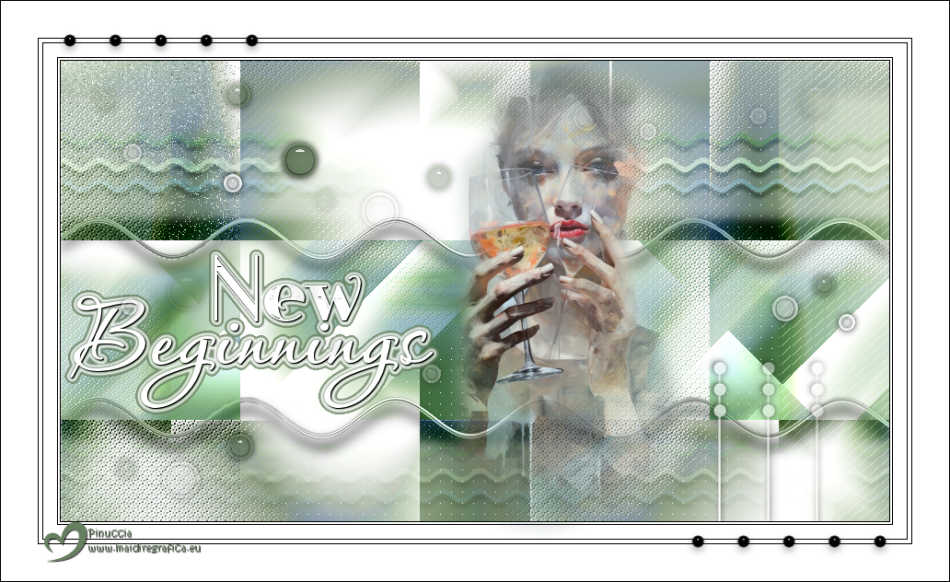

This tutorial was written with Psp2022 and translated with PspX2020, but it can also be made using other versions of PSP.
Message de Soxikibem: May this new year be filled with opportunities to restart, grow, and achieve. May each day bring a chance to write a new story, full of dreams come true and lessons learned. May the future be illuminated by renewed hopes and the courage to move forward. A new beginning awaits, and it is in it that we will find our strength to live the best of ourselves. For this tutorial, you will need:  For the tubes thanks PqnaAlice. (The links of the tubemakers here).  consult, if necessary, my filter section here Filters Unlimited 2.0 here &<Background Designers IV> - sf10Square N Dice (to import in Unlimited) here Mehdi - Wavy Lab 1.1. here Mehdi - Sorting Tiles here FM Tile Tools - Blend Emboss here  You can change Blend Modes according to your colors.  Copy the selections in the Selections Folder. 1. Choose 3 colors to work. Set your foreground color to #667f5e, and your background color to #b7c8b2. 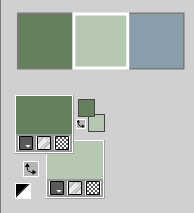 color 3: #899dab. 2. Open a new transparent image 900 x 500 pixels. Effects>Plugins> Mehdi>Wavy Lab 1.1. This filter creates gradients with the colors of your Materials palette. The first is your background color, the second is your foreground color. Change the last two colors created by the filtre: the third color with color 3 #899dab and the fourth color with #ffffff. 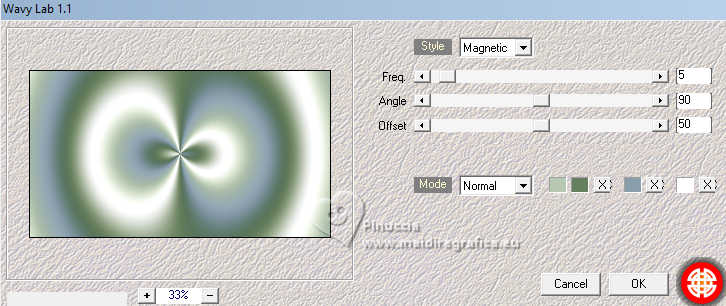 3. Effects>Plugins>Mehdi - Sorting Tiles. 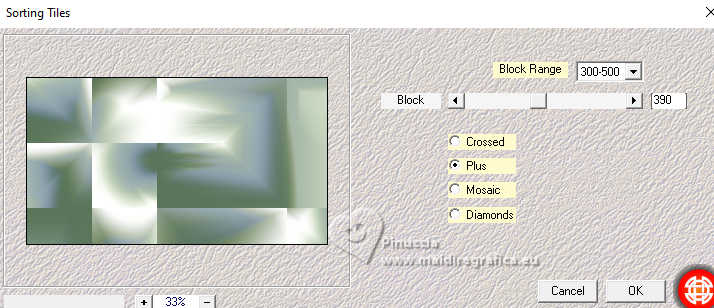 4. Layers>Duplicate. Image>Mirror>Mirror Horizontal. Effects>Texture Effects>Weave, weave color: foreground color. 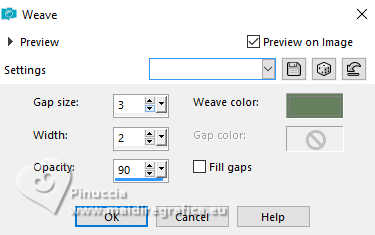 Layers>Properties>General>Blend Mode: Lighten. 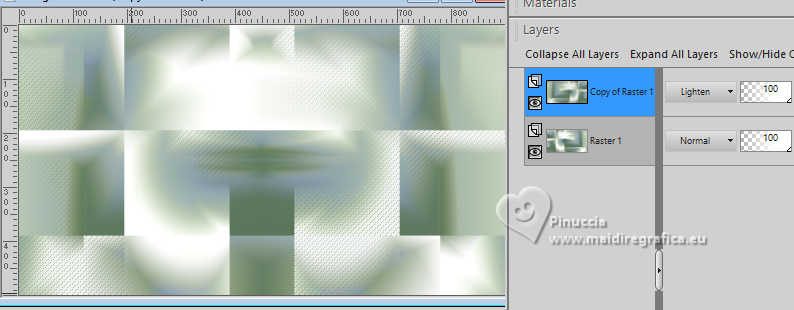 5. Effects>Plugins>FM Tile Tools - Blend Emboss, default settings. 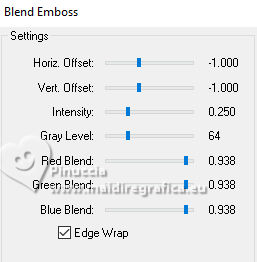 6. Activate the layer Raster 1. Selections>Load/Save Selections>Load Selection From Disk. Look for and load the selection NewBeginnings_Xiki1 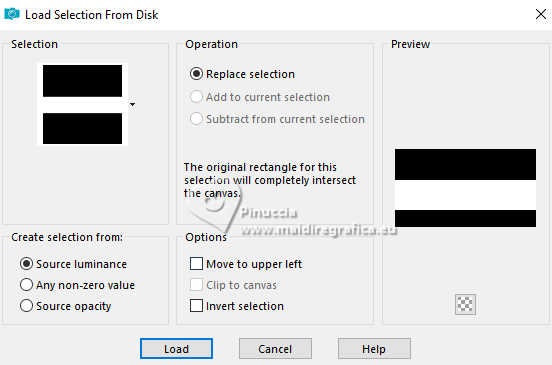 Selections>Promote Selection to Layer. Effects>Plugins>Filters Unlimited 2.0 &<Background Designers IV> - sf10 Square N Dice.  Keep selected. 7. Layers>Arrange>Move Up. Layers>Properties>General>Blend Mode: Overlay. 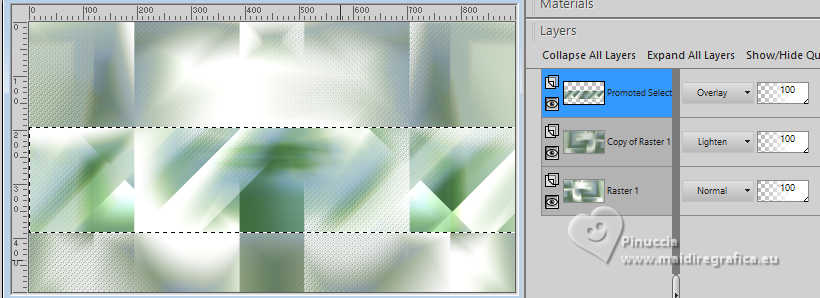 Effects>3D Effects>Drop Shadow, color black. 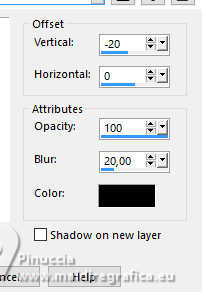 Repeat Drop Shadow, vertical 20. 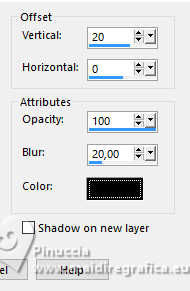 Selections>Select None. 8. Activate the layer Raster 1. Layers>Duplicate. Layers>Arrange>Bring to Top. Adjust>Blur>Gaussian Blur - radius 40.  Effects>Geometric Effects>Perspective - Horizontal. 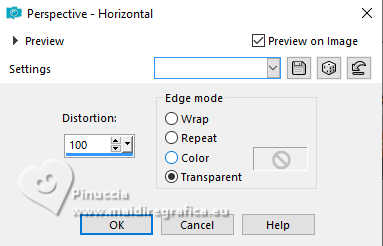 9. Image>Mirror>Mirror Horizontal. Effects>Geometric Effects>Perspective - Horizontal, same settings. You'll have this 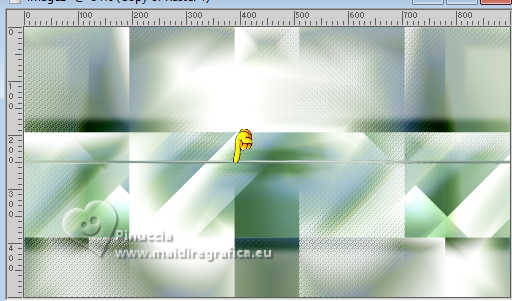 10. Layers>Duplicate. Image>Mirror>Mirror Horizontal. Layers>Merge>Merge Down. Effects>Distortion Effects>Wave. 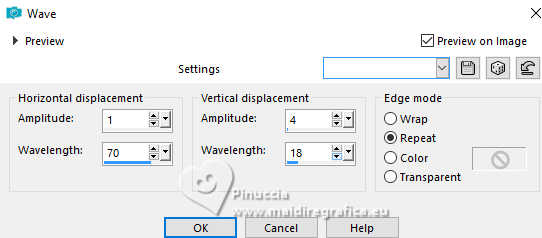 11. K key to activate your Pick Tool  Position X: 0,00 - Position Y: 170,00 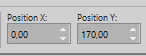 Effects>3D Effects>Drop Shadow, color black. 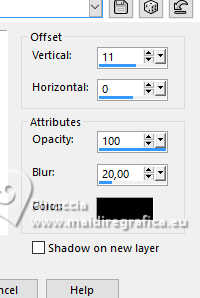 Adjust>Sharpness>Sharpen. 12. Layers>Duplicate. Pick Tool Position X: 0,00 - Position Y: 360,00. 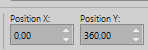 Layers>Merge>Merge Down. Layers>Properties>General>Blend Mode: Luminance (L). 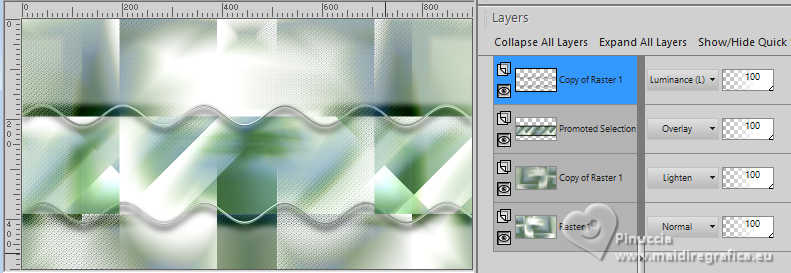 13. Layers>New Raster Layer. Selections>Load/Save Selections>Load Selection From Disk Look for and load the selection NewBeginnings_Xiki2 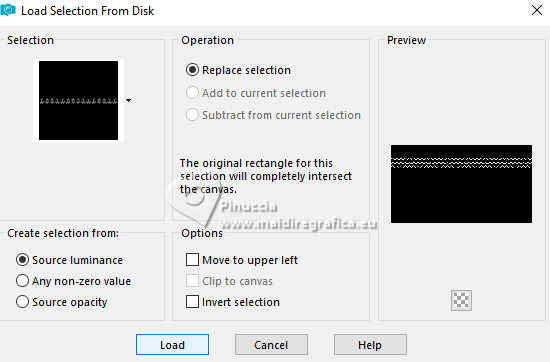 Match mode of your Flood Fill Tool to Color, flood fill  the 3 selections with your 3 colors the 3 selections with your 3 colors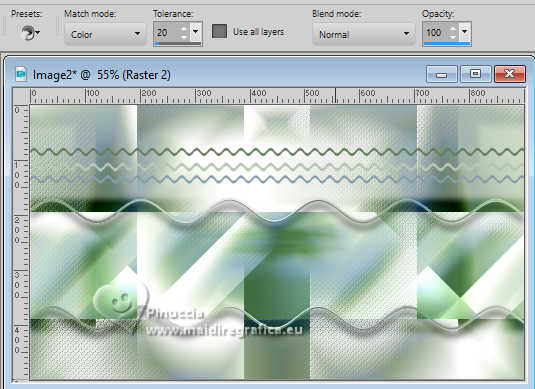 Selections>Select None. 14. Effects>3D Effects Drop Shadow. color black.  15. Effects>Image Effects>Seamless Tiling.  Layers>Properties>General>Blend Mode: Overlay 16. Layers>Duplicate. Pick Tool Position X: 0,00 - Position Y: 415,00.  Layers>Properties>General>Blend Mode: Soft Light.  17. Activate the layer Raster 1. Selections>Load/Save Selections>Load Selection From Disk Look for and load the selection NewBeginnings_Xiki3  Selections>Promote Selection to Layer. Effects>Plugins> AP [Lines] - Lines SilverLining.  Layers>Properties>General>Blend Mode: Lighten - Opacity: 60 Selections>Select None. 18. Activate the layer Raster 1. Selections>Load/Save Selections>Load Selection From Disk Look for and load the selection NewBeginnings_Xiki4.  Selections>Promote Selection to Layer. Effects>Plugins> AP [Lines] - Lines SilverLining.  Selections>Select None. 19. Activate the layer Raster 1. Selections>Load/Save Selections>Load Selection From Disk Look for and load the selection NewBeginnings_Xiki5 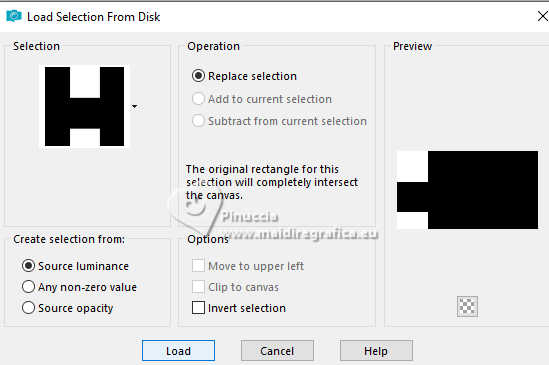 Selections>Promote Selection to Layer. Adjust>Add/Remove Noise>Add Noise.  Selections>Select None. 20. Your tag and the layers.  21. Activate your top Layer, Copy of Raster 2. Open TituloNB_ByXiki  Erase the watermark and go to Edit>Copy. Go back to your work and go to Edit>Paste As New Layer. Pick Tool Position X: 4,00 - Position Y: 204,00.  22. Open DecorNB_ByXiki  Erase the watermark and go to Edit>Copy. Go back to your work and go to Edit>Paste As New Layer. 23. Open DecorNB2_ByXiki  Erase the watermark and go to Edit>Copy. Go back to your work and go to Edit>Paste As New Layer. Pick Tool Position X: 585,00 - Position Y: -1,00.  24. Image>Add Borders, 1 pixel, symmetric, color black. Image>Add Borders, 2 pixels, symmetric, color white. Image>Add Borders, 1 pixel, symmetric, color black. Image>Add Borders, 15 pixels, symmetric, color white. Image>Add Borders, 1 pixel, symmetric, color black. Image>Add Borders, 4 pixels, symmetric, color white. Image>Add Borders, 1 pixel, symmetric, color black. Image>Add Borders, 40 pixels, symmetric, color white. 25. Open the tube 1153MulherByPqnaAlice  Erase the watermark and go to Edit>Copy. Go back to your work and go to Edit>Paste As New Layer. Image>Resize, if necessary, for the supplied tube to 50%, resize all layers not checked. Move  the tube. the tube.Apply Effect at your choice. 26. Open DecorNB3_ByXiki  Erase the watermark and go to Edit>Copy. Go back to your work and go to Edit>Paste As New Layer. Pick Tool Position X: 59,00 - Position Y: 31,00.  27. Image>Add borders, 1 pixel, symmetric, color black. 28. Image>Resize, if you want. Sign your work and save as jpg. For the tube of this version thanks Mentali 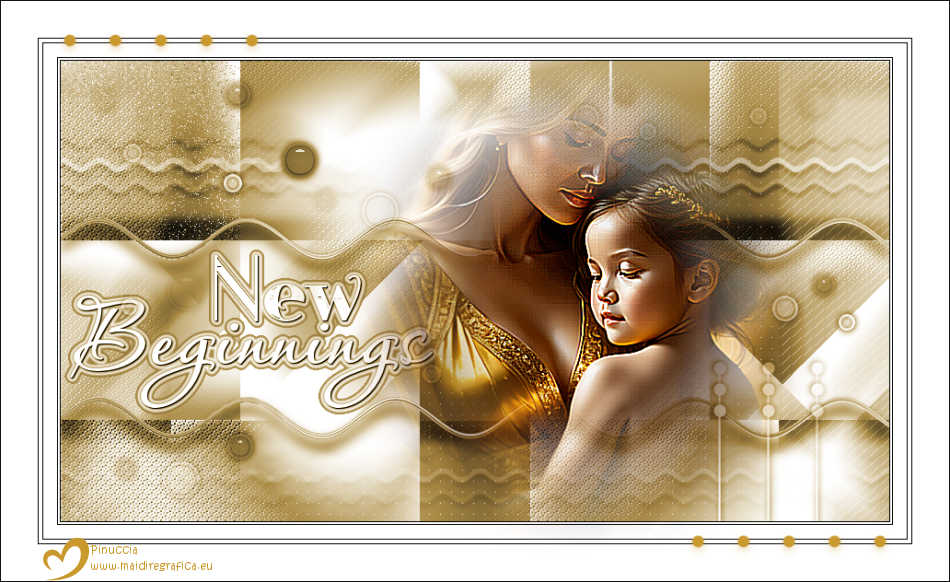  Your versions. Thanks 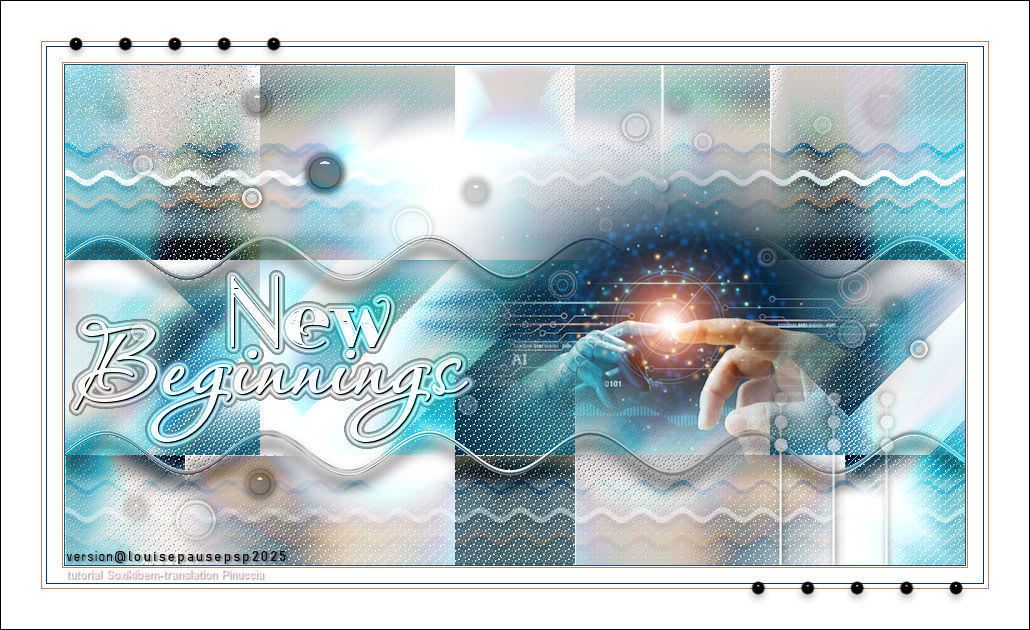 Louise  Jolcsi  Aria  Kamelius 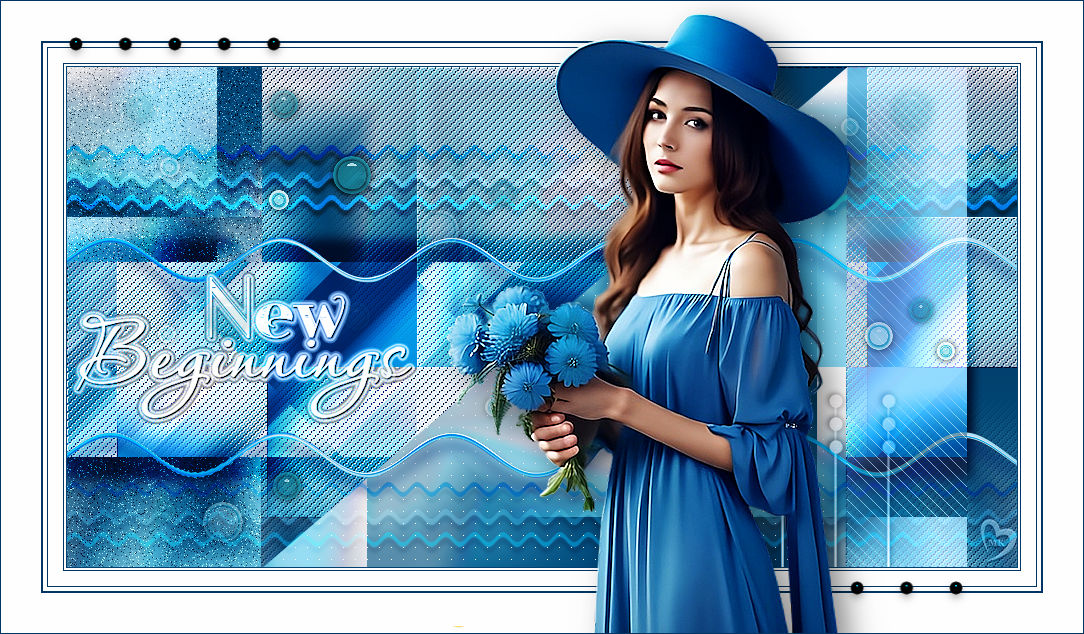 Kamelius   If you have problems or doubts, or you find a not worked link, or only for tell me that you enjoyed this tutorial, write to me. 9 Janvier 2025 |