|
OLHAR OCULTO  HIDDEN LOOK HIDDEN LOOK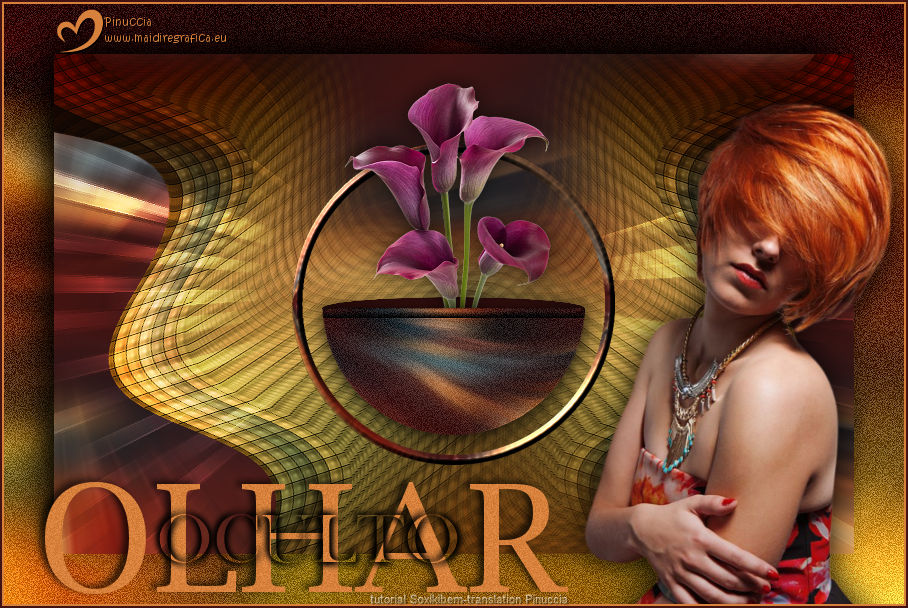

This tutorial was written with Psp2022 and translated with PspX2020, but it can also be made using other versions of PSP.
For this tutorial, you will need:  For the tubes thanks PqnaAlice. (The links of the tubemakers here).  consult, if necessary, my filter section here Mura's Meister - Copies here Nik Software - Color Efex 3.0 here  You can change Blend Modes according to your colors.  Open the mask in Psp and minimize it with the rest of the material. 1. Choose 2 colors to work. Set your foreground color to #431311, and your background color to #d7813c.  2. Open AlphaChannel1272 This image, that will be the basis of your work, is not empty, but contains the selections saved to alpha channel. 3. Flood Fill  the transparent image with your foreground color. the transparent image with your foreground color.Selections>Select All. 4. Open your landscape's misted 156PaisagemByPqnaAlice  Erase the watermark and go to Edit Copy. Go back to your work and go to Edit>Paste Into Selection. Selections>Select None. 5. Effects>Image Effects>Seamless Tiling, default settings.  Adjust>Blur>Radial Blur.  6. Layers>Duplicate. Effects>Geometric Effects>Circle.  Image>Resize, to 65%, resize all layers not checked. Layers>Duplicate. 7. Close the layer Copy (2) of Raster 1. Activate the layer Copy of Raster 1.  Selections>Load/Save Selections>Load Selection from Alpha Channel. The selection Selection #1 is immediately available. You just have to click Load. 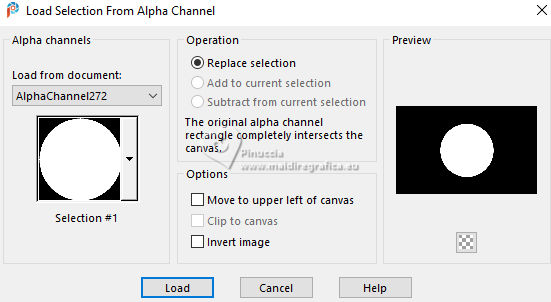 Press CANC on the keyboard  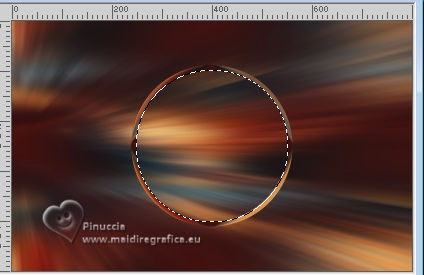 Selections>Select None. 8. Effects>3D Effects>Inner Bevel. 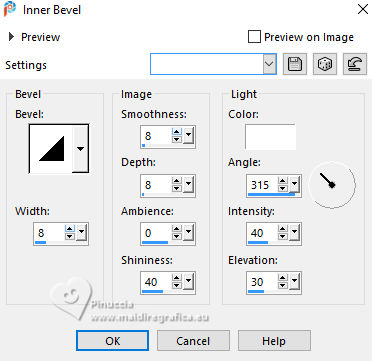 9. Open and activate the layer Copy (2) of Raster 1. 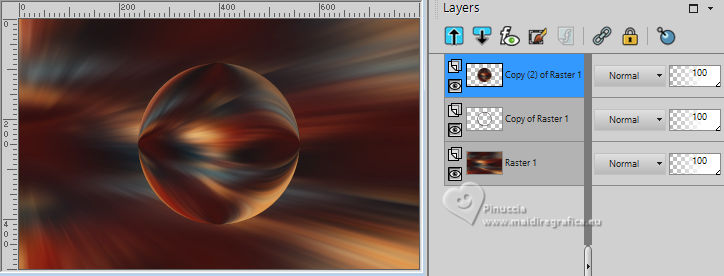 Selections>Load/Save Selections>Load Selection from Alpha Channel. Open the Selections Menu and load the selection Selection #2  Press CANC on the keyboard  Selections>Select None. 10. Selections>Load/Save Selections>Load Selection from Alpha Channel. Open the Selections Menu and load the selection Selection #3  Press CANC on the keyboard  Selections>Select None. 11. Selections>Load/Save Selections>Load Selection from Alpha Channel. Open the Selections Menu and load the selection Selection #4  Effects>3D Effects>Inner Bevel.  Selections>Select None. 12. Layers>New Raster Layer. Selections>Load/Save Selections>Load Selection from Alpha Channel. Open the selections menu and load the selection Selection #5  Flood Fill the selection with your foreground color.Layers>New Raster Layer. Effects>3D Effects>Cutout.  Selections>Select None. 13. Activate the layer Copy (2) of Raster 1. 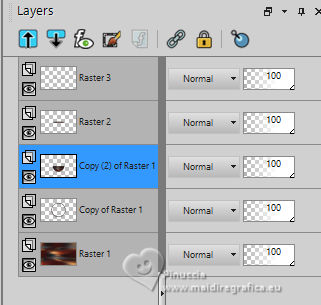 Layers>Arrange>Bring to Top.  14. Open the flowers' tube 134FlorByPqnaAlice 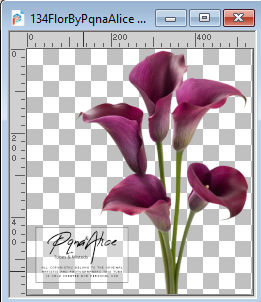 Edit>Copy. Go back to your work and go to Edit>Paste as New Layer. Resize, if necessary, for the supplied tube to 50%. Adjust>Sharpness>Sharpen. I colored the tube to match the colors I'm using. Effects>3D Effects>Drop Shadow, at your choice. Layers>Arrange>Move Down. Place  the tube as in my example. the tube as in my example.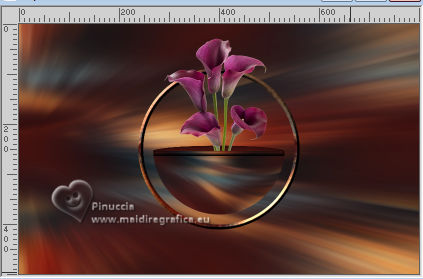 15. Activate the top layer, Copy (2) of Raster 1. Adjust>Add/Remove Noise>Add Noise. 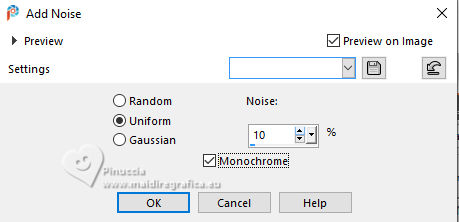 Adjust>Sharpness>Sharpen. Effects>3D Effects>Drop Shadow, color black #000000.  16. Close the layer Raster 1. Layers>Merge>Merge Visible. 17. Open and activate the layer Raster 1. Selections>Load/Save Selections>Load Selection from Alpha Channel. Open the selections menu and load the selection Selection #6  Selections>Promote Selection to Layer. Selections>Select None. 18. Effects>Texture Effects>Tiles.  19. Effects>Reflection Effects>Rotating Mirror.  20. Effects>Distortion Effects>Wave.  21. Plugins>Mura's Meister>Copies.  22. Pick Tool  Position X: 247,00 - Position Y: 0,00.  Layers>Duplicate. Image>Mirror>Mirror Horizontal. Layers>Merge>Merge Down. Adjust>Sharpness>Sharpen. 23. Effects>Plugins>Nik Software - Color Efex Pro 3.0. Bi-Color Filter - to the right Colorset Brown 1  24. Set your foreground color to white #ffffff. Layers>New Raster Layer. Flood Fill the layer with color white #ffffff.Layers>New Mask layer>From image Open the menu under the source window and you'll see all the files open. Select the mask P&A_Mask036.  Layers>Merge>Merge Group. 25. Change the Blend Mode of this layer to Overlay. Layers>Duplicate. Change the Blend Mode of this layer to Dodge. Move this layer under the layer Promoted Selection.  Note: At this point we will start to finalize our work. If you wish, duplicate it, save it in psp and finish it in the copy. 26. Edit>Copy Special>Copy Merged. Selections>Select All. Image>Add Borders, 50 pixels, symmetric, whatever color. Selections>Invert. Edit>Paste Into Selection. 27. Adjust>Blur>Radial Blur.  28. Effects>Plugins>Nik Software - Color Efex Pro 3.0, as at step 23.  Adjust>Add/Remove Noise>Add Noise. Edit>Repeat Add Noise. Adjust>Sharpness>Sharpen. 29. Selections>Invert. Effects>3D Effects>Drop Shadow, color black #000000.  Selections>Select None. 30. Open your main tube 984MulherbyPqnaAlice  Edit>Copy. Go back to your work and go to Edit>Paste as New Layer. Move the tube to the right.Effects>3D Effects>Drop Shadow, at your choice. 31. Open Titulo_bySoxikibem  Edit>Copy. Go back to your work and go to Edit>Paste as New Layer. Pick Tool Position X: 27,00 - Position Y: 467.00.  32. Image>Add Borders, 2 pixels, symmetric, background color. Image>Add Borders, 2 pixels, symmetric, foreground color. 33. If you want, resize your work. Sign your work and save as jpg. For the tubes of this version thanks Luz Cristina and NaiseM   Your versions. Thanks  Jolcsi  Baby  Baby 2   If you have problems or doubts, or you find a not worked link, or only for tell me that you enjoyed this tutorial, write to me. 27 October 2024 |