|
TEARS


Thanks Soxikibem for your invitation to translate your tutorials into english

This tutorial was written with Psp2022 and translated with PspX17, but it can also be made using other versions of PSP.
Since version PSP X4, Image>Mirror was replaced with Image>Flip Horizontal,
and Image>Flip with Image>Flip Vertical, there are some variables.
In versions X5 and X6, the functions have been improved by making available the Objects menu.
In the latest version X7 command Image>Mirror and Image>Flip returned, but with new differences.
See my schedule here
For this tutorial, you will need:

For the tube thanks PqnaAlice
The rest of the material is by Soxikibem.
(The links of the tubemakers here).

consult, if necessary, my filter section here
Filters Unlimited 2.0 here
Alien Skin Eye Candy 5 Impact - Bevel here
Alien Skin Eye Candy 5 Nature - Drip here
Funhouse - Faceter here
Mura's Meister - Perspective Tiling here
Filters Funhouse can be used alone or imported into Filters Unlimited.
(How do, you see here)
If a plugin supplied appears with this icon  it must necessarily be imported into Unlimited it must necessarily be imported into Unlimited

You can change Blend Modes according to your colors.
In the newest versions of PSP, you don't find the foreground/background gradient (Corel_06_029).
You can use the gradients of the older versions.
The Gradient of CorelX here
Copy the presets  in the folders of the plugin Alien Skin Eye Candy 5 Impact>Settings>Bevel in the folders of the plugin Alien Skin Eye Candy 5 Impact>Settings>Bevel
and Alien Skin Eye Candy 5 Nature>Settings>Nature.
One or two clic on the file (it depends by your settings), automatically the preset will be copied in the right folder.
why one or two clic see here

1. Choose 3 colors from your material.
For the example: Foreground color #3c081b,
background color #ffb43f
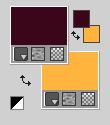
third color: #ffffff.
Set your foreground color to a Foreground/Background Gradient, style Linear
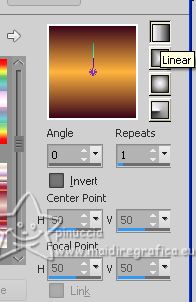
2. Open a new transparent image 1000 x 700 pixels.
Flood Fill  the transparent image with your Gradient. the transparent image with your Gradient.
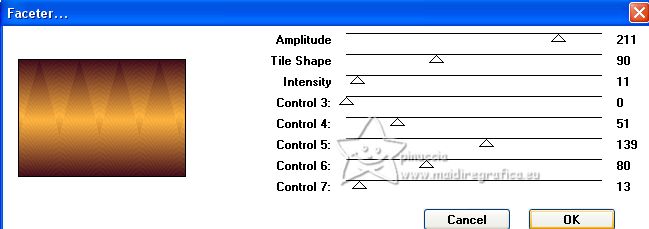
3. Effects>Plugins>Funhouse - Faceter.
4. Layers>Duplicate.
Image>Flip.
Change the Blend Mode of this layer to Screen.
5. Activate the layer Raster 1.
Layers>Duplicate.
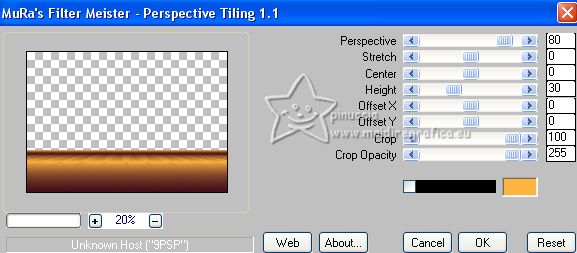
Effects>Plugins>Mura's Meister - Perspective Tiling.
6. Activate your Magic Wand Tool  , tolerance 0 and feather 80 , tolerance 0 and feather 80

Click in the transparent part to select it.
Press 4 times CANC on the keyboard 
Selections>Select None.
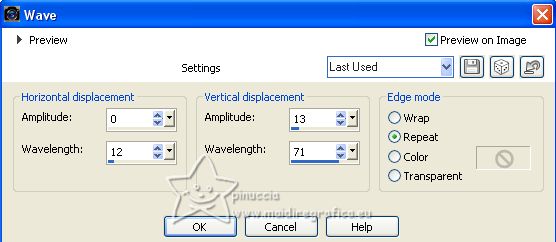
7. Effects>Distortion Effects>Wave.
8. Layers>Duplicate.
Image>Flip.
Layers>Merge>Merge Down.
Effects>3D Effects>Drop Shadow, color black.
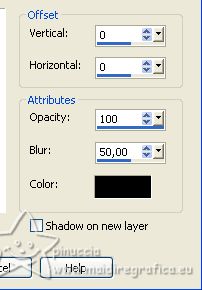
Edit>Repeat Drop Shadow.
9. Activate your top layer, Copy of Raster 1.
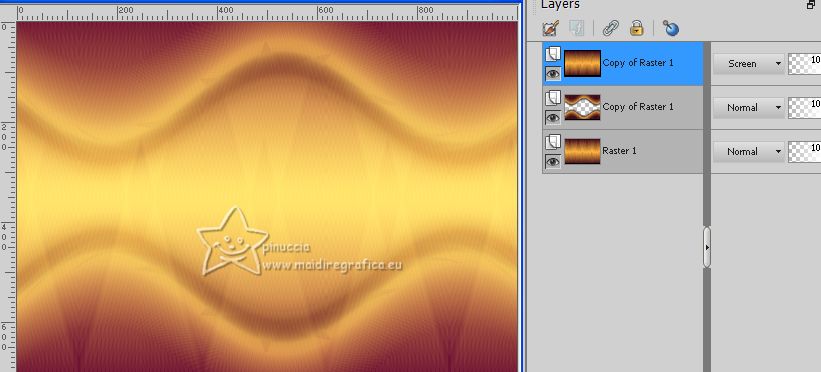
Layers>New Raster Layer.
Change the settings of your Gradient.
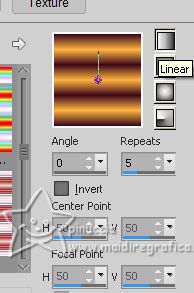
Flood Fill  the layers with your Gradient. the layers with your Gradient.
10. Effects>Geometric Effects>Perspective horizontal.
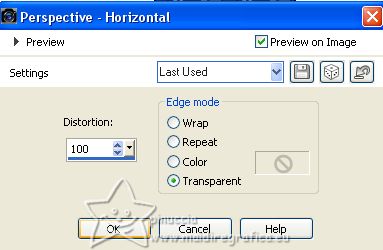
Edit>Repeat Perspective horizontal.
Image>Miroir.
Effects>Geometric Effects>Perspective Horizontal, same settings.
You will get this
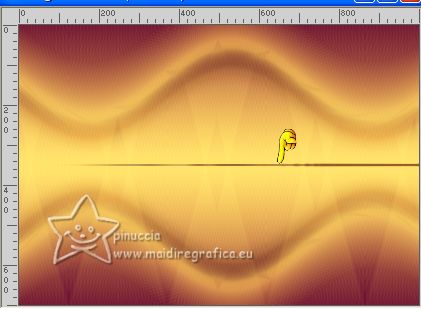
11. Effects>Distortion Effects>Wave, same settings.

K key to activate your Pick Tool 
keep Position X: 38,00 and set Position Y: 274,00.

12. Layers>Duplicate.
Image>Mirror.
Image>Flip.
Layers>Merge>Merge Down.
13. Activate your Magic Wand Tool  , tolerance and feather 0, , tolerance and feather 0,
e click in the central ellipse to select it.
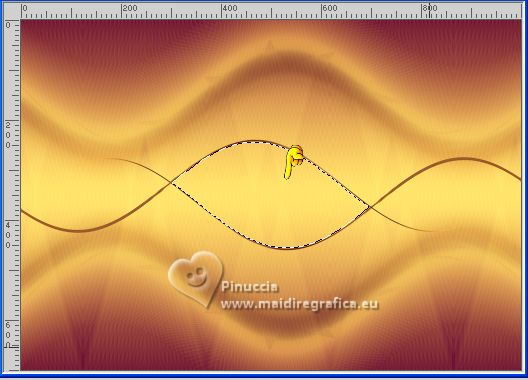
14. Selections>Modify>Expand - 2 pixels.
Set again the initial settings of your Gradient

Layers>New Raster Layer.
Flood Fill  the selection with your Gradient. the selection with your Gradient.
15. Layers>Arrange>Move Down.
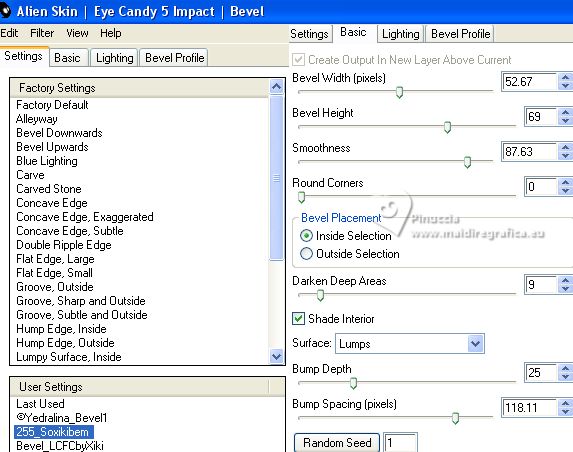
Effects>Modules Externes>Alien Skin Eye Candy 5 Impact - Bevel.
Select the preset 255_Soxikibem
Here below the settings, in case of problems with the preset
Selections>Select None.
16. Activate the top layer, Raster 2.
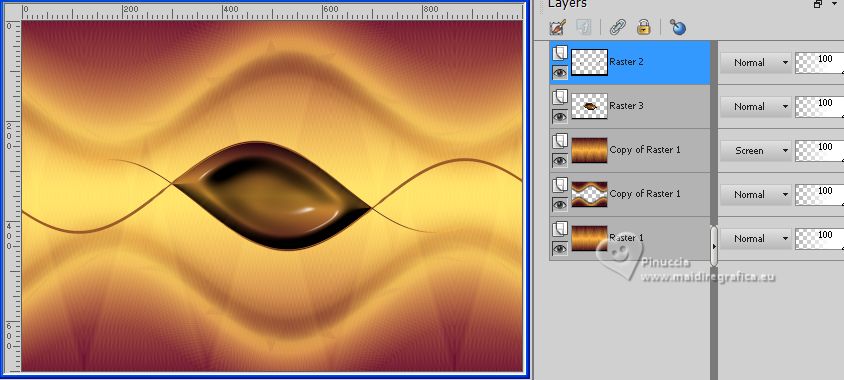
Effects>3D Effects>Drop Shadow, color black.
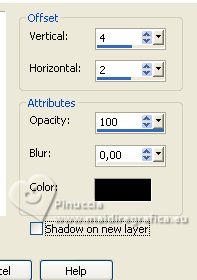
Again Effects>3D Effects>Drop Shadow, color black.
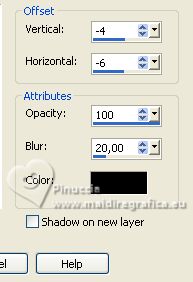
17. Layers>Merge>Merge Down.
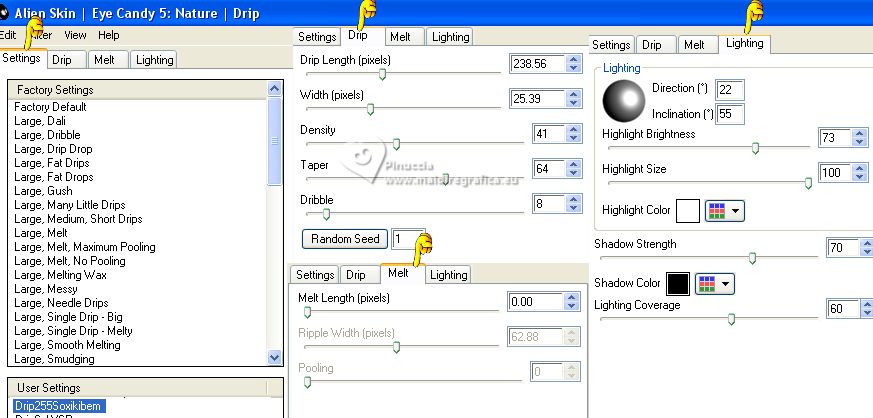
Effects>Modules Externes>Alien Skin Eye Candy 5 Nature - Drip.
Select the preset Drip255_Soxikibem
Here below the settings, in case of problems with the preset
18. Image>Mirror.
Pick Tool 
keep Position X: 0,00 and set Position Y: 84,00.
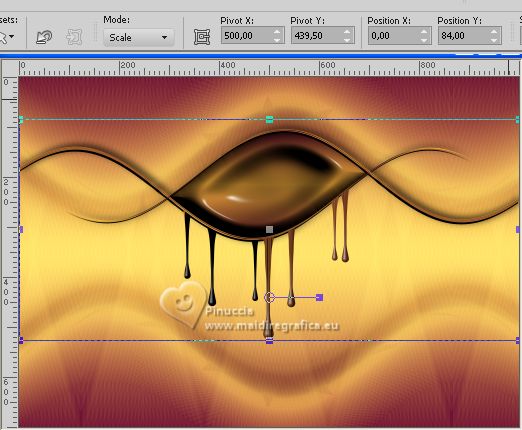
19. Layers>New Raster Layer.
Selections>Select All.
Open the misted 156DiversosByPqnaAlice 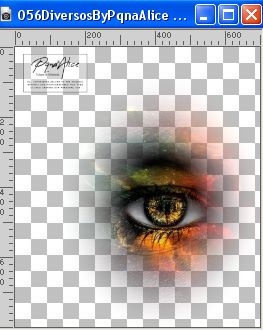
Erase the watermark and go to Edit>Copy.
Go back to your work and go to Edit>Paste into Selection.
Selections>Select None.
20. Effects>Image Effects>Seamless Tiling, default settings.

Adjust>Blur>Radial Blur.
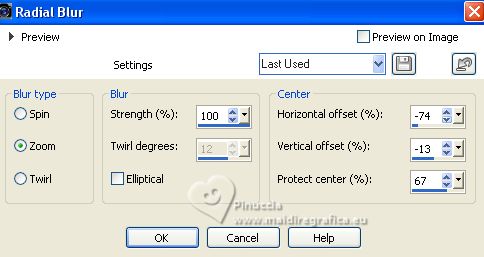
Layers>Arrange>Move Down.
Effects>Edge Effects>Enhance.
Edit>Repeat Enhance Edges.
21. Adjust>Add/Remove Noise>Add Noise.
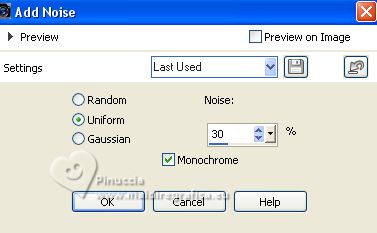
If you agree, you can change the Blend Mode of this layer to your liking.
22. Activate your Top Layer.
Edit>Paste as a new layer (your misted Eye is still in memory).
Image>Resize, if necessary, resize all layers not checked.
Place  correctly the tube, about as below. correctly the tube, about as below.
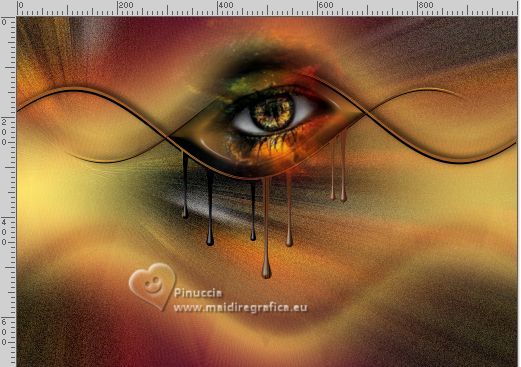
23. Layers>Merge>Merge visible.
Edit>Copy
Layers>New Raster Layer.
Change again the settings of your Gradient.
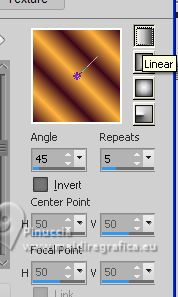
Flood Fill  the layer with your Gradient. the layer with your Gradient.
24. Selections>Select All.
Selections>Modify>Contract - 3 pixels.
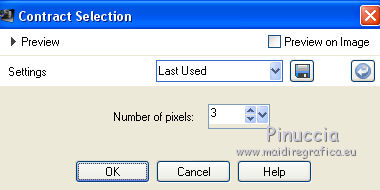
Press CANC on the keyboard.
25. Selections>Modify>Contract - 40 pixels.
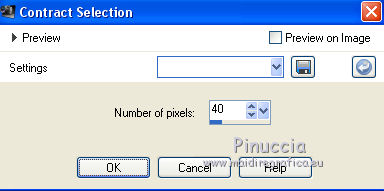
Flood Fill  the selection with your Gradient. the selection with your Gradient.
Selections>Modify>Contract - 3 pixels.
Press CANC on the keyboard.
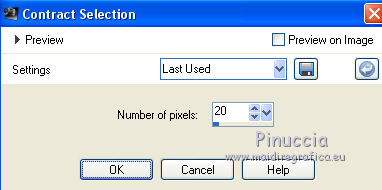
26. Selections>Modify>Contract - 20 pixels.
Flood Fill  the selection with your Gradient. the selection with your Gradient.
Selections>Modify>Contract - 3 pixels.
Press CANC on the keyboard.
27. Layers>New Raster Layer.
Edit>Paste into Selection (the image copied at step 23 is in memory).
28. Selections>Invert.
Activate the bottom layer, Merged.
Adjust>Blur>Radial Blur, same settings.

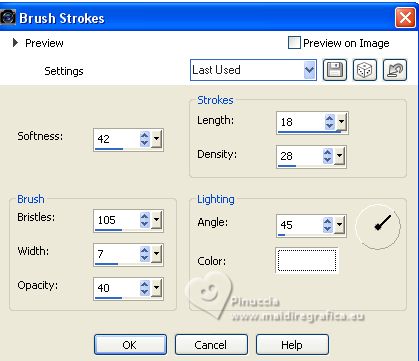
29. Effects>Art Media Effects>Brush Strokes.
Selections>Select None.
30. Activate the borders layer, Raster 1.
Effects>3D Effects>Drop Shadow, color black.
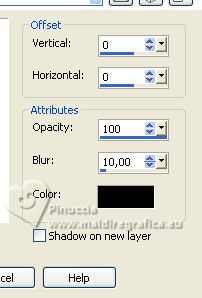
Edit>Repeat Drop Shadow.
31. Activate your top Layer.
Open the tube TituloTearsBySoxikibem 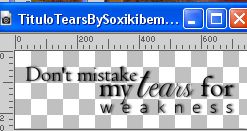
Pick Tool 
Set Position X: 82,00 and Position Y: 459,00.

32. Sign your work on a new layer.
Add, if you want, the author and the translators watermarks.
Save as jpg.
For the tube of this version thanks Nightangel.


Your versions. Thanks

Nelly


If you have problems or doubts, or you find a not worked link, or only for tell me that you enjoyed this tutorial, write to me.
1 July 2023

|

