|
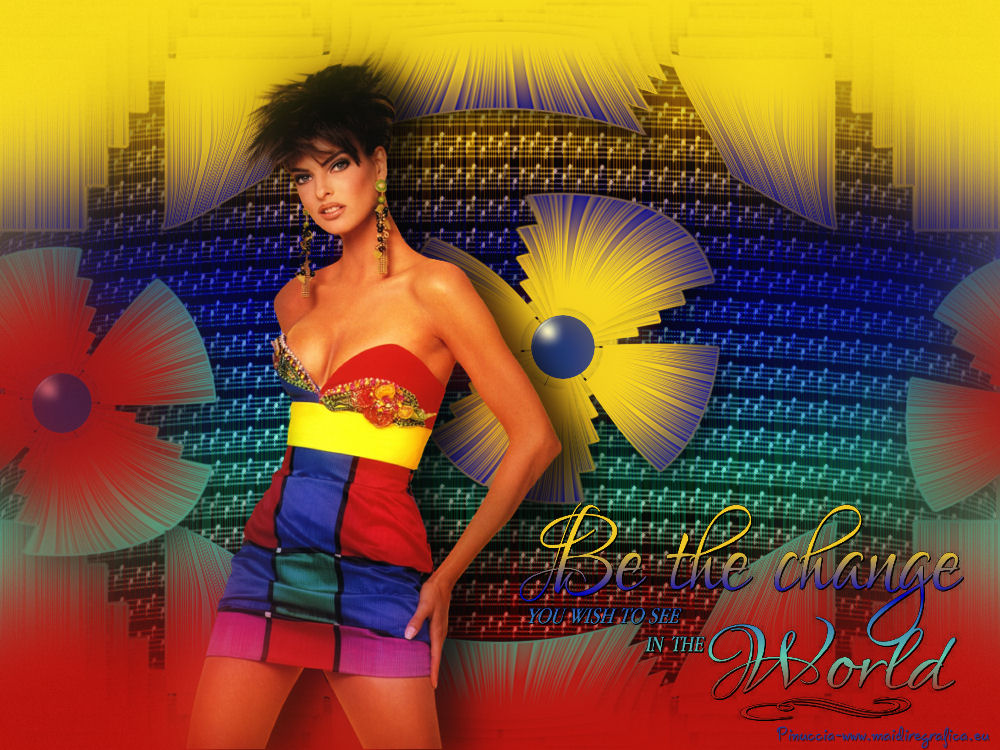
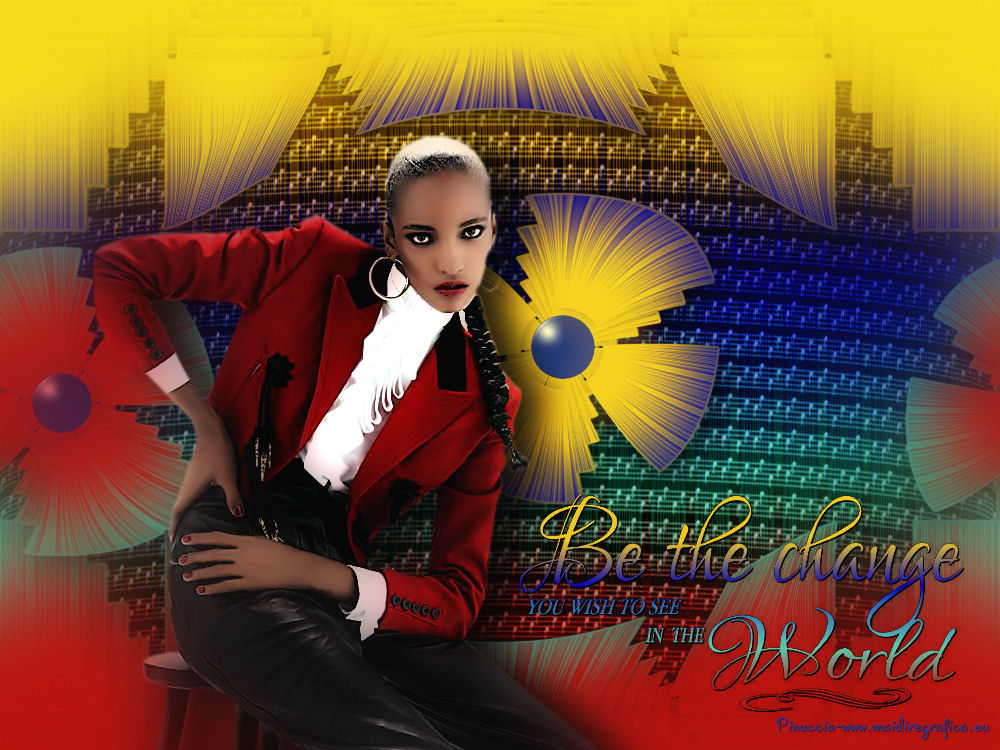
TOP BE THE CHANGE WORLD
english version


This tutorial was created with PSPX8 and translated with Corel X3, but it can also be made using other versions of PSP.
Since version PSP X4, Image>Mirror was replaced with Image>Flip Horizontal,
and Image>Flip with Image>Flip Vertical, there are some variables.
In versions X5 and X6, the functions have been improved by making available the Objects menu.
In the latest version X7 command Image>Mirror and Image>Flip returned, but with new differences.
See my schedule here
Italian translation here
French translation here
Your versions here
For this tutorial, you will need:
Material here
Tube WordArt..LF-WA-11.png
Leny-vrouw598.psp
Mask_Zen_68.jpg
seleccionsuiza001027
Plugins
consult, if necessary, my filter section here
Eye Candy 4000 - Glass here
Filters unlimited 2.0 here
Funhouse - ZigZaggerate here
Flaming Pear - Flexify 2 here
Andromeda - Designs Filters here
Nik Software - Color Efex Pro here
Filters Funhouse can be used alone or imported into Filters Unlimited.
(How do, you see here)
If a plugin supplied appears with this icon  it must necessarily be imported into Unlimited it must necessarily be imported into Unlimited

You can change Blend Modes and opacity of the layer, according to your colors.
Copy the mask in the Masks Folder.
Copy the selection in the Selections Folder.
Copy the gradient in the Gradients Folder.
1. Set your foreground color to #af1d15
Set your background color to #1f3a94.
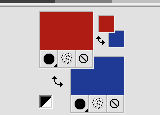
Set your foreground color to Gradient and select the gradient SuiGrad20, style Linear.
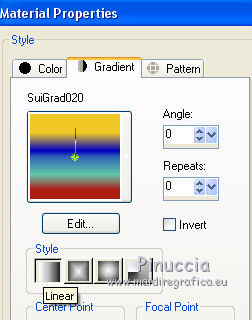
2. Open a new transparent image 1000 x 750 pixels,
Flood Fill  the image with your gradient. the image with your gradient.
3. Effects>Plugins>Filters Unlimited 2.0 - Funhouse - ZigZaggerate, default settings.
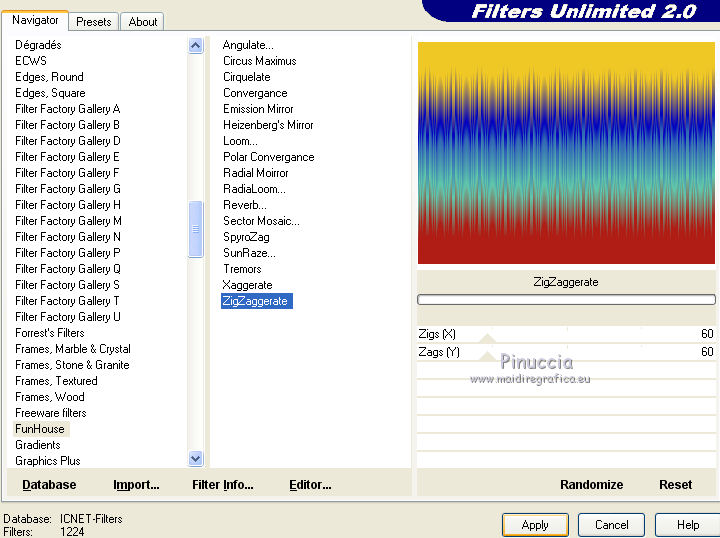
4. Layers>Duplicate.
Layers>Load/Save Mask>Load Mask from Disk.
Look for and load the mask Mask_Zen_68.
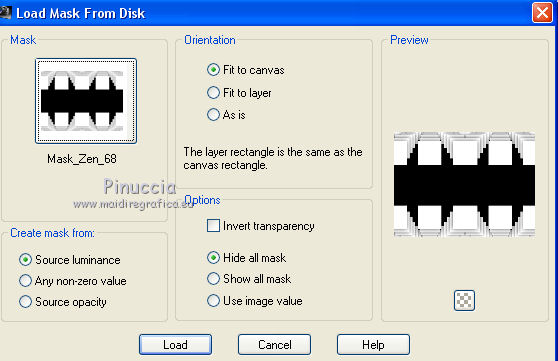
Layers>Merge>Merge Group.
don't worry if, for a moment, you don't see anything
5. Selections>Select All.
Selection>Float.
6. Selections>Modify>Select Selection Borders.
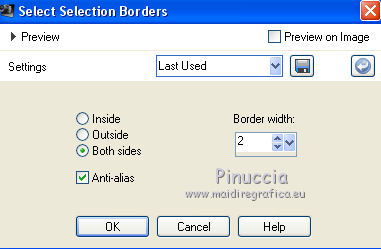
Flood Fill  the selection with your gradient. the selection with your gradient.
Selections>Select None.
7. Layers>Duplicate.
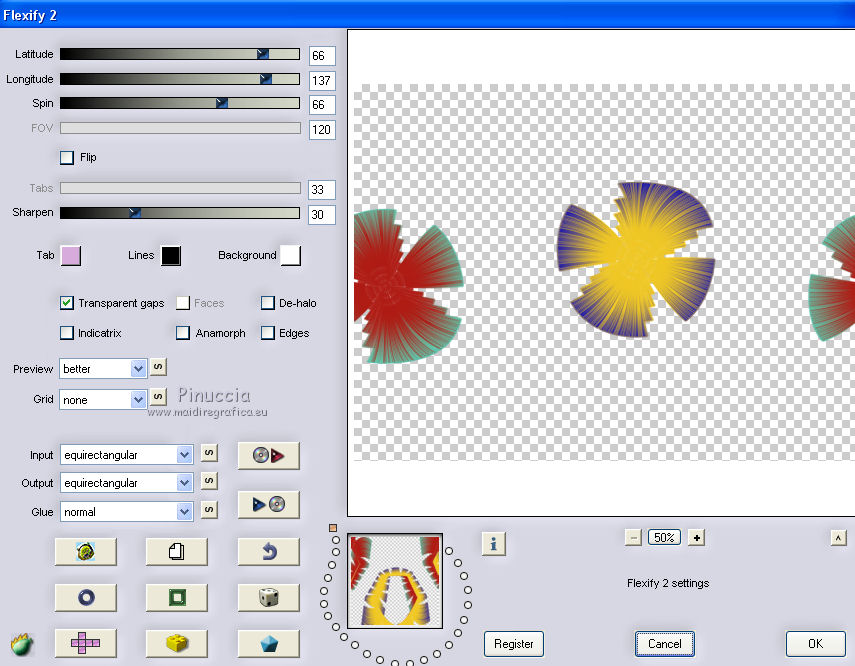
Effects>Plugins>Flaming Pear - Flexify 2.
8. Effects>3D Effects>Drop Shadow.
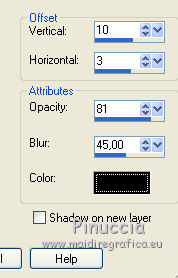
9. Layers>New Raster Layer.
Selections>Load/Save Selection>Load Selection from Disk.
Look for and load the selection Seleccionsuiza001027.
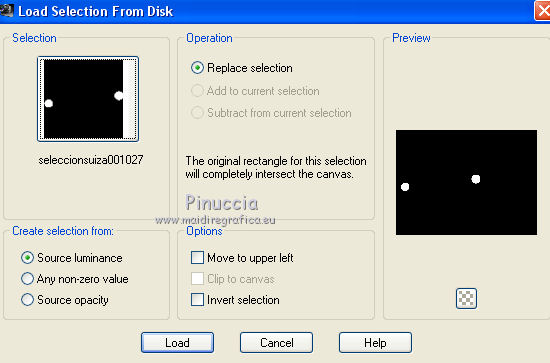
Flood Fill  the selection with your background color #1f3a94. the selection with your background color #1f3a94.
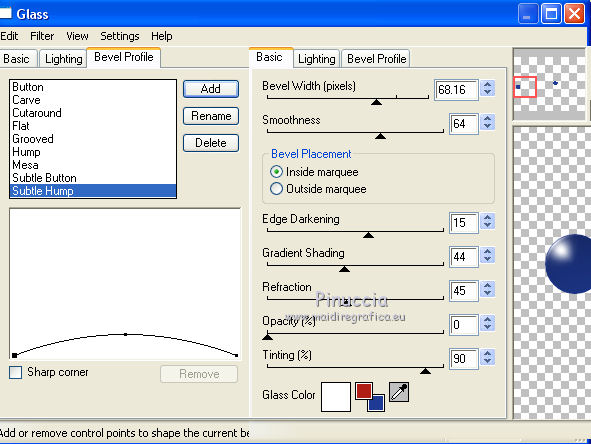
10. Effects>Plugins>Eye Candy 4000 - Glass - Glass Color: white.
Selections>Select None.
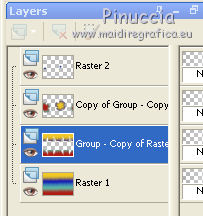
11. Activate the mask layer.
Effects>3D Effects>Drop Shadow, same settings.
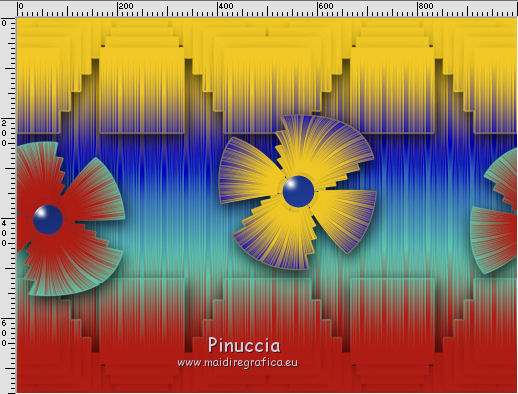
12. Effects>Distortion Effects>Warp.
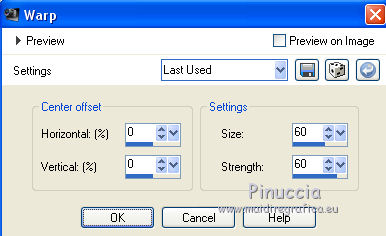
13. Activate the layer Raster 1.
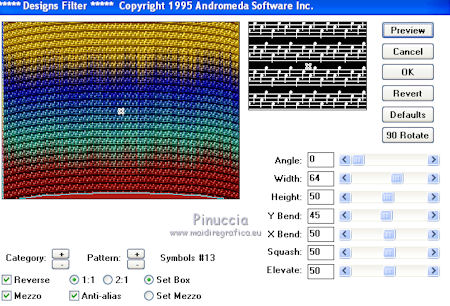
Effects>Plugins>Andromeda - Designs Filter.
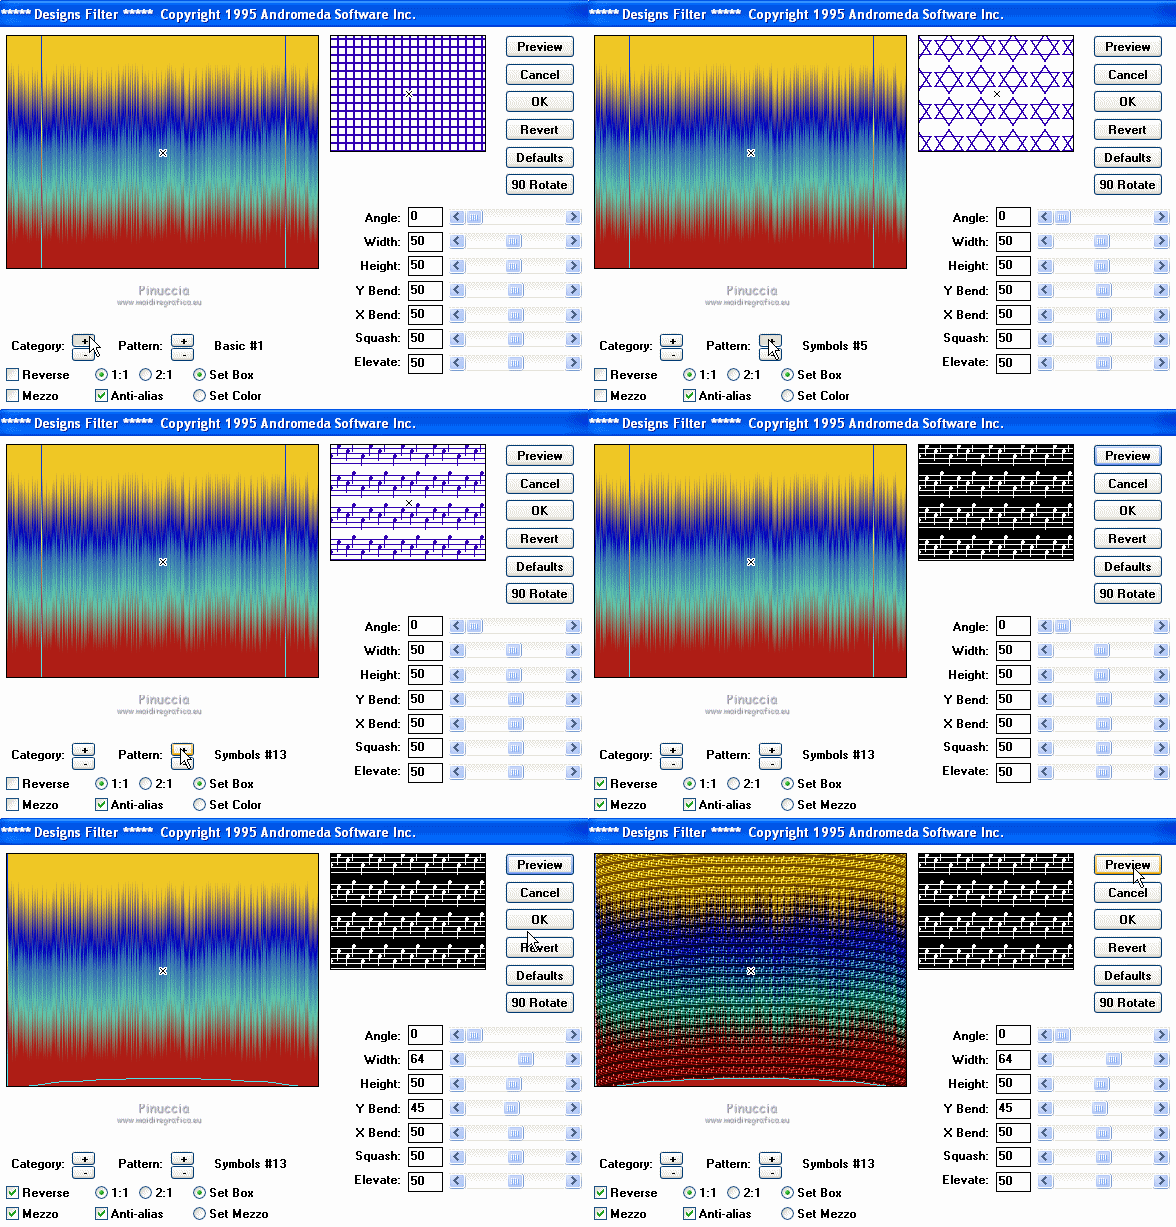
Clic on the sign + of Category to run the menu of presets and select Symbols
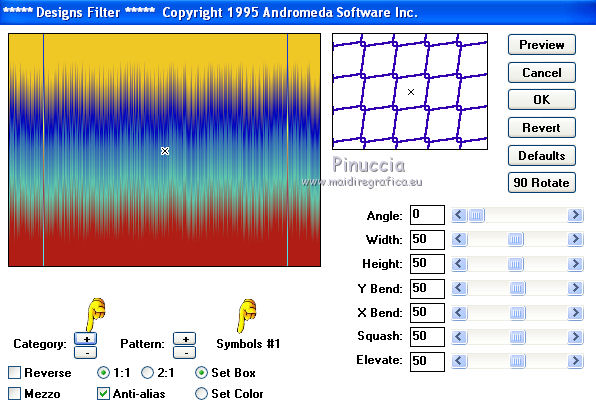
Clic on the sign + of Pattern to run the menu of Symbols and select Symbols 13.
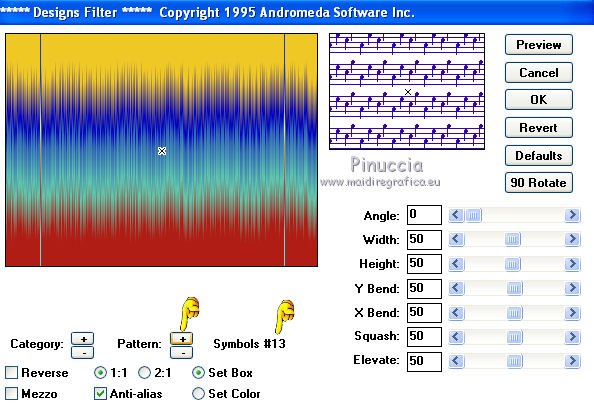
Place the settings and if you want see the final result clic on Preview
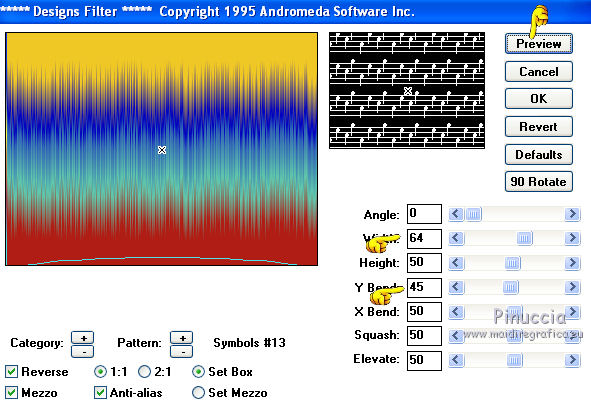 
Here below the animated sequence.
14. Activate the top layer.
Open the tube Leny-vroux598.psp - Edit>Copy.
Go back to your work and go to Edit>Paste as new layer.
Image>Resize, to 85%, resize all layers not checked.
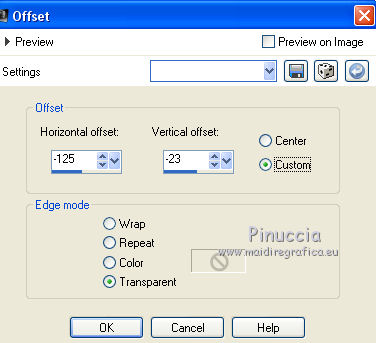
15. Effects>Image Effects>Offset.
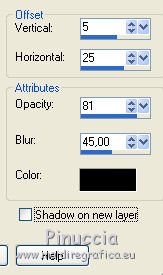
16. Effects>3D Effects>Drop Shadow.
17. Layers>Merge>Merge All.
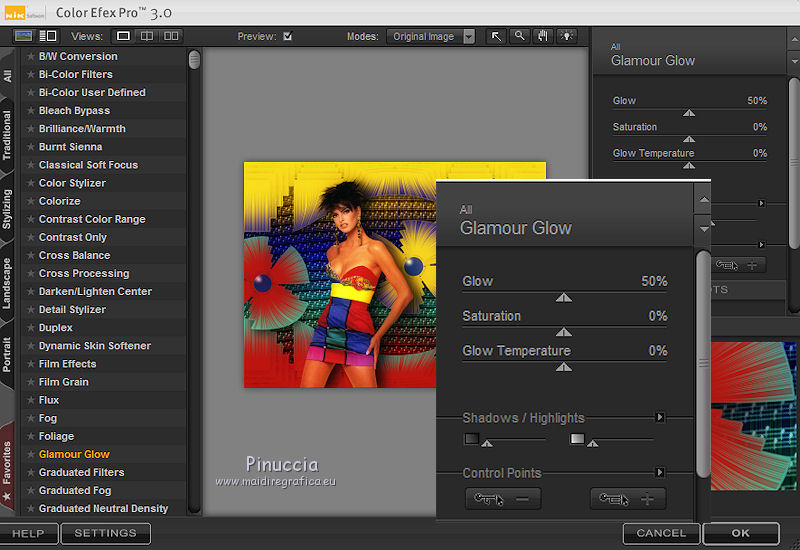
18. Effects>Plugins>Nik Software - Color Efex Pro - Glamour Glow.
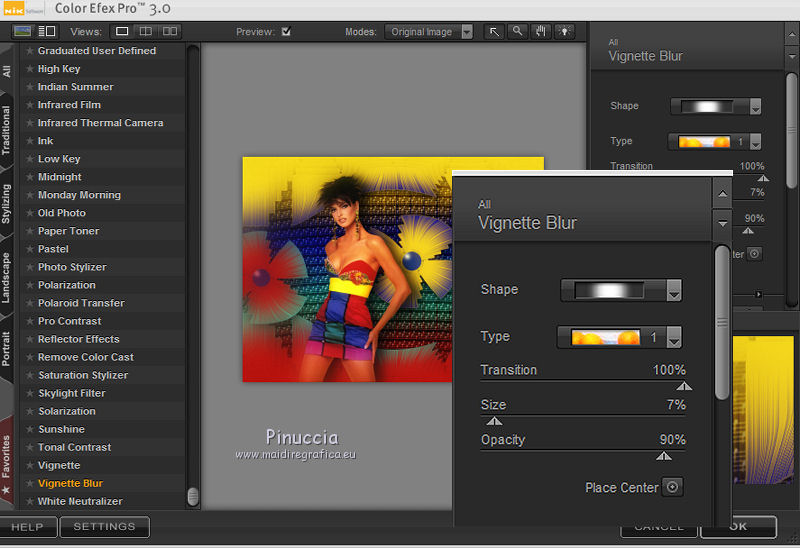
19. Effects>Plugins>Nik Software - Color Efex Pro - Vignette Blur.
20. Open the wordart LF-WA-11- - Edit>Copy.
Go back to your work and go to Edit>Paste as new layer.
Image>Resize, to 85%, resize all layers not checked.
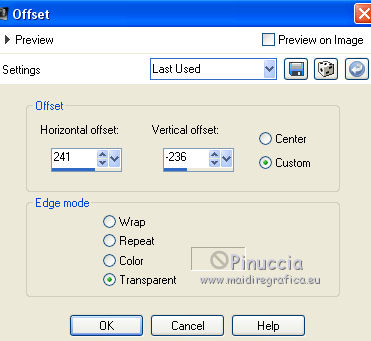
Effects>Image Effects>Offset.
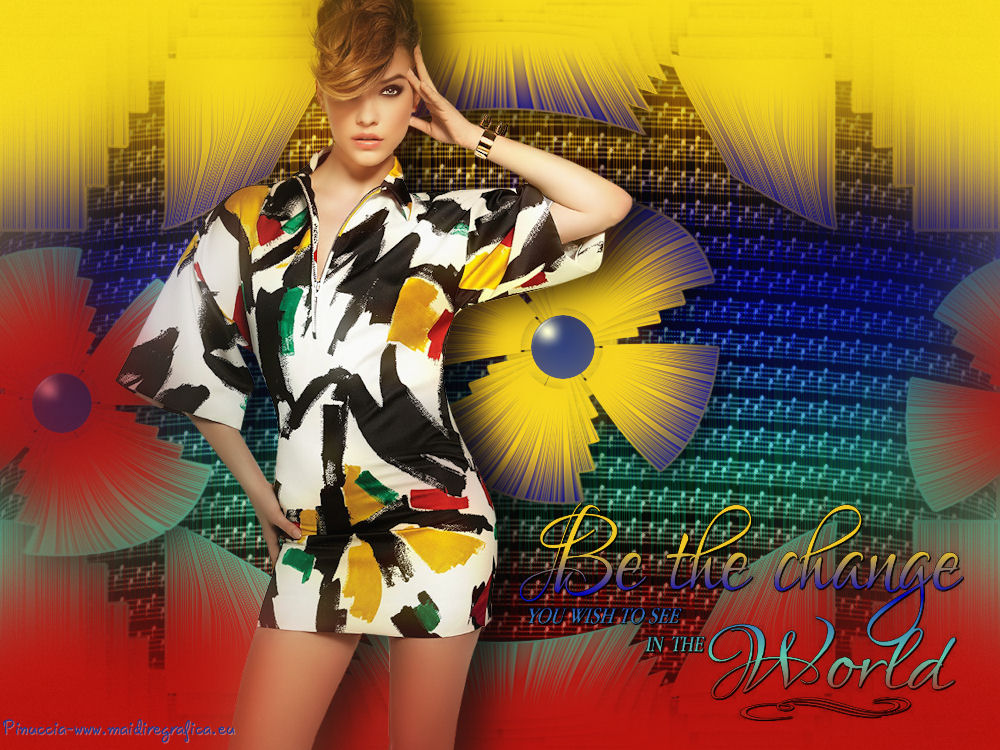
if you want another wordart, you can choose from the original wordart that is in the material
21. Sign your work.
Layers>Merge>Merge All and save as jpg.
The tubes of these versions are by
Tocha
Thafs

If you have problems or doubt, or you find a not worked link, or only for tell me that you enjoyed this tutorial, write to me.
2 June 2016
|
