|
TOP BEVEL AND GLASS
 english version english version
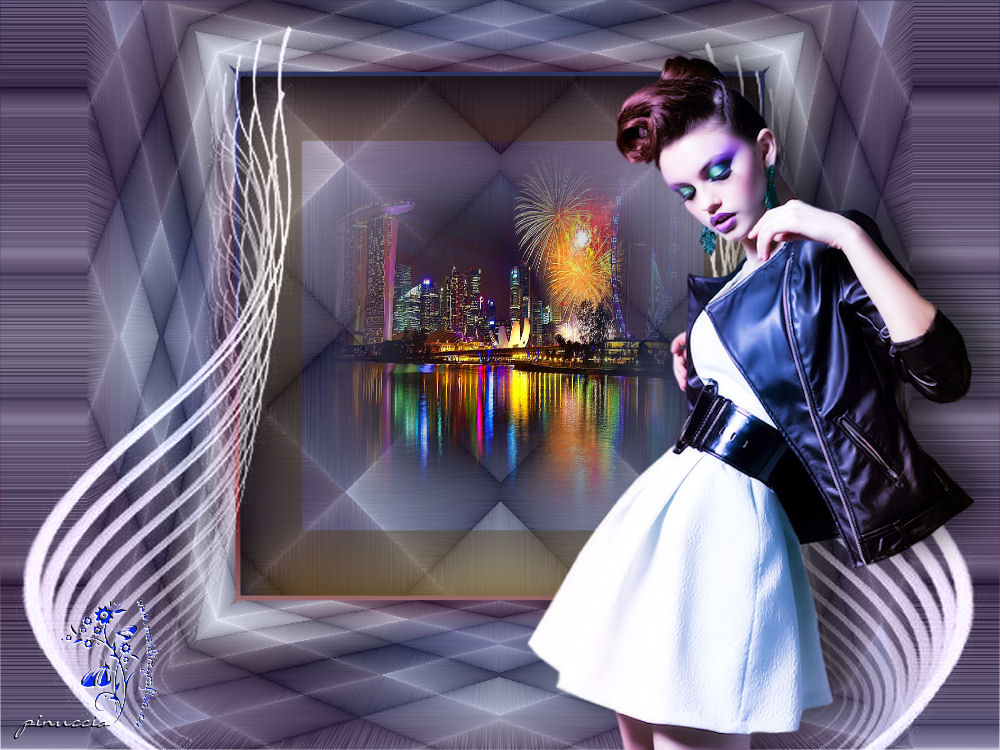

This tutorial was created with PSPX5 and translated with Corel X3, but it can also be made using other versions of PSP.
Since version PSP X4, Image>Mirror was replaced with Image>Flip Horizontal,
and Image>Flip with Image>Flip Vertical, there are some variables.
In versions X5 and X6, the functions have been improved by making available the Objects menu.
In the latest version X7 command Image>Mirror and Image>Flip returned, but with new differences.
See my schedule here
Italian translation here
French translation here
Your versions here
For this tutorial, you will need:
Material here
babette - 719 - 14.png
4392-luzcristina.pspimage
Narah_mask_0230.jpg
(The links of the tubemakers here).
Plugins
consult, if necessary, my filters section here
Mehdi - Sorting Tiles here
Alien Skin Eye Candy 5 Impact - Glass, Bevel here

You can change Blend Modes and opacity of the layer, according to your colors.
Copy the Gradient in the Gradients Folder.
Copy the preset Emboss 3 in the Presets Folder.
Copy the Mask in the Masks Folder.
1. Set your foreground color to #2f3462,
and your background color to #f8f9ff.
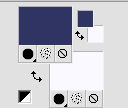
Set your foreground color to Gradient and select the gradient SuiGrad018, style Linear.
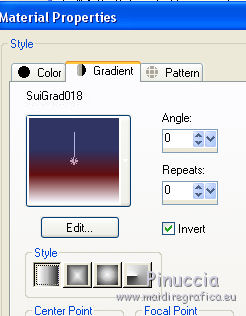
if you use other colors, also the gradient will change color
2. Open a new transparent image 1000 x 750 pixels.
Flood Fill  the transparent image with your Gradient. the transparent image with your Gradient.
3. Selections>Select All.
Open the tube Babette-719-14, erase the watermark and go to Edit>Copy.
Minimize the tube.
Go back to your work and go to Edit>Paste into Selection.
Selections>Select None.
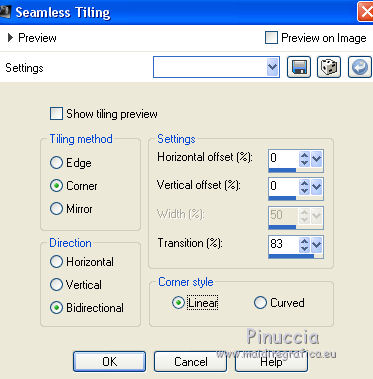
4. Effects>Image Effects>Seamless Tiling.

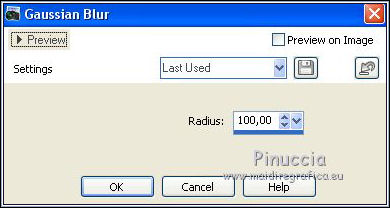
5. Adjust>Blur>Gaussian Blur - radius 100.

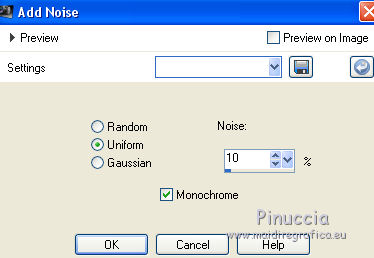
6. Adjust>Add/Remove Noise>Add Noise.

7. Effects>User Defined Filter - select the preset Emboss 3 and ok.

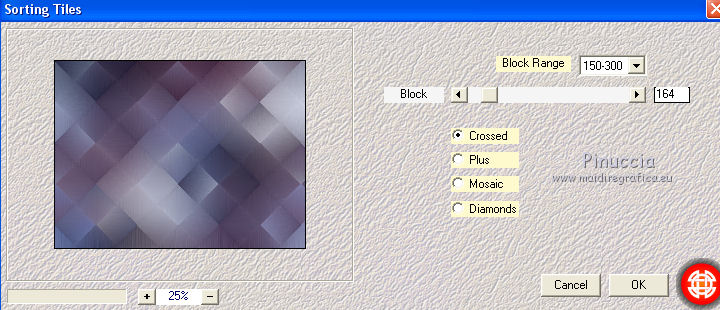
8. Effects>Plugins>Mehdi - Sorting Tiles.

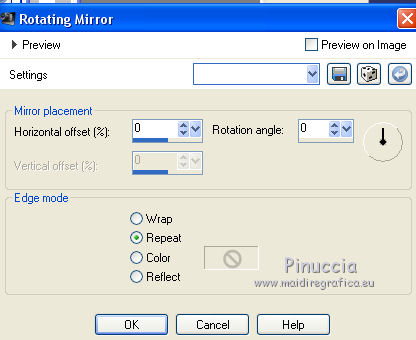
9. Effects>Reflection Effects>Rotating Mirror.

10. Layers>Duplicate.
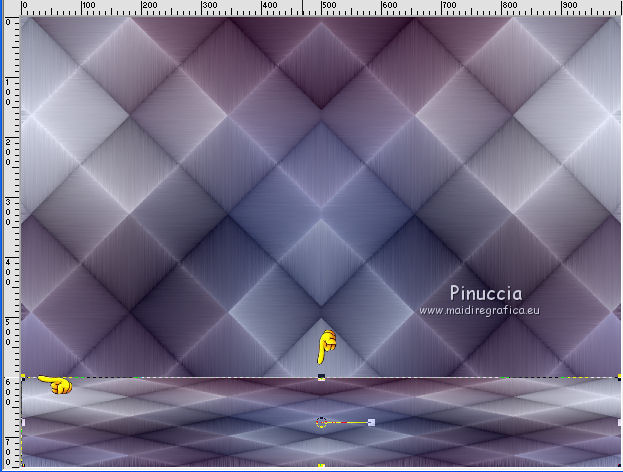
11. K key to activate the Pick Tool 
mode Scale 
push the central top node down, until 600 pixels.

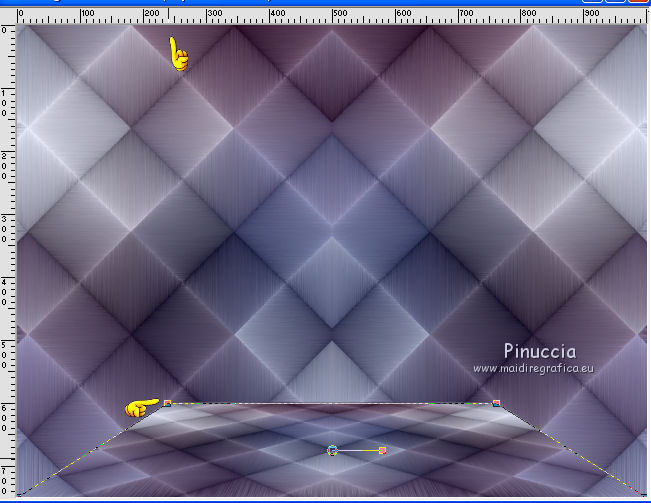
Mode Perspective 
push the top left node to the right, until 240 pixels
(the opposite node will move symmetrically)

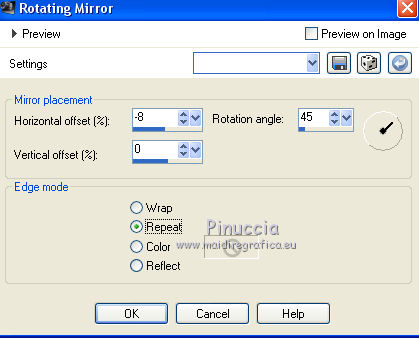
12. Effects>Reflection Effects>Rotating Mirror.

13. Image>Mirror.
Repeat Effects>Reflection Effects>Rotating Mirror, same settings.

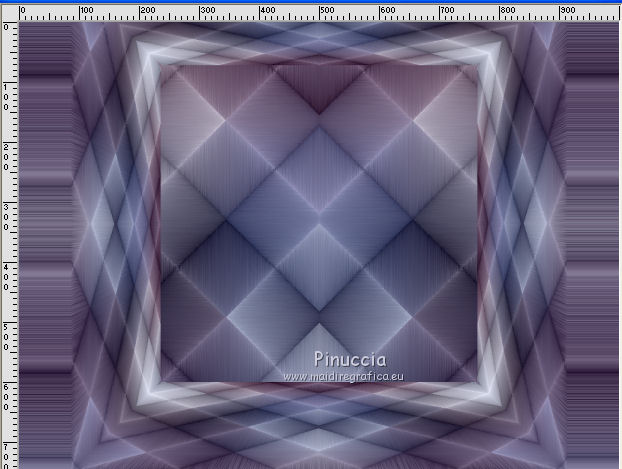
Result

14. Selections>Select All.
Selections>Float.
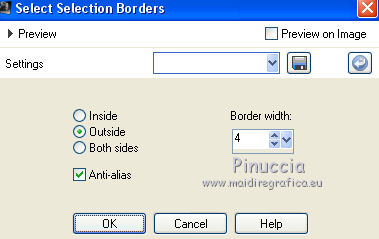
Selections>Modify>Select Borders Selection.

Flood Fill  the selection with your gradient. the selection with your gradient.
Selections>Select None.
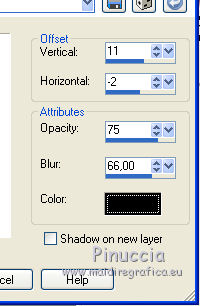
15. Effects>3D Effects>Drop Shadow.

16. Activate the layer Raster 1.
Layers>New Raster Layer.
Selection Tool 
(no matter the type of selection, because with the custom selection your always get a rectangle)
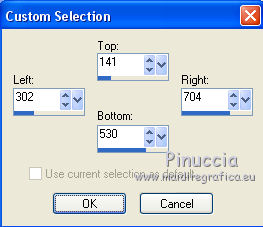
clic on the Custom Selection 
and set the following settings.

17. Open the tube 4392-luzcristina.pspimage and go to Edit>Copy.
Go back to your work and go to Edit>Paste into Selection.
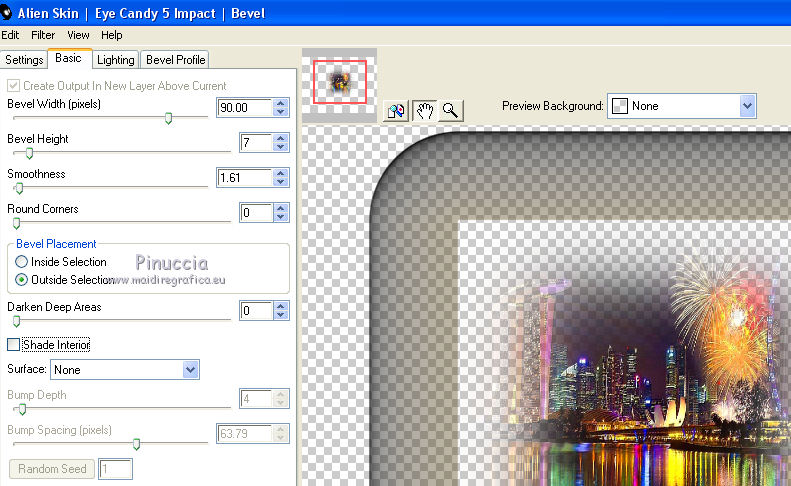
18. Effects>Plugins>Alien Skin Eye Candy 5 Impact - Bevel.

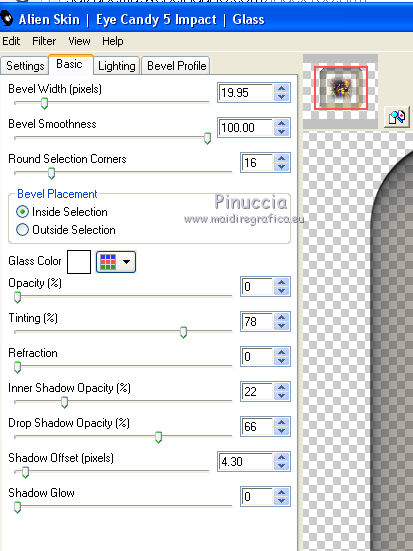
19. Effects>Plugins>Alien Skin Eye Candy 5 Impact - Glass.

Selections>Select None.
20. Layers>Merge>Merge visible.
21. Layers>New Raster Layer.
Flood Fill  with your Background color #f8f9ff. with your Background color #f8f9ff.
22. Layers>Load/Save Mask>Load Mask from Disk.
Look for and load the mask Narah_mask_0230.jpg

Layers>Merge>Merge Group.
Change the Blend Mode of this layer to Luminance (legacy).
23. Activate again the tube babette-719-14 and go to Edit>Copy.
Go back to your work and go to Edit>Paste as new layer.
Image>Resize, to 85%, resize all layers not checked.
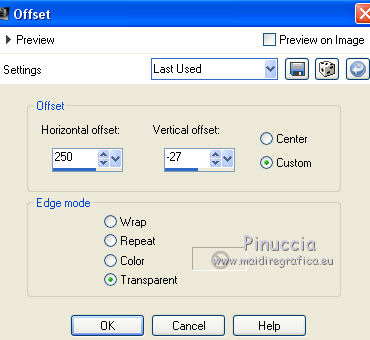
24. Effects>Image Effects>Offset.

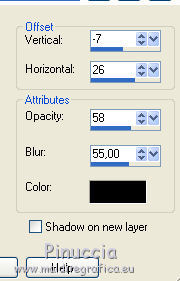
25. Effects>3D Effects>Drop Shadow.

26. Sign your work on a new layer.
Layers>Merge>Merge All and save as jpg.

If you have problems or doubt, or you find a not worked link, or only for tell me that you enjoyed this tutorial, write to me.
30 September 2017
|
 english version


 the transparent image with your Gradient.