|
TOP ENCHANTING
english version


This tutorial was created with PSPX5 and translated with Corel X3, but it can also be made using other versions of PSP.
Since version PSP X4, Image>Mirror was replaced with Image>Flip Horizontal,
and Image>Flip with Image>Flip Vertical, there are some variables.
In versions X5 and X6, the functions have been improved by making available the Objects menu.
In the latest version X7 command Image>Mirror and Image>Flip returned, but with new differences.
See my schedule here
Italian translation here
French translation here
Your versions here
For this tutorial, you will need:
Material here
SvB%20(496)%20Beauty.png
QB_WordArt_Enchanting.psp
Imagen27.png
decotuto 1.png; decotuto 2.png
Plugins
consult, if necessary, my filter section here
Filters Unlimited 2.0 ici
Horizonaus Mixed Bag ici
Harry's Button Tools ici
Nik software - Color Efex Pro ici
Simple ici

You can change Blend Modes and opacity of the layer, according to your colors.
Copy the Gradient in the Gradient Folder.
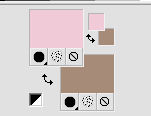
1. Set your foreground color to #f0cad7
and your background color to #a78b79.
2. Set your foreground color to Gradient, and select the gradient SuiGrad16, style Linear.
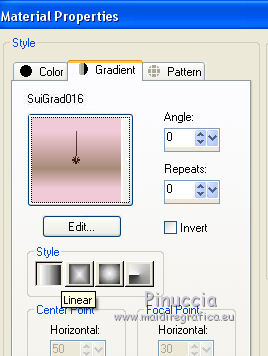
if you use other colors, the gradient will have the tone of your colors
3. Open a new transparent image 1000 x 700 pixels,
Flood Fill  with your Gradient. with your Gradient.
4. Selections>Select All.
Open the tube SvB(496)Beauty, erase the watermark and Edit>Copy.
Minimize the tube.
Go back to your work and go to Edit>Paste into Selection.
Selections>Select None.
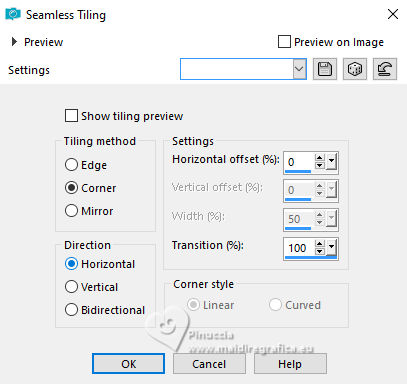
5. Effects>Image Effects>Seamless Tiling.
6. Effects>Plugins>Filters Unlimited 2.0 - Horizonaus Mixed Bag, default settings.

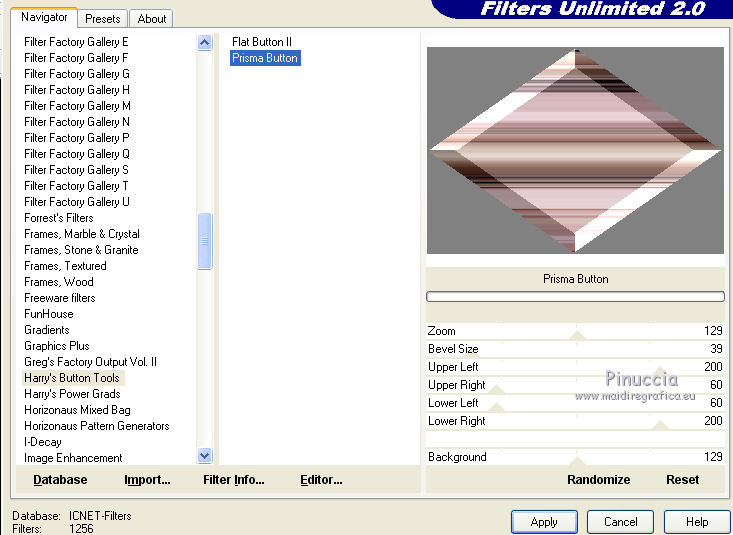
7. Effects>Plugins>Filters Unlimited 2.0 - Harry's Button Tools - Prisma Button, default settings.
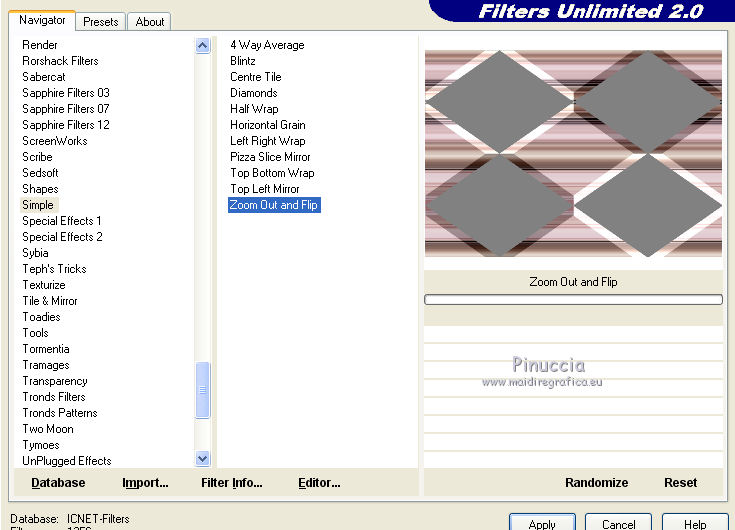
8. Effects>Plugins>Filters Unlimited 2.0 - Simple - Zoom out and flip.
9. Activate the Magic Wand tool 
and clic on the figure to select it.
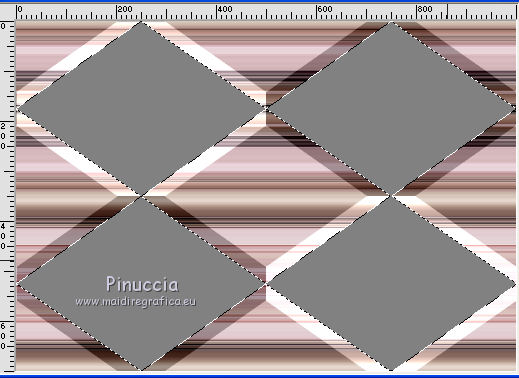
Flood Fill  the selection with your gradient. the selection with your gradient.
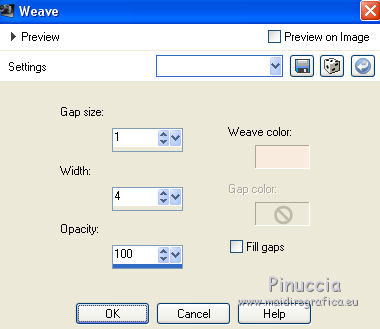
10. Effects>Texture Effects>Weave
Weave color #f9ebdf.
Result
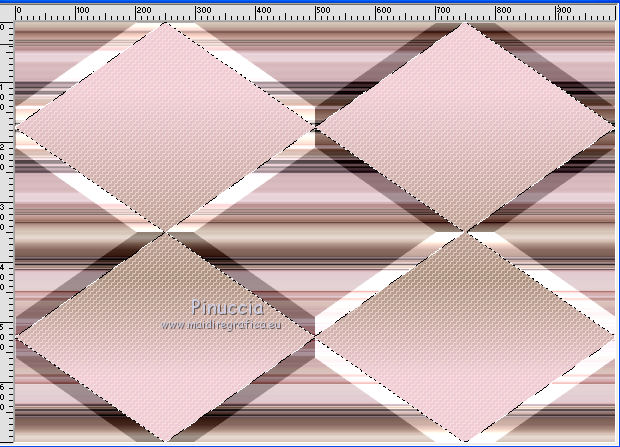
11. Selections>Modify>Select Selection Borders.
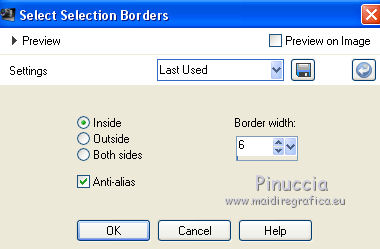
12. Effects>3D Effects>Inner Bevel.
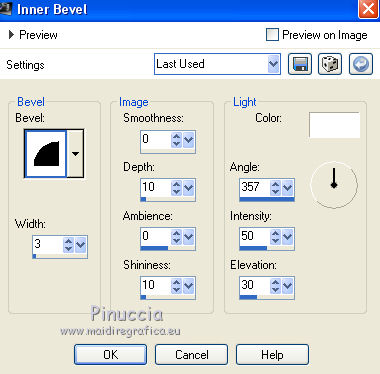
Selections>Select None.
13. Layers>Duplicate.
Effects>Geometric Effects>Circle.

14. Effects>3D Effects>Drop Shadow.
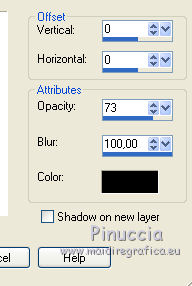
15. Image>Flip.
16. Activate the layer Raster 1.
Adjust>Blur>Gaussian Blur - radius 100.
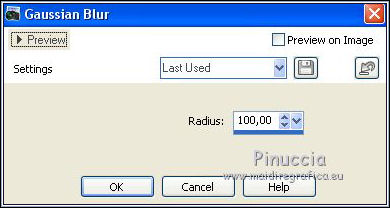
17. Effects>Texture Effects>Weave, same settings.

18. Layers>Merge>Merge visible.
19. Open the tube decotuto1 - Edit>Copy.
Go back to your work and go to Edit>Paste as new layer.
20.
Adjust>Brightness and Contrast>Fill Light/Clarity.
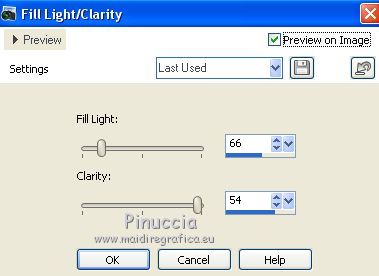
you don't find this effect before the version X14.
If you want, you can apply, according to your version of PSP:
Brightness and Contrast/Clarify (until Corel X2),
our Brightness and Contrast>Local Tone Mapping (Corel X3).
21. Open the tube decotuto2 - Edit>Copy.
Go back to your work and go to Edit>Paste as new layer.
22. Adjust>Brightness and Contrast>Fill Light/Clarity, same settings.
23. Open again the tube SvB(496)Beauty - Edit>Copy.
Go back to your work and go to Edit>Paste as new layer.
24. Effets>Effets d'image>Offset.
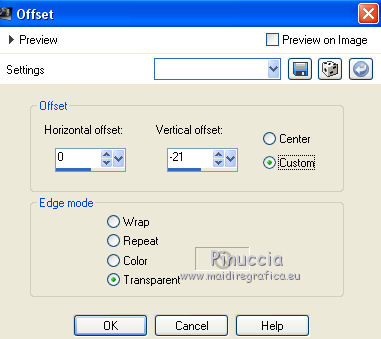
25. Effects>3D Effects>Drop Shadow, same settings.
26. Open the wordart - Edit>Copy.
Go back to your work and go to Edit>Paste as new layer.
Move  the text in the upper right. the text in the upper right.
27. Layers>Merge>Merge visible.
28. Effetti>Plugins>Nik Software - Color Efex Pro - Photo Sylizer-Varitone.
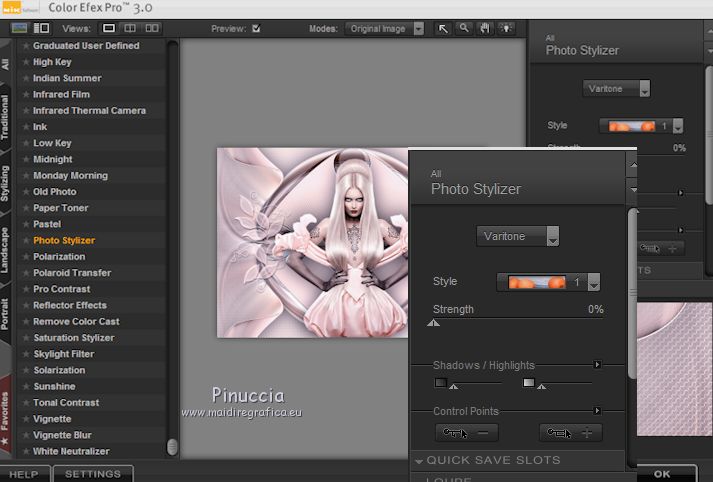
29. Sign your work and save as jpg.
The tube of this version is by Claudia Stirner.


If you have problems or doubt, or you find a not worked link, or only for tell me that you enjoyed this tutorial, write to me.
24 June 2016
|


