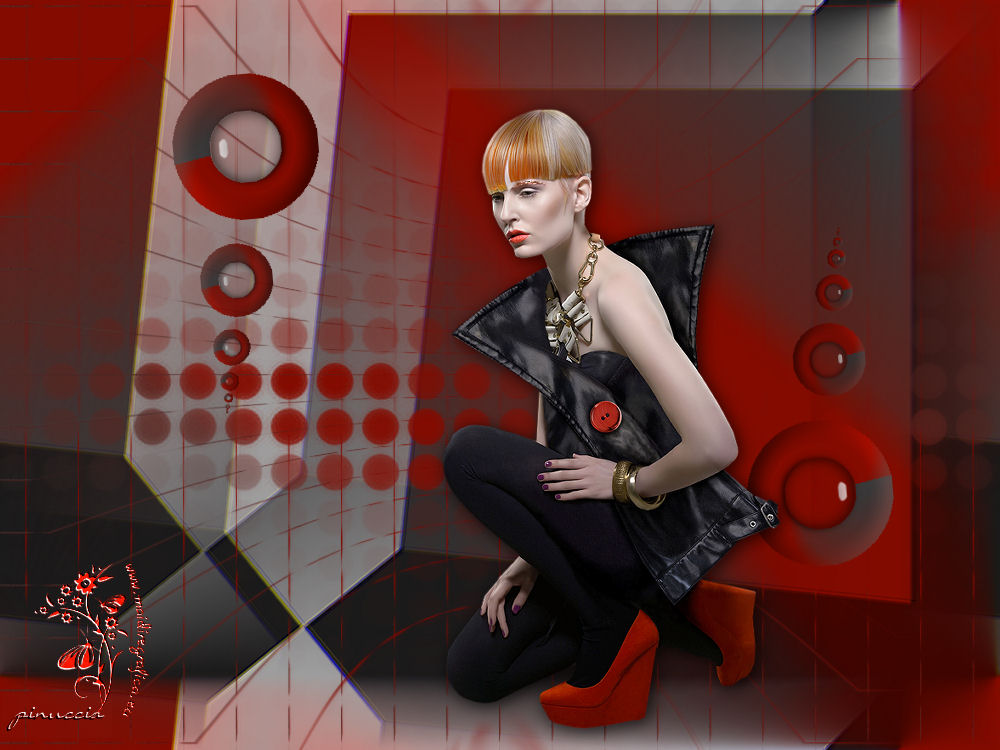
|
TOP GUISMO
english version


This tutorial was created with Corel18 and translated with CorelX3, but it can also be made using other versions of PSP.
Since version PSP X4, Image>Mirror was replaced with Image>Flip Horizontal,
and Image>Flip with Image>Flip Vertical, there are some variables.
In versions X5 and X6, the functions have been improved by making available the Objects menu.
In the latest version X7 command Image>Mirror and Image>Flip returned, but with new differences.
See my schedule here
Italian translation here
French translation here
Your versions here
For this tutorial, you will need:
Material here
For the tube thanks Guismo (CalGuisAdreanna11112013.pspimage)
For the masks thanks Nikita (1250181316_nikita_masques.jpg) and Annie (cre@nnie-46.jpg)
(here the sites of the tubemakers)
Plugins
consult, if necessary, my filter section here
Filters Unlimited 2.0 here
Mura's Meister - Copies here
Alien Skin Eye Candy 5 Impact - Glass here
It@lian Editors Effect - Bordo con luci here
VM Distortion - Circulator here
Filters It@lian Editors et VM Distortion can be used alone or imported into Filters Unlimited.
(How do, you see here)
If a plugin supplied appears with this icon  it must necessarily be imported into Unlimited it must necessarily be imported into Unlimited

You can change Blend Modes according to your colors.
Copy the preset in the Presets Folder.
Copy the Gradient in the Gradients Folder.
Copy the Mask in the Masks Folder.
1. Set your foreground color to #830b00,
Set your background color to #393737.
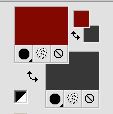
Set your foreground color to Gradient and select the Gradient Suigrad044, style Linear.

if you use other colors, also the gradient will change color
2. Open a new transparent image 1000 x 750 pixels
Flood Fill  with your Gradient. with your Gradient.
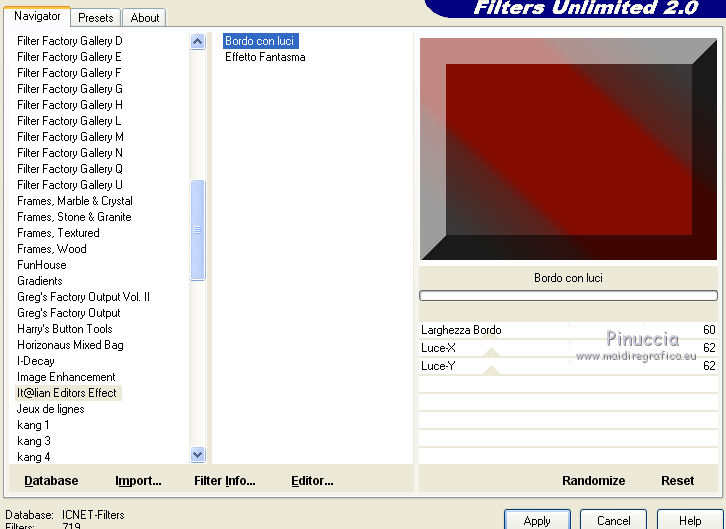
3. Effects>Plugins>Filters Unlimited 2.0 - It@lian Editors Effect - Bordo con Luci.
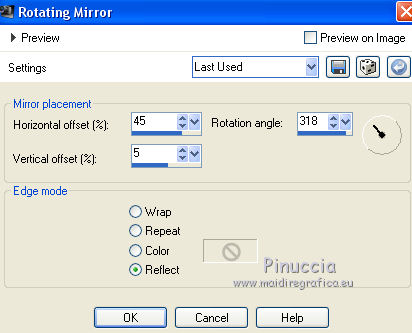
4. Effects>Reflection Effects>Rotating Mirror.
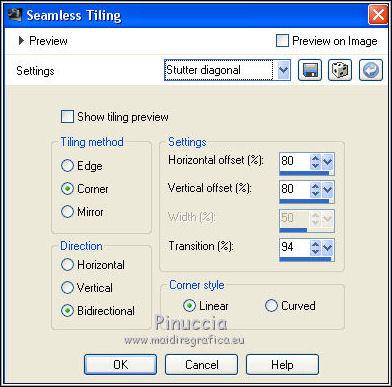
5. Effects>Image Effects>Seamless Tiling, Stutter diagonal.
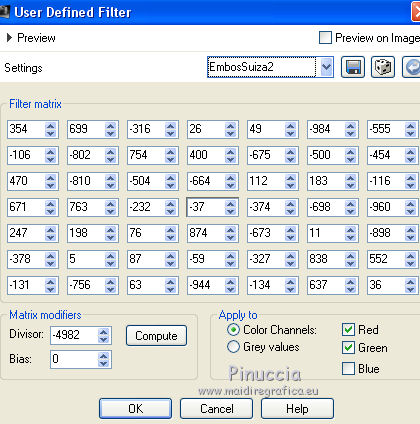
6. Effects>User Defined Filter - select the preset EmbosSuiza2 and ok.
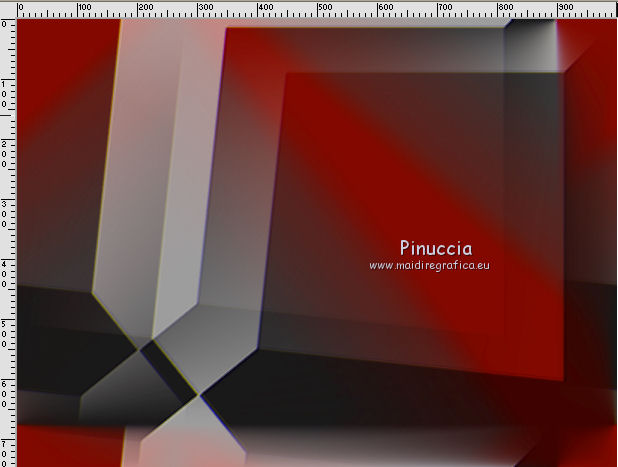
7. Result.
8. Layers>New Raster Layer.
Flood Fill  with your gradient. with your gradient.
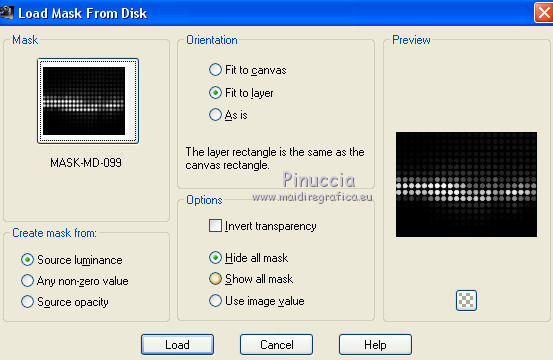
9. Layers>Load/Save Mask>Load Mask from Disk.
Look for and load the mask MASK-MD-099.jpg.
Layers>Merge>Merge Group.
10. Layers>Duplicate.
Effects>Geometric Effects>Perspective Horizontal.
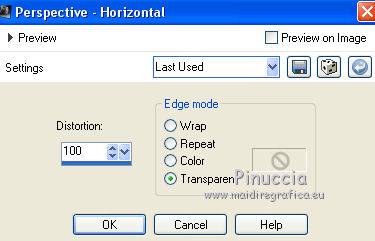
Image>Mirror.
Repeat Effects>Geometric Effects>Perspective Horizontal, same settings.
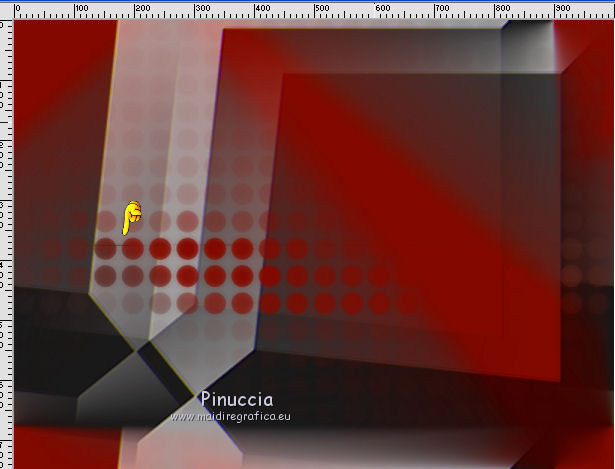
You'll get this
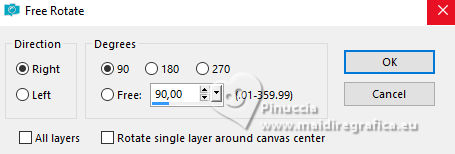
11. Image>Free Rotate - 90 degrees to right.
12. Effects>Plugins>Mura's Meister - Copies.
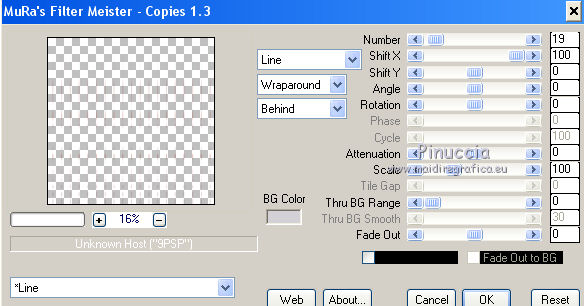
Layers>Duplicate.
Repeat Image>Free Rotate - 90 degrees to right.
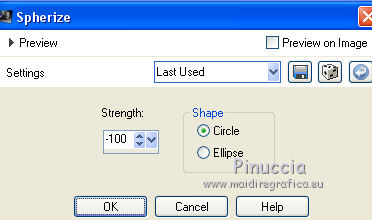
13. Effects>Geometric Effects>Spherize - 2 times with these settings.
Result
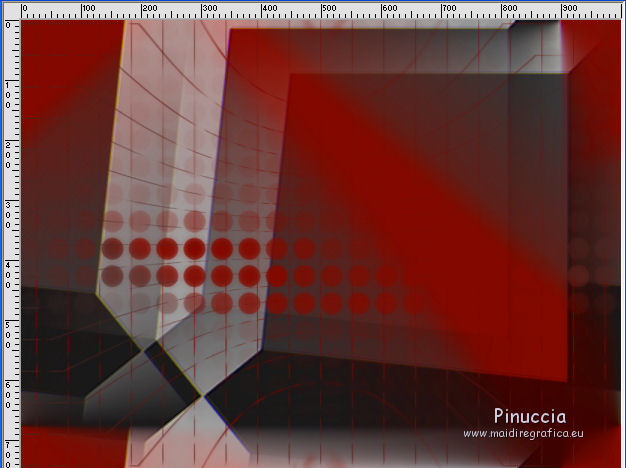
14. Layers>Merge>Merge visible.
15. Layers>New Raster Layer.
Flood Fill  with your gradient. with your gradient.
16. Effects>Plugins>Filters Unlimited 2.0>VM Distortion - Circulator.
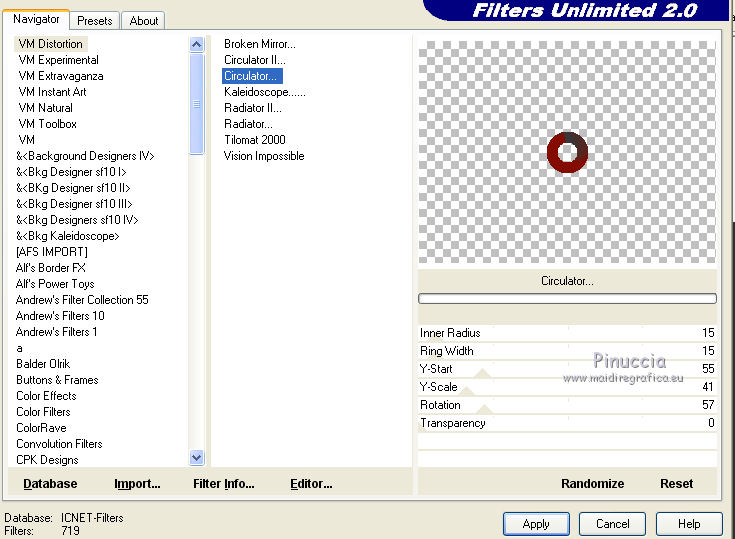
17. Activate the Magic Wand Tool 

click on the circle to select it.
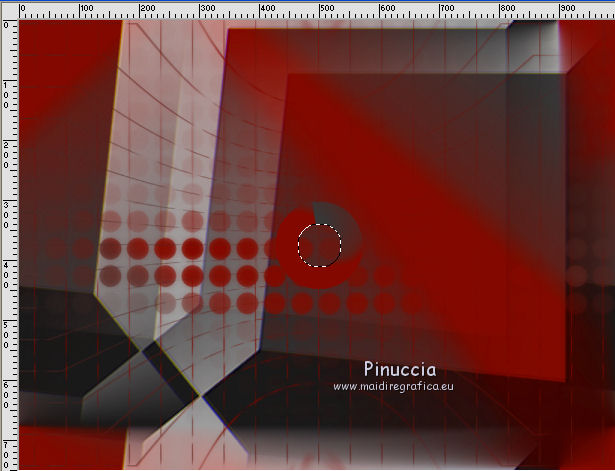
18. Effects>Plugins>Alien Skin Eye Candy 5 Impact - Glass.
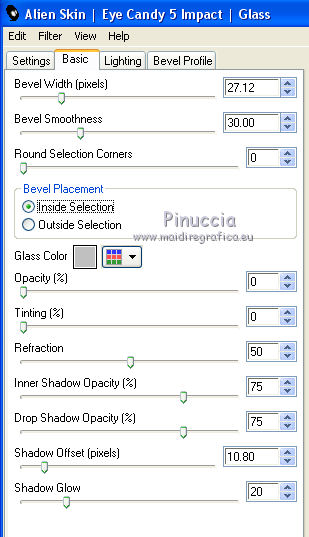
Selections>Select None.
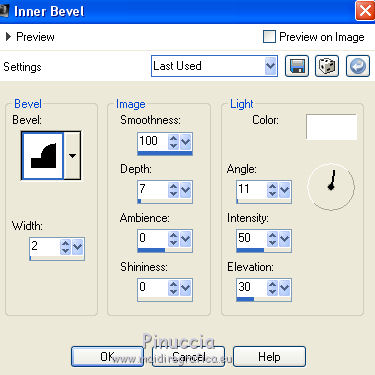
19. Effects>3D Effects>Inner Bevel.
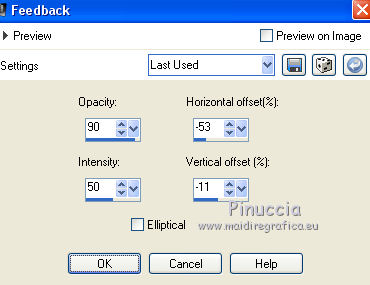
20. Effects>Reflection Effects>Feedback.
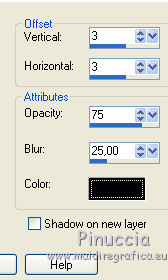
21. Effects>3D Effects>Drop Shadow.
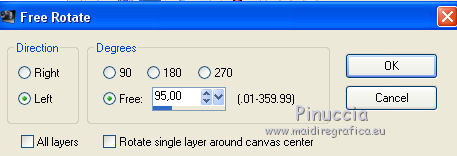
22. Image>Rotation libre - 95 degrees to left.
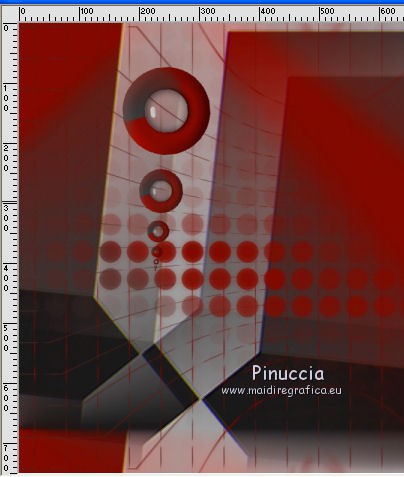
Move  the image to the left side. the image to the left side.
23. Layers>Duplicate.
Image>Flip.
Image>Mirror.
Place  rightly the image to the right side. rightly the image to the right side.
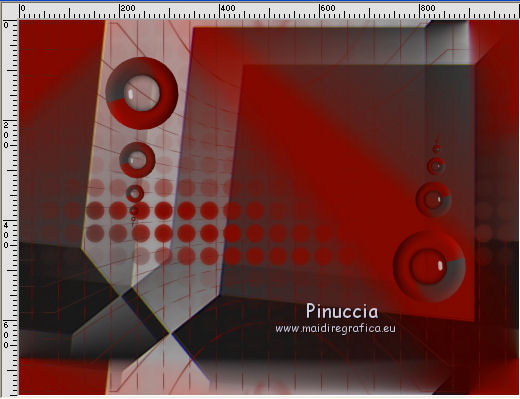
24. Open the tube CalGuisAdreanna11112013.pspimage and go to Edit>Copy.
Go back to your work and go to Edit>Paste as new layer.
Image>Resize, to 85%, resize all layers not checked.
Place  rightly the tube, see my example. rightly the tube, see my example.
25. Effects>3D Effects>Drop Shadow, same settings.

26. Layers>Merge>Merge All.
Sign your work and save as jpg.

If you have problems or doubt, or you find a not worked link, or only for tell me that you enjoyed this tutorial, write to me.
6 September 2017
|
