|
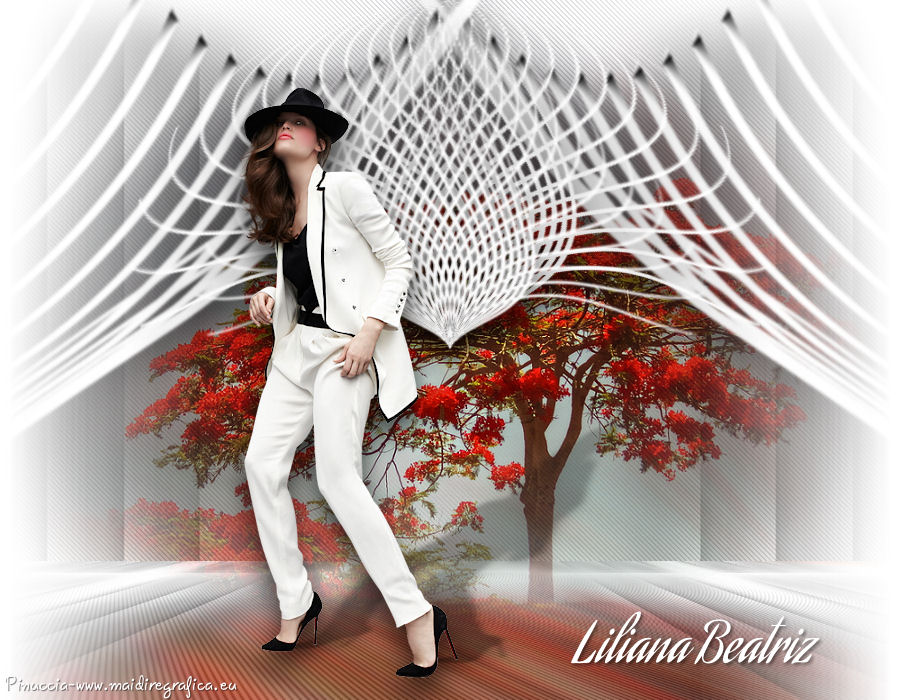
TOP LILIANA BEATRIZ
english version


This tutorial was created with PSPX7 but it can also be made using other versions of PSP.
Since version PSP X4, Image>Mirror was replaced with Image>Flip Horizontal,
and Image>Flip with Image>Flip Vertical, there are some variables.
In versions X5 and X6, the functions have been improved by making available the Objects menu.
In the latest version X7 command Image>Mirror and Image>Flip returned, but with new differences.
See my schedule here
Italian translation here
French translation here
Your versions here
For this tutorial, you will need:
Material here
The used tube (not included) is a Tocha's exclusive tube.
Plugins
consult, if necessary, my filter section here
Mura's Meister - Copies here
Mura's Meister - Perspective Tiling here
Filters Unlimited 2.0 here
Carolaine and Sensibility - CS-DLines here
Alien Skin Eye Candy 5 Impact - Perspective Shadow here

You can change Blend Modes and opacity of the layer, according to your colors.
Copy the Masks in the Masks Folder.
Copy the Gradient in the Gradients Folder.
1. Set your foreground color to #ffffff,
and your background color to #050505.
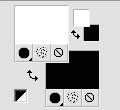
Set your foreground color to Gradient, and select the gradient SuiGrad019, style Linear.
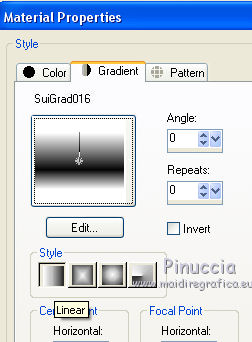
2. Open a new transparent image 900 x 700 pixels,
Flood Fill  with your Gradient. with your Gradient.
Selections>Select All.
Open the tube Crisspaisaje 29, Edit>Copy.
Go back to your work and go to Edit>Paste into Selection.
Selections>Select None.
Adjust>Blur>Radial Blur.
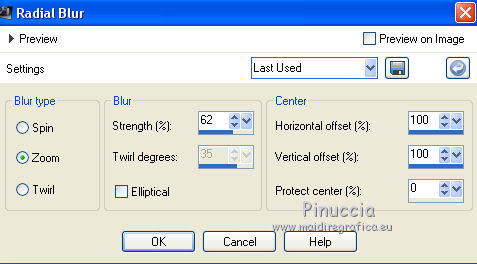
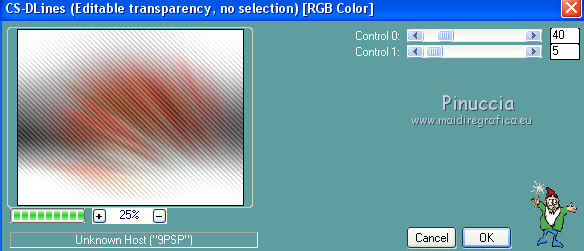
3. Effects>Plugins>Carolaine and Sensibility - CS-DLines.
Layers>Duplicate.
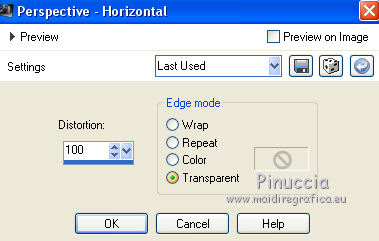
Effects>Geometric Effects>Perspective Horizontal.
Image>Mirror.
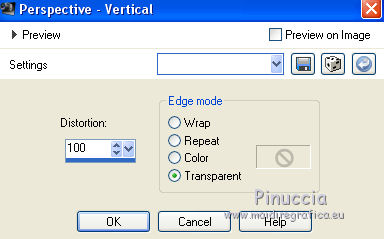
Effects>Geometric Effects>Perspective Vertical.
Image>Mirror.
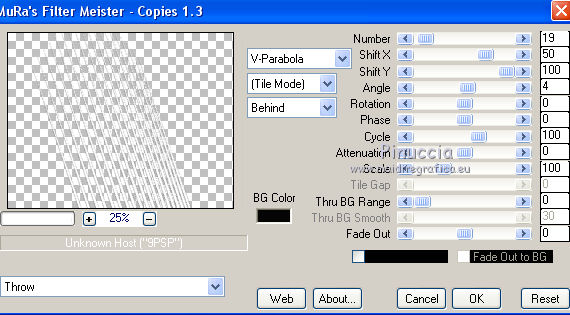
4. Effects>Plugins>Mura's Meister - Copies.
Layers>Duplicate.
Image>Mirror.
Layers>Merge>Merge down.
Effects>Distortion Effects>Pinch.
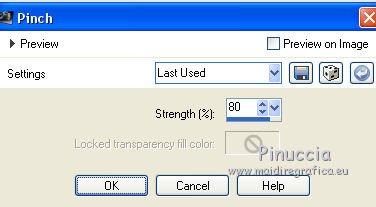
Effects>Geometric Effects>Circle.

Image>Flip.
Effects>Distortion Effects>Polar Coordinates.
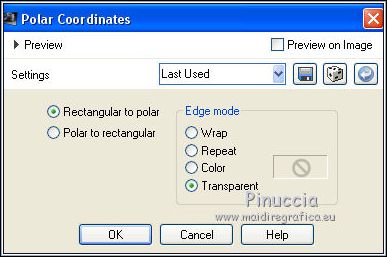
Image>Flip.
Effects>3D Effects>Drop Shadow.

Layers>Duplicate.
Adjust>Blur>Blur.
Effects>Distortion Effects>Pinch.

Layers>Merge>Merge down.
5. Layers>New Raster Layer.
Flood Fill  with your gradient. with your gradient.
Effects>Geometric Effects>Perspective Horizontale.

Image>Mirror.
Effects>Geometric Effects>Perspective Vertical.

Effects>Distortion Effects>Pinch.

6. Effects>Plugins>Mura's Meister - Copies.
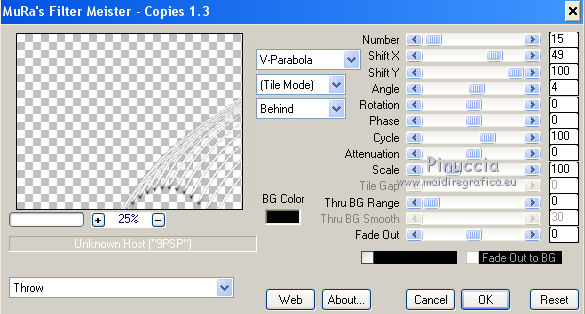
Image>Flip.
Effects>3D Effects>Drop Shadow.
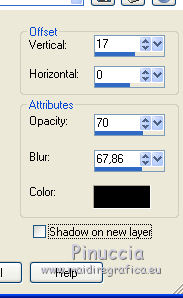
Layers>Duplicate.
Image>Mirror.
Layers>Merge>Merge down.
Adjust>Blur>Blur.
Layers>Merge>Merge down.
Activate the top layer.
Layers>Merge>Merge down.
7. Close the top layer and activate the bottom layer Raster 1.
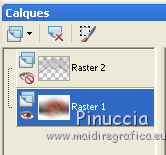
Layers>Duplicate.
Layers>Load/Save mask>Load mask from disk.
Look for and load the mask MaskGeoZen-105.
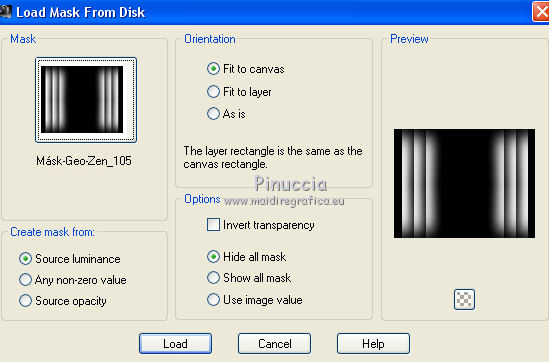
Layers>Merge>Merge Group.
8. Effects>3D Effects>Drop Shadow.

Layers>Merge>Merge down.
Layers>Duplicate.
9. Effects>Plugins>Mura's Meister - Perspective Tiling.
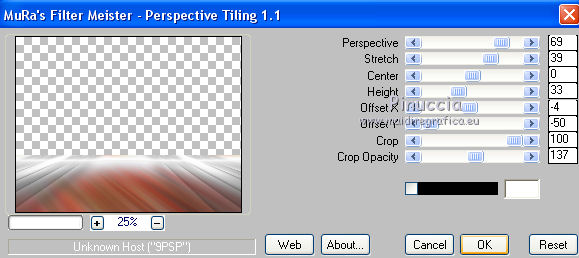
Optional: it is my variation.
K key to activate the Pick Tool 
with PSP 9 D key to activate Deformation Tool 
mode Scale  , ,
push the central node at the top, down to 560 pixels
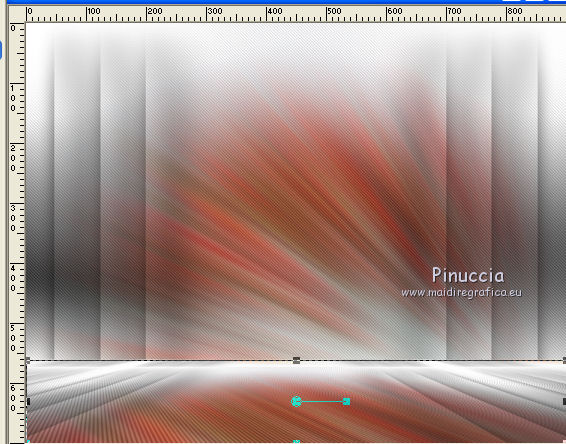
Layers>Merge>Merge down.
10. Open the tube Crisspaisaje 29 Exclusivo, Edit>Copy.
Go back to your work and go to Edit>Paste as new layer.
11. Open the layer closed.
Layers>Merge>Merge visible.
12. Layers>Load/Save mask>Load mask from disk.
Look for and load the mask FadeSuaveA.
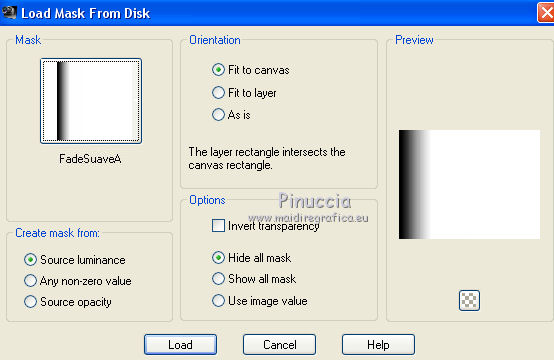
Layers>Merge>Merge Group.
13. Layers>Load/Save mask>Load mask from disk.
Look for and load the mask FadeSuaveB.
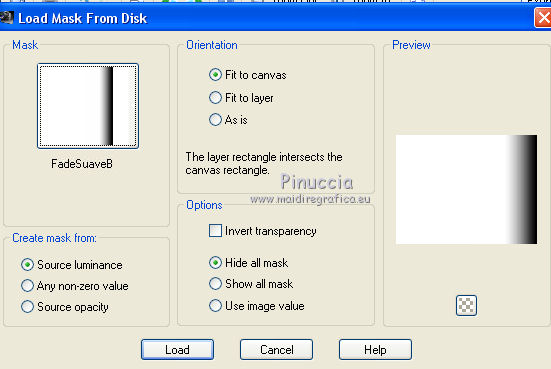
Layers>Merge>Merge Group.
14. Layers>New Raster Layer.
Set your foreground color to Color.
Flood Fill  the layer with your foreground color #ffffff. the layer with your foreground color #ffffff.
Layers>Arrange>Send to Bottom.
Layers>Merge>Merge All.
15. Open your tube (mine is Tocha_23940_Exclusivo), Edit>Copy.
Go back to your work and go to Edit>Paste as new layer.
Image>Resize, if it is necessary (for me 65%), resize all layers not checked.
Effects>3D Effects>Drop Shadow.
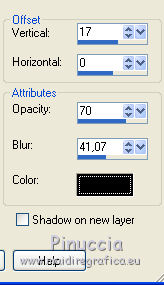
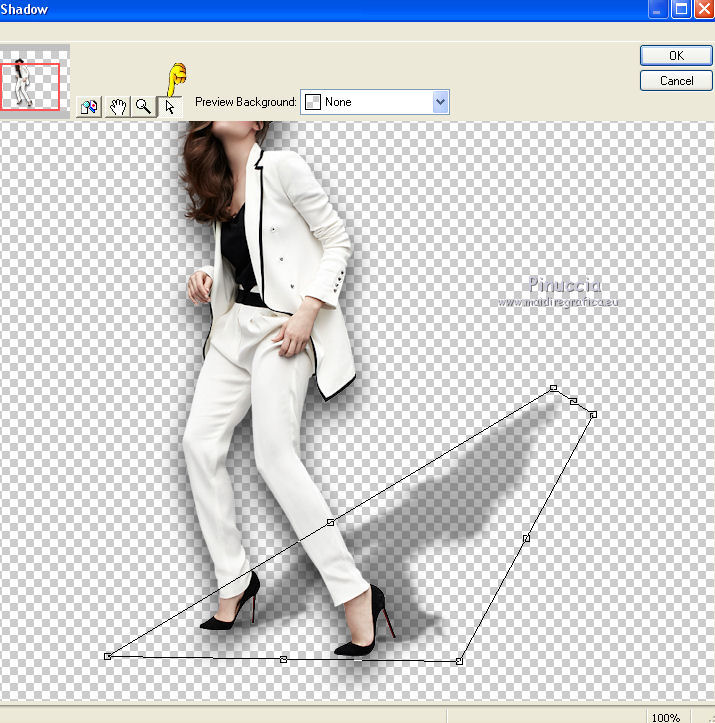
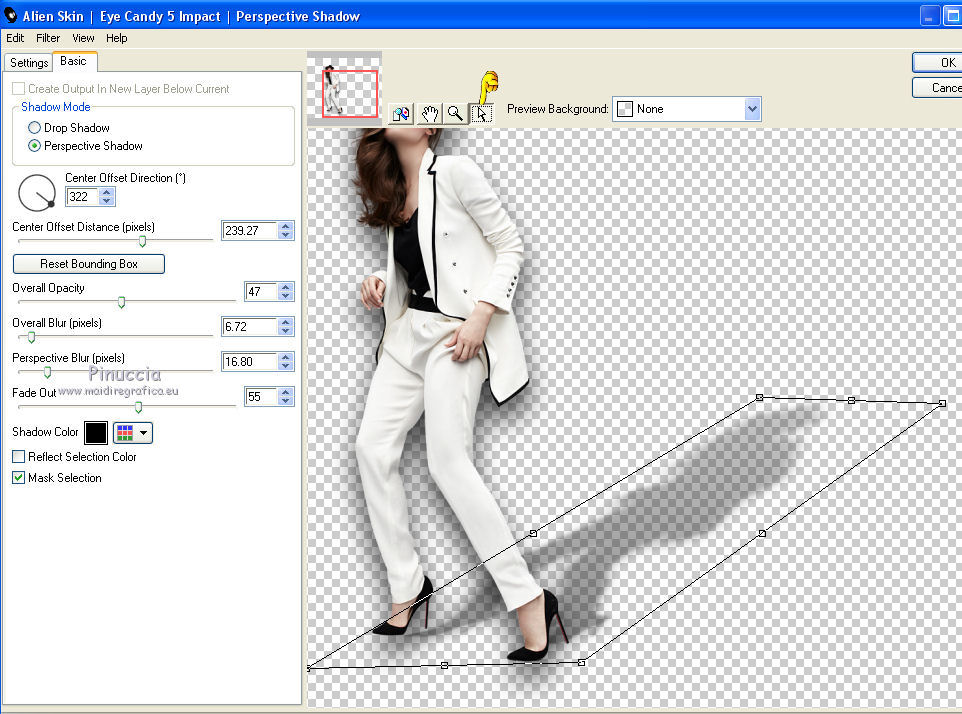
16. Effects>Plugins>Alien Skin Eye Candy 5 Impact - Perspective Shadow.
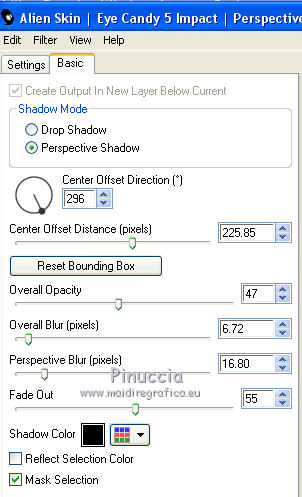
If your shadow is not compatible with your tube, clic on the white arrow,
and use the junctions to move the shadow and fit it, as shown in the screen.
Another example of shadow.
17. If you want, write your text (in the zip the font I used for my text).
18. Layers>Merge>Merge all and save as jpg.

If you have problems or doubt, or you find a not worked link, or only for tell me that you enjoyed this tutorial, write to me.
17 September 2015
|
