|
TOP MICHEL
english version
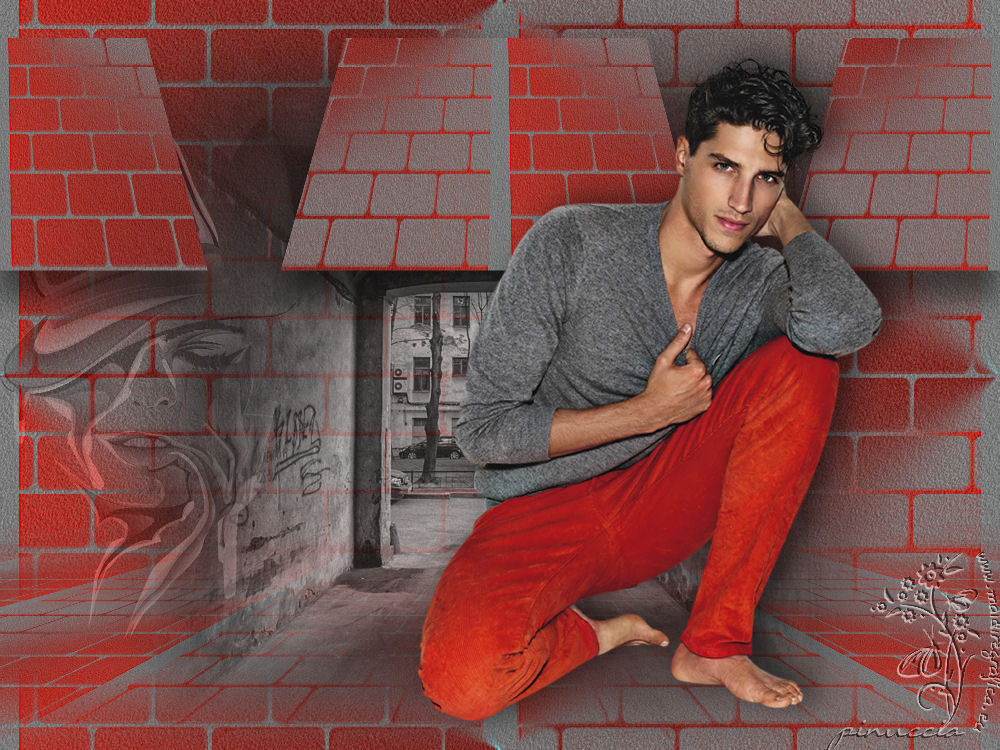

This tutorial was created with PSPX9 and translated with Corel X, Corel X2 and Corel X3, but it can also be made using other versions of PSP.
Since version PSP X4, Image>Mirror was replaced with Image>Flip Horizontal,
and Image>Flip with Image>Flip Vertical, there are some variables.
In versions X5 and X6, the functions have been improved by making available the Objects menu.
In the latest version X7 command Image>Mirror and Image>Flip returned, but with new differences.
See my schedule here
Italian translation here
French translation here
Your versions here
For this tutorial, you will need:
Material here
Tubes:
Grisi_Hombre_317.pspimage
AR33.pspimage
Liza tube 339.psp
(The links of the tubemakers here).
Plugins
consult, if necessary, my filter section here
Mura's Meister - Perspective Tiling here
Mura's Meister - Copies here
Nik Software - Color Efex Pro here

You can change Blend Modes and opacity of the layer, according to your colors.
Copy the preset Emboss 3 in the Presets Folder.
Copy the Gradient SuiGrad018 in the Gradients Folder.
Copy the Masks Ladrillo en mosaico and ketgradientedoble in the Masks Folder.
1. Set your foreground color to #949495
and your background color to #db372b.
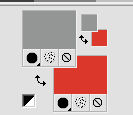
2. Set your foreground color to Gradient and select the Gradient Suigrad018, style Radial.
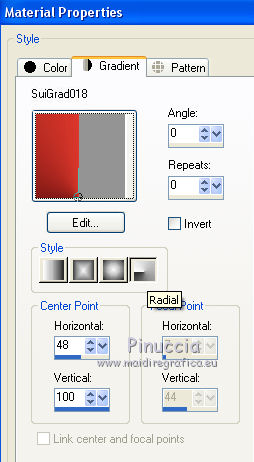
if you use other colors, also the gradient will change color
3. Open a new transparent image 1000 x 750 pixels,
Flood Fill  with your Gradient. with your Gradient.
4. Effects>Image Effects>Seamless Tiling, default settings.

5. Adjust>Add/Remove Noise>Add Noise.
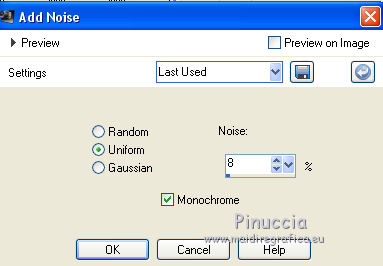
6. Effects>Filter User Defined - select the preset Emboss 3 and ok.

7. Layers>Dupliquer.
Image>Miroir.
8. Layers>Load/Save Mask>Load Mask from disk.
Look for and load the mask Ladrillo en mosaico.
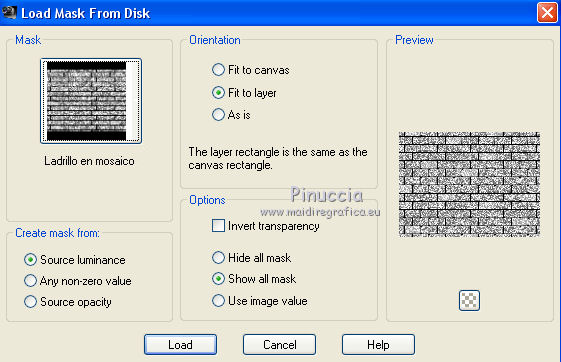
Layers>Merge>Merge Group.
Layers>Duplicate.
Layers>Merge>Merge Visible.
9. Layers>Duplicate.
10. Effects>Plugins>Mura's Meister - Perspective Tiling.
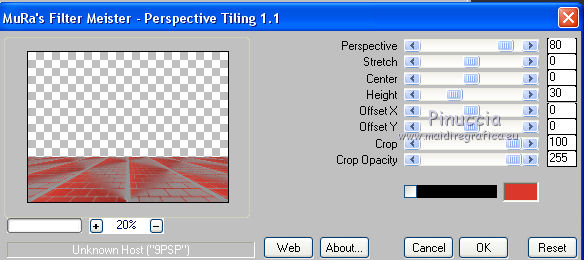
11. Effects>Reflection Effects>Rotating Mirror, default settings.

12. Layers>Load/Save Mask>Load Mask from disk.
Look for and load the mask Ketgradientedoble.
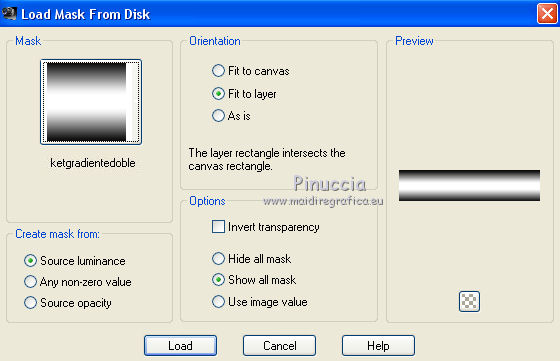
Layers>Merge>Merge group.
13. Open the tube AR33.pspimage
(in the material, there are two copies of the tube: a colored and a black and white copy.
For the tutorial I used the black and white copy)
Edit>Copy.
Go back to your work and go to Edit>Paste as new layer.
Image>Resize, to 85%, resize all layers not checked.
Change the opacity of this layer to 7%.
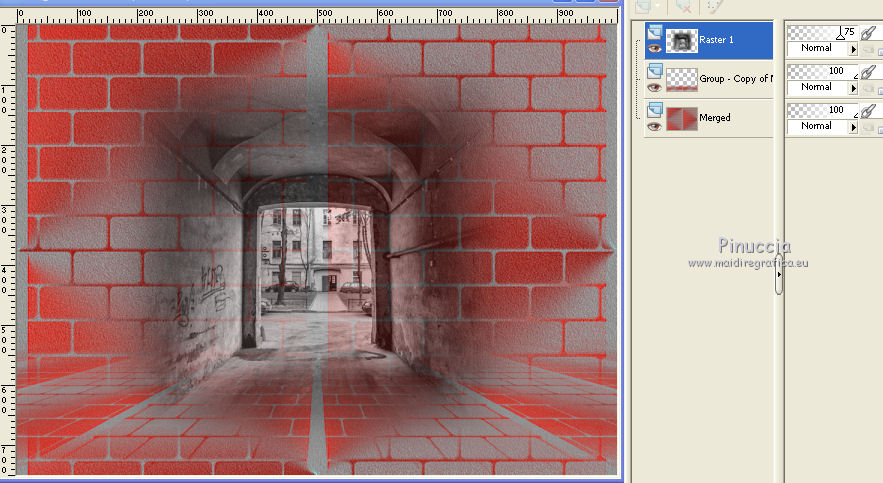
14. Open the tube Liza tube 339.psp - Edit>Copy.
Go back to your work and go to Edit>Paste as new layer.
Image>Resize, to 50%, resize all layers not checked.
Objects>Align>Left
if you are using a previous version that have not available the menu Objects,
use the Move Tool  . .
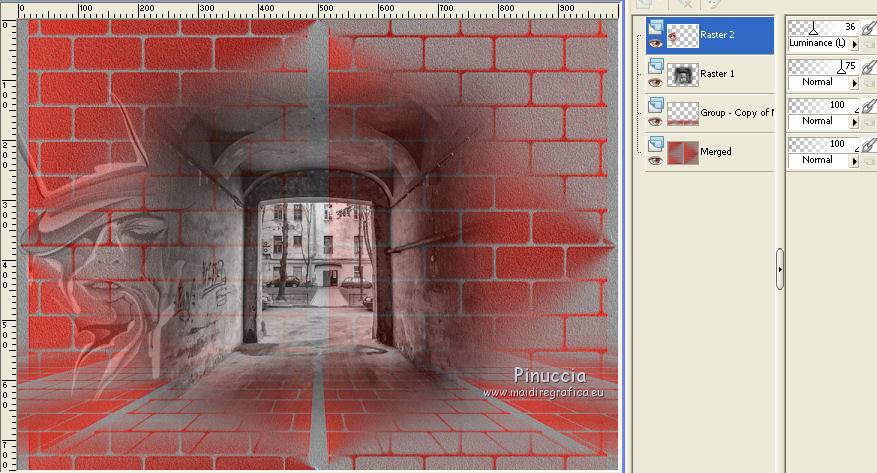
Change the Blend Mode of this layer to Luminance (Legacy) et reduce the opacity to 36%.

15. Activate the bottom layer, Merged.
Selection Tool 
(no matter the type of selection, because with the custom selection your always get a rectangle)
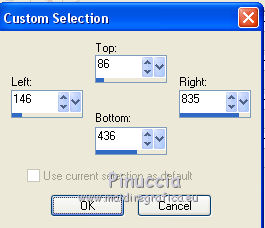
clic on the Custom Selection 
and set the following settings.

Selections>Promote Selection to Layer.
Selections>Select None.
16. Layers>Arrange>Bring to Top.
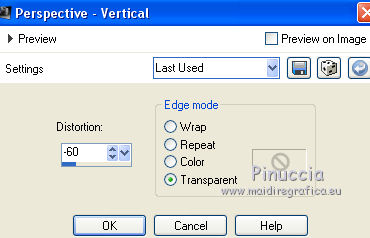
17. Effects>Geometric Effects>Perspective vertical

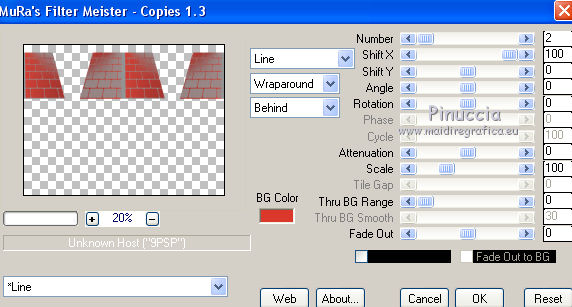
18. Effects>Plugins>Mura's Meister - Copies.

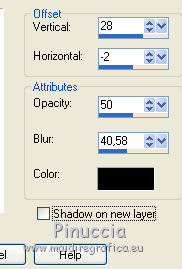
19. Effects>3D Effects>Drop Shadow.

20. Layers>Merge>Merge visible.
21. Open the tube Grisi_Hombre_317.pspimage - Edit>Copy.
Go back to your work and go to Edit>Paste as new layer.
Image>Resize, to 85%, resize all layers not checked.
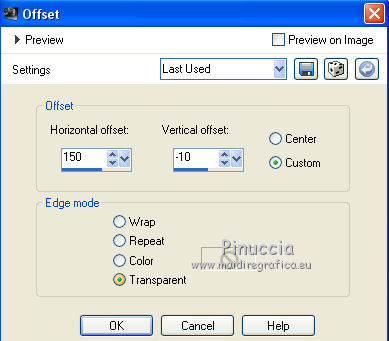
22. Effects>Image Effects>Offset.

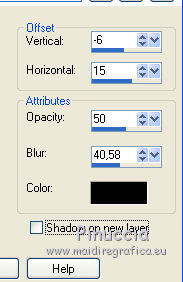
23. Effects>3D Effects>Drop Shadow.

24. Layers>Merge>Merge All.
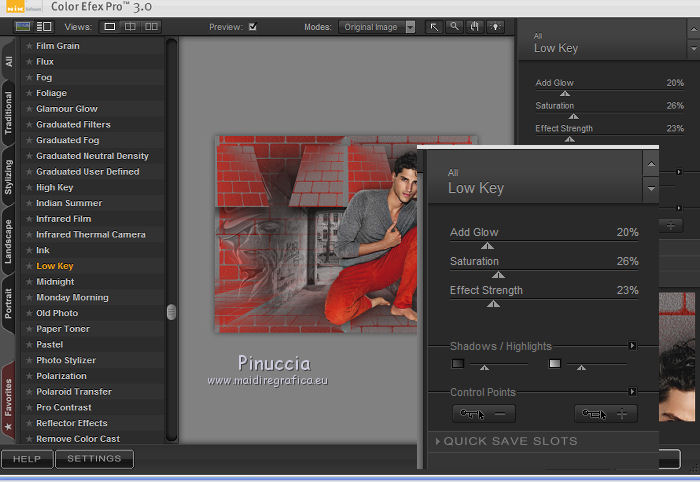
25. Effects>Plugins>Nik Software - Color Efex Pro - Low Key

26. Sign your work and save as jpg.
The tube of this version is by Mina


If you have problems or doubt, or you find a not worked link, or only for tell me that you enjoyed this tutorial, write to me.
26 Avril 2017
|


 with your Gradient.


 .
.