|
TOP MINEKO
english version


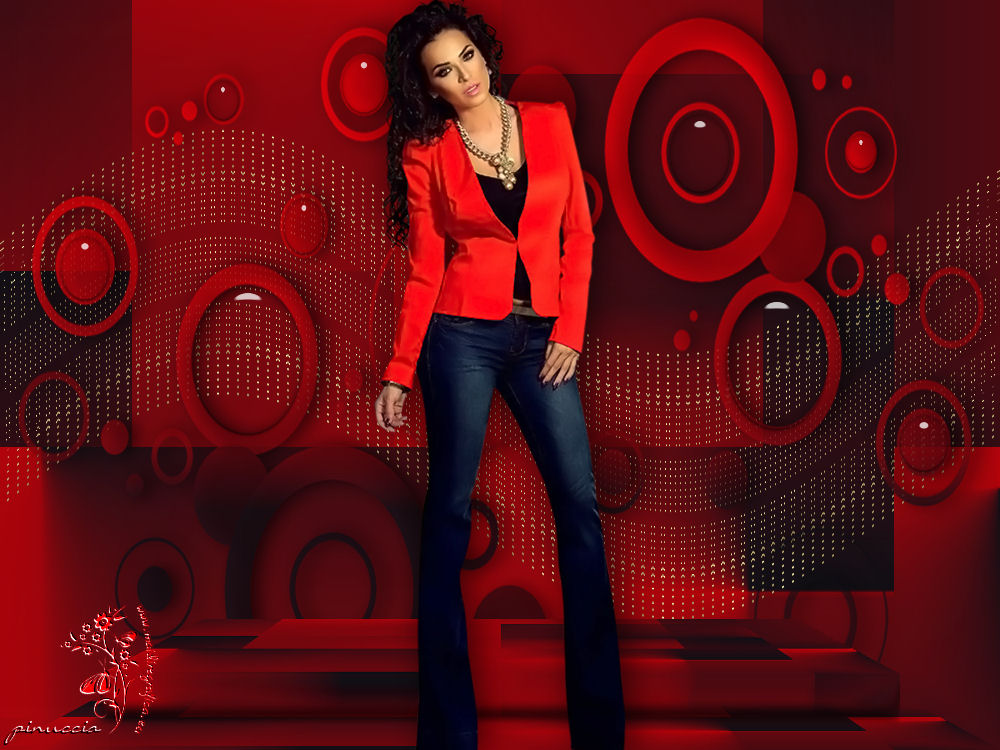
This tutorial was created with PSPX9 and translated with Corel X3, but it can also be made using other versions of PSP.
Since version PSP X4, Image>Mirror was replaced with Image>Flip Horizontal,
and Image>Flip with Image>Flip Vertical, there are some variables.
In versions X5 and X6, the functions have been improved by making available the Objects menu.
In the latest version X7 command Image>Mirror and Image>Flip returned, but with new differences.
See my schedule here
Italian translation here
French translation here
Your versions here
For this tutorial, you will need:
Material here
Tubes:
RoseArt Bb37IzknBfufqia3zB8i_UPKW_0.png
cas_Mask_0313_01.jpg
The tube used for my version is by Colybrix.
Plugins
consult, if necessary, my filter section here
Filters Unlimited 2.0 here
Toadies - Plain Mosaic Blur here
Freeware filters - Flipper here
Alien Skin Eye Candy 5 Impact - Glass here
Mura's Meister - Copies here

You can change Blend Modes and opacity of the layer, according to your colors.
Copy the Gradient in the Gradients Folder.
Copy the Selection in the Selections Folder.
Copy the Mask in the Masks Folder.
1. Set your foreground color to #110f15
and your background color to #d80009.
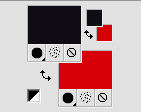
Set your foreground color to Gradient and select the Gradient Suigrad044, style Linear.
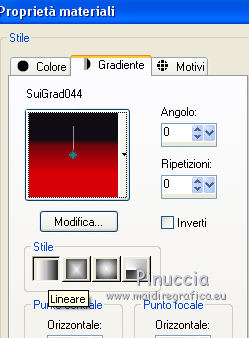
if you use other colors, also the gradient will change color
2. Open a new transparent image 1000 x 750 pixels.
Flood Fill  the transparent image with your Gradient. the transparent image with your Gradient.
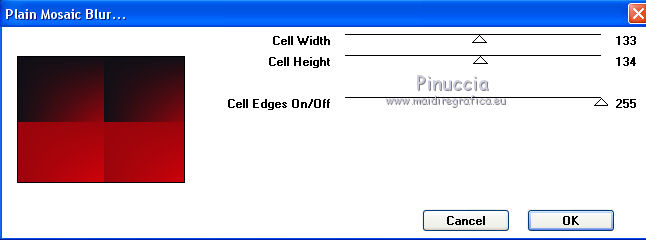
3. Effects>Plugins>Toadies - Plain Mosaic Blur
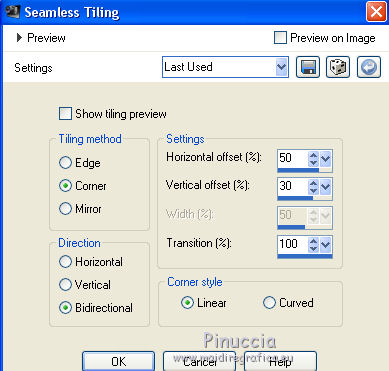
4. Effects>Image Effects>Seamless Tiling.
5. Effects>Plugins>Freeware Filters - Flipper
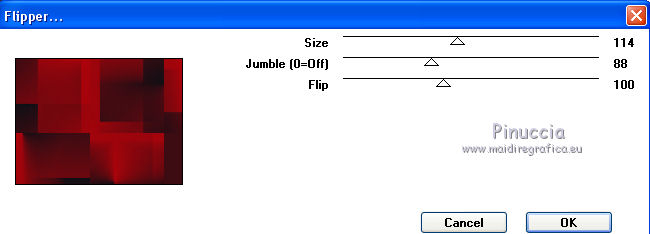
if you don't see the Effect in Filter's liste, you may have previously added in the File Location VM Distortion which has an effect with the same name.
And this doesn't let you see Flipper in the list.
You'll need to remove VM Distortion from File location
6. Open Deco 1 - Edit>Copy.
Go back to your work and go to Edit>Paste as new layer.
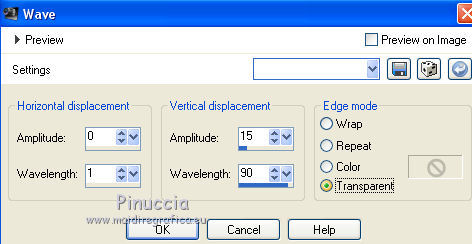
7. Effects>Distortion Effects>Wave.
8. Layers>Merge>Merge down.
9. Layers>New Raster Layer.
Flood Fill  the layer with your Gradient. the layer with your Gradient.
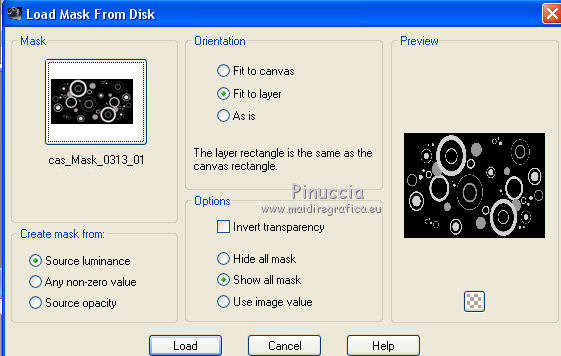
10. Layers>Load/Save Mask>Load Mask from Disk.
Look for and load the mask cas_Mask_0313_01.
Layers>Merge>Merge Group.
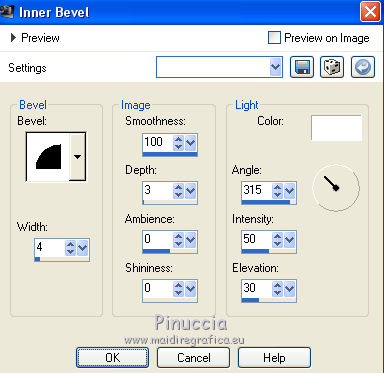
11. Effect>3D Effects>Inner Bevel.
12. Image>Flip.
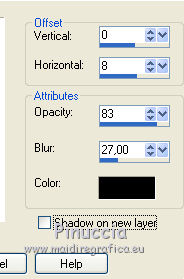
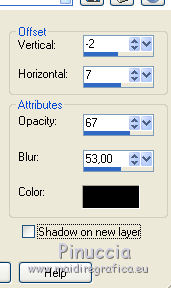
13. Effects>3D Effects>Drop Shadow.
14. Layers>New Raster Layer.
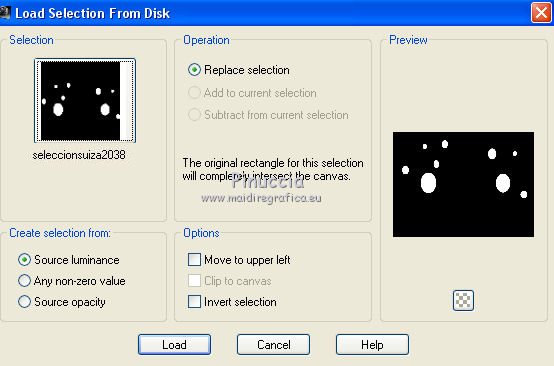
Selections>Load/Save Selection>Load Selection from disk.
Look for and load the selection seleccionsuiza2038.PspSelection.
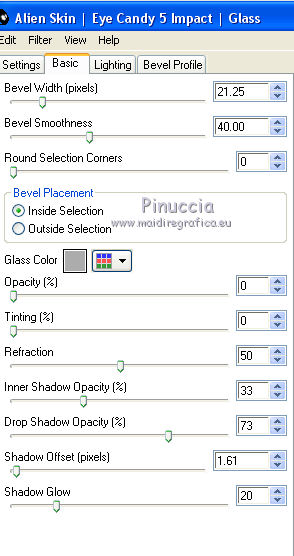
15. Effects>Plugins>Alien Skin Eye Candy 5 Impact - Glass.
Selections>Select None.
16. Activate the layer Raster 1.
Layers>Duplicate.
Layers>Arrange>Bring to Top.
17. K key to activate the Pick tool 
mode Scale 
push the central top node down, until 680 pixels.
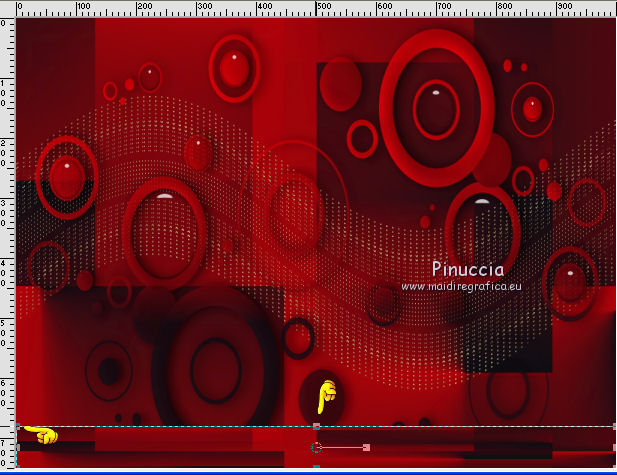
mode Perspective 
push the top left node to the right, until 130 pixels
(the opposite node will move symmetrically to the left)
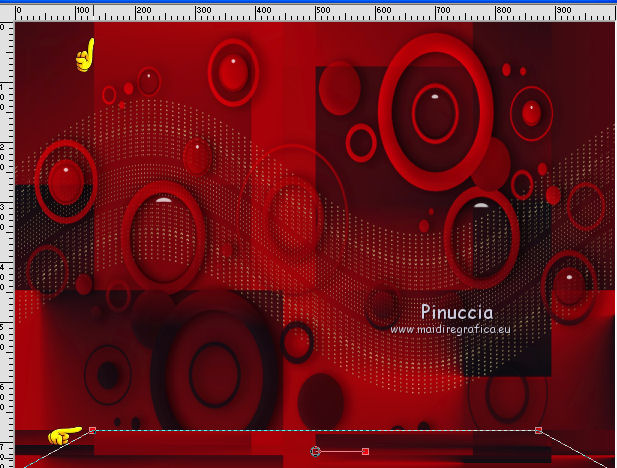
18. Layers>Duplicate.
Image>Resize, to 80%, resize all layers not checked.
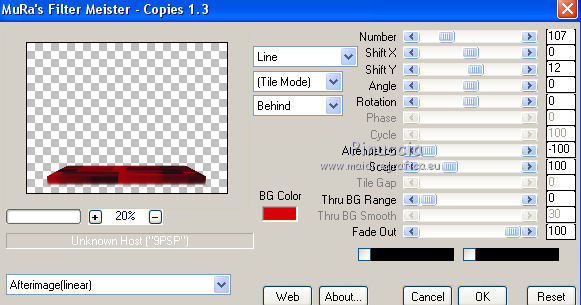
19. Effects>Plugins>Mura's Meister - Copies.
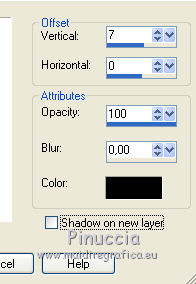
20. Effects>3D Effects>Drop Shadow.
21. Open the tube Bb37IzknBfufqia3zB8i_UPKW_0.png - Edit>Copy.
Go back to your work and go to Edit>Paste as new layer.
Image>Resize, 65%, resize all layers not checked.
22. Effects>3D Effects>Drop Shadow.
23. Layers>Merge>Merge All.
24. Sign your work and save as jpg.

If you have problems or doubt, or you find a not worked link, or only for tell me that you enjoyed this tutorial, write to me.
13 September 2017
|
