|
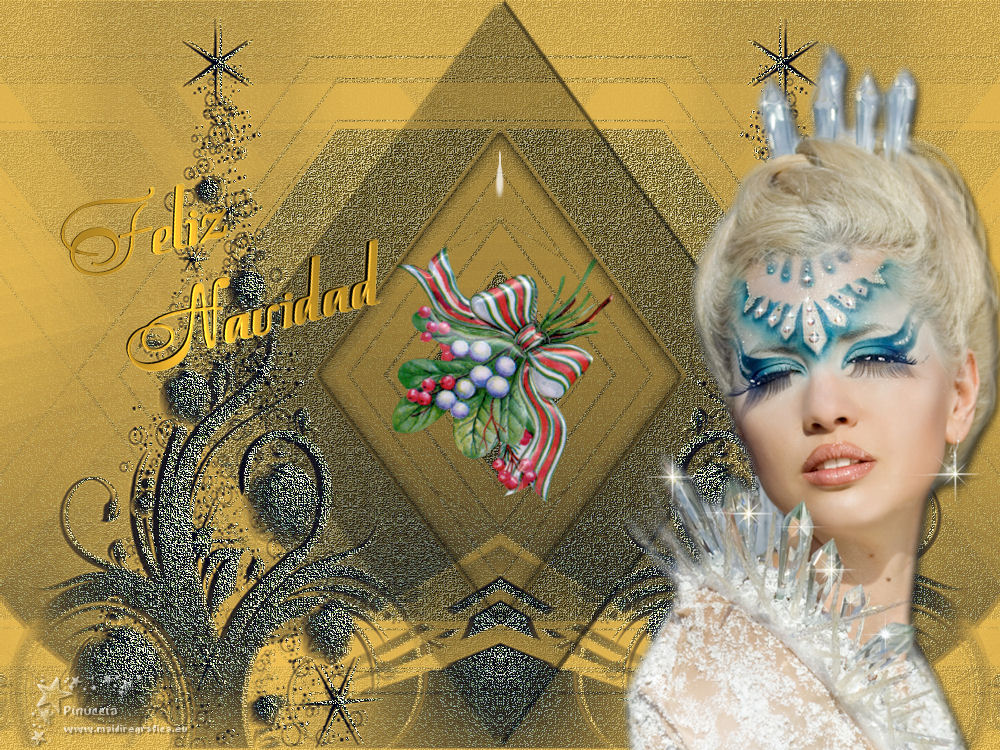
FELIZ NAVIDAD
 english version english version


This tutorial was created with PSPX9 and translated with Corel X7, but it can also be made using other versions of PSP.
Since version PSP X4, Image>Mirror was replaced with Image>Flip Horizontal,
and Image>Flip with Image>Flip Vertical, there are some variables.
In versions X5 and X6, the functions have been improved by making available the Objects menu.
In the latest version X7 command Image>Mirror and Image>Flip returned, but with new differences.
See my schedule here
 Italian translation here Italian translation here
 French translation here French translation here
Your versions here
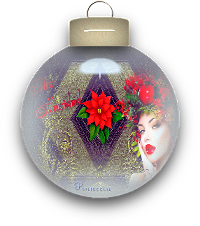
Una pallina-souvenir per il vostro Albero di Natale
Une boule-souvenir pour votre Arbre de Noël
For this tutorial, you will need:
Material here
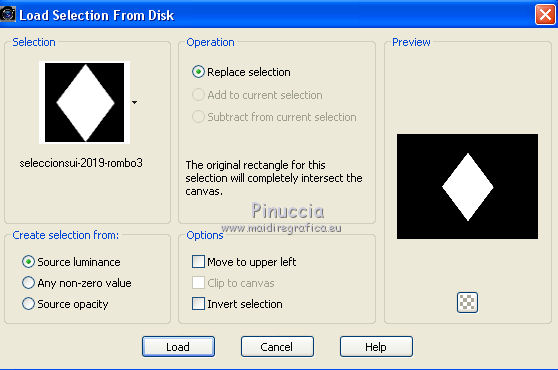
SuizaBella_Ref_AG-00945.pspimage
cas_MaskChristmas_0415_01.jpg
@nn_141012_mask_190_tdstudio
florpointsettia.png
(The links of the tubemakers sites here).
Plugins
consult, if necessary, my filter section here
Alien Skin Eye Candy 5 Impact - Perspective Shadow, Glass here
You can change Blend Modes and opacity of the layer, according to your colors.
Copy the selections in the Selections Folder.
Copy the masks in the Masks Folder.
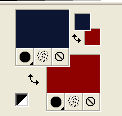
1. Set your foreground color to #0d1732,
and your background color to #8f0000.
2. Open the texture FelizNavidad (1000 x 750 pixels).
This image will be the basis of your work.
3. Layers>Promote Selection to Layer.
4. Layers>New Raster Layer.
Flood Fill  with your foreground color #0d1732. with your foreground color #0d1732.
5. Layers>Load/Save Mask>Load Mask from Disk.
Look for and load the mask @nn_141012_mask_190_tdstudio
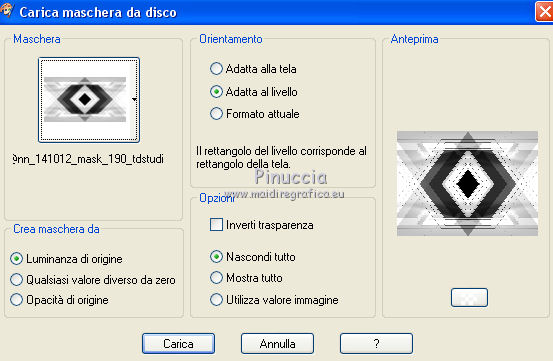
Layers>Merge>Merge group.
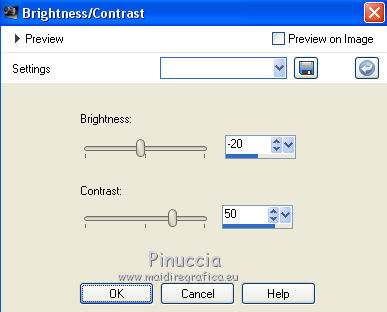
6. Adjust>Brightness and Contrast>Brightness and Contrast.
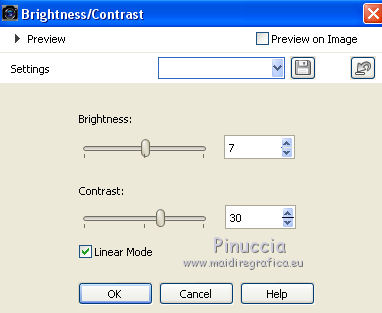
in the previous versions:
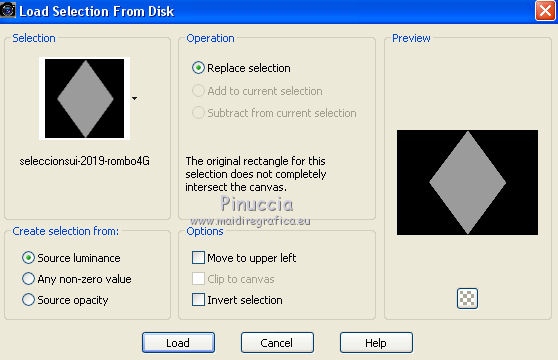
7. Layers>New Raster Layer.
Selections>Load/Save Selection>Load Selection from Disk.
Look for and load the selection seleccionsui-2019-rombo4G.PspSelection
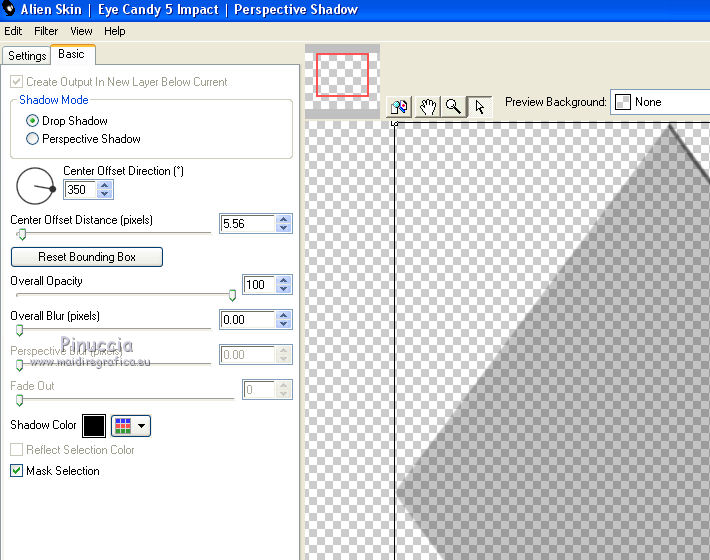
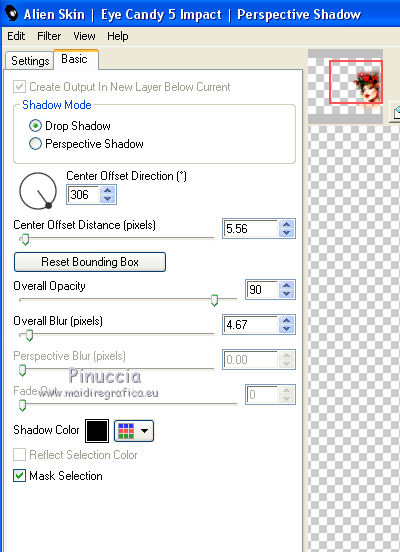
8. Effects>Plugins>Alien Skin Eye Candy 5 Impact - Perspective Shadow
Shadow color: #000000
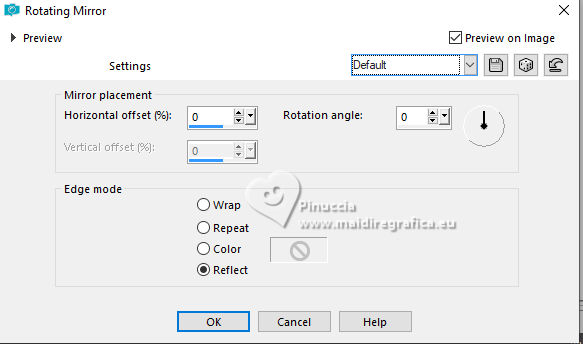
9. Effects>Reflection Effects>Rotating Mirror, default settings.
Selections>Select None.
10. Activate the bottom layer, Raster 1.
Layers>Duplicate.
Layers>Arrange>Bring to Top.
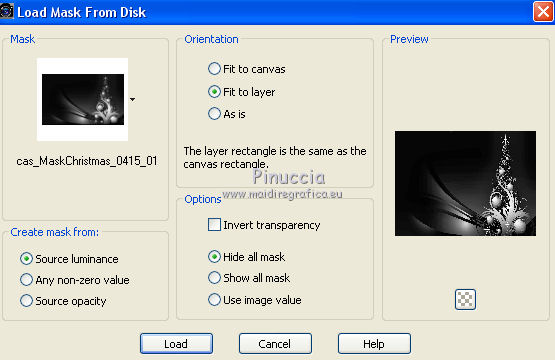
11. Layers>Load/Save Mask>Load Mask from Disk.
Look for and load the mask cas_MaskChristmas_0415_01.jpg
Layers>Merge>Merge Group.
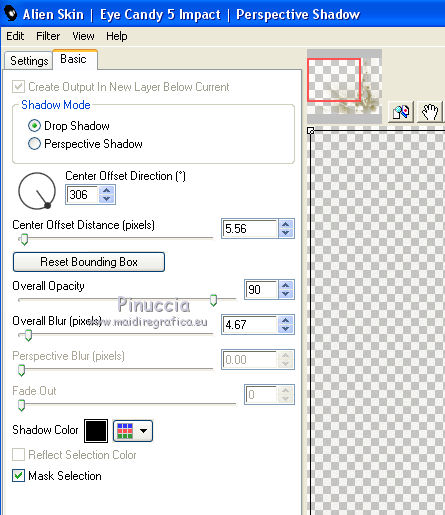
12. Effects>Plugins>Alien Skin Eye Candy 5 Impact - Perspective Shadow.
Shadow color: #000000
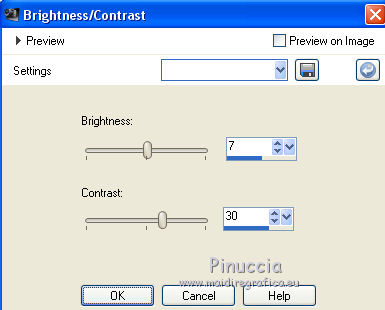
13. Adjust>Brightness and Contrast>Brightness and Contrast.

in the previous versions:
14. Effects>Reflection Effects>Rotating Mirror, default settings.
15. Open the tube florpointsettia.png and go to Edit>Copy.
Go back to your work and go to Edit>Paste as new layer.
16. Layers>New Raster Layer.
Selections>Load/Save Selection>Load Selection from Disk.
Look for and load the selection seleccionsui-2019-rombo3.PspSelection
17. Effetti>Plugins>Alien Skin Eye Candy 5 Impact - Glass.
Glass Color: #000000
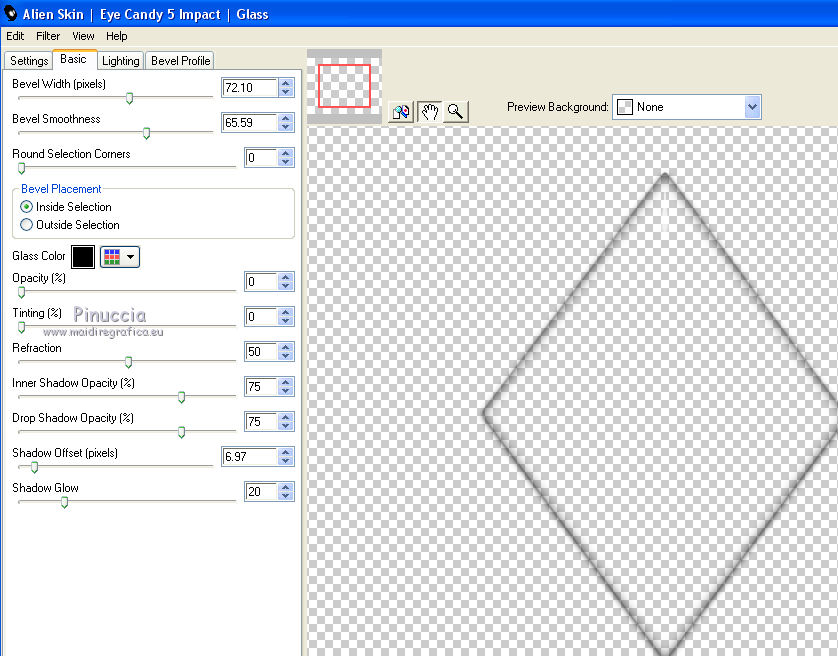
Selections>Select None.
18. Layers>Merge>Merge visible.
19. Open the tube SuizaBella_Ref_AG-00493.pspimage and go to Edit>Copy.
Go back to your work and go to Edit>Paste as new layer.
Image>Resize, to 90%, resize all layers not checked.
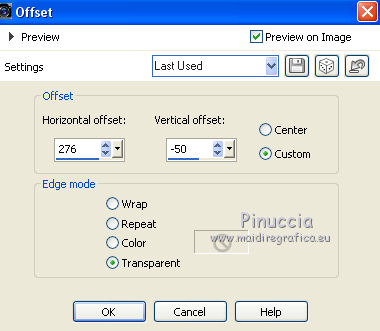
20. Effects>Image Effects>Offset.
21. Effects>Plugins>Alien Skin Eye Candy 5 Impact - Perspective Shadow.
Shadow Color: #000000
22. Open the tube Word ArtSui/Feliz Navidad and go to Edit>Copy.
Go back to your work and go to Edit>Paste as new layer.
Move  the texte at the upper left, see my example. the texte at the upper left, see my example.
23. Sign your work on a new layer.
Optional: add the author watermark and the translator watermark.
24. Layers>Merge>Merge All and save as jpg.
Version with tube by Gabry

If you have problems or doubt, or you find a not worked link, or only for tell me that you enjoyed this tutorial, write to me.
6 November 2019
|