|
TUTORIAL 2019-13
 english version english version


This tutorial was created with PSP2019 and translated with Corel X7, but it can also be made using other versions of PSP.
Since version PSP X4, Image>Mirror was replaced with Image>Flip Horizontal,
and Image>Flip with Image>Flip Vertical, there are some variables.
In versions X5 and X6, the functions have been improved by making available the Objects menu.
In the latest version X7 command Image>Mirror and Image>Flip returned, but with new differences.
See my schedule here
Italian translation here
French translation here
Your versions here
For this tutorial, you will need:
Material here
SuizaBella_Ref_AG-00216
seleccionsuiza-2019-09-11-10
Decosuizatuto2019-13.png
1228-road misted 1-LB TUBES
(The links of the tubemakers sites here).
Plugins
consult, if necessary, my filter section here
Filters Unlimited 2.0 here
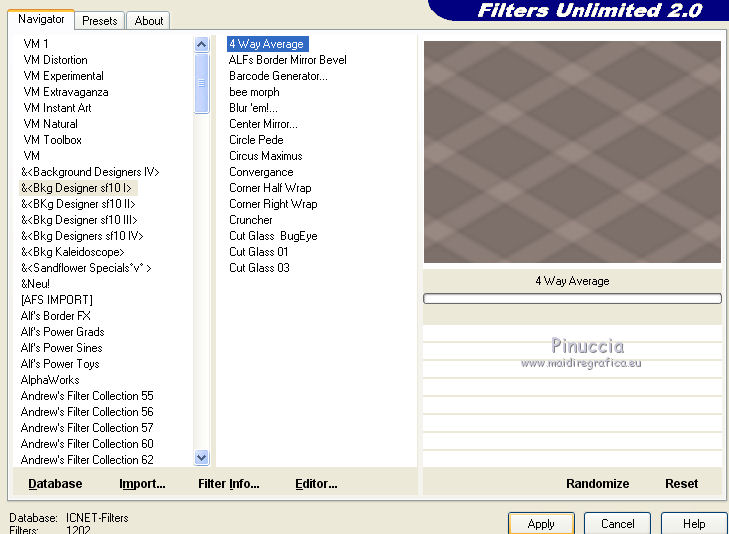
&<Bkg Designer sf10I> - 4Way Average (da importare in Unlimited) here
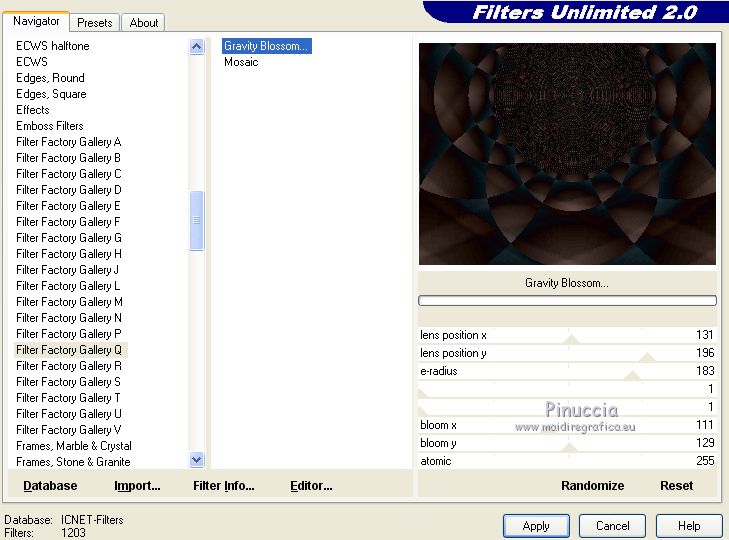
Filter Factory Gallery Q - Gravity Blossom here
Mehdi - Flat Median here
Mura's Meister - Copies here
Nik Software - Color Efex here
Xero - Fuzzifier here
Filters Factory Gallery can be used alone or imported into Filters Unlimited.
(How do, you see here)
If a plugin supplied appears with this icon  it must necessarily be imported into Unlimited it must necessarily be imported into Unlimited

You can change Blend Modes and opacity of the layer, according to your colors.
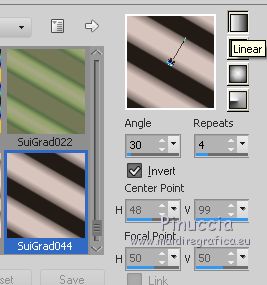
Copy the Gradient in the Gradients Folder.
Copy the selection in the Selections Folder.
1. Set your foreground color to #231b17,
and your background color to #d7c4bc.
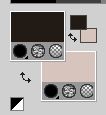
2. Set your foreground color to Gradient, and select the gradient Suigrad044, style Linear.
3. Open a new transparent image 1000 x 750 pixels,
Flood Fill  with your Gradient . with your Gradient .
4. Effects>Plugins>Filters Unlimited 2.0 - &<Bkg Designer sf10I> - 4Way Average.
5. Layers>Duplicate.
Change the Blend Mode of this layer to Multiply.
Layers>Merge>Merge Down.
6. Effects>Plugins>Filters Unlimited 2.0 - Filter Factory Gallery Q - Gravity Blossom
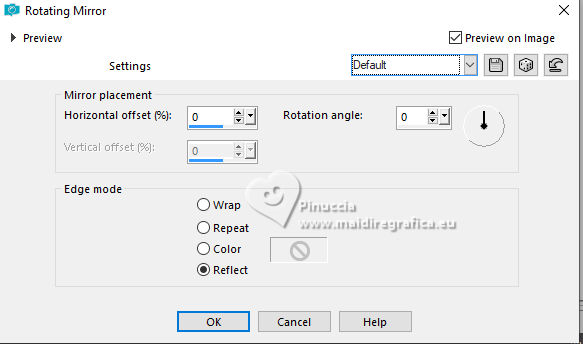
7. Effects>Reflection Effects>Rotating Mirror, default settings.
8. Adjust>One Step Photo Fix.
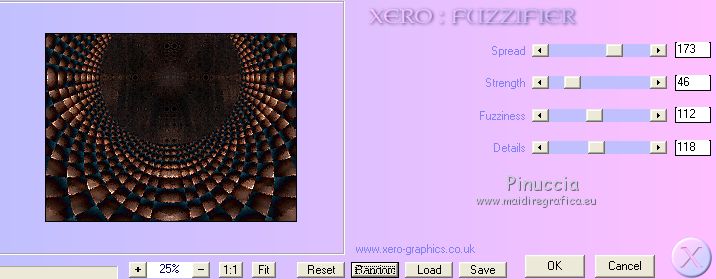
9. Effects>Plugins>Xero - Fuzzifier.
10. Layers>New Raster Layer.
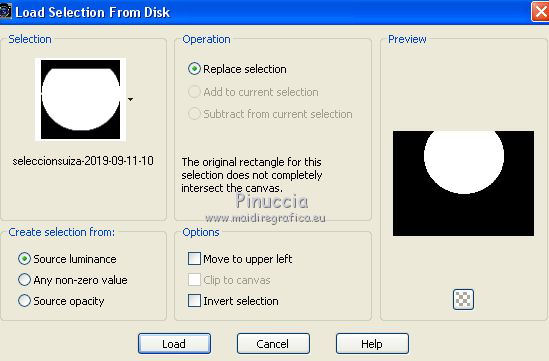
Selections>Load/Save selection>Load Selection from Disk.
Look for and load the selection seleccionsuiza-2019-09-11-10.
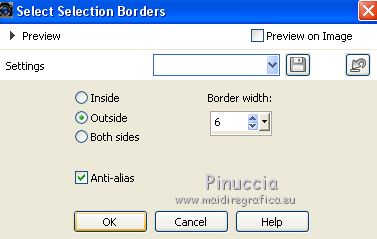
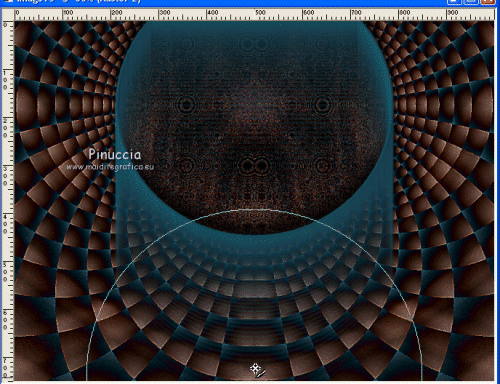
11. Selections>Modify>Select Selection Borders.
Set your foreground color to #1d4c5d.
Flood Fill the selection with your foregrund color #1d4c5d.
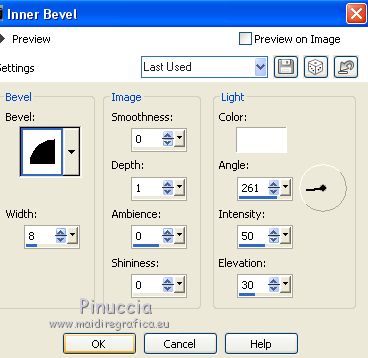
12. Effects>3D Effects>Inner Bevel.
Selections>Select None.
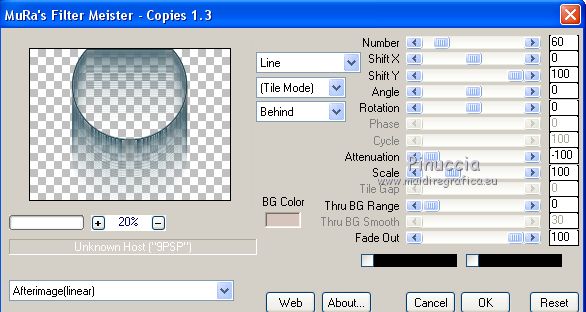
13. Effects>Plugins>Mura's Meister - Copies.
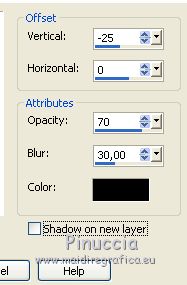
14. Effects>3D Effects>Drop Shadow.
15. Activate your Warp Brush 
with these settings

Point the mouse at the bottom point, indicated by the hand (500 pixels width) and hold the mouse down without moving it
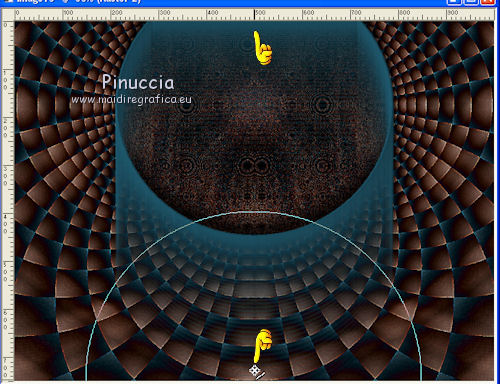
until you get a V, as in the example
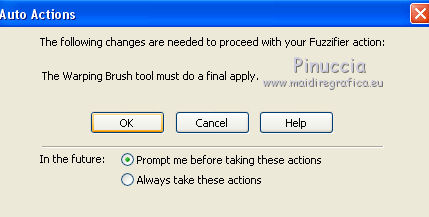
If, before the nex step, this message appears, click ok and continue
16. Effects>Plugins>Xero - Fuzzifier, same settings.

17. Activate the layer Raster 1.
Open the landscape 1228-road misted 1-LB TUBES and go to Edit>Copy.
Go back to your work and go to Edit>Paste as new layer.
Change the Blend Mode of this layer to Luminance (legacy).
18. Open the tube Decosuizatuto2019-13 and go to Edit>Copy.
Go back to your work and go to Edit>Paste as new layer.
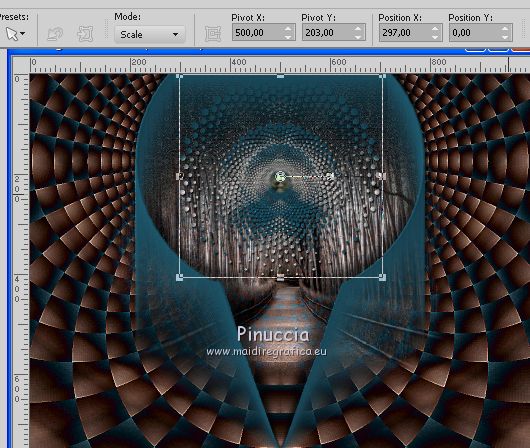
19. Objects>Align>Top.
If you are working with a previous version that doesn't make the Objects menu available,
use the Move Tool 
or, with your Pick Tool 
set Position Y to 0,00.
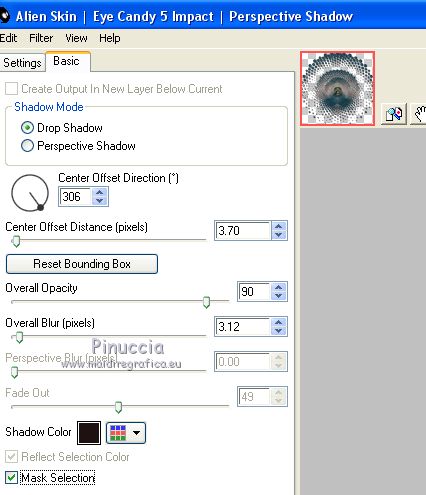
30. Effects>Plugins>Alien Skin Eye Candy 5 Impact - Perspective Shadow.
31. Activate the top layer.
Open the tube Suizabella_Ref_AG-00216 and go to Edit>Copy.
Go back to your work and go to Edit>Paste as new layer.
Image>Resize, to 60%, resize all layers not checked.
Place the layer as in my example.
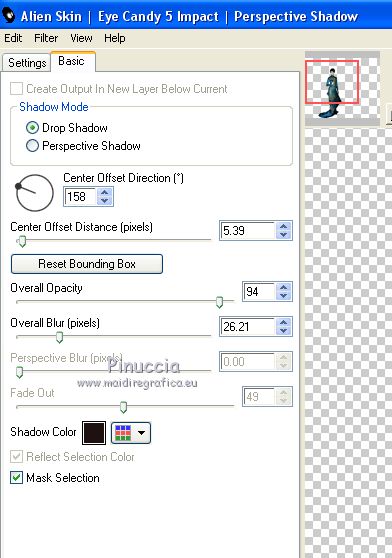
32. Effects>Plugins>Alien Skin Eye Candy 5 Impact - Perspective Shadow.
33. Layers>Merge>Merge visible.
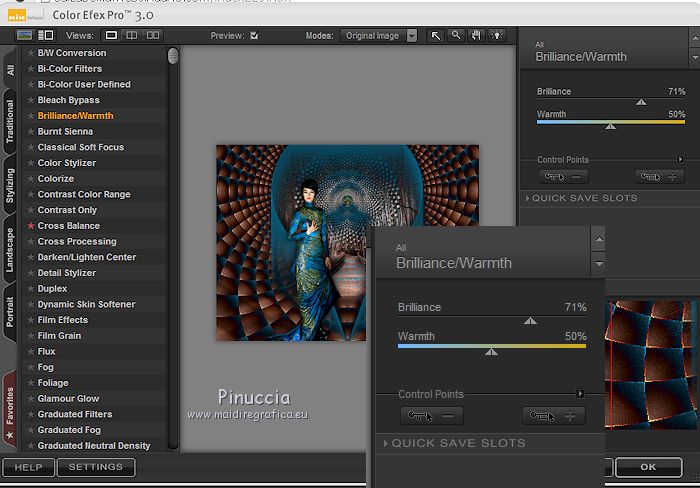
34. Effects>Plugins>Nik Software - Color Efex Pro - Brilliance Warmth
35. Sign your work on a new layer.
Optional: add the author watermark and the translator watermark.
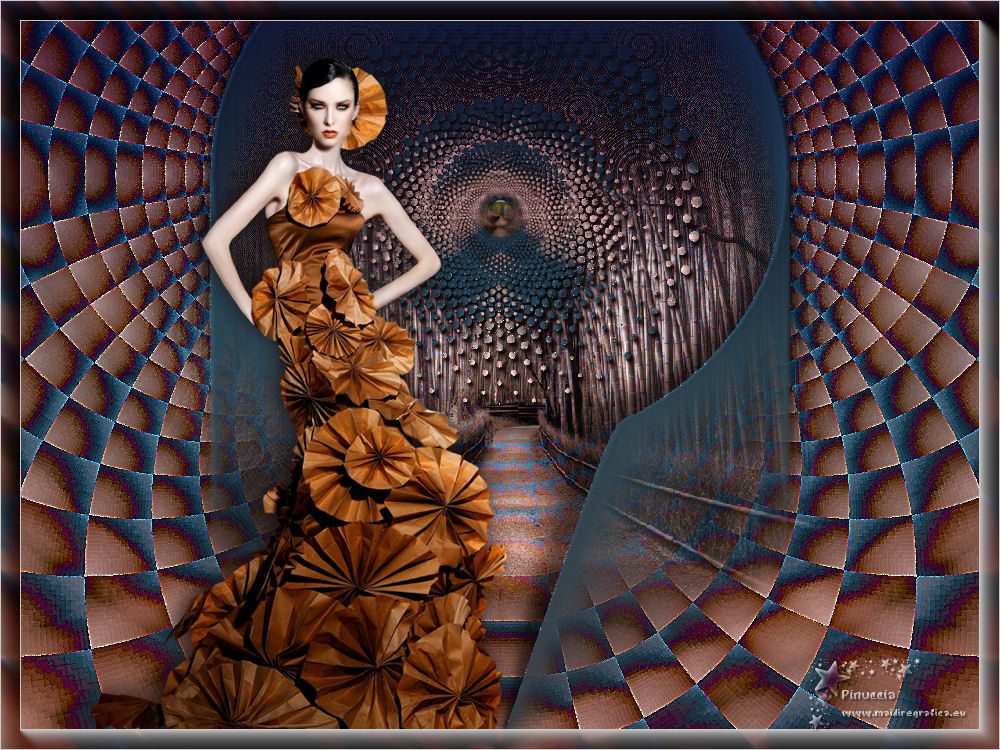
36. Layers>Merge>Merge All and save as jpg.
Version with tube by Cibi-Bijoux

If you have problems or doubt, or you find a not worked link, or only for tell me that you enjoyed this tutorial, write to me.
14 June 2019
|