|
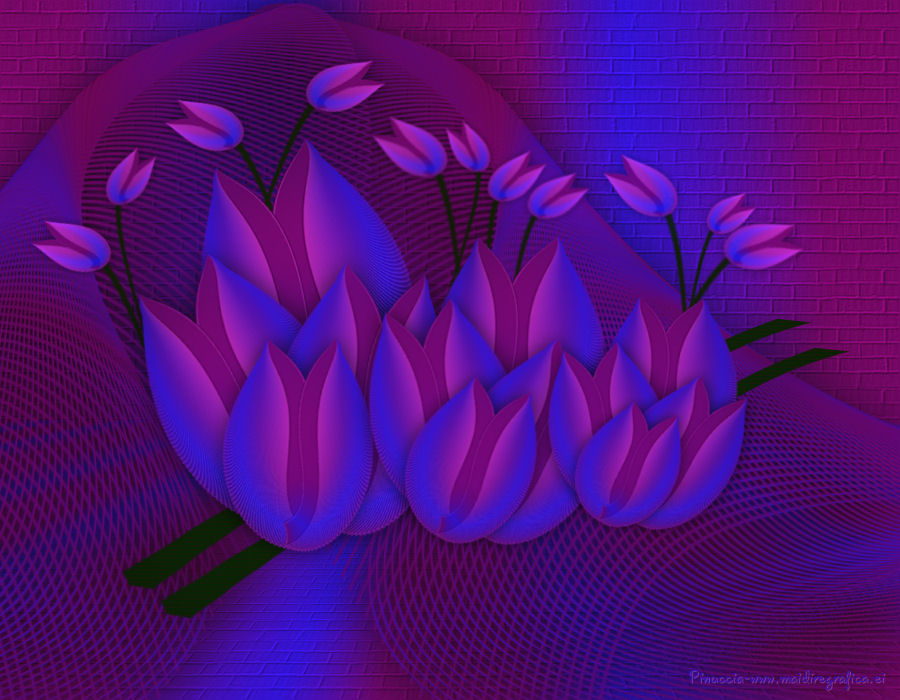
TAG TULIPAN
english version


This tutorial was created with PSPX7 and translated with Corel X3, but it can also be made using other versions of PSP.
Since version PSP X4, Image>Mirror was replaced with Image>Flip Horizontal,
and Image>Flip with Image>Flip Vertical, there are some variables.
In versions X5 and X6, the functions have been improved by making available the Objects menu.
In the latest version X7 command Image>Mirror and Image>Flip returned, but with new differences.
See my schedule here
Italian translation here
French translation here
Your versions here
For this tutorial, you will need:
Material here
Plugins
consult, if necessary, my filter section here
Nik Software - Color Efex Pro here
Filters unlimited 2.0 here
Mura's Meister - Perspective Tiling here
Mura's Meister - Copies here
Flaming Pear - Flexify 2 here
Filters Simple can be used alone or imported into Filters Unlimited.
(How do, you see here)
If a plugin supplied appears with this icon  it must necessarily be imported into Unlimited it must necessarily be imported into Unlimited

You can change Blend Modes and opacity of the layer, according to your colors.
Copy the Gradient in the Gradient Folder.
1. Set your foreground color to #7c0670,
and your background color to #401cc8.
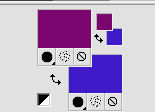
2. Set your foreground color to Gradient, and select the gradient SuiGrad16, style Linear.
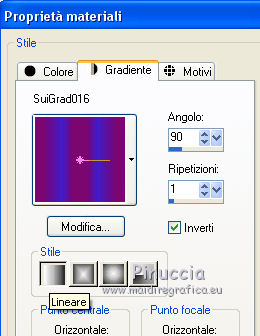
3. Open a new transparent image 900 x 700 pixels,
Flood Fill  with your Gradient. with your Gradient.
4. Effects>Plugins>Filters Unlimited 2.0 - Buttons & Frames - 3D Glass Frame (rounded).
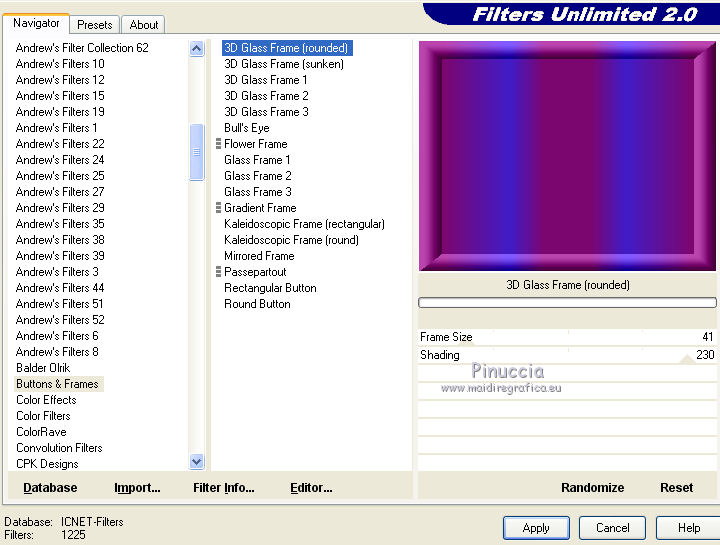
5. K key to activate the Pick Tool 
with PSP 9 D key to activate Deformation Tool 
mode Scale  , ,
push the central node at the top, down to 560 pixels
(if you don't see the rulers go to View>Rulers)
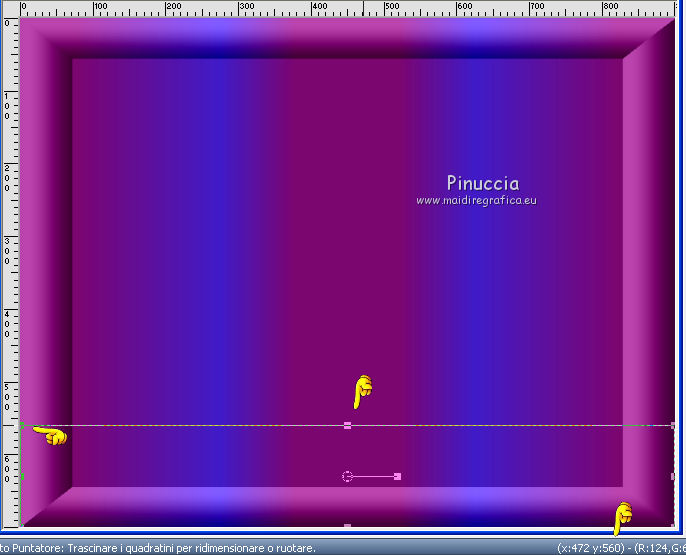
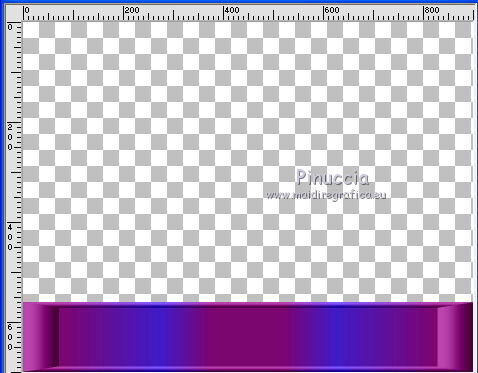
7. Effects>Geometric Effects>Cylinder Vertical.
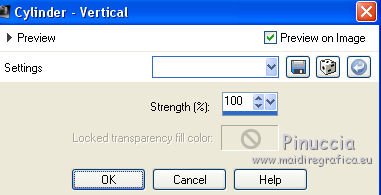
8. Effects>Geometric Effects>Pentagon.
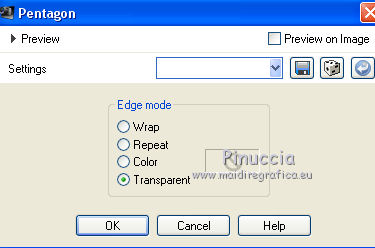
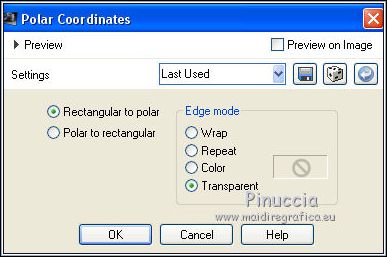
9. Effects>Distortion Effects>Polar Coordinates.
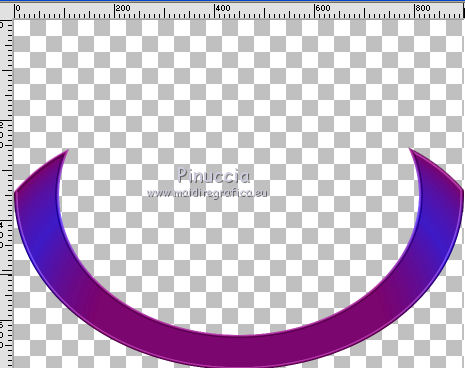
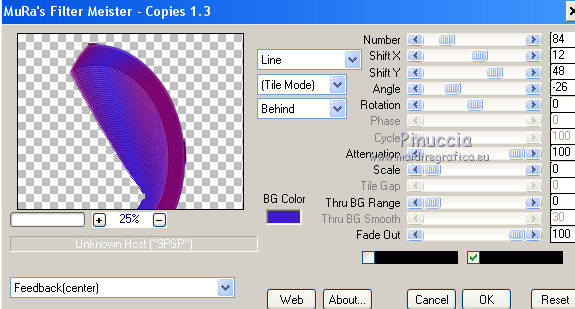
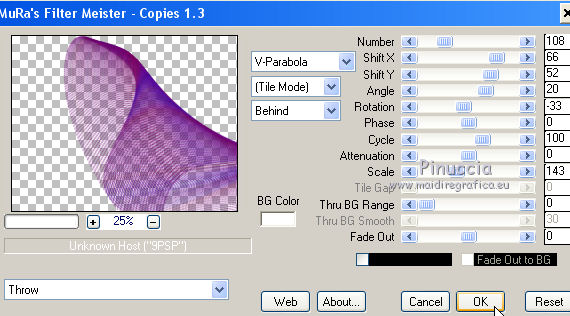
10. Effects>Plugins>Mura's Meister - Copies.
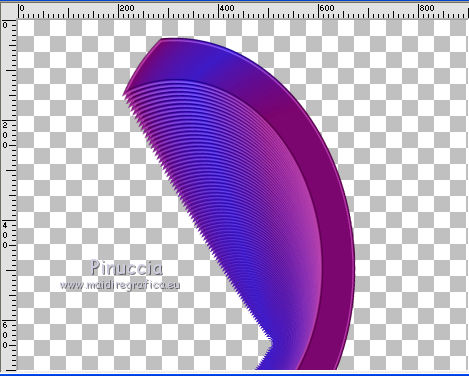
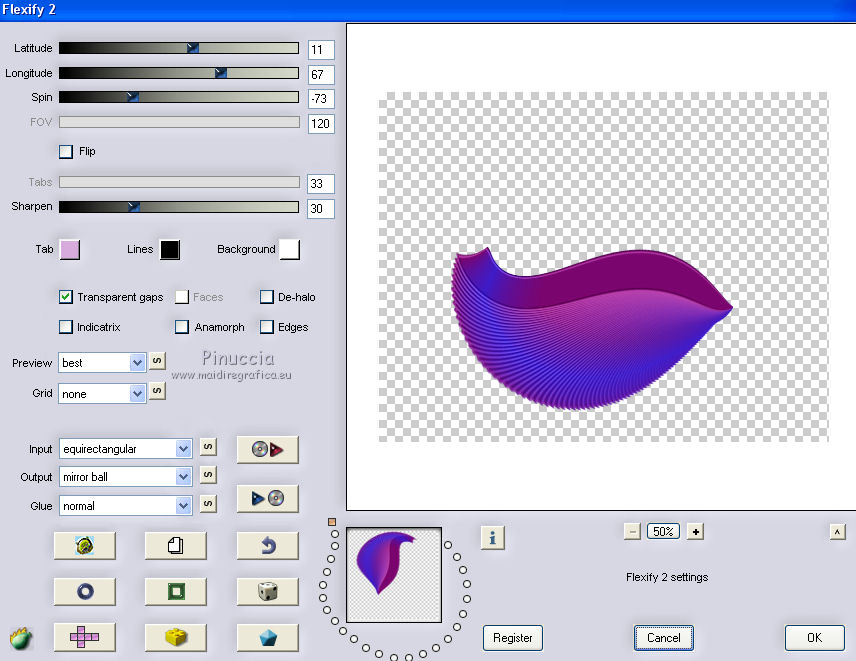
11. Effects>Plugins>Flaming Pear - Flexify 2.
12. Layers>Duplicate.
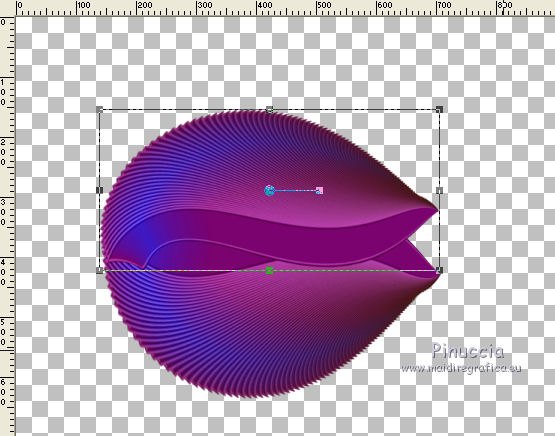
Image>Flip.
13. K/D key to activate the Pick/Deformation Tool  / /
place the formes as below.
14. Assure that the top layer is activate
and execute a little rotation to left.
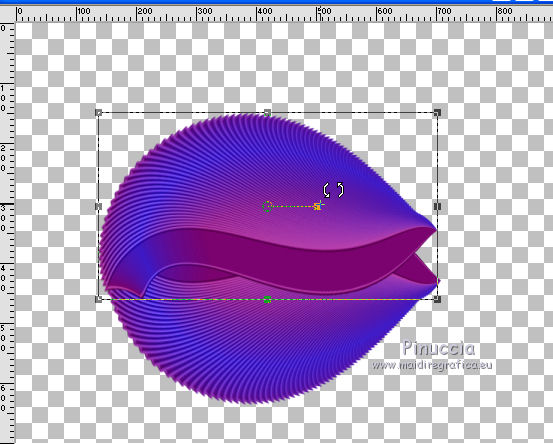
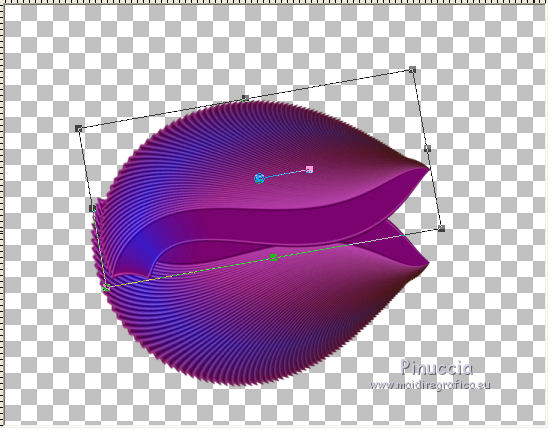
and place rightly the form.
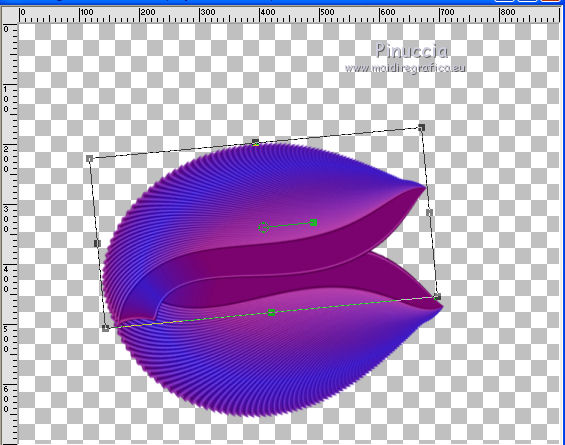
15. Layers>Merge>Merge down.
16. Always with you Pick/Deformation Tool  / /
rotate, reduce and place the form, about as below.
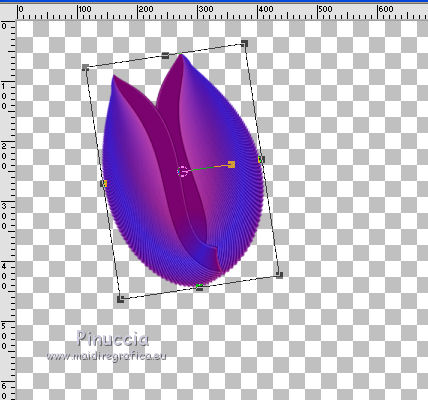
And here is our first tulip.
17. Now you can create your tulip branch.
Layers>Duplicate.
rotate, reduce and place the form, about as below.
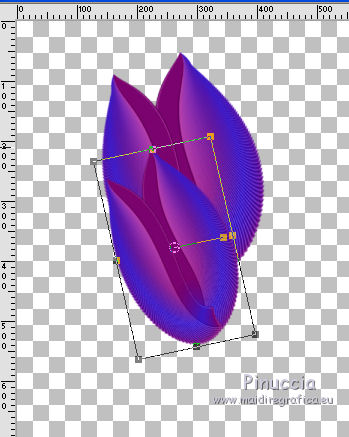
18. Effects>3D Effects>Drop Shadow.
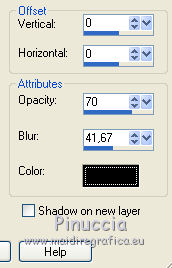
19. Layers>Duplicate.
With the Pick Tool 
rotate, reduce and place the form, about as below.
20. Layers>Duplicate.
With the Pick Tool 
rotate, reduce and place the form, about as below.
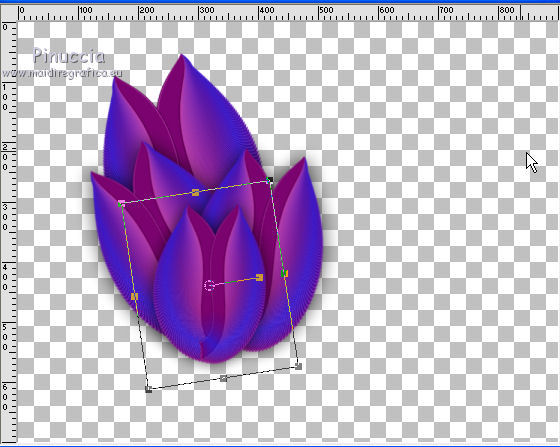
Layers>Merge>Merge visible.
21. Layers>Duplicate.
With the Pick Tool 
rotate, reduce and place the form, about as below.
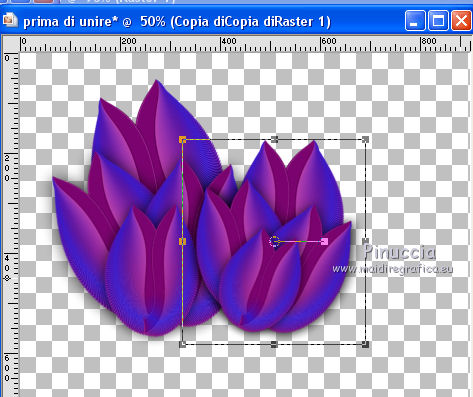
Layers>Duplicate.
With the Pick Tool 
rotate, reduce and place the form, about as below.
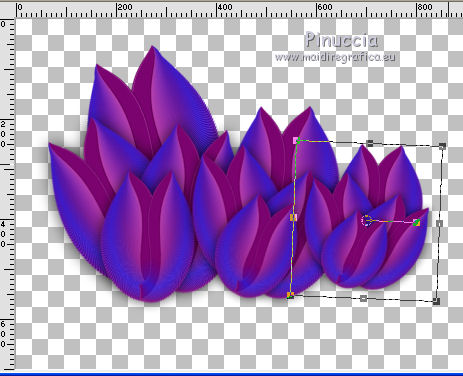
22. Layers>Merge visible.
In case, if you want, Image>Resize, resize all layers not checked.
23. Open the tube of the stem (decopersonalsui0) - Edit>Copy.
Go back to your work and go to Edit>Paste as new layer.
Layers>Arrange>Move down.
24. Effects>Image Effects>Offset.
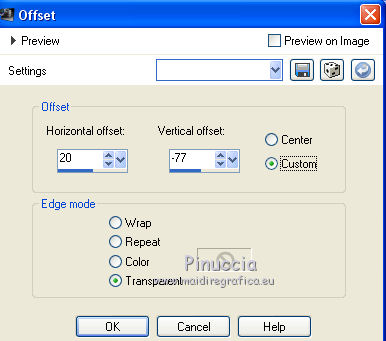
25. Layers>Duplicate.
Effects>Image Effects>Offset.
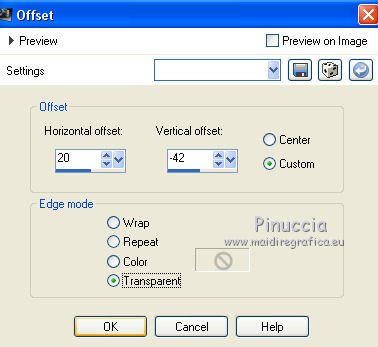
26. Layers>Merge visible.
27. Layers>New Raster Layer.
Flood Fill  with your Gradient. with your Gradient.
Layers>Arrange>Send to bottom.
28. Effects>Texture Effects>Texture - select the texture Brik Wall or Corel_15_032.
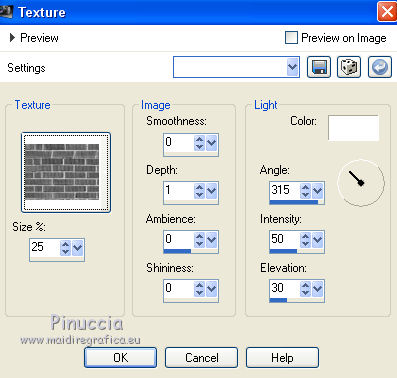
29. Layers>Duplicate.
Effects>Plugins>Mura's Meister - Perspective Tiling.
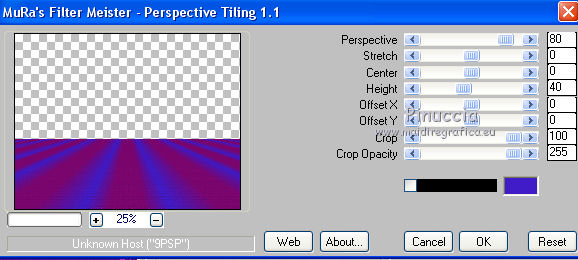
30. Effects>3D Effects>Drop Shadow, your foreground color.
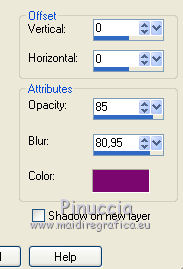
31. Layers>Duplicate.
Effects>Geometric Effects>Perspective Horizontal.
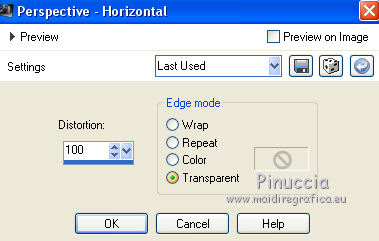
Image>Mirror.
Repeat Perspective Horizontal, same settings.
32. Effects>Distortion Effects>Wave.
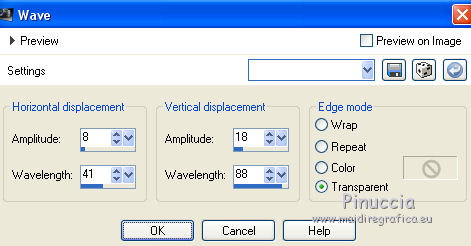
33. Effects>Plugins>Mura's Meister - Copies.
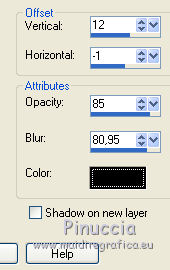
Effects>3D Effects>Drop Shadow.
34. Layers>Duplicate.
Image>Mirror.
Effects>Image Effects>Offset.
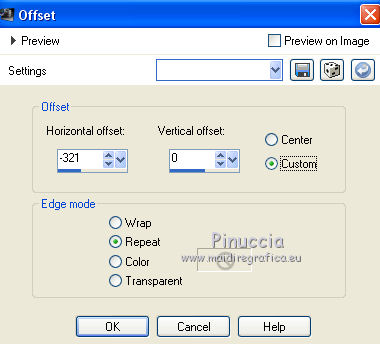
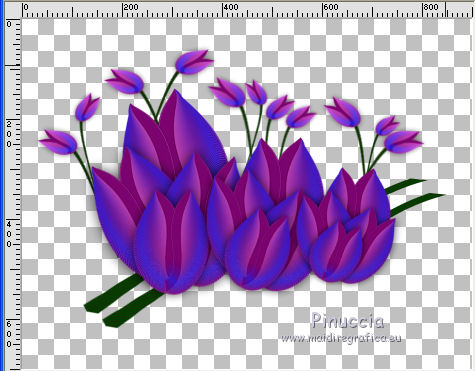
35. To finish your work, copy and past the little tubes,
in order to realize some flowers, as you like.
don't worry to give the same disposition of my example.
36. Layers>Merge>Merge visible.
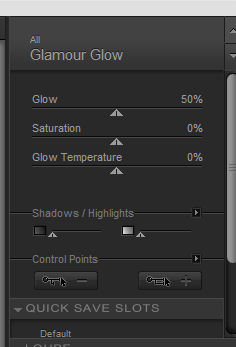
37. Effects>Plugins>Nik Software - Color Efex Pro - Glamour Glow, default settings.
Sign your work and save as jpg.
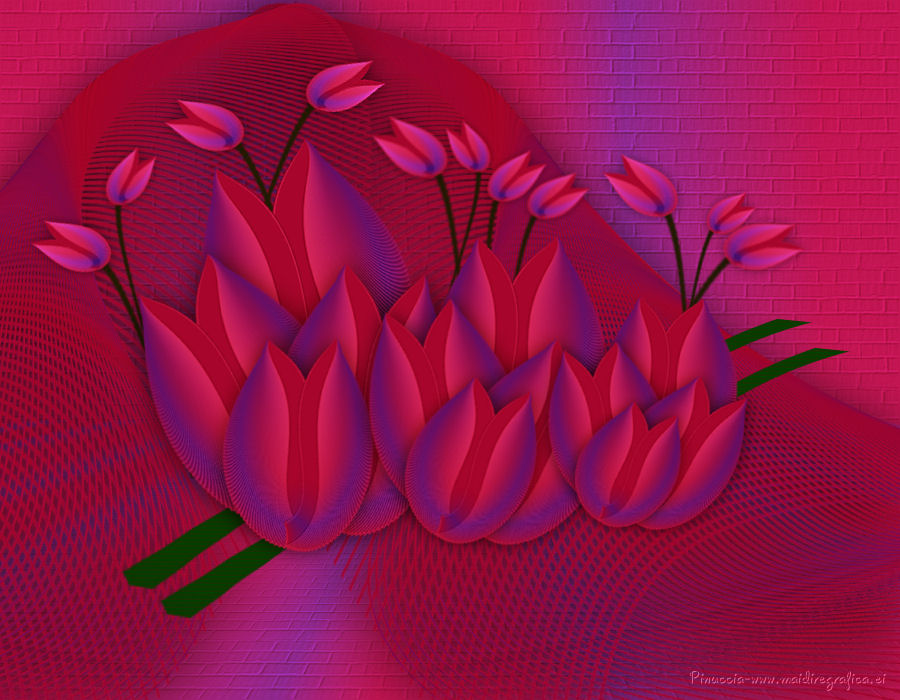
The tube of this version is by Tocha


If you have problems or doubt, or you find a not worked link, or only for tell me that you enjoyed this tutorial, write to me.
8 June 2016
|
