|
TUTORIAL 74
 english version english version
Thank you Sweety for your invite to translate your tutorial.
Here you find the original of this tutorial:
This tutorial is a personal creation of Sweety and it is prohibited to copy or distribute it on the net (forums, groupes.. etc), or to use it on commercials sites.
This tutorial was created and translated with Corel12, but can also be made using other versions of PSP.
Since version PSP X4, Image>Mirror was replaced with Image>Flip Horizontal,
and Image>Flip with Image>Flip Vertical, there are some variables.
In versions X5 and X6, the functions have been improved by making available the Objects menu.
In the latest version X7 command Image>Mirror and Image>Flip returned, but with new differences.
See my schedule here
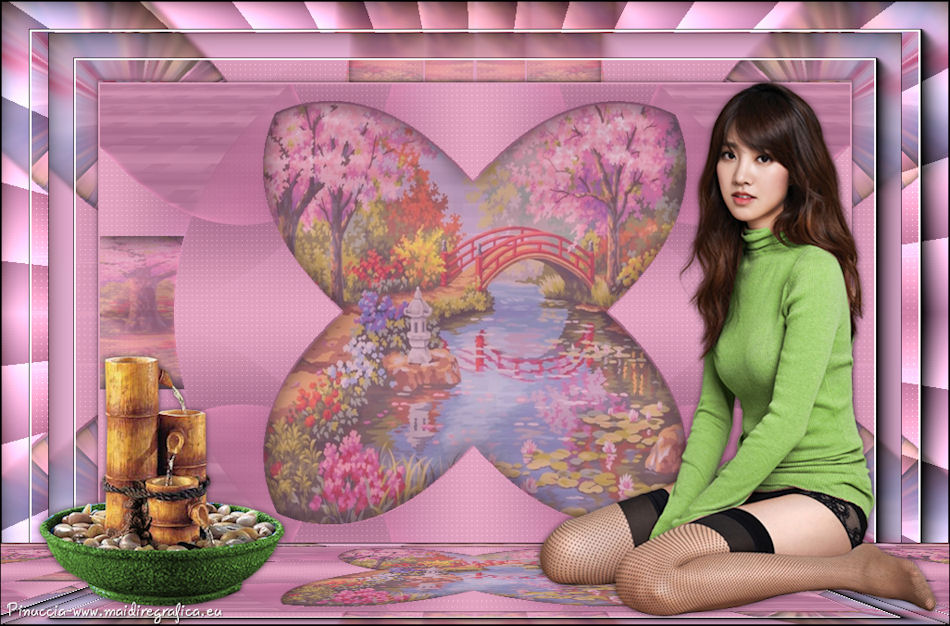
For this tutorial, you will need:
A landscape, a person and a deco.
The rest of material here
The tubes used and not added is jin-se-yeon- png – render- by sellscarol.
Plugins
consult, if necessary, my filter section here
Filters Unlimited 2.0 here
&<Bkg Designer sf10I> - Corner Half Wrap (to import in Unlimited) here
&<Bkg Designer sf10II> - Fan Blades (to import in Unlimited) here
VM Toolbox - Zoom Blur here
Toadies - Weaver here
AAA Frames - Foto Frame here
Mura's Meister - Perspective Tiling here
Carolaine and Sensibility - CS-LDots here
Simple - Top Left Mirror, Pizza slice Mirror here
Mehdi - Wavy Lab 1.0 here
Flamimg Pear - Flexify 2 here
Flaming Pear - Kyoto color here
Filters Simple, Toadies and VM Toolbox can be used alone or imported into Filters Unlimited.
(How do, you see here)
If a plugin supplied appears with this icon  it must necessarily be imported into Unlimited it must necessarily be imported into Unlimited

You can change Blend Modes according to your colors.
Copy the selections in the Selections Folder.
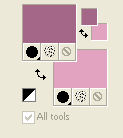
1. Set your foreground color to #a46788,
and your background to #e2a3c0.
Open a new transparent image 900 x 550 pixels.
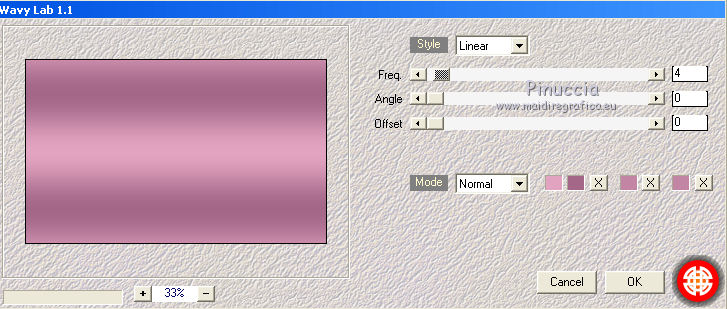
Effecs>Modules Externes>Mehdi - Wavy Lab 1.1.
This filter works with the colors of your Materials palette.
The first is the background color, the second is the foreground color.
Keep the other colors created by the filter.
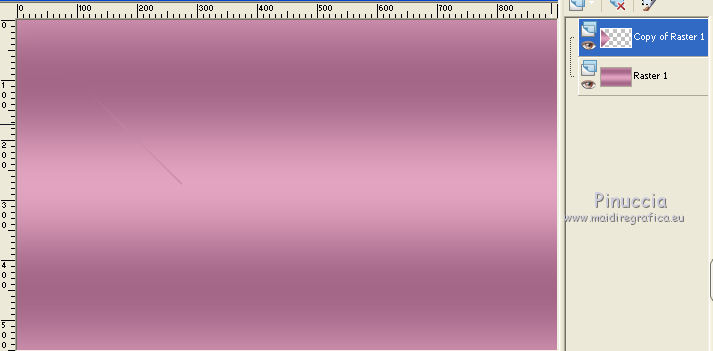
Layers>Duplicate.
Effects>Plugins>Simple - Pizza Slice Mirror.
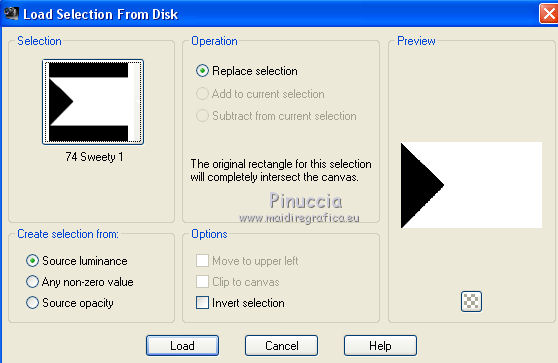
Selections>Load/Save Selection>Load Selection from disk.
Load again the selection "74 Sweety 1".
Press CANC on the keyboard 
Selections>Select None.
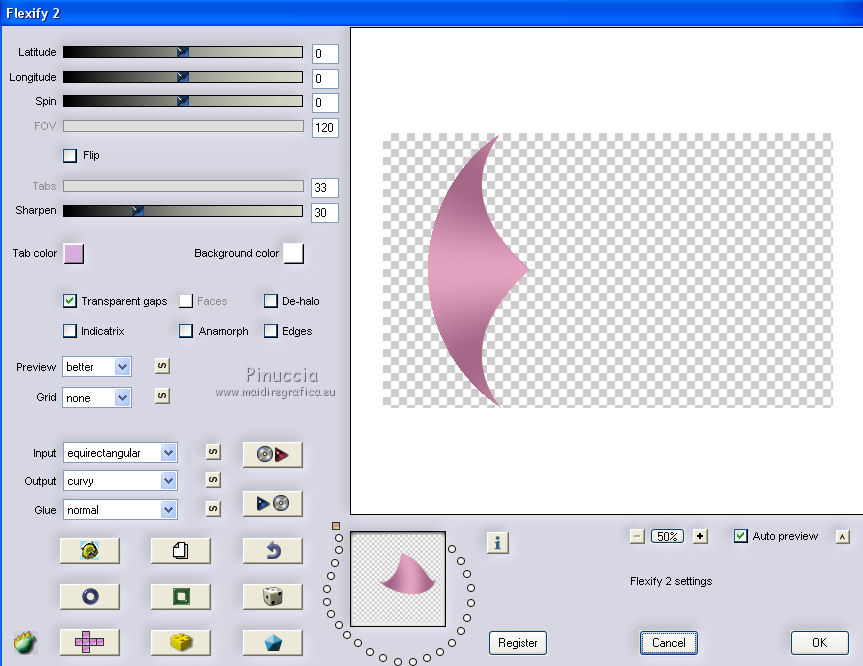
2. Effects>Plugins>Flaming Pear - Flexify 2.
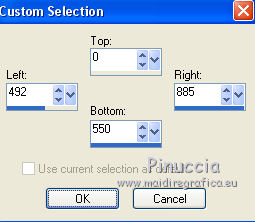
Selection Tool 
(no matter the type of selection, because with the custom selection your always get a rectangle)
clic on the Custom Selection 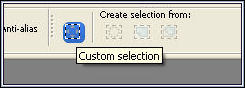
and set the following settings.
Press CANC on the keyboard
Selections>Select None.
Layers>Duplicate.
Image>Mirror.
Layers>Merge>Merge down.
Layers>Duplicate.
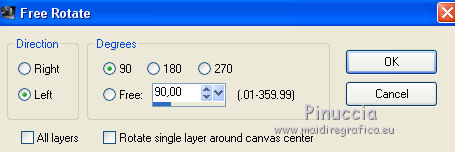
Image>Free Rotate - 90 degrees to left
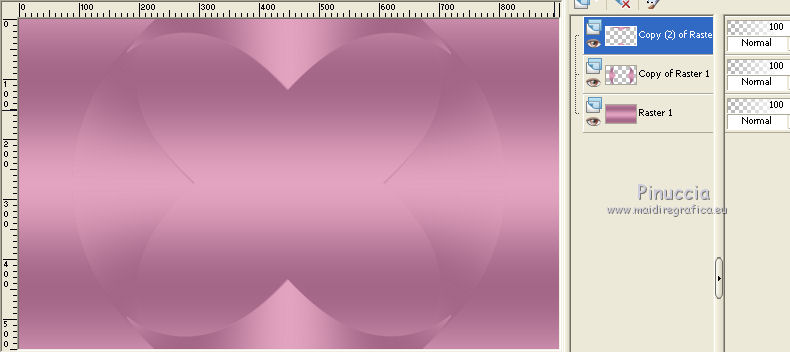
3. You should have this
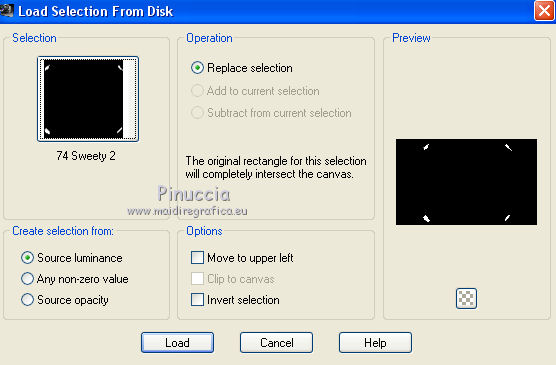
Selections>Load/Save Selection>Load Selection from disk.
Load again the selection "74 Sweety 2".
Press CANC on the keyboard
Selections>Select None.
Layers>Merge>Merge down.
Layers>Duplicate.
Layers>Arrange>Move down.
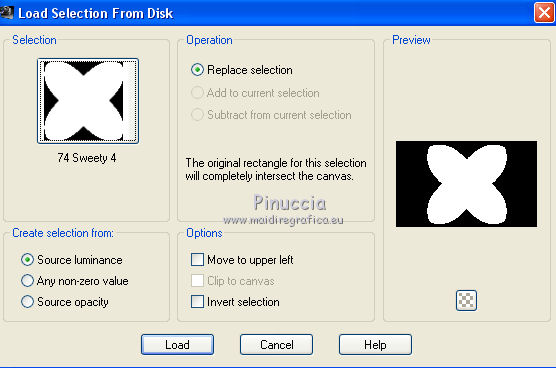
Selections>Load/Save Selection>Load Selection from disk.
Load again the selection "74 Sweety 4".
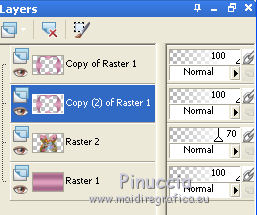
Layers>New Raster Layer.
Open your landscape - Edit>Copy.
Go back to your work and go to Paste>Into Selection.
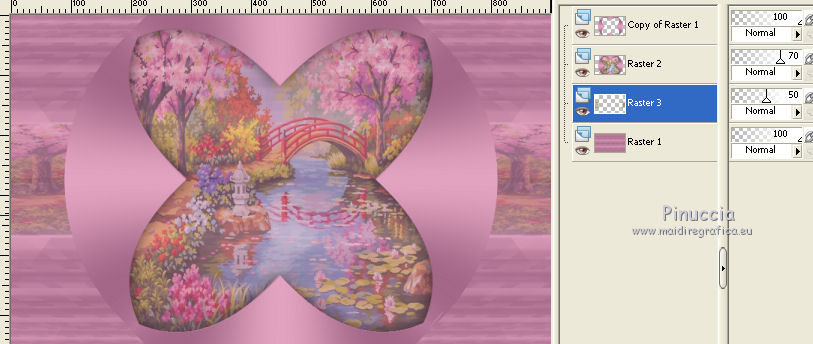
Layers>Arrange>Move down.
Change the opacity of this layer to 70/80% (according to your landscape).

4. Your selection is still active.
Activate the layer above (copy(2) of Raster 1).
Selections>Invert.
Effects>3D Effects>Drop Shadow, color black.

Selections>Select None.
Layers>Merge>Merge down.
Change the opacity of this layer to 70/80%.
Activate the bottom layer (Raster 1).
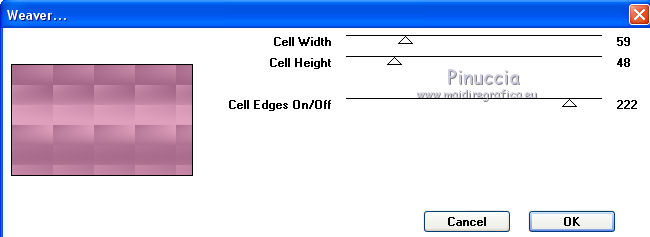
Effects>Plugins>Toadies - Weaver.
Layers>Duplicate.
Image>Mirror.
Change the opacity of this layer to 50%.
Layers>Merge>Merge down.
5. On this layer.
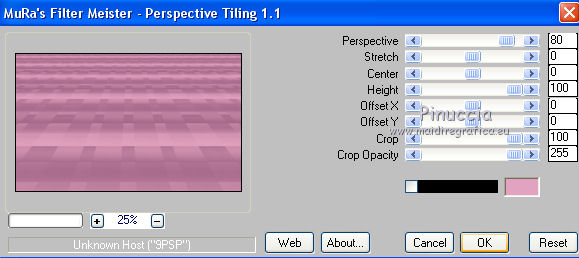
Effects>Plugins>Mura's Meister - Perspective Tiling.
Layers>Duplicate.
Image>Flip.
Change the opacity of this layer to 50%.
Layers>Merge>Merge down.
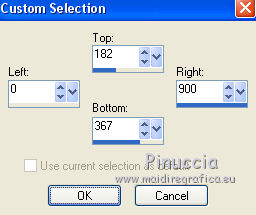
Custom Selection
and set the following settings.
Layers>New Raster Layer.
Edit>Paste into Selection (your landscape is still in memory).
Selections>Select None.
Change the opacity of this layer to 40/50%, as your like.
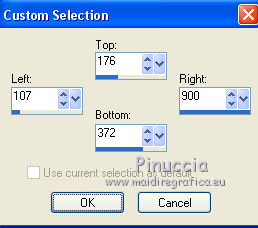
Custom Selection
and set the following settings.
Press CANC on the keyboard
Selections>Select None.
Layers>Duplicate.
Image>Mirror.
Layers>Merge>Merge down.
Change the opacity of this layer to 50%, according to your landscape.
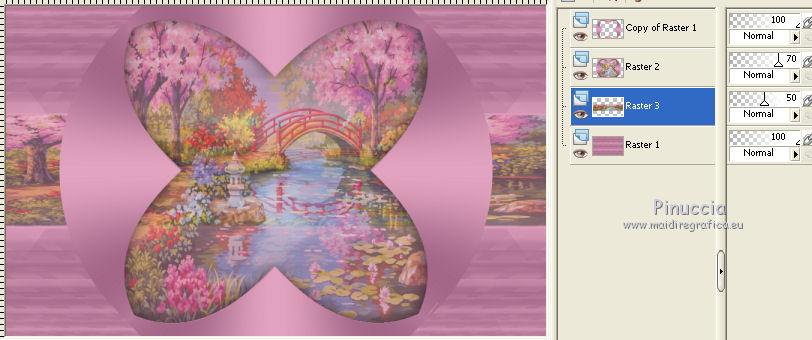
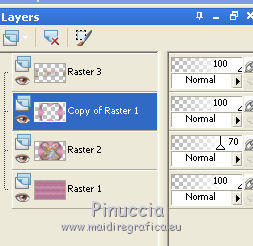
6. You should have this
We are on Raster 3.
Activate the tube déco perso 1 - Edit>Copy.
Go back to your work and go to Edit>Paste as new layer.
Don't move it. It is on his place.
Layers>Merge>Merge down.
Layers>Arrange>Bring to top.
Selections>Load/Save Selection>Load Selection from disk.
Load again the selection "74 Sweety 3".
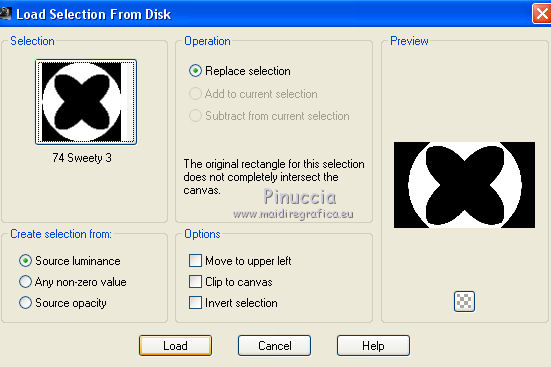
Press CANC on the keyboard
Selections>Select None.
7. You should have this.
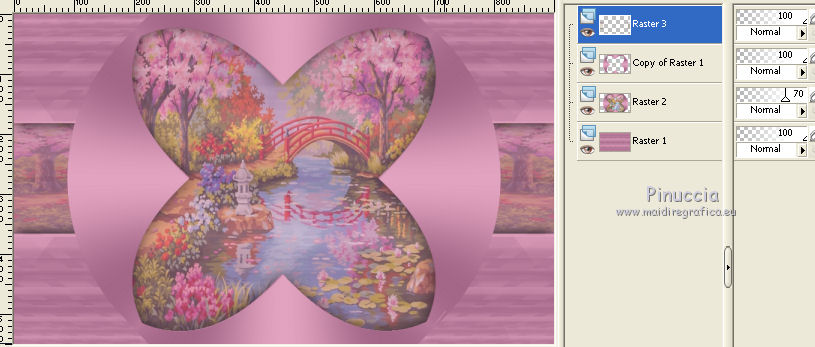
Activate the layer below (copy of Raster 1).
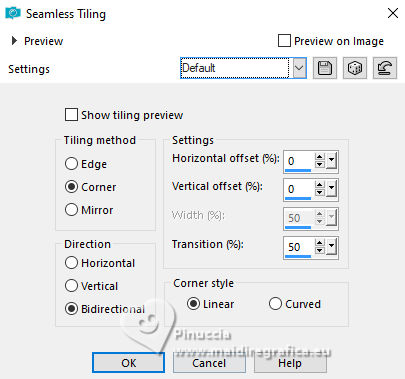
Effects>Image Effects>Seamless Tiling.
Selections>Load/Save Selection>Load Selection from disk.
Load again the selection "74 Sweety 4".
Press CANC on the keyboard
Selections>Select None.
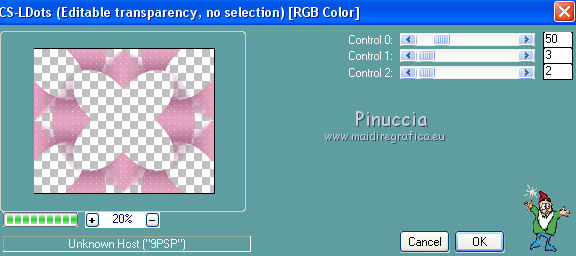
Effects>Plugins>Carolaine And Sensibility - CS LDots.
Effects>3D Effects>Drop Shadow, color black, foreground color and shadow on new layer checked.
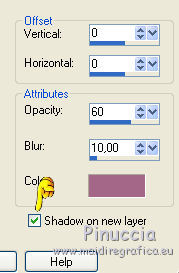
Change the blend mode of shadow's layer to Dodge or as you like.
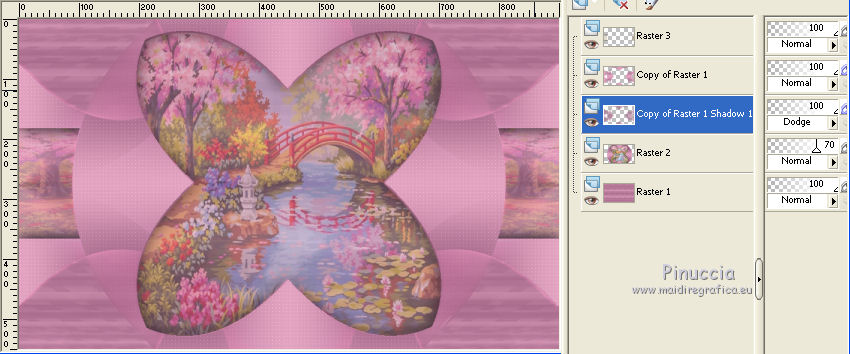
8. Check your work and your layers before the bords.
If all is ok, we can go on.
Image>Add borders, 2 pixels, symmetric, background color.
Selections>Select All.
Image>Add borders, 60 pixels, symmetric, foreground color.
Edit>Copy.
Selections>Invert.
Edit>Paste into Selection.
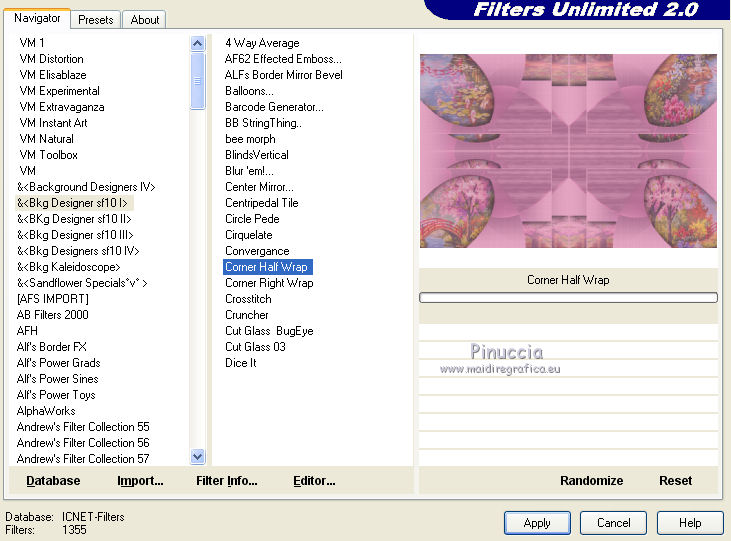
Effects>Plugins>Filters Unlimited 2.0 - &<Bkg Designer sf10> - Corner Half Wrap
Selections>Invert.
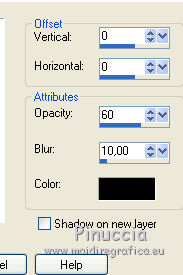
Effects>3D Effects>Drop Shadow, color black, shadow on new layer not checked.
Selections>Select None.
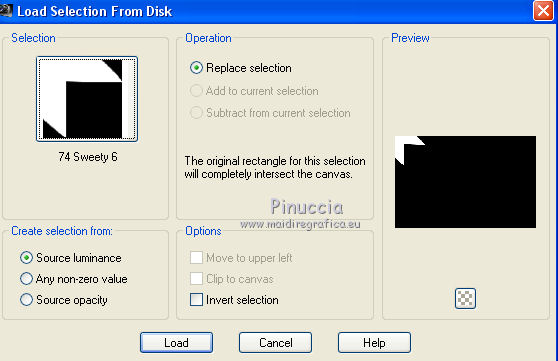
9. Selections>Load/Save Selection>Load Selection from disk.
Load again the selection "74 Sweety 6".
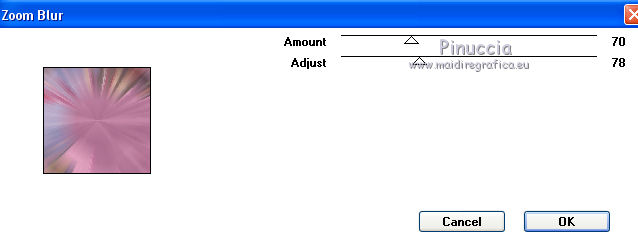
Effects>Plugins>VMToolbox - Zoom Blur.
Selections>Promote selection to layer.
Selections>Select None.
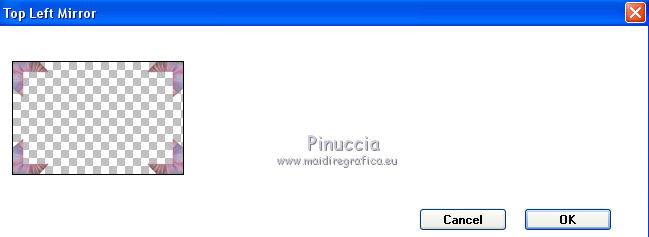
Effects>Plugins>Simple - Top Left Mirror.
Activate the tube déco perso 2 - Edit>Copy.
Go back to your layer and go to Edit>Paste as new layer.
Don't move it. It is at his place.
Layers>Merge>Merge visible.
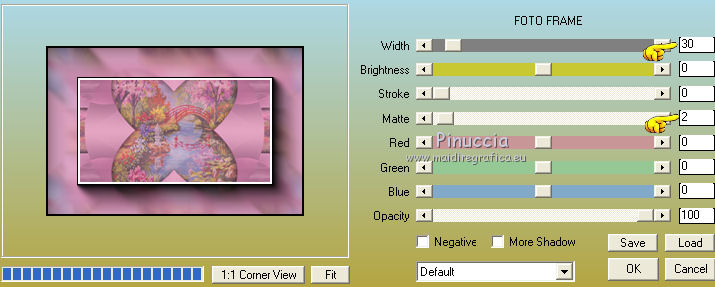
Effects>Plugins>AAA Frames - Foto Frame.
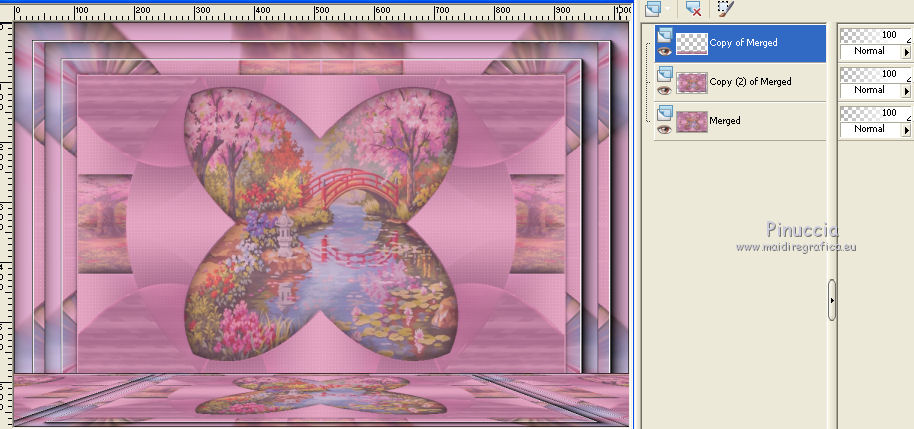
Layers>Duplicate - 2 times.
Now we have 3 layers.

10. Keep selected the top layer (copy(2) of Merged).
Image>Resize, to 90%, resize all layers not checked.
Activate the layer below (copy of Merged).
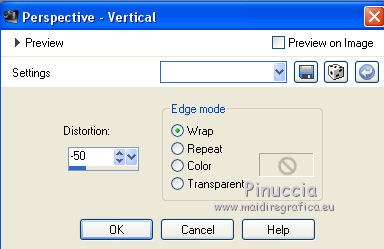
Effects>Geometric Effects>Perspective vertical.
K key to activate the Pick Tool 
with PSP 9 D key to activate Deformation Tool 
mode Scale 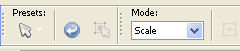 , ,
push the central node at the top, down to 585 pixels
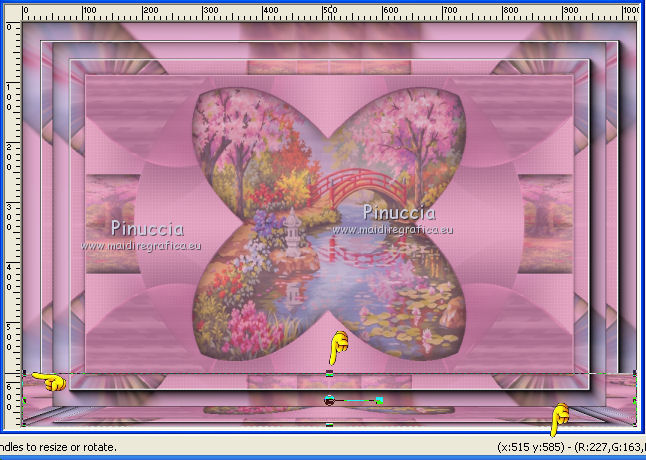
M key to deselect the Tool.
Layers>Arrange>Bring to top.
11. You should have this:
Activate the bottom layer (Merged).
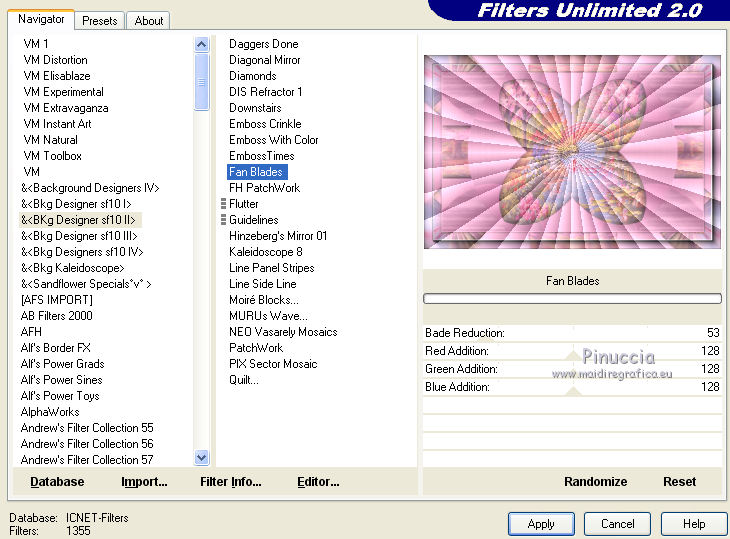
Effects>Plugins>Filters Unlimited 2.0 - &<Bkg Designer sf10II> - Fan Blades.
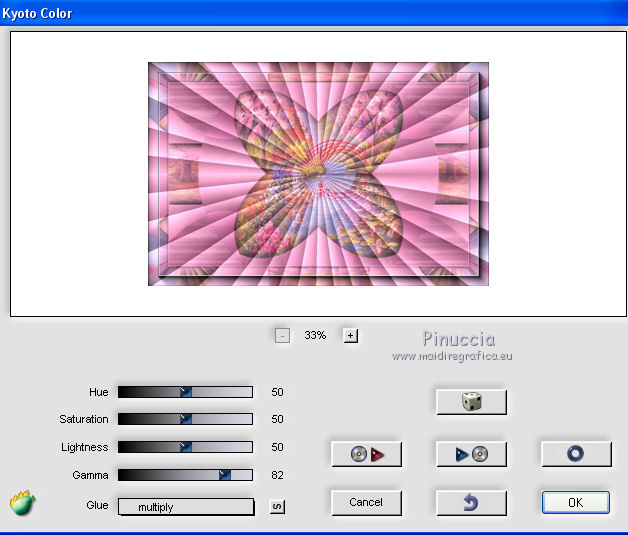
Effects>Plugins>Flaming Pear - Kyoto color
Glue: Multiply or as you like
12. Activate the top layer.
Activate your person tube; for me jin-se-yeon- png – render- by sellscarol.
I resized to 85%, resize all layers not checked (you'll resize according your tube).
Move  your tube as you like. your tube as you like.
Effects>3D Effects>Drop Shadow, color black.
To finish, decorate as you like.
13. Sign your work.
Image>Add borders, 1 pixel, symmetric, color black.
Image>Resize - 950 pixels width, resize all layers checked.
Save as jpg.
The tubes of this version are by Malacka and Thafs.
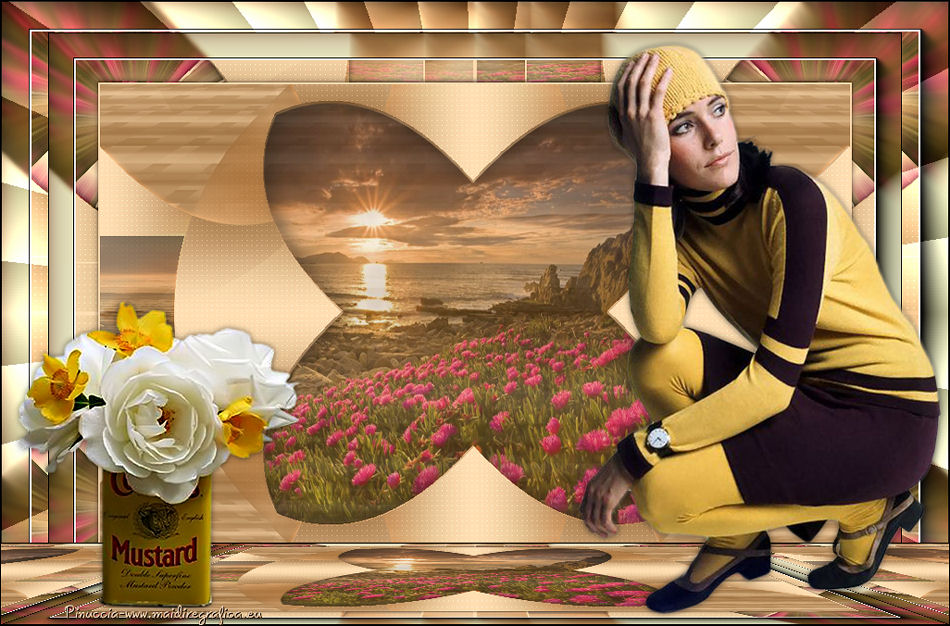
Your versions. Thanks
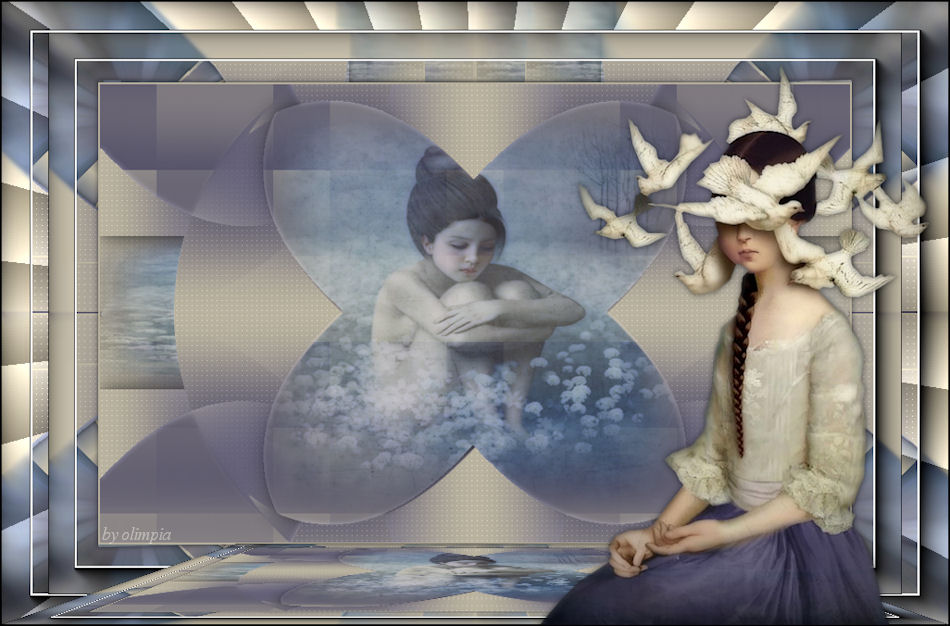
Olimpia
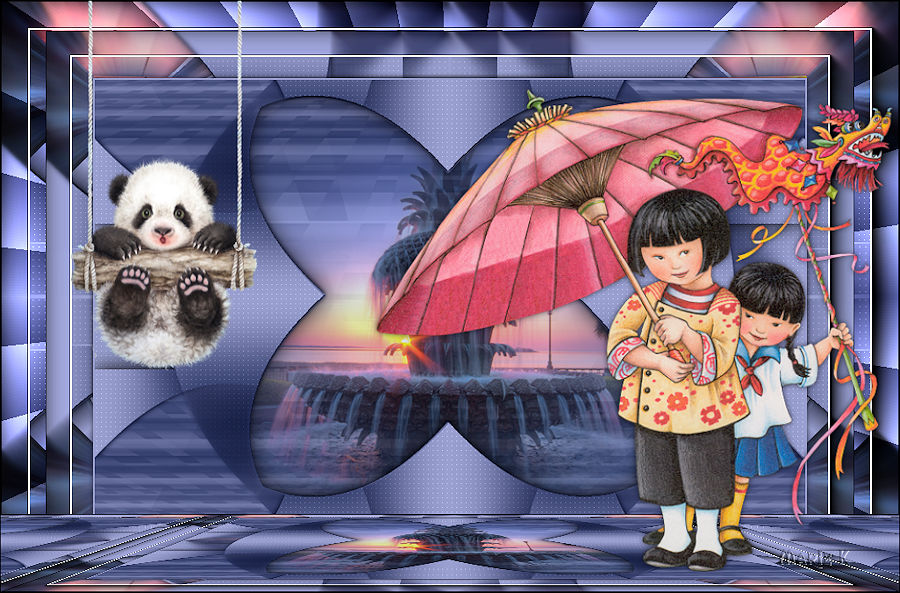
Marie K.
If you have problems or doubt, or you find a not worked link, or only for tell me that you enjoyed this tutorial, write to me.
6 September 2015
|