|
TUTORIAL 82
english version

Thank you Sweety for your invitation to translate your tutorial.
Here you find the original of this tutorial:
This tutorial is a personal creation of Sweety and it is prohibited to copy or distribute it on the net (forums, groupes.. etc), or to use it on commercials sites.
This tutorial was created and translated with Corel12, but can also be made using other versions of PSP.
Since version PSP X4, Image>Mirror was replaced with Image>Flip Horizontal,
and Image>Flip with Image>Flip Vertical, there are some variables.
In versions X5 and X6, the functions have been improved by making available the Objects menu.
In the latest version X7 command Image>Mirror and Image>Flip returned, but with new differences.
See my schedule here
For this tutorial, you will need:
tubes and decos of yours,
The rest of material here
Plugins
consult, if necessary, my filter section here
Filters Unlimited 2.0 here
VM's Plugins - PanoWarp here
Simple - Centre Tile, 4Way Average here
Flaming Pear - Kyoto here
Filters Simple can be used alone or imported into Filters Unlimited.
(How do, you see here)
If a plugin supplied appears with this icon  it must necessarily be imported into Unlimited it must necessarily be imported into Unlimited

You can change Blend Modes according to your colors.
Copy the selection in the Selections Folder.
Open the mask in PSP et minimize it with the rest of the material.
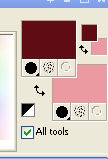
1. Set your foreground color to the #5f0f17,
and your background color to #ec9aa2.
Open a new transparent image 900 x 600 pixels.
Selections>Select All.
Ouvrir l'image de fond.
Colorize it with your color's tones.
Edit>Copy (don't close your image: you'll need it many times again).
Go back to your work and go to Edit>Paste into Selection.
Selections>Select None.
Layers>Duplicate.
Image>Resize, to 90%, resize all layers not checked.
2. Effects>Plugins>MV's Plugins - Pano Warp.
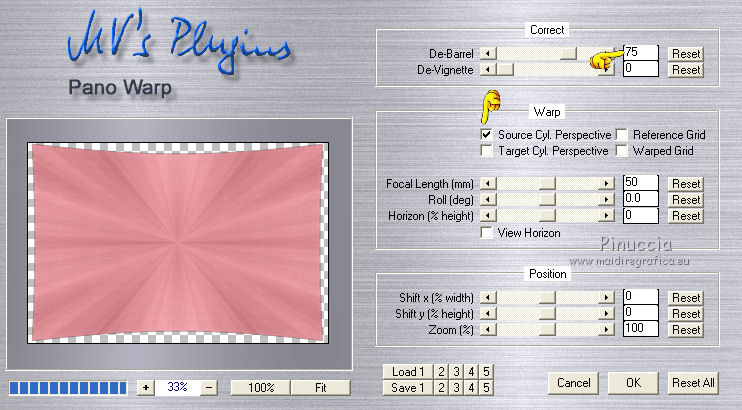
Effects>3D Effects>Drop Shadow, color black.
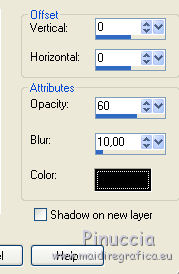
Layers>Dupliquer.
Image>Resize, to 90%, resize all layers not checked.
Again two times: Layers>Duplicate.
Image>Resize, to 90%, resize all layer not checked.
You should have this.
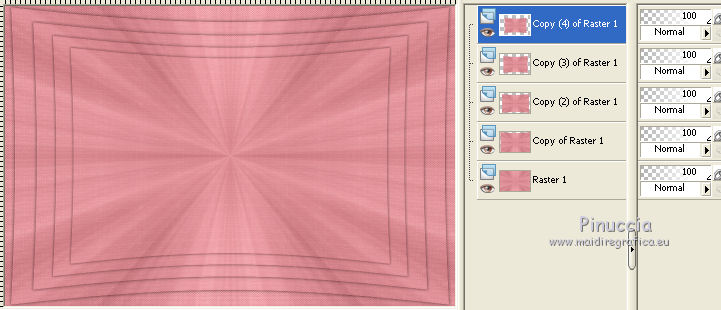
3. Activate the bottom layer - raster 1.
Effects>Plugins>Flaming Pear - Kyoto Color.
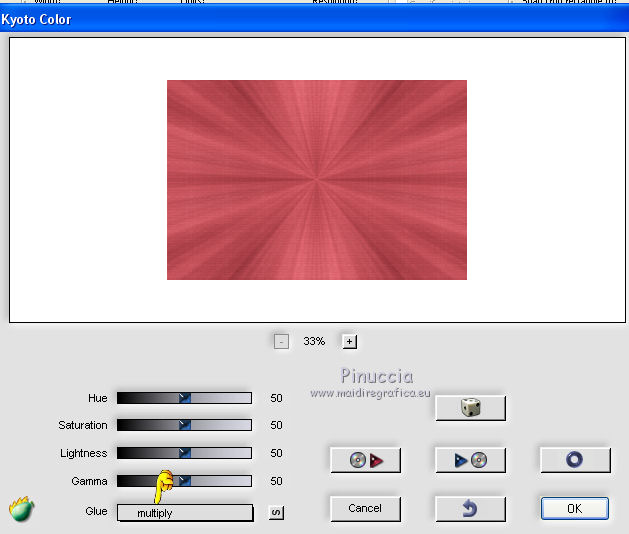
if you want you can repeat the filter one more time
Activate the third layer from the bottom (copy (2) of Raster 1).
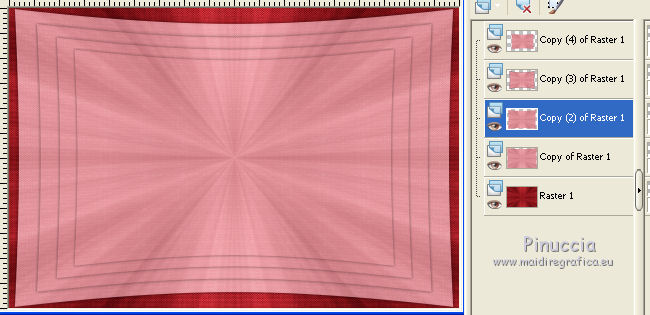
Effects>Plugins>Flaming Pear - Kyoto Color, same settings.

if you want you can repeat the filter one more time
Activate the top layer (copy(4) of Raster1).
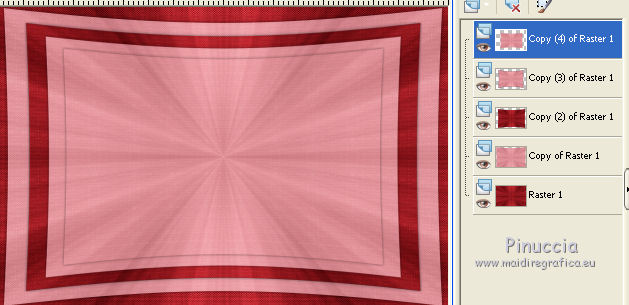
Effects>Plugins>Flaming Pear - Kyoto Color, same settings.

if you want you can repeat the filter one more time
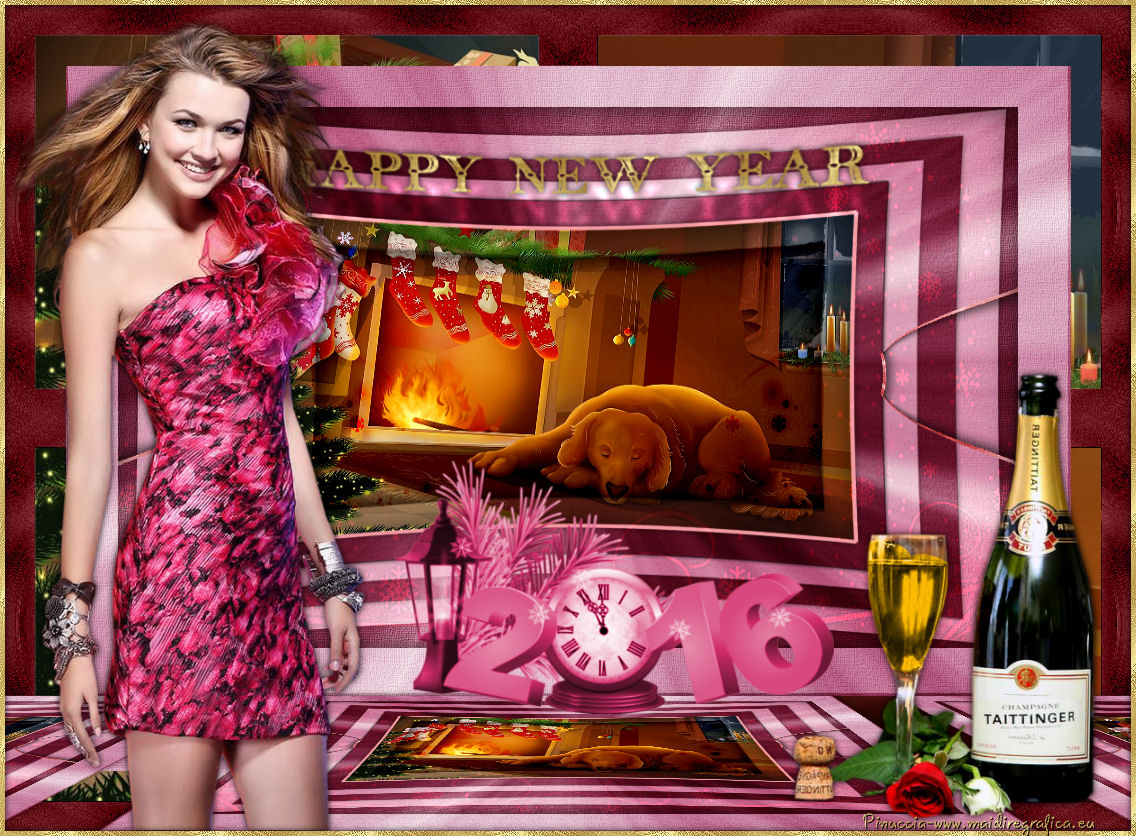
4. You should have this.
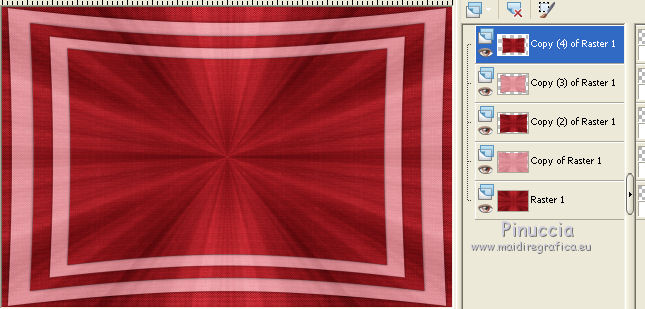
Keep selected the top layer.
Selections>Select All.
Selections>Float.
Selections>Defloat.
Selections>Modify>Contract - 30 pixels.
Layers>New Raster Layer.
Open the landscape tube and go to Edit>Copy.
Go back to your work and go to Edit>Paste into Selection.
Selections>Modify>Contract - 1 pixel.
Selections>Invert.
Press CANC on the keyboard 
Keep selected.
5. On the same layer (the landscape).
Selections>Select All.
Select>Float.
Select>Defloat.
Adjust>Sharpness>Sharpen.
Selections>Modify>Contract - 30 pixels.
Selections>Invert.
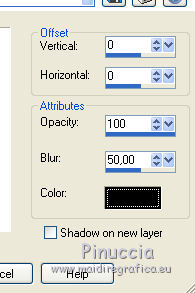
Effects>3D Effects>Drop Shadow, color black.
Again: Selections>Select All.
Select>Float.
Select>Defloat.
Selections>Modify>Select Selection borders.
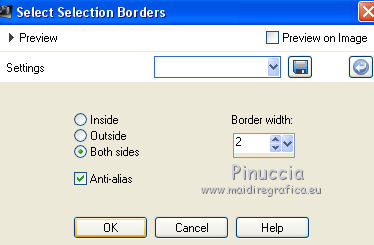
Layers>New Raster Layer.
Match mode to None and Flood Fill  the selection with your background color the selection with your background color
(many clics will be useful).
Selections>Select None.
Activate the Magic Wand tool 
and clic into the frame to select it.
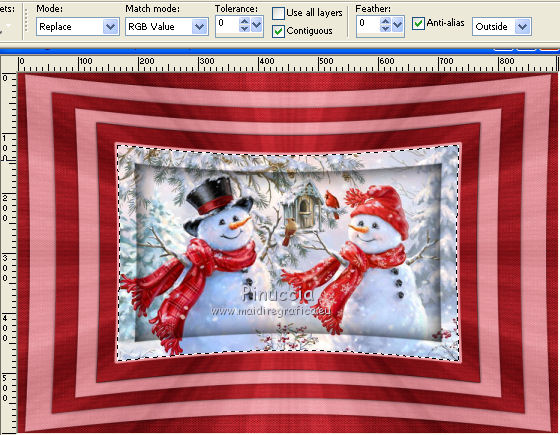
Effects>3D Effects>Cutout.
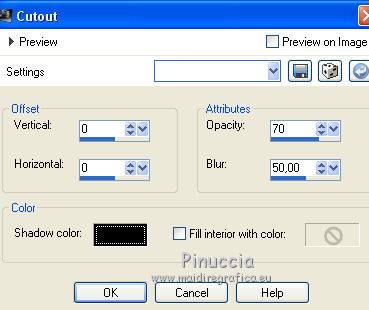
Selections>Select None.
Layers>Merge>Merge down.
Effects>3D Effects>Drop Shadow, colore black.

6. You should have this.
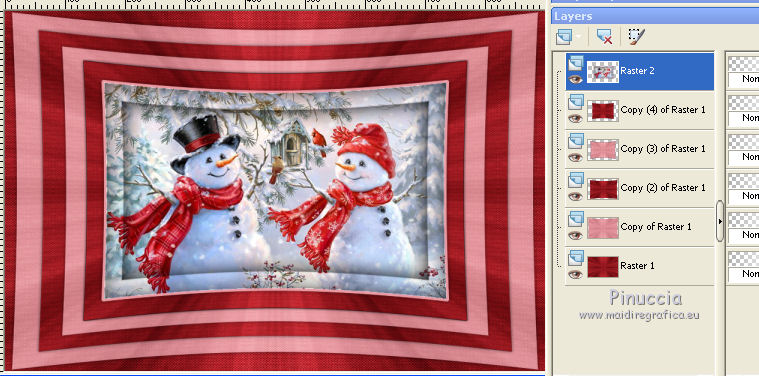
Open the tube Déco 1 - Edit>Copy.
Go back to your work and go to Edit>Paste as new layer.
Place  the tube, as in my final tag. the tube, as in my final tag.
Adjust>Sharpness>Sharpen.
optional, if the tube is not placed well:
Effects>Image Effects>Offset - H:0 - V: 96.
Layers>Merge>Merge visible.
Selections>Select All.
Layers>New Raster Layer.
Effects>3D Effects>Cutout.

Layers>Merge>Merge down and keep selected.
7. Image>Add borders, 50 pixels, symmetric, don't worry for the color.
Selections>Invert.
Activate your image "fond" of step 1 - Edit>Copy.
Go back to your work and go to Edit>Paste into selection.
Selections>Promote selection to layer.
Selections>Select None.
Layers>New Raster Layer.
Flood fill  with your foreground color. with your foreground color.
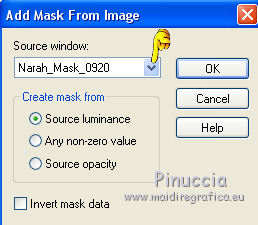
Layers>New Mask layer>From image
Open the menu under the source window and you'll see all the files open.
Select the mask Narah_Mask_0920:
Effects>Edge Effects>Enhance more.
Layers>Merge>Merge group.
8. Keep this layer selected (group raster 1).
Layers>Duplicate.
Image>Mirror.
Layers>Merge>Merge down.
Layers>Arrange>Move down.
Effects>3D Effects>Drop Shadow, color black.

Change the Blend mode of this layer to Dodge and the opacity about 60%.
Layers>Duplicate, and change the opacity of this layer about 30%, as you prefer.
Selections>Load/Save Selection>Load Selection from Disk.
Look for and load the selection Sélection#1.
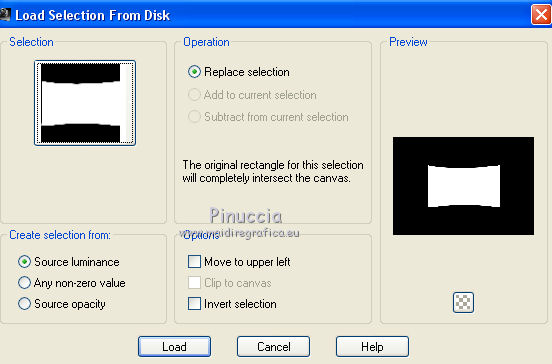
Selections>Promote Selection to Layer, and play with the Blend Mode and opacity of the layer,
as you prefer.
9. Selections>Select All.
Image>Add borders, 3 pixels, symmetriche (don't worry for the color).
Selections>Invert.
Edit>Paste into Selection (your image "Fond" is still in memory).
Effects>Plugins>Flaming Pear - Kyoto Color, same settings step 3.
Selections>Select All.
Image>Add border, 60 pixels, symmetric, a whatever color.
Selections>Invert.
Effects>Plugins>Simple - Centre Tile.
Adjust>Blur>Radial Blur.
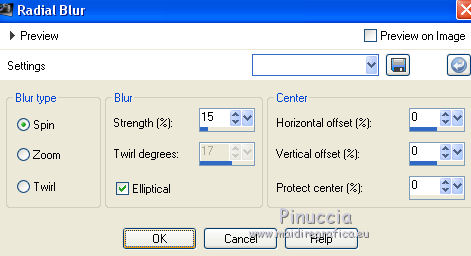
Effects>Plugins>Flaming Pear - Kyoto Color, same settings step 3.
Selections>Invert.
Edit>Copy.
Again Selections>Invert.
Selections>Promote Selection to Layer.
Another time Selections>Invert.
Layers>New Raster Layer.
Edit>Paste into Selection.
Selections>Select None.
You should have this.
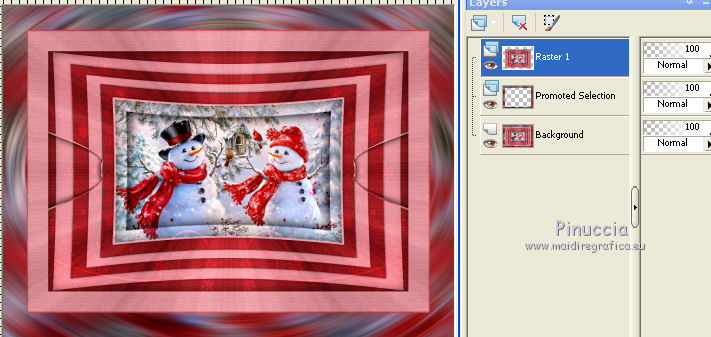
Keep Raster 1 selected.
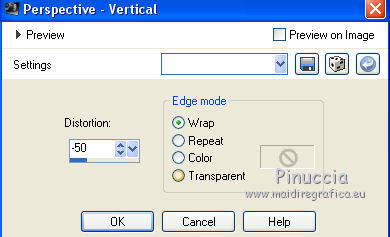
Effects>Geometric Effects>Perspective verticale.
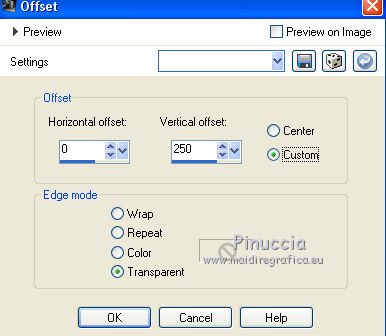
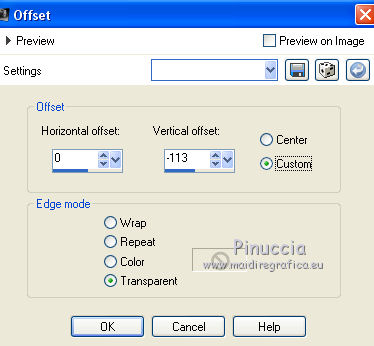
Effects>Image Effects>Offset.
K key to activate the Pick Tool 
with PSP 9 D key to activate Deformation Tool 
mode Scale  , ,
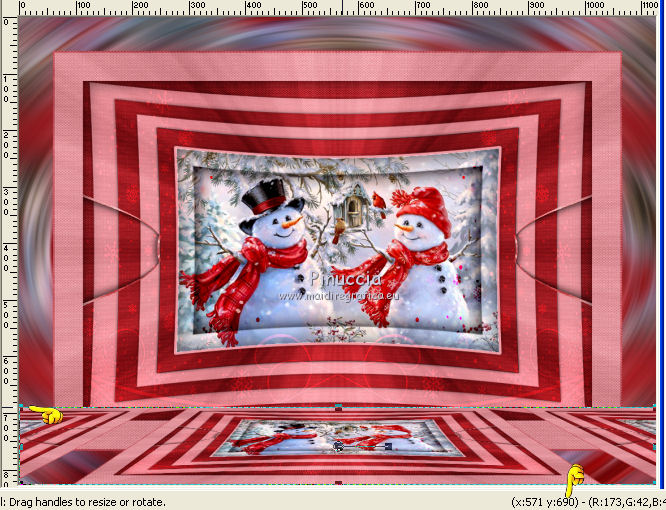
push the central node at the top, down to 690 pixels

M key to deselect the tool.
Effects>3D Effects>Drop shadow, color black.

11. Activate the bottom layerb (Background).
Layers>Promote Background Layer.
K key to activate the Pick Tool 
with PSP 9 D key to activate Deformation Tool 
mode Scale  , ,
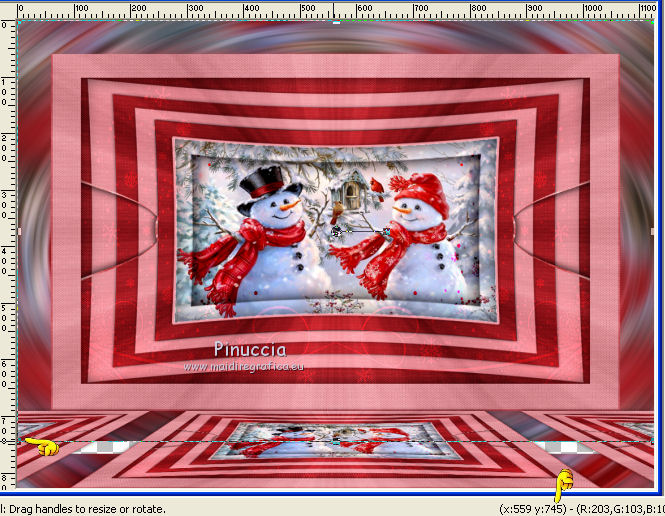
push the central node at the bottom, up to 745 pixels

Selection Tool 
(no matter the type of selection, because with the custom selection your always get a rectangle)
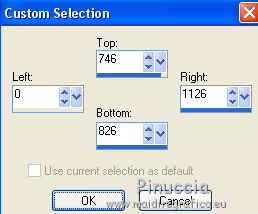
clic on the Custom Selection 
and set the following settings.

Layers>New Raster Layer.
Activate again your image "fond" of step 1, Edit>Copy.
Go back to your work and go to Edit>Paste into Selection.
Selections>Select None.
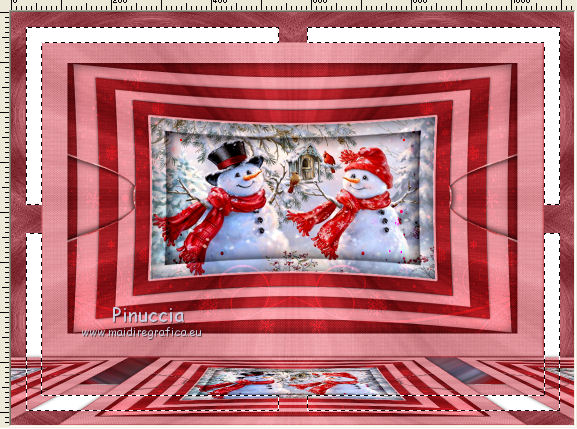
You should have this.

12. Activate the layer above (Promoted Selection).
Effects>Plugins>Simple - 4Way Average.
Effects>Edge Effects>Enhance.
Choose a color of your tag.
Selections>Select All.
Selections>Float.
Selections>Defloat.
Layers>New Raster Layer.
Layers>Arrange>Send to bottom.
Flood Fill  the layer with your color. the layer with your color.
Activate the above layers (Promoted Selection).
Change the Blend Mode of this layer to Luminance (H) or as you like.
Layers>Merge>Merge down.
If you want: Effects>Pugins>Simple - 4Way Average.
Effects>Edge Effects>Enhance.
Selections>Select None.
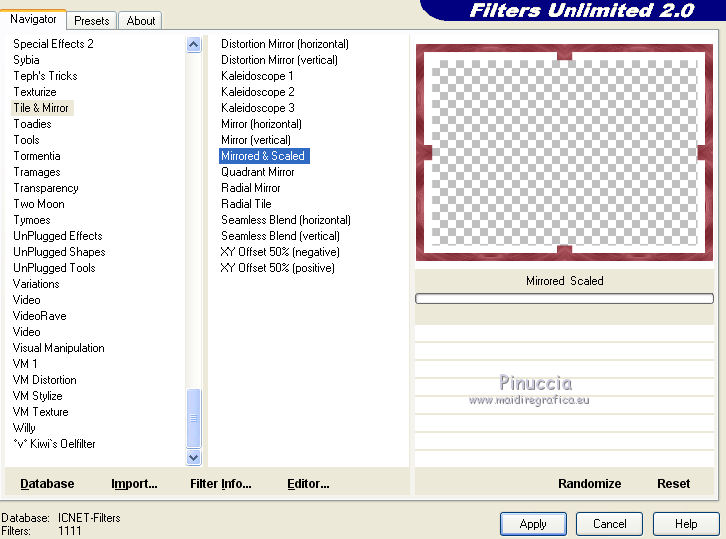
13. Effects>Plugins>Filters Unlimited 2.0 - Tile & Mirror - Mirrored & Scaled.

14. Activate the Magic Wand tool 

clic on the white borders to select them.

Open your landscape tube - Edit>Copy.
Go back to your work and go to Edit>Paste into Selection.
Selections>Select None.
Open the tube Déco perso 2 - - Edit>Copy.
Go back to your work and go to Edit>Paste as new layer.
Image>Resize - to 140%, resize all layers not checked.
Effects>Image Effects>Offset.

Effects>Plugins>MV's Plugins - Pano Warp, same setting step 2.
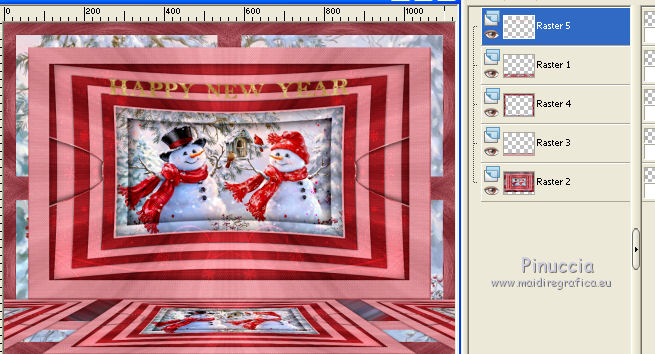
14. You should have this.

Keep Raster 5 selected.
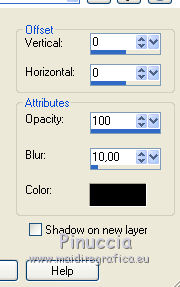
Effects>3D Effects>Drop Shadow, color white,
shadow on new layer selected.

Change the Blend Mode of the shadow layer to Dodge or as you like.
Activate the layer Raster 5.
Effects>3D Effects>Drop shadow, color black.

Finish the tag as you like.
Final step.
Activate the bottom layer.
Selections>Select All.
Image>Crop to Selection.
Selections>Select All.
Image>Add border, 5 pixels, symmetric, no matter the color.
Selections>Invert.
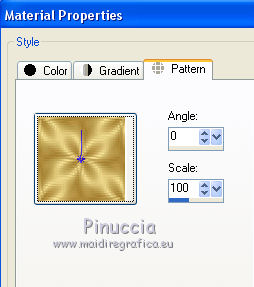
Open a golden pattern of your and minimize it.
Set your foreground color to Pattern and select the golden pattern.

Flood fill  the selection with your golden pattern. the selection with your golden pattern.
Effects>3D Effects>Drop Shadow, color black.

Selections>Select None.
Sign your work and save as jpg.
The tubes of this version are by Azalée et Gabry.


If you have problems or doubts, or you find a not worked link, or only for tell me that you enjoyed this tutorial, write to me.
2 January 2016
|


 the selection with your background color


 the tube, as in my final tag.


 ,
,