|
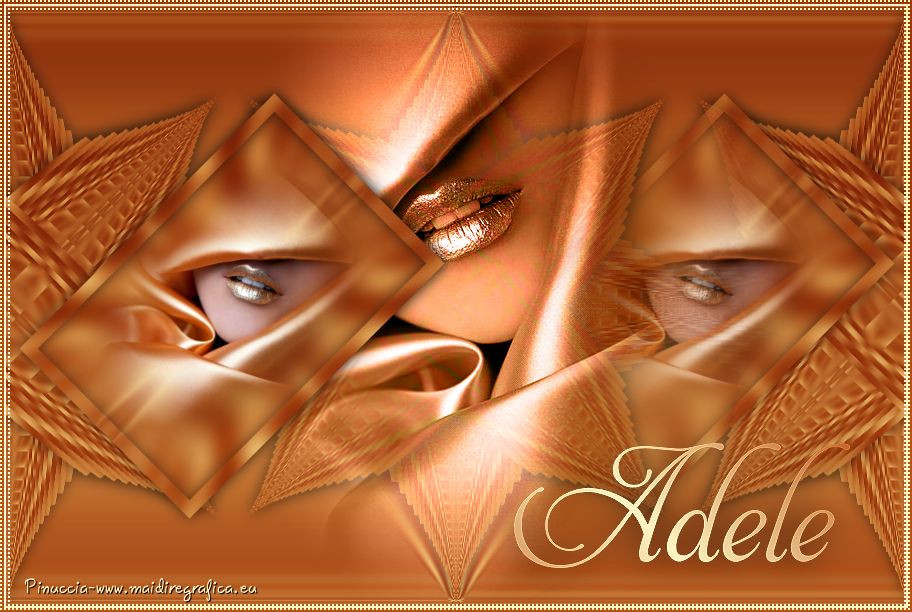
ADELE

english version

Here you find the original of this tutorial:

This tutorial was written with CorelX19 and translated with CorelX17, but it can also be made using other versions of PSP.
Since version PSP X4, Image>Mirror was replaced with Image>Flip Horizontal,
and Image>Flip with Image>Flip Vertical, there are some variables.
In versions X5 and X6, the functions have been improved by making available the Objects menu.
In the latest version X7 command Image>Mirror and Image>Flip returned, but with new differences.
See my schedule here
italian translation here
french tanslation here
your versions here
For this tutorial, you will need:
A misted of a face
The rest of the material here
The tube used and not supplied is by di Coleçao (©LDesigns).
The text is by Yedralina
Plugins:
consult, if necessary, my filter section here
Filters Unlimited 2.0 here
AFS IMPORT - sqborder2 here
Mehdi - Wavy lab 1.1 here
Optional: Nik Software - Color Efex here
Filters AFS IMPORT can be used alone or imported into Filters Unlimited.
(How do, you see here)
If a plugin supplied appears with this icon  it must necessarily be imported into Unlimited it must necessarily be imported into Unlimited

You can change Blend Modes according to your colors.
In the newest versions of PSP, you don't find the foreground/background gradient (Corel_06_029).
You can use the gradients of the older versions.
The Gradient of CorelX here
Colors
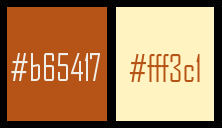
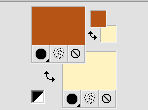
1. Set your foreground color to dark color #b65417,
and your background color to light color #fff3c1.
2. Open a new transparent image 900 x 600 pixels.
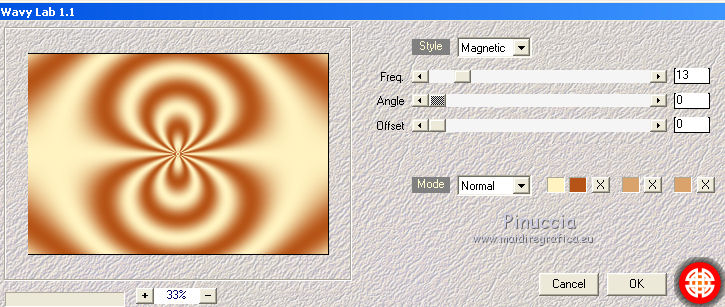
3. Effects>Plugins>Mehdi - Wavy Lab 1.1
This plugin works with the colors of your palette:
the first is the your background color, the second is your foreground color;
keep the other two colors created by the plugin.
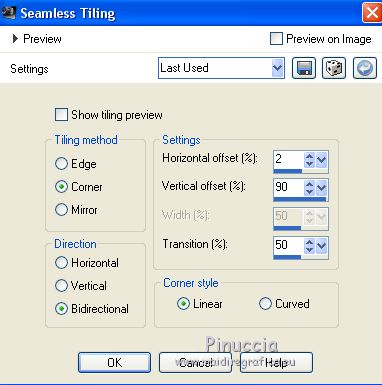
4. Effects>Image Effects>Seamless Tiling.
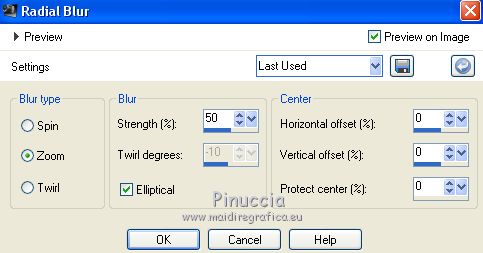
5. Adjust>Blur>Radial Blur.
6. Layers>Duplicate.
Image>Flip.
Change the Blend Mode of this layer to Multiply.
7. Layers>Merge>Merge Down.
8. Layers>Duplicate.
Image>Resize, to 40%, resize all layers not checked.
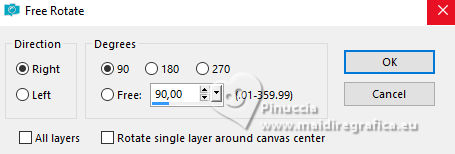
9. Image>Free Rotate - 90 degrees to right.
10. Layers>Duplicate.
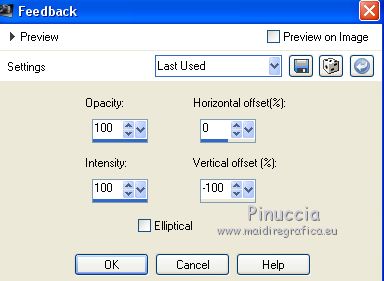
Effects>Reflection Effects>Feedback.
11. Effects>Reflection Effects>Rotating Mirror.
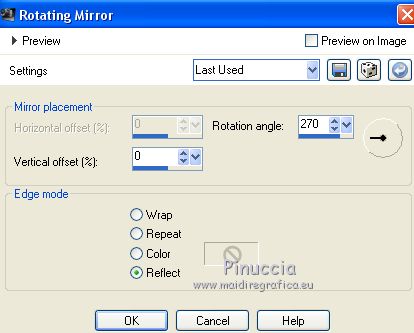
12. Layers>Arrange>Move Down.
Activate again the top layer.
13. Selections>Select All.
Selections>Float.
Selections>Defloat.
14. Selections>Modify>Contract - 13 pixels.
Selections>Promote Selection to layer.
15. Adjust>Blur>Radial Blur, same settings.

16. Open the misted and go to Edit>Copy.
Go back to your work and go to Edit>Paste into Selection.
17. Selections>Invert.
Effects>3D Effects>Drop Shadow, color black.
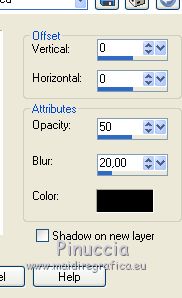
Selections>Select None.
18. Layers>Merge>Merge Down.
19. Effects>3D Effects>Drop Shadow, same settings.
20. Activate the layer below, the second copy of Raster 1.
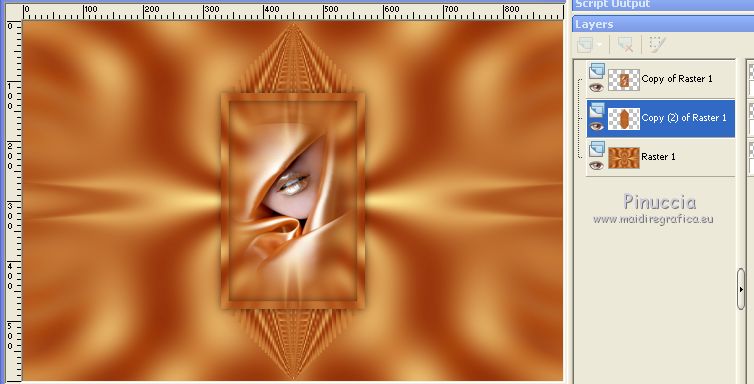
21. Effects>Geometric Effects>Circle.

22. Layers>Duplicate.
Image>Free Rotate, same settings.

23. Layers>Merge>Merge Down.
24. Layers>Duplicate.
Image>Free Rotate - 45 degrees to right.
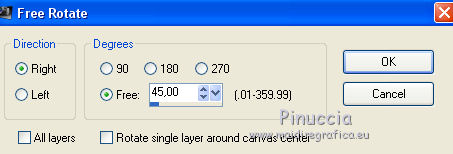
25. Effects>3D Effects>Drop Shadow, same settings.
Layers>Merge>Merge Down.
Effects>3D Effects>Drop Shadow, same settings.
26. Effects>Image Effects>Seamless Tiling.

27. Activate the top layer (copy of Raster 1).
Image>Free Rotate, same settings.

28. Objects>Align>Left
If you are working with a previous version that has not available the menu Objects,
use the Move Tool 
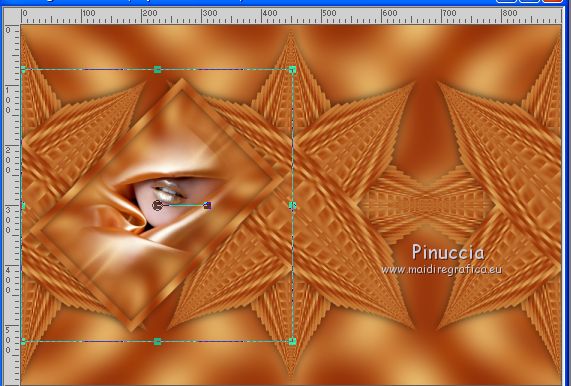
29. Layers>Duplicate.
Effects>Image Effects>Seamless Tiling, same settings.

30. Layers>Arrange>Move down.
31. Edit>Paste as new layer (the misted is still in memory).
Image>Resize, if it is necessary, resize all layers not checked.
Move  the tube up, more or less on the middle star. the tube up, more or less on the middle star.
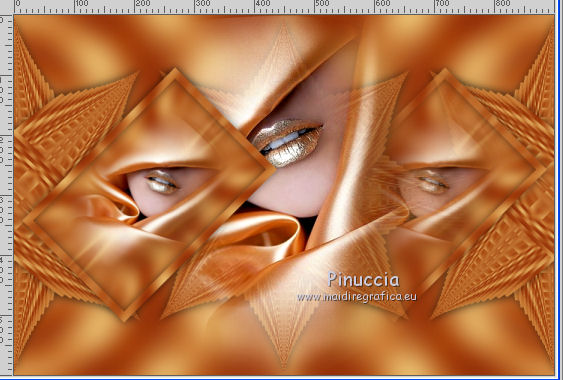
Optional: Change the Blend Mode of this layer to Luminance (Legacy).
Layers>Arrange>Move Down.
32. Activate the bottom layer, Raster 1.
Layers>Duplicate.
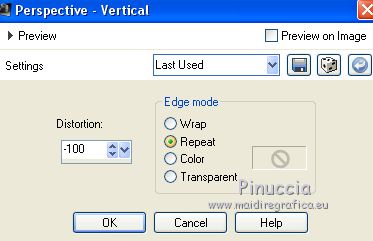
33. Effects>Geometric Effects>Perspective vertical.
34. Effects>Reflection Effects>Rotating Mirror, same settings.

35. Image>Add borders, 2 pixels, symétrique, light color.
Image>Add borders, 4 pixels, symétrique, dark color.
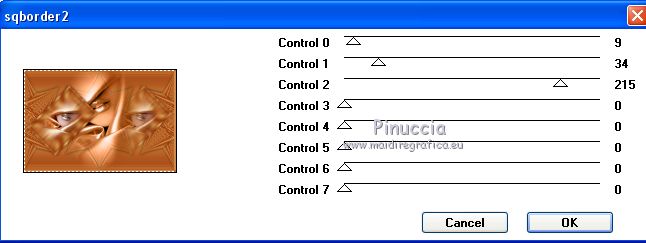
36. Effects>Plugins>AFS IMPORT - sqborder2.
37. Open the text Text_Adele©Yedralina and go to Edit>Copy.
Go back to your work and go to Edit>Paste as new layer.
Change the Blend Mode of this layer to luminance (legacy), or other, according to your colors.
If you prefer, you can write your text.
For the text supplied: font AphroditePro (it is in the material).
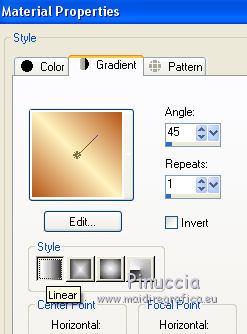
background color: Foreground/Background Color, style Linear.
38. Layers>Merge>Merge visible.
39. Sign your work on a new layer.
40. Image>Resize, 900 pixels width, resize all layers checked.
41. Layers>Merge>Merge All.
42. Optional:
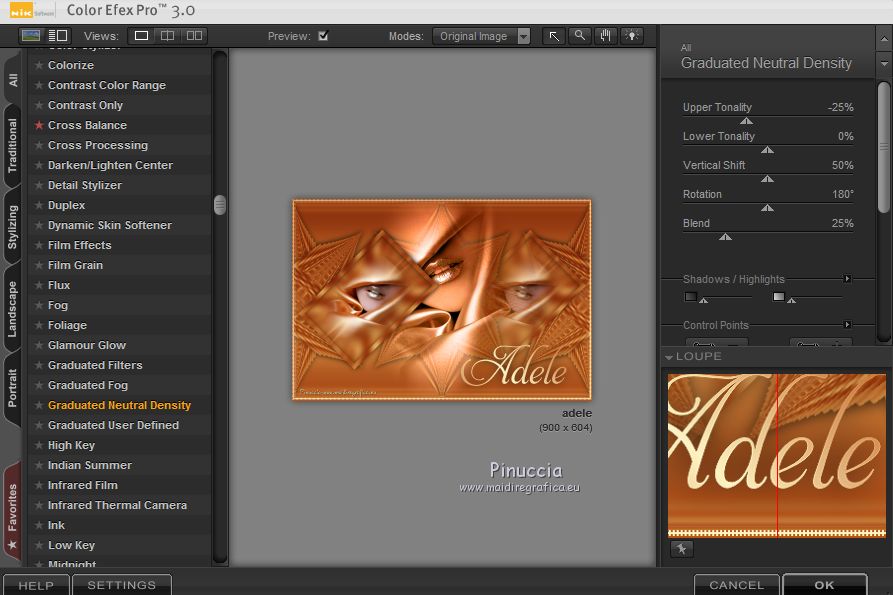
Effects>Plugins>Nik Software - Color Efex Pro - Graduated Neutral Density
43. Save as jpg.
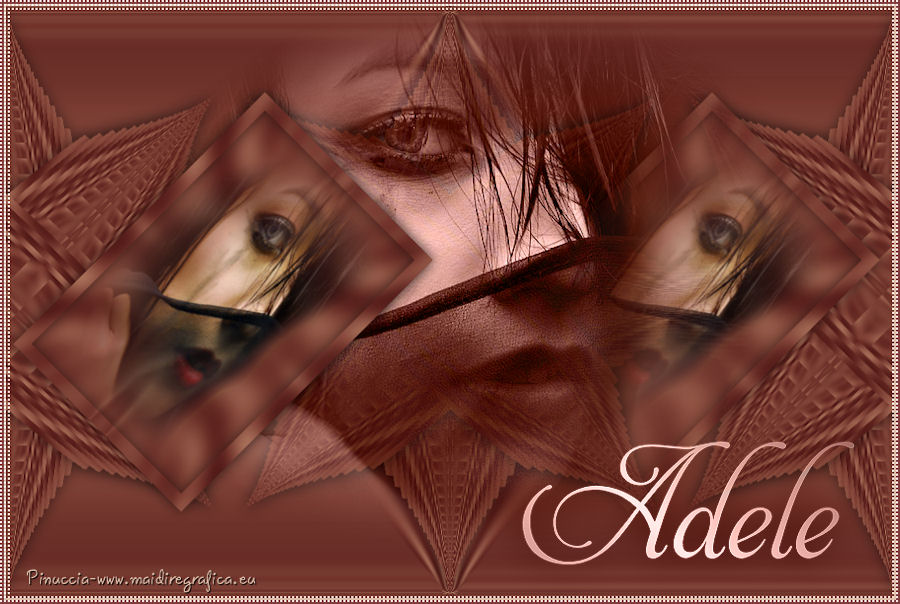
The tube of this version is by MMDesignz

If you have problems or doubts, or you find a not worked link, or only for tell me that you enjoyed this tutorial, write to me.
10 March 2018
|

