|
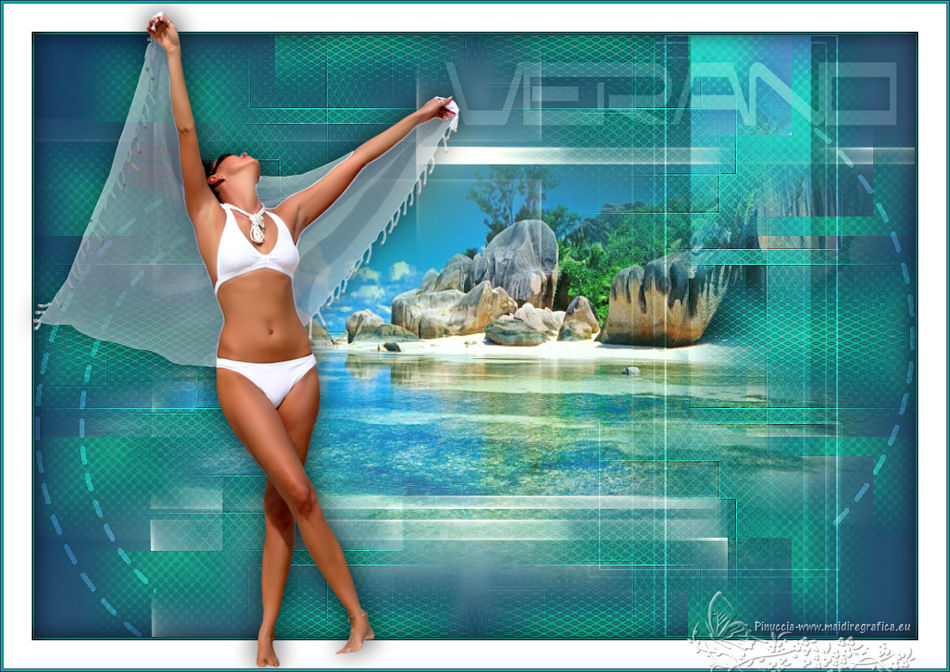
BIENVENIDO VERANO
WELCOME SUMMER
english version


This tutorial was written with CorelX19 and translated with CorelX17, but it can also be made using other versions of PSP.
Since version PSP X4, Image>Mirror was replaced with Image>Flip Horizontal,
and Image>Flip with Image>Flip Vertical, there are some variables.
In versions X5 and X6, the functions have been improved by making available the Objects menu.
In the latest version X7 command Image>Mirror and Image>Flip returned, but with new differences.
See my schedule here
italian translation here
french tanslation here
your versions here
For this tutorial, you will need:
2 Tubes of yours.
The rest of the material here
For the tubes not supplied thanks Talanat (talanat_ledi-127-02-06-2013) and Jewel (Paysage misted jewel 023).
For the masks thanks Narah.
The rest of the material is by Yedralina
(The links of the tubemakers here).
Plugins:
consult, if necessary, my filter section here
Andromeda - cMulti here
in the zip I joined the effect
AAA Filters - Custom here

You can change Blend Modes according to your colors.
In the newest versions of PSP, you don't find the foreground/background gradient (Corel_06_029).
You can use the gradients of the older versions.
The Gradient of CorelX here
Copy the Selection in the Selections Folder.
Open the masks in PSP and minimize them with the rest of your material.
1. Set your foreground color to the light color #2aa897,
and your background color to the dark color #193b6a.
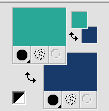
Set your foreground color to a Foreground/Background Gradient, style Rectangular.
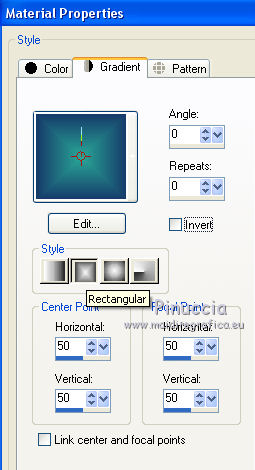
2. Open a new transparent image 950 x 650 pixels,
Flood Fill  the transparent image with your Gradient. the transparent image with your Gradient.
3. Layers>Duplicate.
Image>Resize, to 40%, resize all layers not checked.
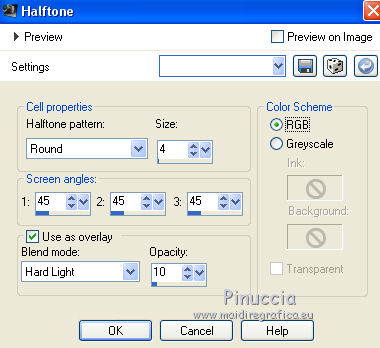
4. Effects>Artistic Effects>Halftone.
5. Effects>Plugins>Andromeda - CMulti
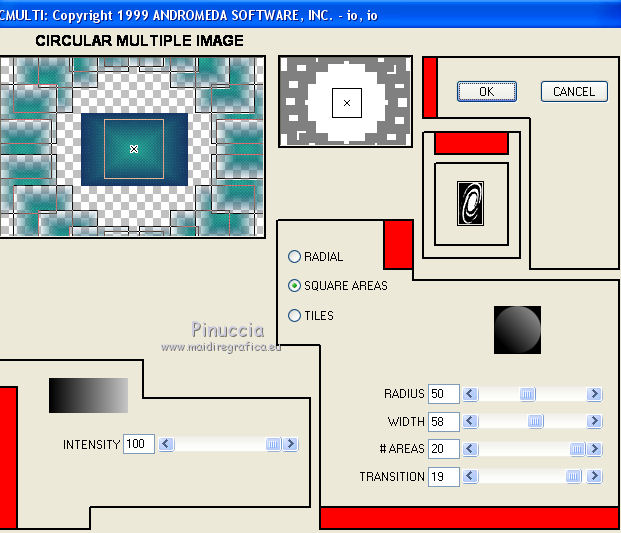
if you are problems with the plugin, copy/paste as new layer the file (livello multi),
that I joined in the material
6. Selections>Load/Save Selection>Load Selection from Disk.
Look for and load the selection ©Yedralina_Sel547.
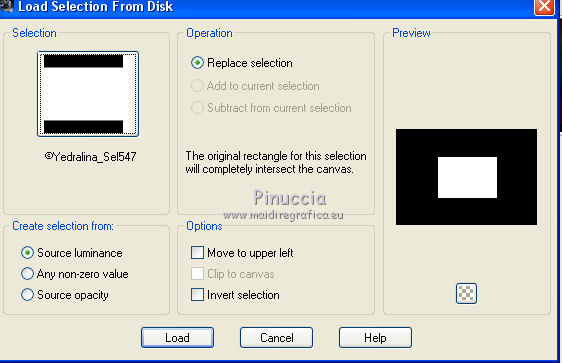
Press CANC on the keyboard 
Selections>Select None.
7. Effects>Reflection Effects>Rotating Mirror.
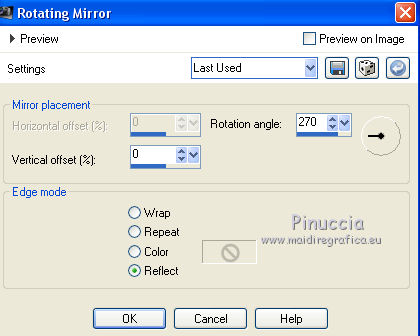
8. Layers>Duplicate.
Effects>Distortion Effects>Pinch.
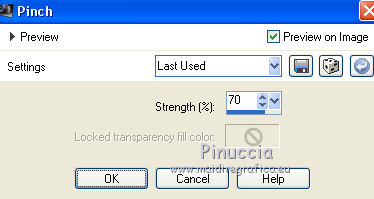
9. Effects>Image Effects>Seamless Tiling.

Effects>Edge Effects>Enhance.
10. Layers>Merge>Merge Down.
11. Activate the bottom layer, Raster 1.
Layers>New Raster Layer.
Selections>Select All.
12. Open your landscape misted and go to Edit>Copy.
Go back to your work and go to Edit>Paste into Selection
Selections>Select None.
13. Layers>Merge>Merge Down.
14. Layers>New Raster Layer.
Set your foreground color to white #ffffff.
Flood Fill  the layer with color white. the layer with color white.
15. Layers>New Mask layer>From image
Open the menu under the source window and you'll see all the files open.
Select the mask Narah_Mask_1262.
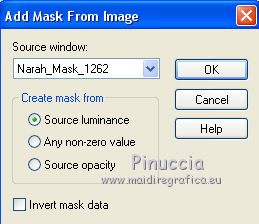
Layers>Merge>Merge Group.
16. Layers>New Raster Layer.
Flood Fill  the layer with color white. the layer with color white.
17. Layers>New Mask layer>From image
Open the menu under the source window and select the mask Narah_Mask_1264.
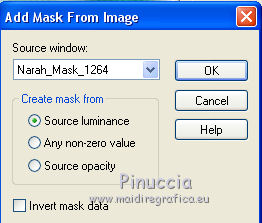
Layers>Duplicate.
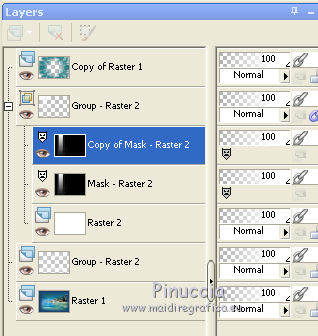
Layers>Merge>Merge group.
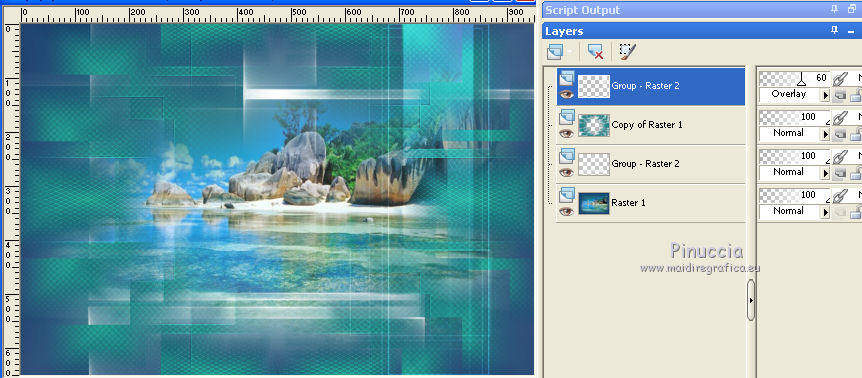
18. Layers>Arrange>Bring to Top.
Image>Mirror.
Change the Blend Mode of this layer to Overlay, opacity 60%.
19. Open the tube Deco00196©Yedralina and go to Edit>Copy.
Go back to your work and go to Edit>Paste as new layer.
Objets>Align>Bottom.
if you are working with a previous version that has not available the menu Objects,
use the Move tool 
Layers>Arrange>Move Down.
Change the Blend Mode of this layer to Overlay, opacity 40%.
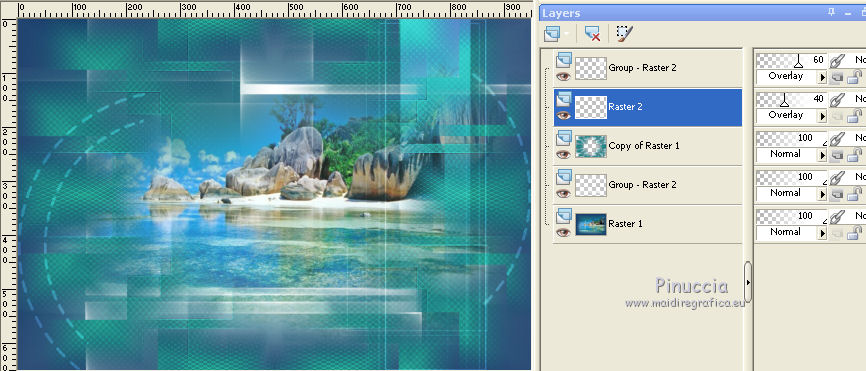
20. Open the text VERANO and go to Edit>Copy.
Go back to your work and go to Edit>Paste as new layer.
If you want, you can write your text with the font New Brilliant, that you find in the material,
I writed it with white, size 26
Move  the text at the upper right. the text at the upper right.
Change the Blend Mode of this layer to Soft Light.
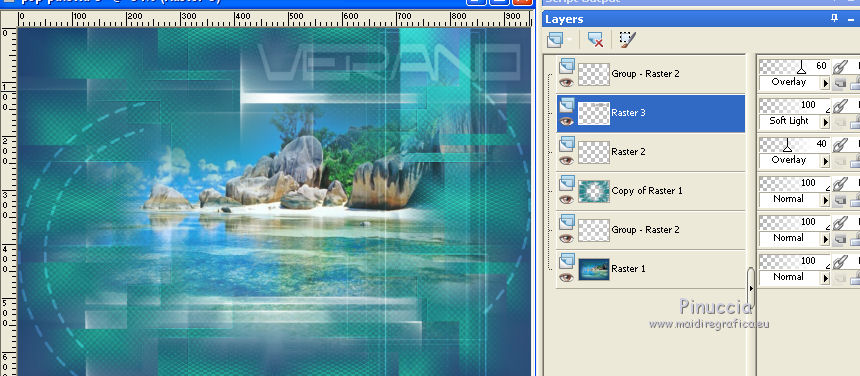
21. Layers>Merge>Merge visible.
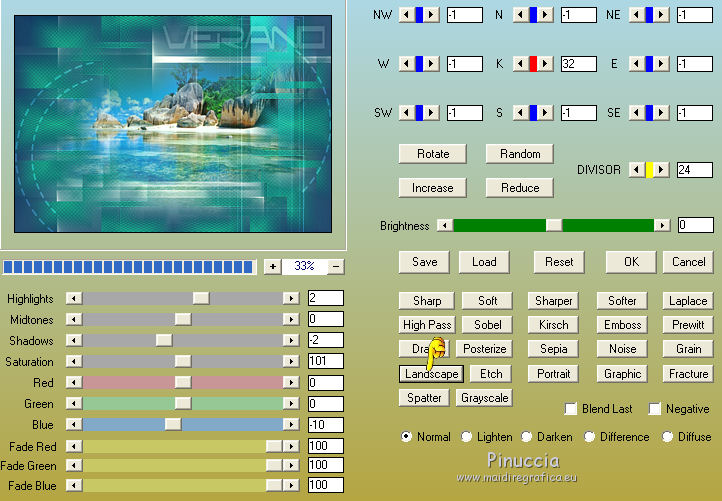
22. Effects>Plugins>AAA Filters - Custom - click on Landscape and ok.
23. For the bord, set again your foreground color to light color #2aa897.

Image>Add borders, 1 pixel, symmetric, dark color.
Image>Add borders, 2 pixels, symmetric, light color.
Image>Add borders, 1 pixel, symmetric, dark color.
24. Selections>Select All.
Image>Add borders, 30 pixels, symmetric, color white.
25. Selections>Invert.
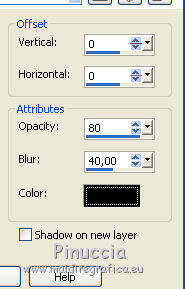
Effets>Effets 3D>Drop Shadow, color black.
Selections>Select None.
26. Open your main tube and go to Edit>Copy.
Go back to your work and go to Edit>Paste as new layer.
Place  the tube where you like. the tube where you like.
Effects>3D Effects>Drop Shadow, at your choice.
27. Image>Add borders, 1 pixel, symmetric, dark color.
Image>Add borders, 2 pixels, symmetric, light color.
Image>Add borders, 1 pixel, symmetric, dark color.
28. Image>Resize, 900 pixels width, resize all layers checked.
29. Sign your work on a new layer.
(my watermark is optional: only for those who like to have it)
Layers>Merge>Merge All and save as jpg.
The tubes of this version are by Jacotte (tube-jacotte-a286)
and Yedralina (1743©Yedralina-Paseo_Marítimo_Pablo_Ruiz_Picasso_©Tyk).


If you have problems or doubts, or you find a not worked link, or only for tell me that you enjoyed this tutorial, write to me.
6 July 2018
|

