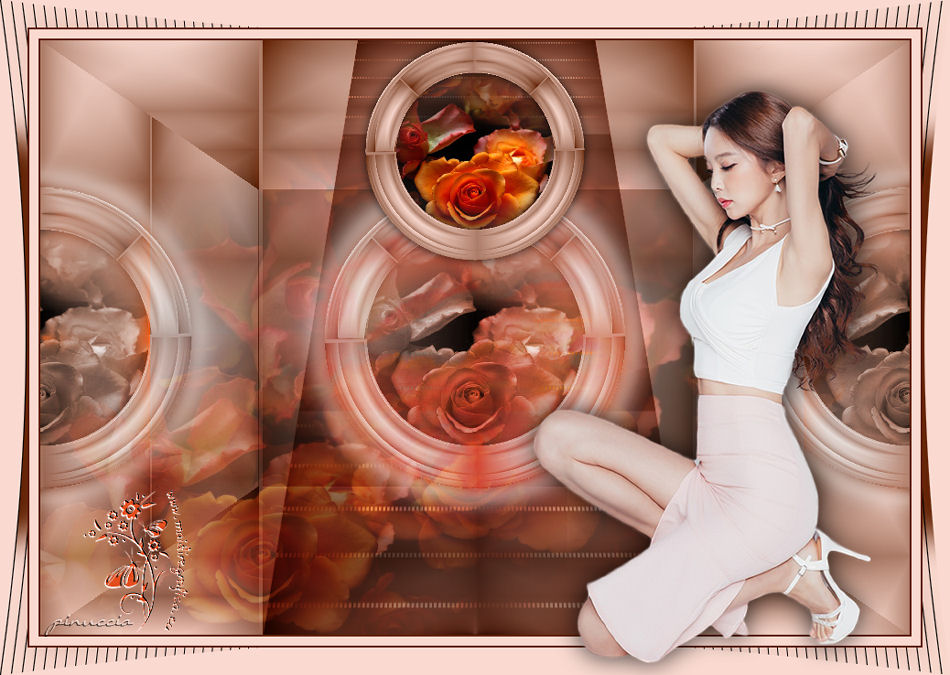
|
JULIA
english version

Here you find the original of this tutorial:

This tutorial was written with CorelX19 and translated with CorelX and CorelX17, but it can also be made using other versions of PSP.
Since version PSP X4, Image>Mirror was replaced with Image>Flip Horizontal,
and Image>Flip with Image>Flip Vertical, there are some variables.
In versions X5 and X6, the functions have been improved by making available the Objects menu.
In the latest version X7 command Image>Mirror and Image>Flip returned, but with new differences.
See my schedule here
italian translation here
your versions qui/here
For this tutorial, you will need:
A woman tube of yours
The rest of the material qui
The woman tube is by Malacka (malackatube v0564)
Misted di Yedralina (0669-Yedralina)
Plugins:
consult, if necessary, my filter section here
Filters Unlimited 2.0 here
Mehdi - Sorting Tiles here
L&K's - L&K's Zitah here
&<Bkg Designer sf10I> - ALF's Border Mirror Bevel (to import in Unlimited) here
AP Lines - Lines SilverLining here
Mura's Meister - Pole Transform 2.1 here

You can change Blend Modes according to your colors.
In the newest versions of PSP, you don't find the foreground/background gradient (Corel_06_029).
You can use the gradients of the older versions.
The Gradient of CorelX here
Copy the Selection in the Selections Folder.
1. Set your foreground color to #612001,
and your background color to #fadad0.
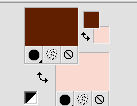
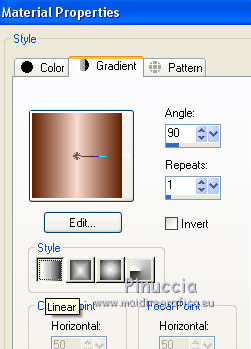
Set your foreground color to a Foreground/Background Gradient, style Linear.
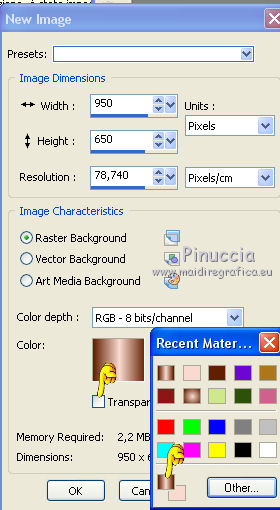
2. Open a new image 950 x 650 pixels, gradient background.
Transparent deselected, and right click on the color palette.
You'll have the latest color chart; at the bottom left your material palette.
Click on the gradient palette to set it as background of your new image
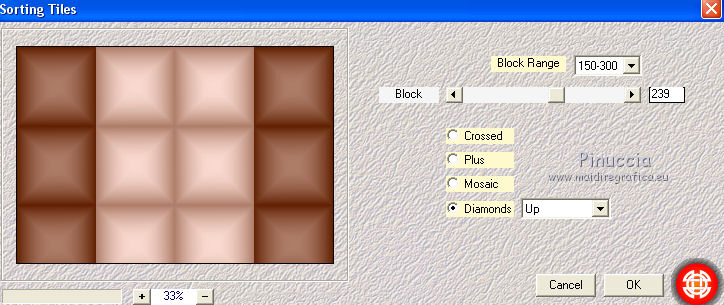
3. Effects>Plugins>Mehdi - Sorting Tiles.
4. Effects>Image Effects>Seamless Tiling.

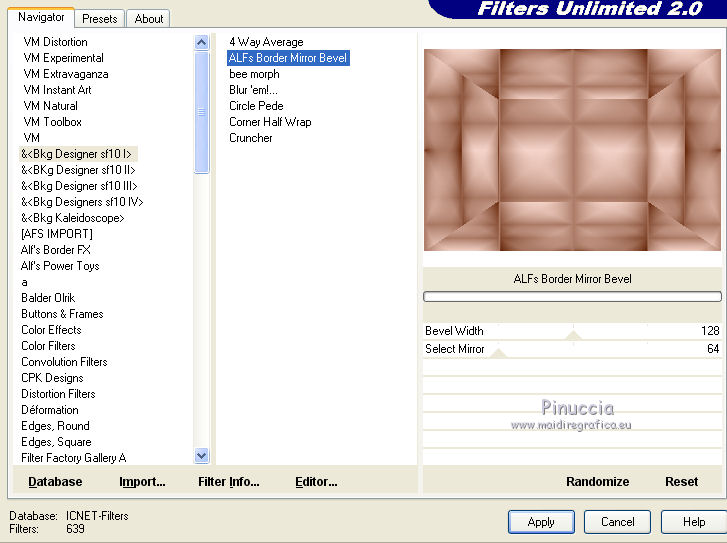
5. Effects>Plugins>Filters Unlimited 2.0 - &<Bkg Designer sf10I> - ALF's Border Mirror Bevel, default settings.
6. Selections>Load/Save Selection>Load Selection from Disk.
Look for and load the selection ©Yedralina_sel384.
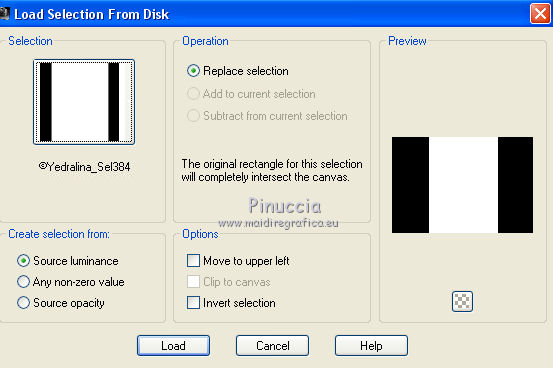
Selections>Promote Selection to layer.
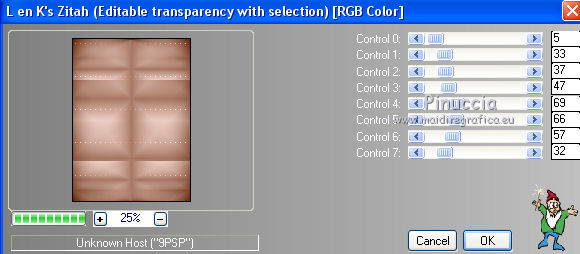
7. Effects>Plugins>L&K's - L&K Zitah, default settings
8. Selections>Select None.
Effects>Edge Effects>Dilate
9. Effects>Geometric Effects>Perspective Vertical.
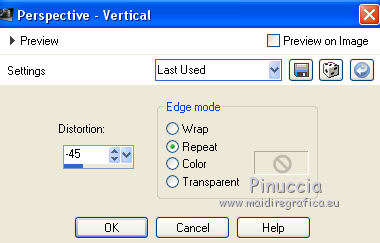
10. Change the Blend Mode of this layer to Multiply.
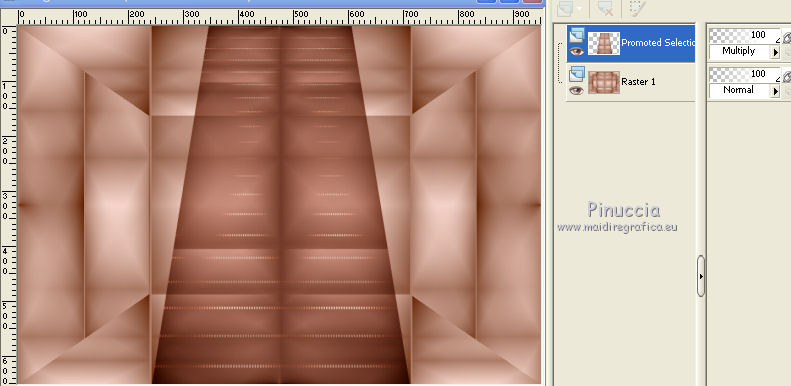
11. Layers>New Raster Layer.
Selections>Select All.
Open the landscape misted - Edit>Copy.
Go back to your work and go to Edit>Paste into Selection.
Selections>Select None.
12. Change the Blend Mode of this layer Multiply
and reduce the opacity between 50 and 60% (according to your tube).
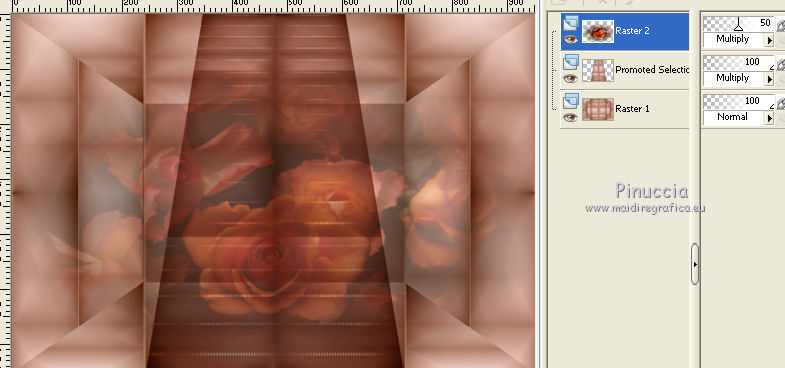
13. Layers>Duplicate.
Change the Blend Mode to Normal, opacity 100
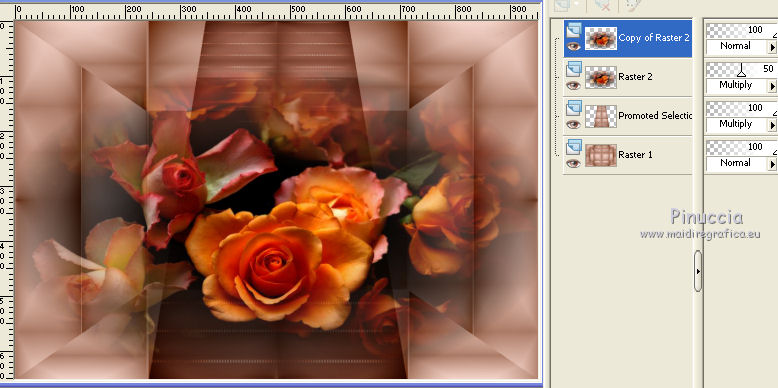
14. Activate the background layer (Raster 1).
Layers>Duplicate.
Layers>Arrange>Bring to top.
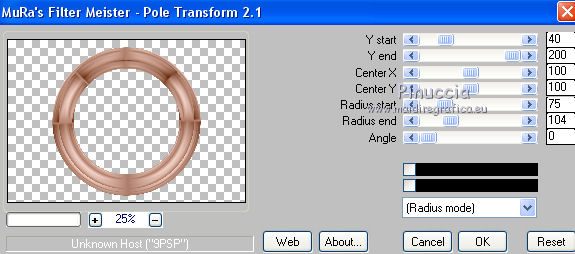
15. Effects>Plugins>Mura's Meister - Pole Transform 2.1
16. Activate the Magic Wand Tool 
and click in the middle of the circle to select it.
Activate the layer below, copy of Raster 2.
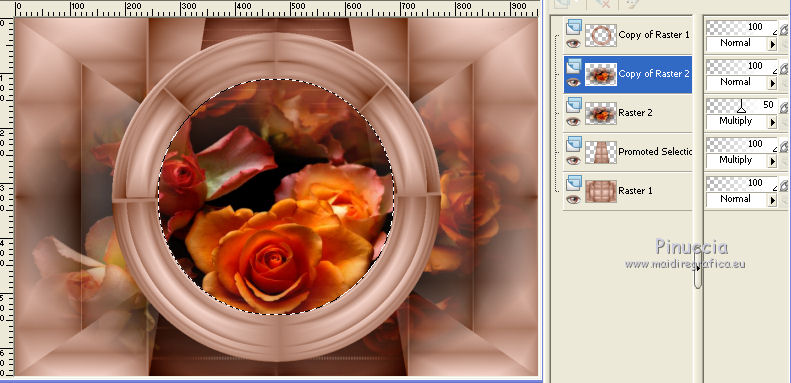
17. Selections>Invert.
Press CANC on the keyboard 
18. Effects>3D Effects>Drop Shadow, color black.
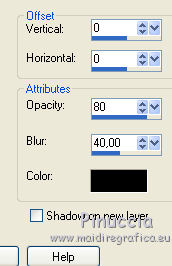
Selections>Select None.
19. Activate the top layer (copy of Raster 1).
Layers>Merge>Merge down.
20. Effects>3D Effects>Drop Shadow, same settings.
21. Layers>Duplicate.
Image>Resize, to 55%, resize all layers not checked.
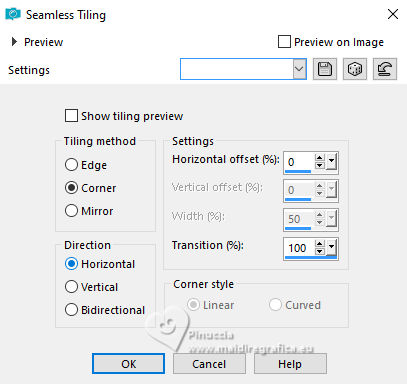
22. Effects>Image Effects>Seamless Tiling.
23. Layers>Arrange>Move down.
24. Effects>3D Effects>Drop Shadow, same settings but with your light color.
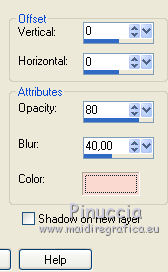
Apply this Drop Shadow two times, to your choice.
25. Change the Blend Mode of this layer to Luminance
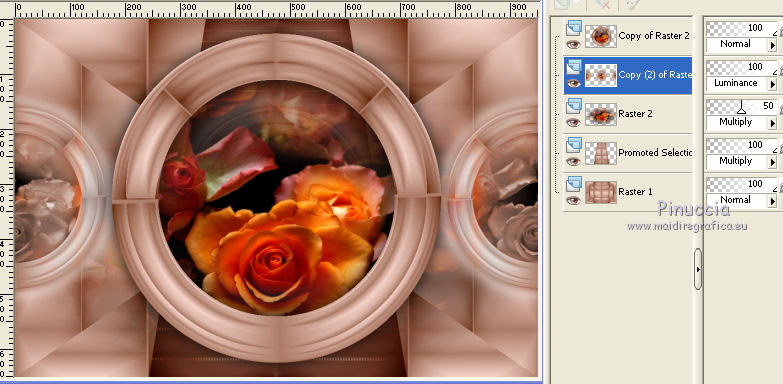
26. Go back to the top layer (Copy of Raster 2).
Image>Resize, to 40%, resize all layers not checked.
27. Objects>Align>Top
if you are working with a previous versions that has not available the menu Objects,
use the Move Tool 
28. Activate the misted layer (Raster 2).
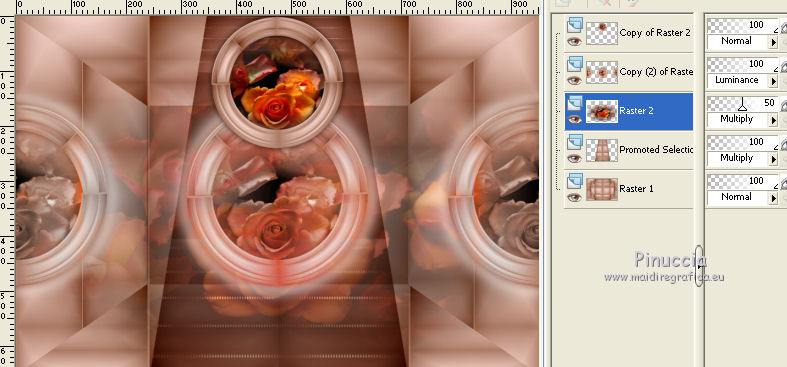
Layers>Duplicate.
Image>Resize, to 70%, resize all layers not checked.
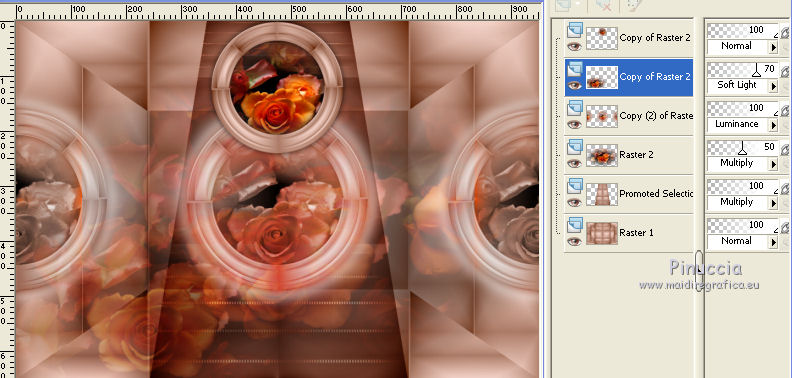
Move  the tube at the bottom left, see my example. the tube at the bottom left, see my example.
Layers>Arrange>Move Up.
Change the Blend Mode of this layer to Soft Light, or as you like better,
and reduce the opacity to 70%.
29. Image>Add borders, 2 pixels, symmetric, dark color.
Image>Add borders, 10 pixels, symmetric, light color.
Image>Add borders, 2 pixels, symmetric, dark color.
30. Selections>Select All.
31. Image>Add borders, 30 pixels, symmetric, light color.
32. Selections>Invert.
33. Change the Gradient settings, style Radial.
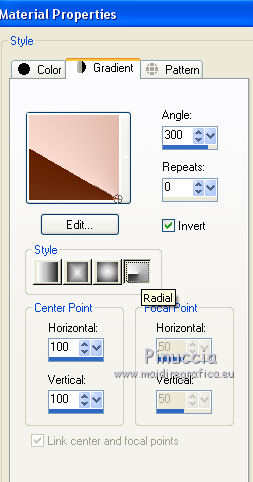
Flood Fill  the selection with the gradient. the selection with the gradient.
34. Effects>Reflection Effects>Rotating Mirror.
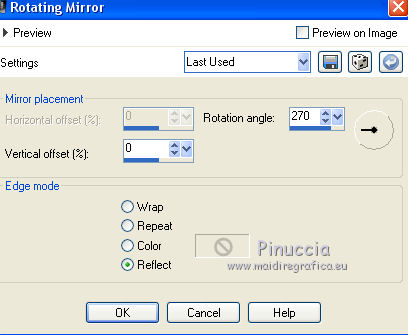
35. Again Effects>Reflection Effects>Rotating Mirror, avec these settings.

36. Adjust>Blur>Gaussian Blur - radius 15.

37. Effects>Plugins>AP [Lines] - Lines SilverLining

38. Effects>Distortion Effects>Lens Distortion, light color.
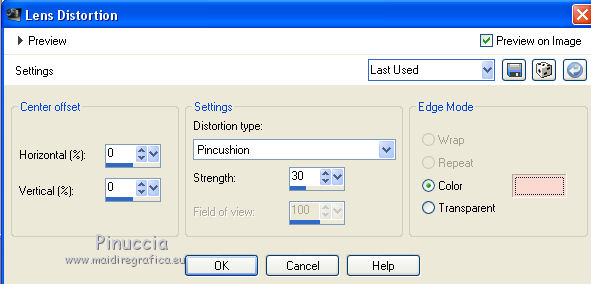
Selections>Select None.
39. Open your tube - Edit>Copy.
Go back to your work and go to Edit>Paste as new layer.
Effects>3D Effects>Drop Shadow, as you prefer.
40. Image>Resize, 950 pixels width, resize all layers checked.
Sign your work on a new layer.
41. Layers>Merge>Merge All and save as jpg.
The tubes of this version are by Colybrix and Cal
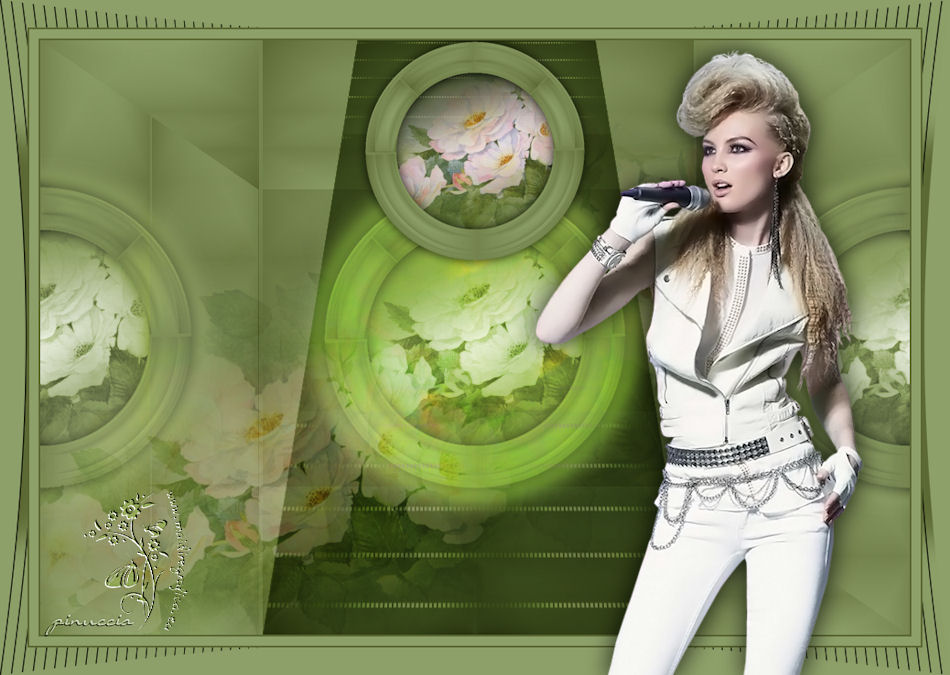

If you have problems or doubts, or you find a not worked link, or only for tell me that you enjoyed this tutorial, write to me.
20 June 2017
|
