|
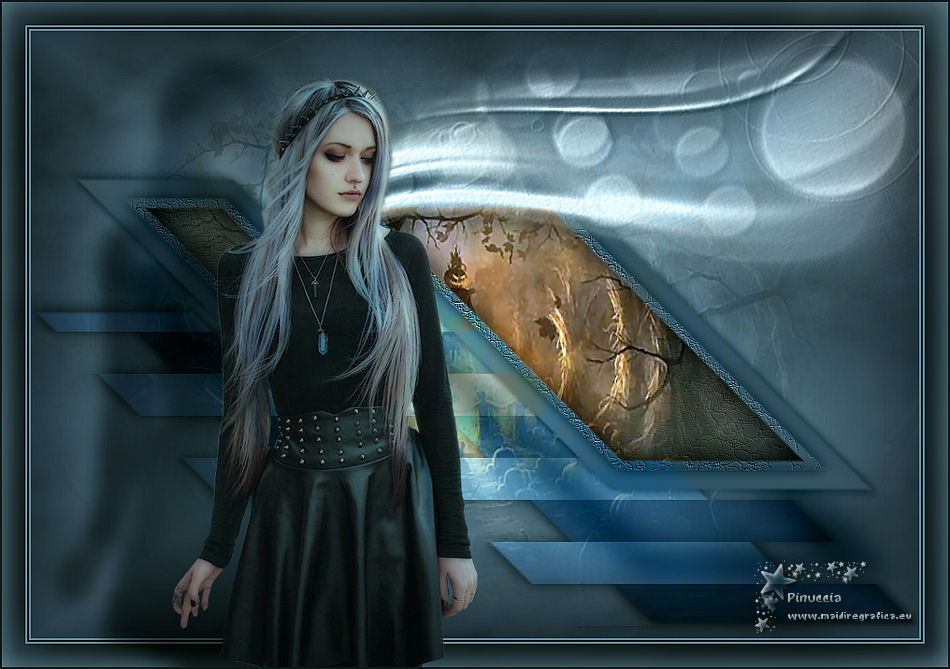
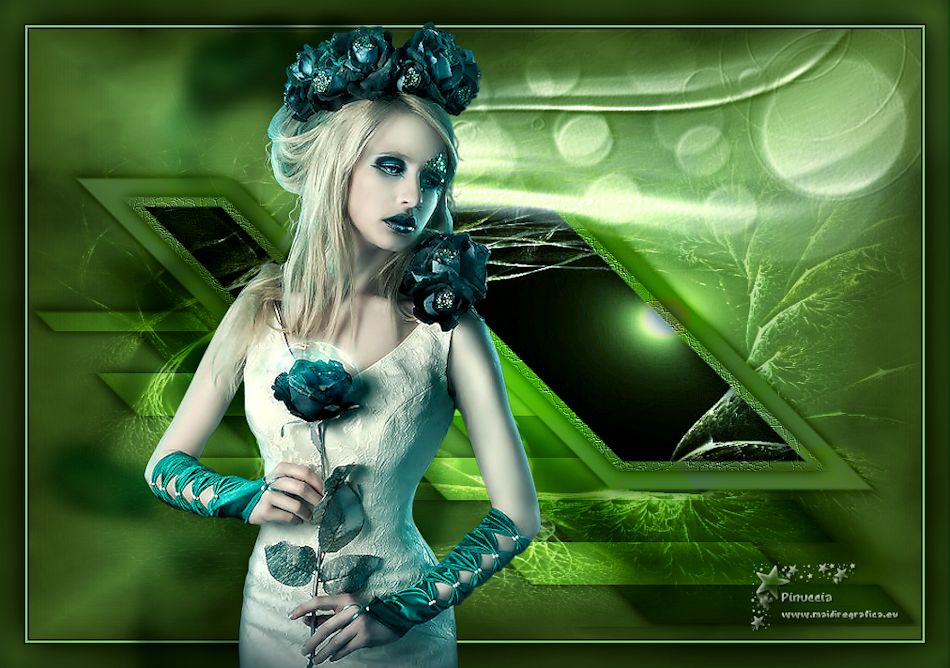
LUNA MISTERIOSA


Thanks Yedralina for your invitation to translate your tutorials into english

This tutorial was written with CorelX19 and translated with CorelX17, but it can also be made using other versions of PSP.
Since version PSP X4, Image>Mirror was replaced with Image>Flip Horizontal,
and Image>Flip with Image>Flip Vertical, there are some variables.
In versions X5 and X6, the functions have been improved by making available the Objects menu.
In the latest version X7 command Image>Mirror and Image>Flip returned, but with new differences.
See my schedule here
italian translation here
french translation here
your versions here
For this tutorial, you will need:
A landscape and a tube
The rest of the material qui
For the tube used and not supplied, thanks Silvie and Nena Silva.
Masque by TD (TD_TagMask039)
(The links of the tubemakers here).
Plugins:
consult, if necessary, my filter section here
Filters Unlimited 2.0 here
Mura's Meister - Cloud here
VM Extravaganza - Transmission here
Alien Skin Eye Candy 5 Impact - Perspective Shadow here
AAA Filters - Custom here
Filters VM Extravaganza can be used alone or imported into Filters Unlimited.
(How do, you see here)
If a plugin supplied appears with this icon  it must necessarily be imported into Unlimited it must necessarily be imported into Unlimited

You can change Blend Modes according to your colors.
In the newest versions of PSP, you don't find the foreground/background gradient (Corel_06_029).
You can use the gradients of the older versions.
The Gradient of CorelX here
Copy the preset  in the folder of the plugins Alien Skin Eye Candy 5. in the folder of the plugins Alien Skin Eye Candy 5.
One or two clic on the file (it depends by your settings), automatically the preset will be copied in the right folder.
why one or two clic see here
Copy the preset Emboss 4 in the Presets Folder.
Open the mask in PSP and minimize it with the rest of the material.
1. Set your foreground color to #182029,
and your background color to #698aa1.
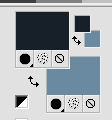
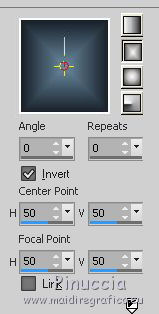
Set your foreground color to a Foreground/Background Gradient, style Rectangular.
2. Open Alpha_Luna misteriosa.
Window>Duplicate or, on the keyboard, shift+D to make a copy.
Close the original.
The copy, that will be the basis of your work, is not empty,
but contains the selections saved on the alpha channel.
Flood Fill  the transparent image with your Gradient. the transparent image with your Gradient.
3. Selections>Load/Save Selection>Load Selection from Alpha Channel.
The selection #1 is immediately available. You just have to click Load.
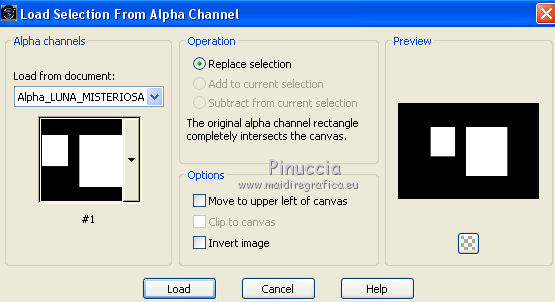
Selections>Promote Selection to Layer.
Effects>3D Effects>Drop Shadow, color black.
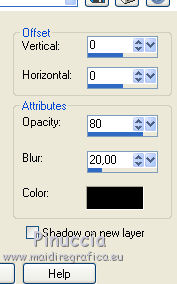
Selections>Select None.
4. Effects>Geometric Effects>Skew.
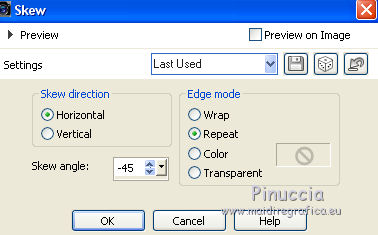
5. Layers>Duplicate
Activate the layer below of the original, Promoted Selection.
Image>Mirror.
Effects>Plugins>VM Extravaganza - Transmission.
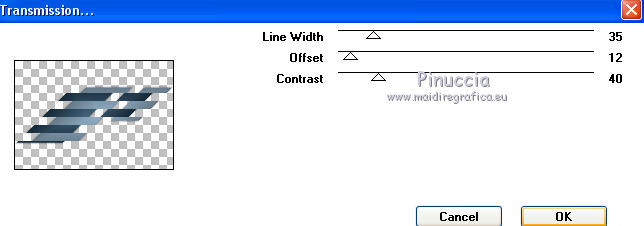
Again Image>Mirror.
Objects>Align>Bottom
If you are working with a previous version that doesn't make the Object menu available,
use the Move Tool 
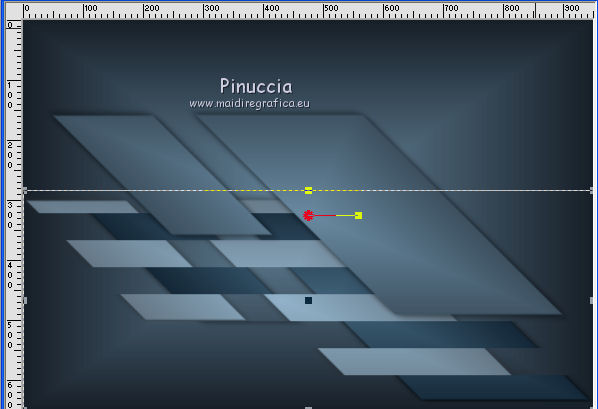
or you can do: Effects>Image Effects>Offset
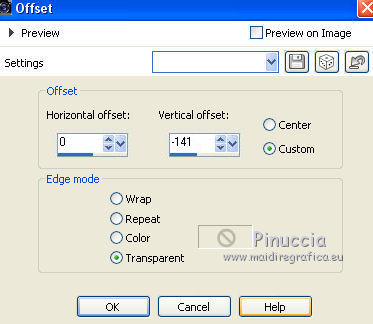
Effects>3D Effects>Drop Shadow, same settings.

Change the Blend Mode of this layer to Soft Light.
6. Layers>New Raster Layer.
Selections>Select All.
Open the landscape tube and go to Edit>Copy.
Go back to your work and go to Edit>Paste into Selection.
Selections>Select None.
Change the Blend Mode of this layer to Soft Light,
and reduce the opacity +/-65%.
7. Activate the top layer, copy of Promoted Selection.
Selections>Load/Save Selection>Load Selection from Alpha Channel.
Open the selections menu and load the selection #2.
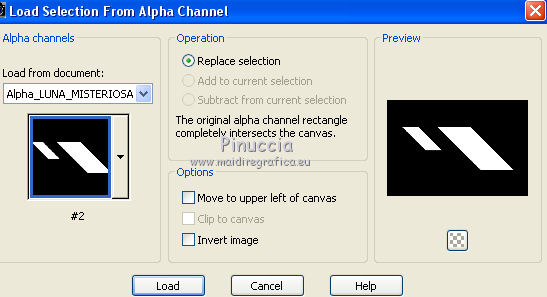
Effects>3D Effects>Drop Shadow, same settings.

Effects>Texture Effects>Fine Leather.
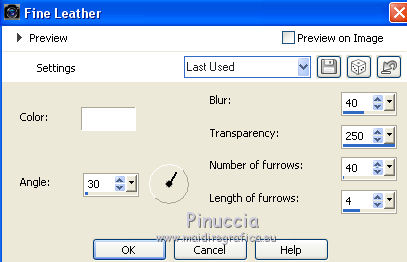
Selections>Modify>Contract - 10 pixels.
Selections>Promote Selection to Layer.
Go back to the layer below
Press CANC on the keyboard 
8. Activate the layer of the misted, Raster 1
Selections>Promote Selection to Layer.
Layers>Arrange>Bring to Top.
Selections>Invert.
Effects>3D Effects>Drop Shadow, color black.
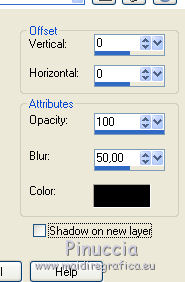
Selections>Select None.
Layers>Merge>Merge Down.
9. Activate again the layer Copy of Promoted Selection.
Effects>Plugins>Alien Skin Eye Candy 5 Impact - Perspective Shadow.
Select the preset preset EC5_PS8.
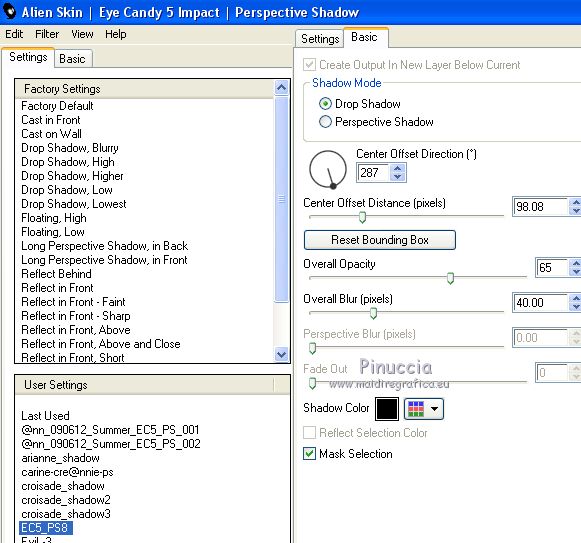
Change the Blend Mode of this layer to Luminance (legacy), or other.
10. Set your foreground color to white.
Layers>New Raster Layer.
Flood Fill  with color white. with color white.
Layers>New Mask layer>From image
Open the menu under the source window and you'll see all the files open.
Select the mask TD_TagMask039.
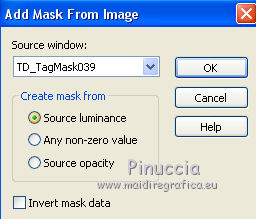
Layers>Duplicate.
Layers>Merge>Merge group.
Image>Resize, to 80%, resize all layers not checked.
Image>Mirror.
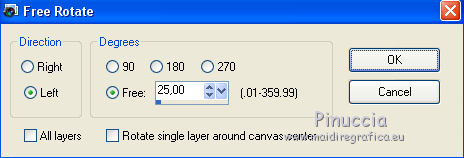
Image>Free Rotate - 25 degrees to left
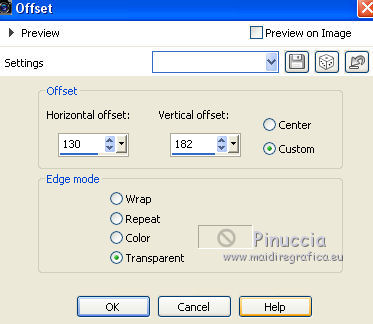
Effects>Image Effects>Offset.
Effects>User Defined Effects - select the preset Emboss 4 and ok.
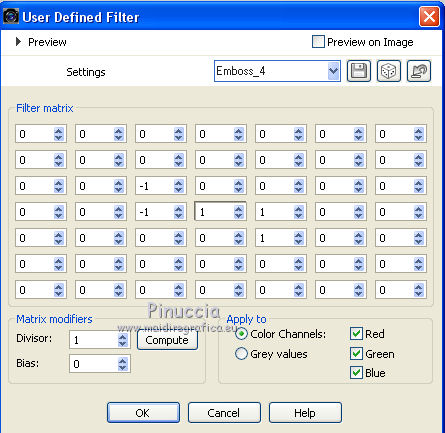
Effects>3D Effects>Drop Shadow, color black.

Change the Blend Mode of this layer to Luminance (legacy).
Layers>Arrange>Bring to Top.
11. Layers>New Raster Layer.
Effects>Plugins>Mura's Meister - Cloud
select only the color white
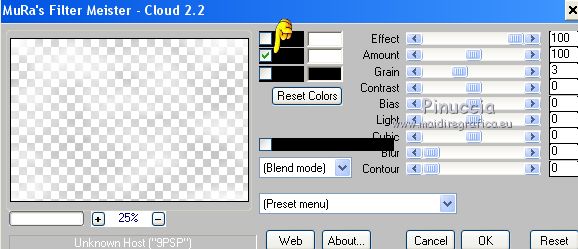
Layers>Arrange>Move Down - 3 times.
Change the Blend Mode of this layer to Overlay.
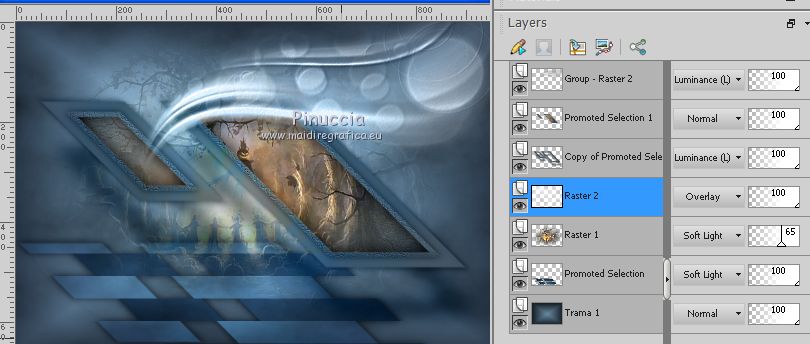
12. Layers>Merge>Merge All.
13. Image>Add borders, 2 pixels, symmetric, light color.
Image>Add borders, 2 pixels, symmetric, dark color.
Image>Add borders, 2 pixels, symmetric, light color.
Selections>Select All.
Edit>Copy.
14. Image>Add borders, 25 pixels, symmetric, whatever color.
Selections>Invert.
Edit>Paste into Selection.
Adjust>Blur>Gaussian Blur, radius 10.
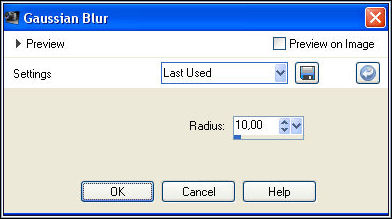
Selections>Invert.
Effects>3D Effects>Drop Shadow, color black.
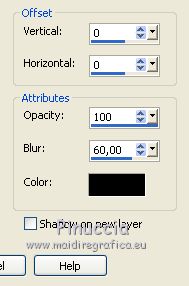
Selections>Select None.
15. Open your main tube and go to Edit>Copy.
Go back to your work and go to Edit>Paste as new layer.
Move  the tube to the left side. the tube to the left side.
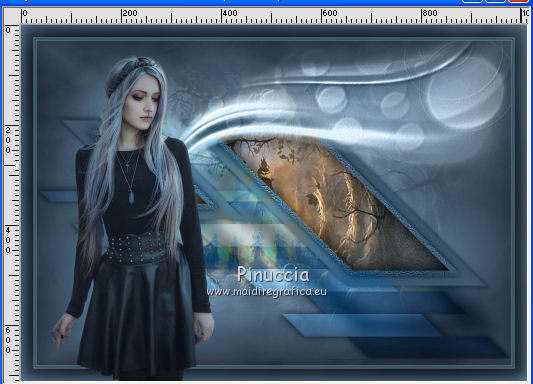
Layers>Duplicate.
Adjust>Blur>Gaussian Blur - radius 10.
Change the Blend Mode of this layer to Multiply,
and reduce the opacity +/-64%.
Layers>Arrange>Move Down.
Attivate the top layer of the original tube.
Move  the tube lightly to the right the tube lightly to the right
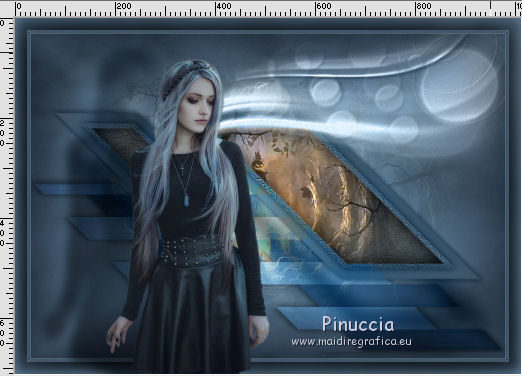
16. Image>Add borders, 2 pixels, symmetric, dark color.
Image>Resize, 1000 pixels width, resize all layers checked.
Optional:
Effects>Plugins>AAA Filters - Custom - Landscape and ok.
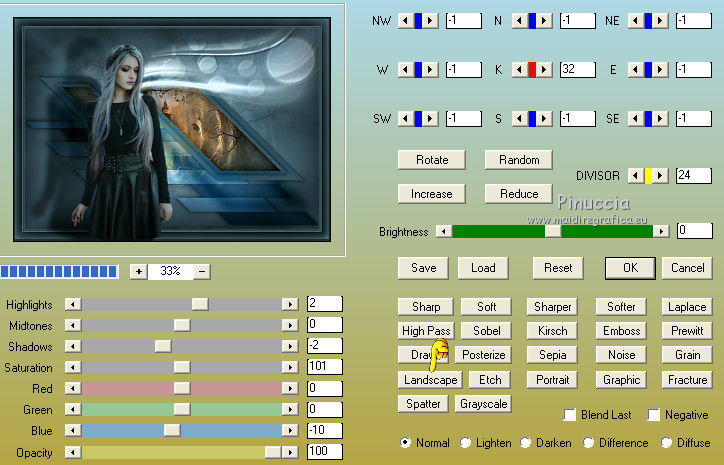
Sign your work on a new layer.
Layers>Merge>Merge All and save as jpg.
Version with tubes by Castorke and Danimage

If you have problems or doubts, or you find a not worked link, or only for tell me that you enjoyed this tutorial, write to me.
17 October 2019
|

