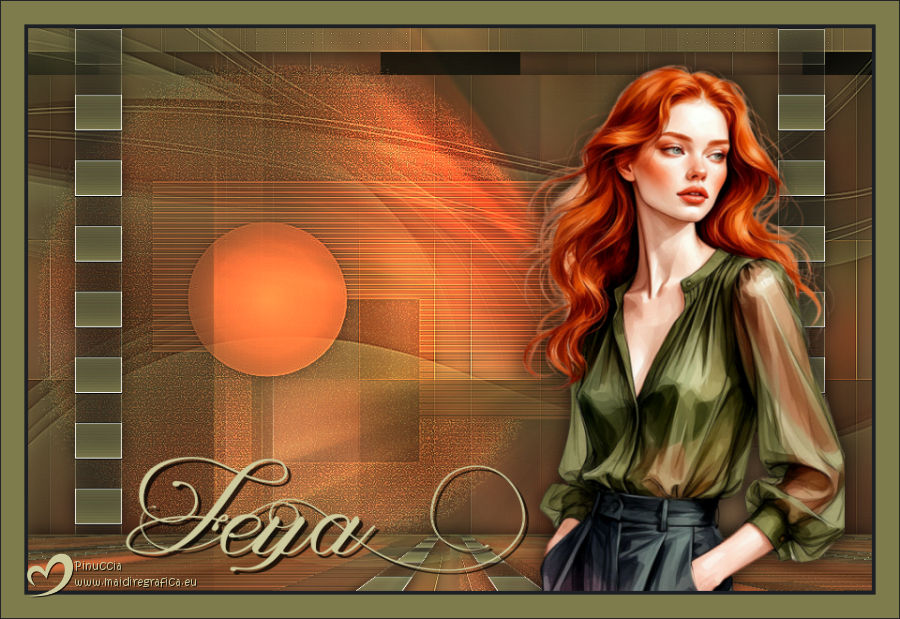
FEYA

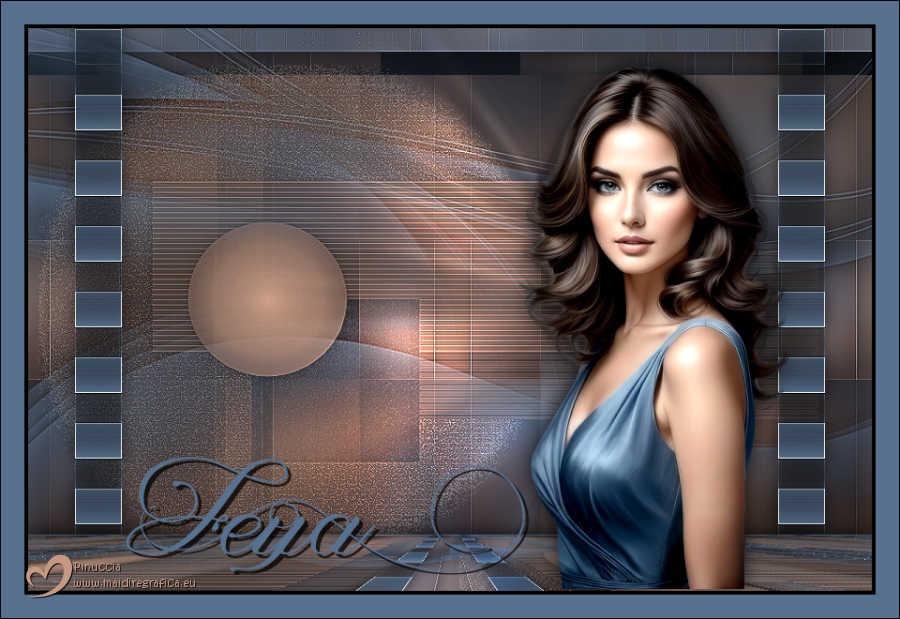
Thanks Annie for your invitation to translate

Clic and move the brush to follow the tutorial.

To print


|
This tutorial, created with PSP2020, was translated with PSPX8, PSPX9 and PSP2020, but it can also be made using other versions of PSP.
Since version PSP X4, Image>Mirror was replaced with Image>Flip Horizontal,
and Image>Flip with Image>Flip Vertical, there are some variables.
In versions X5 and X6, the functions have been improved by making available the Objects menu.
In the latest version X7 command Image>Mirror and Image>Flip returned, but with new differences.
See my schedule here
 italian translation here italian translation here
 french translation here french translation here
 your versions here your versions here
Necessary

For the tube and the mask thanks Kamil and Narah
(The links of the tubemakers here).
Plugins
Filters Unlimited 2.0 qui
AP [Lines] - Lines SilverLining qui
Simple - Left Right Wrap qui
Mura's Meister - Perspective Tiling qui
Toadies - What are you, Weaver qui
Filters Simple and Toadies can be used alone or imported into Filters Unlimited.
(How do, you see here)
If a plugin supplied appears with this icon  it must necessarily be imported into Unlimited it must necessarily be imported into Unlimited

You can change Blend Modes according to your colors.

Open the masks in PSP and minimize them with the rest of the material.
1. Open a new transparent image 650 x 500 pixels.
Set your foreground color to the light color (not too light!) #58718f
and your background color to the dark color #000000.
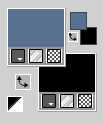
Flood Fill  the transparent image with your foreground color. the transparent image with your foreground color.
2. Selections>Select All.
Open the tube ns-woman3355 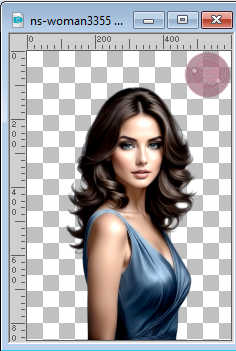
Erase the watermark and go to Edit>Copy.
minimize the tube
Go back to your work and go to Edit>Paste into Selection.
Selections>Select None.
3. Effects>Image Effects>Seamless Tiling, default settings.

4. Adjust>Blur>Gaussian Blur - radius 40.

5. Effects>Reflection Effects>Rotating Mirror.
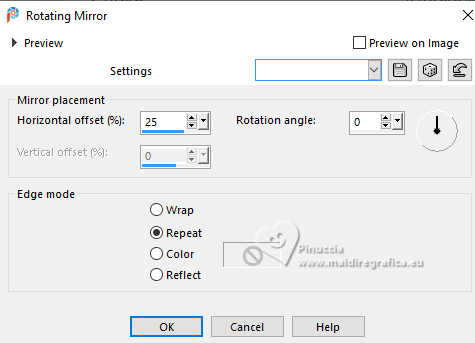
6. Layers>Duplicate.
Image>Mirror>Mirror Horizontal.
Image>Mirror>Mirror Vertical (Image>Flip).
7. Change the Blend Mode of this layer to Hard Light and reduce the opacity to 50%.
Layers>Merge>Merge Down.
8. Activate your Selection Tool 
(no matter the type of selection, because with the custom selection your always get a rectangle)
clic on the Custom Selection 
and set the following settings.
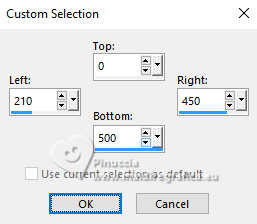
Selections>Promote Selection to layer.
Selections>Select None.
9. Effetti>Plugins>Simple - Left Right Wrap.
This Effect works without window; result
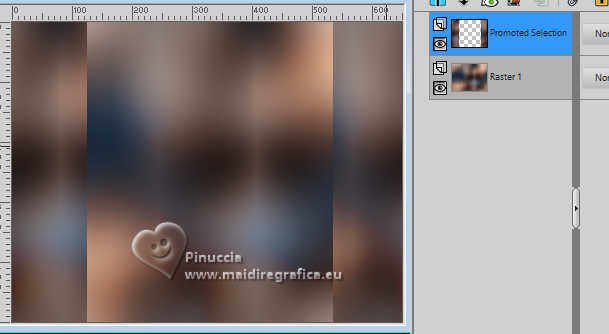
Effects>Edge Effects>Enhance More.
10. Effects>3D Effects>Drop Shadow, color black.

11. Layers>Merge>Merge Down.
Translator's note: If you use the Toadies filter alone,
go to step 12.
****
Author's note: If you use the Toadies filter in Unlimited, you will get a different result
Open the file punt26 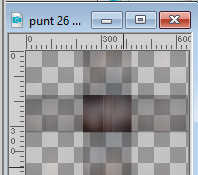
Edit>Copy - Edit>Paste as new layer
Activate the Change Color tool 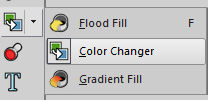
flood fill the layer with your foreground color
and continue with step 14
****
12. Layers>Duplicate.
Image>Resize, to 65%, resize all layers not checked.
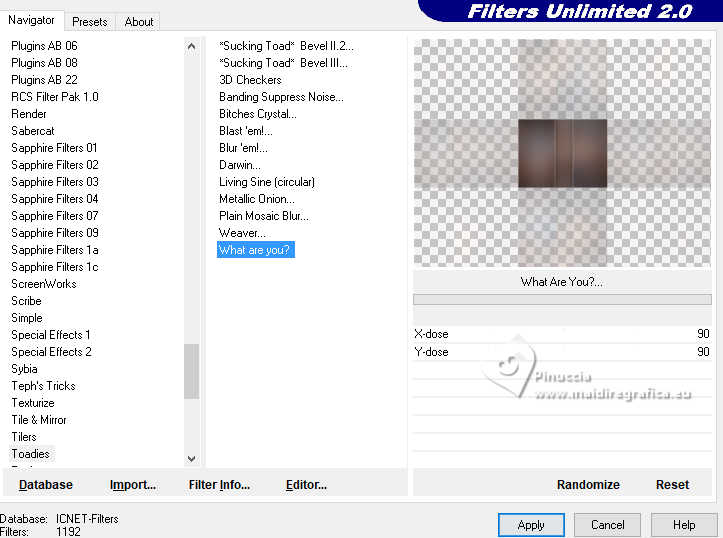
13. Effetti>Plugins>Toadies - What are you.
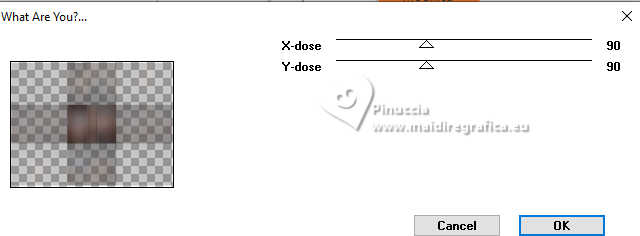
14. Effects>Edge Effects>Enhance More.
15. Selections>Select All.
Image>Add Borders, symmetric not checked, background color.
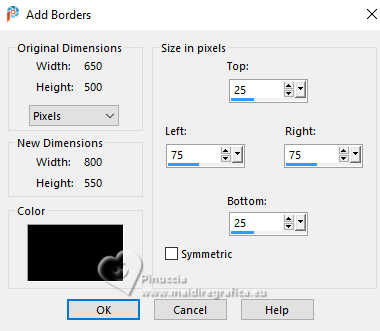
16. Effects>Image Effects>Seamless Tiling, same settings.

17. Effects>3D Effects>Drop Shadow, same settings.
Selections>Select None.
18. Effects>Image Effects>Seamless Tiling, Horizontal checked.

19. Custom Selection 
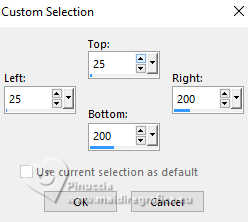
20. Effects>Plugins>AP [Lines] - Lines SilverLining - Dotty Grid
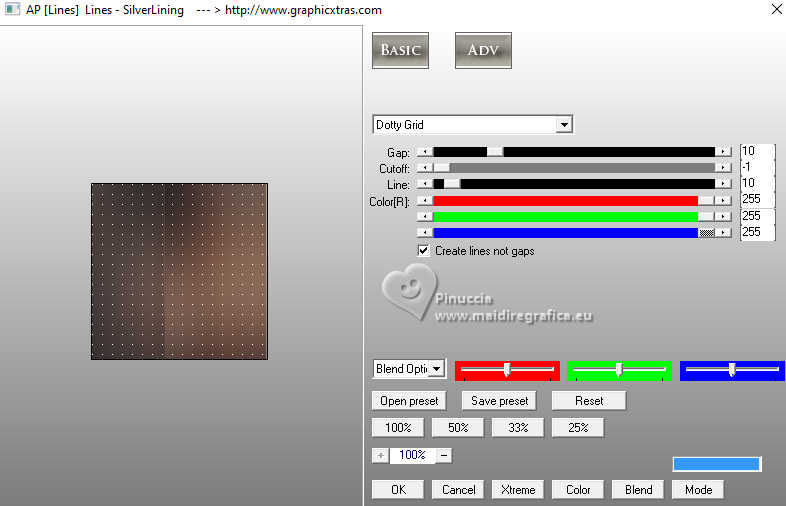
21. Selections>Promote Selection to Layer.
Selections>Select None.
Image>Mirror>Mirror Vertical (Image>Flip).
22. Effects>Distortion Effects>Wind, from right, strength 100.
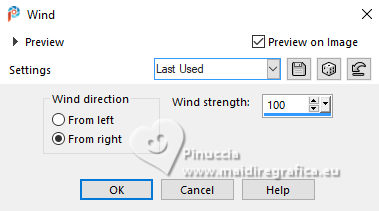
Effects>Edge Effects>Enhance More.
23. Selections>Select All.
Image>Add Borders, symmetric not checked, foreground color.
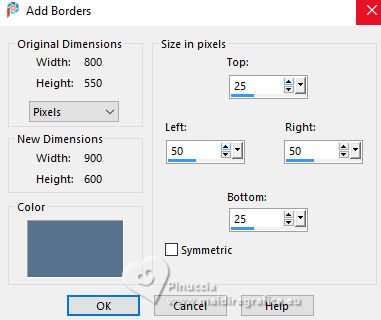
24. Selections>Invert.
Effects>Plugins>Toadies - What are you, same settings.
If you use the filter in Unlimited, you will have to set again the settings (90/90),
because Unlimited doesn't keep them in memory.
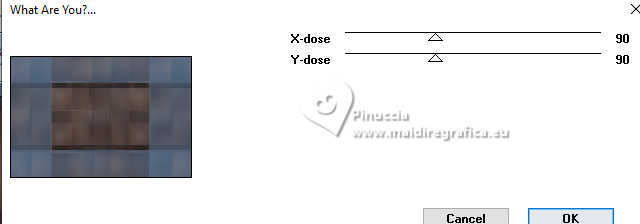
Effects>Edge Effects>Enhance.
25. Effects>3D Effects>Drop Shadow, same settings.
Selections>Select None.
26. Effects>Image Effects>Seamless Tiling, same settings.

27. Layers>New Raster Layer.
Flood Fill  the layer with your foreground color. the layer with your foreground color.
29. Layers>New Mask layer>From image
Open the menu under the source window and you'll see all the files open.
Select the mask Narah_Mask_0972
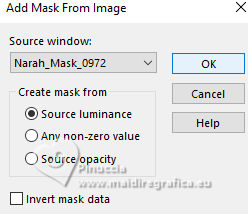
Layers>Merge>Merge Group.
30. Effects>3D Effects>Drop Shadow, same settings.

Effects>Edge Effects>Enhance.
You should have this
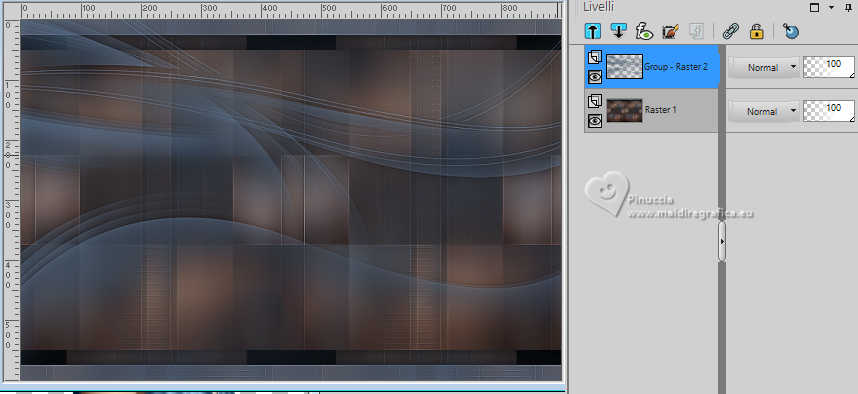
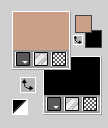
31. Set your foreground color with a different color: #cb9f88
32. Layers>New Raster Layer.
Flood Fill  the layer with your foreground color. the layer with your foreground color.
33. Layers>New Mask layer>From image
Open the menu under the source window
and select the mask NarahsMasks_1729
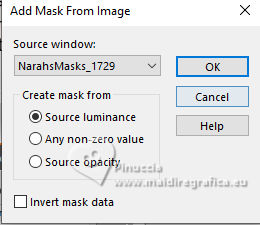
Layers>Merge>Merge Group.
34. Effects>3D Effects>Drop Shadow, same settings.
Effects>Edge Effects>Enhance.
35. Set again your foreground color with the initial color #58718f.

36. Layers>New Raster Layer.
Custom Selection 
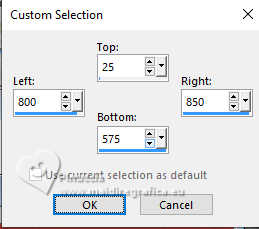
Flood Fill  the layer with your foreground color. the layer with your foreground color.
Selections>Select None.
37. Effects>Plugins>Toadies - Weaver
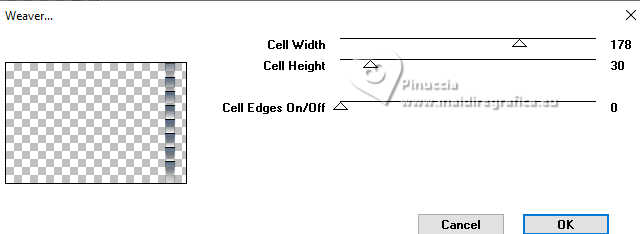
Effects>Edge Effects>Enhance More.
38. Layers>Duplicate.
Image>Mirror>Mirror Vertical (Image>Flip).
Layers>Merge>Merge Down.
Effects>3D Effects>Drop Shadow, same settings.
39. Layers>Duplicate.
Image>Mirror>Mirror Horizontal.
40. Layers>Merge>Merge visible.
41. Layers>Duplicate.
Effetti>Plugins>Mura's Meister - Perspective Tiling
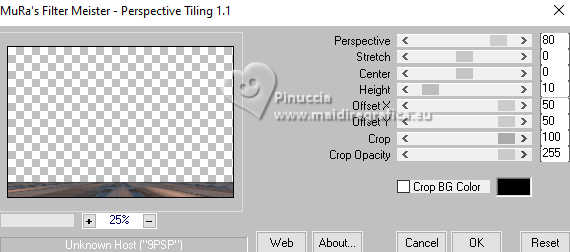
if you have problems with the filter,
copy/paste as new layer the file punt77 
Objects>Align>Bottom
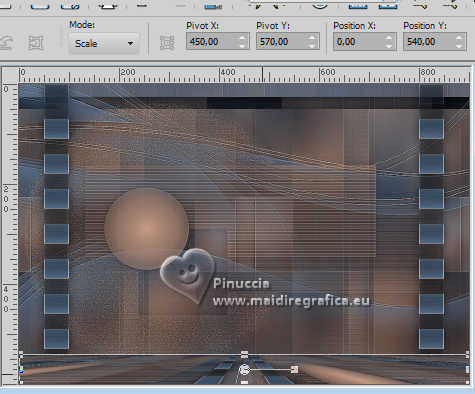
42. Effects>3D Effects>Drop Shadow, same settings.
43. Activate again the tube ns-woman3355 and go to Edit>Copy.
Go back to your work and go to Edit>Paste as new layer.
Image>Resize, to 75%, resize all layers not checked.
Image>Mirror>Mirror Horizontal.
44. K key to activate your Pick Tool 
Position X: 521,00 - Position Y: 38,00.

45. Effects>3D Effects>Drop Shadow, same settings.
46. Layers>Duplicate.
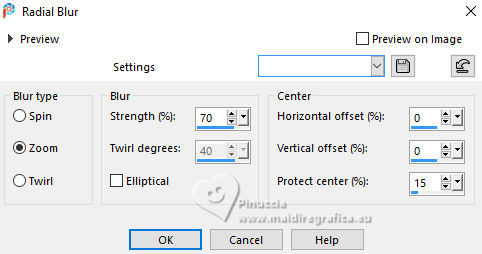
Adjust>Blur>Radial Blur.
47. Image>Mirror>Mirror Horizontal.
Objects>Align>Horizontal Center.
48. Change the Blend Mode of this layer to Dodge.
Layers>Arrange>Move Down.
49. Open the tube tekst-feya 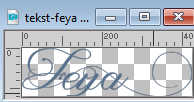
Edit>Copy.
Go back to your work and go to Edit>Paste as new layer.
Position Y: 104,00 - Position Y: 457,00.

M key to deselect the Tool.
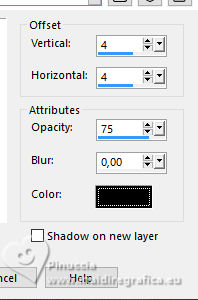
50. Effects>3D Effects>Drop Shadow, color black.
51. Image>Add Borders, 4 pixels, symmetric, background color.
Image>Add Borders, 25 pixels, symmetric, foreground color.
52. Sign your work on a new layer.
53. Image>Add Borders, 1 pixel, symmetric, background color.
54. Image>Resize, 800 pixels width, resize all layers checked.
Save as jpg.
For the tubes of these versions thanks
Luz Cristina
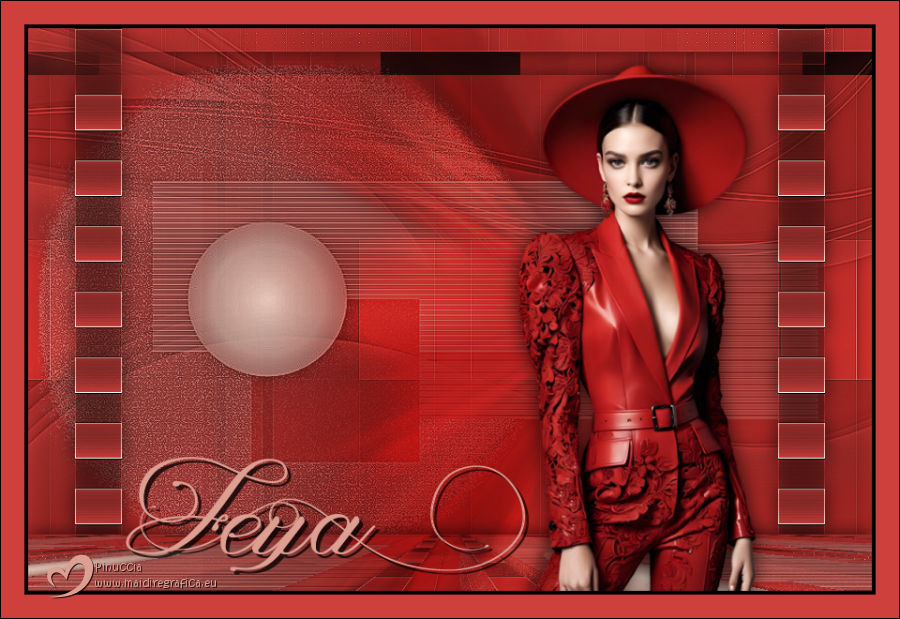
Aria

If you have problems or doubts, or you find a not worked link, or only for tell me that you enjoyed this tutorial, write to me.
1 November 2025

|

