RICHA

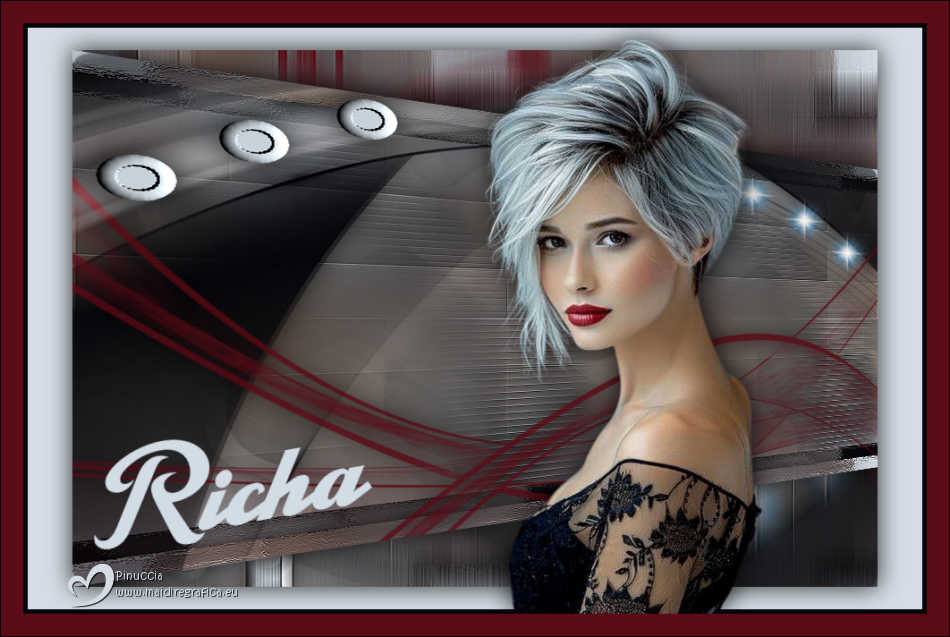
Thanks Annie for your invitation to translate

Clic and move the brush to follow the tutorial.

To print


|
This tutorial, created with PSP2020, was translated with PSPX8, PSPX9 and PSP2020, but it can also be made using other versions of PSP.
Since version PSP X4, Image>Mirror was replaced with Image>Flip Horizontal,
and Image>Flip with Image>Flip Vertical, there are some variables.
In versions X5 and X6, the functions have been improved by making available the Objects menu.
In the latest version X7 command Image>Mirror and Image>Flip returned, but with new differences.
See my schedule here
 italian translation here italian translation here
 french translation here french translation here
 your versions here your versions here
Necessary

For the tube and the masks thank Marja and Narah
(The links of the tubemakers here).
Plugins None

You can change Blend Modes according to your colors.

Open the masks in PSP and minimize them with the rest of the material.
1. Open a new transparent image 650 x 500 pixels.
2. Set your foreground color with the light color #d4dce5
and your background color with the dark color #040509
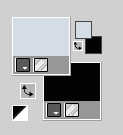
Flood Fill  the transparent image with your foreground color. the transparent image with your foreground color.
3. Selections>Select All.
Open the tube MS Lady 1 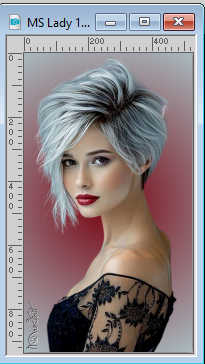
Edit>Copy.
Go back to your work and go to Edit>Paste into Selection.
Selections>Select None.
4. Effects>Image Effects>Seamless Tiling, defaut settings.

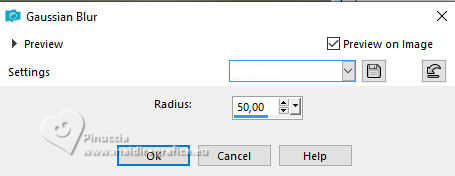
5. Adjust>Blur>Gaussian Blur - radius 50.
6. Layers>Duplicate.
Layers>New Mask layer>From image
Open the menu under the source window and you'll see all the files open.
Select the mask Narah_Mask_0785.
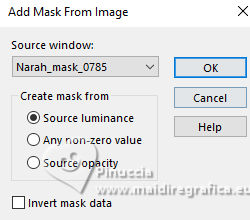
Layers>Merge>Merge Group.
7. Effects>3D Effects>Drop Shadow, color black.

8. Effects>Edge Effects>Enhance More.
9. Layers>New Raster Layer.
Flood Fill  with your background color. with your background color.
10. Layers>New Mask layer>From image
Open the menu under the source window
and select the mask NarahsMask_1532.
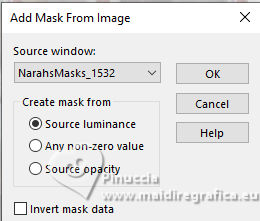
Layers>Merge>Merge visible.
11. Activate your Selection Tool 
(no matter the type of selection, because with the custom selection your always get a rectangle)
clic on the Custom Selection 
and set the following settings.
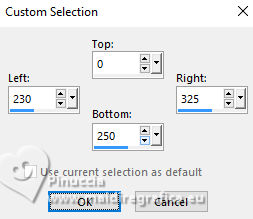
Selections>Promote Selection to Layer.
12. Effects>Texture Effects>Blinds - foreground color.
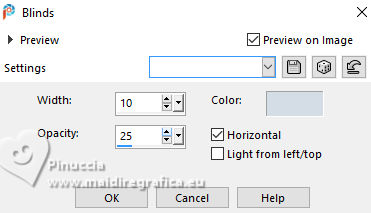
Selections>Select None.
13. Image>Mirror>Mirror Vertical (Image>Flip).
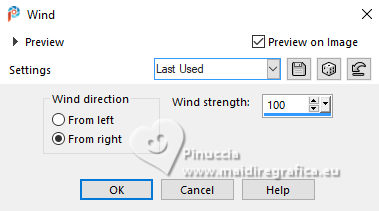
14. Effects>Distorsion Effects>Wind - from right, strength 100.
15. Effects>3D Effects>Drop Shadow, same settings.
Effects>Edge Effects>Enhance More.
16. Selections>Select All.
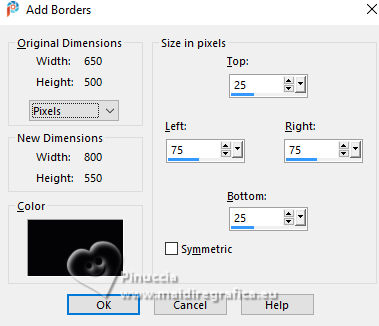
Image>Add Borders, symmetric not checked, background color.
17. Effects>Image Effects>Seamless Tiling, same settings.

18. Selections>Invert.
Effects>Art Media Effects>Brush Strokes - foreground color.
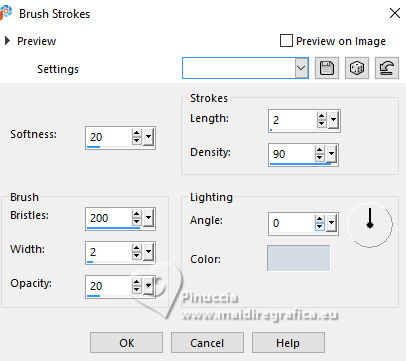
Effects>Edge Effects>Enhance.
19. Selections>Invert.
Effects>3D Effects>Drop Shadow, same settings.
Selections>Select None.
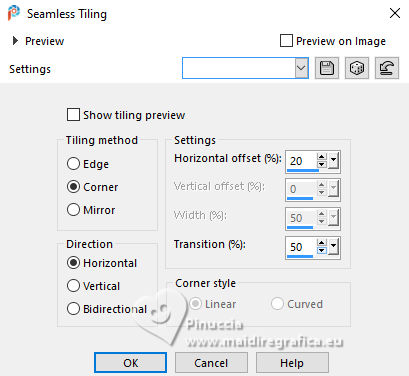
20. Effects>Image Effects>Seamless Tiling.
21. Layers>Duplicate.
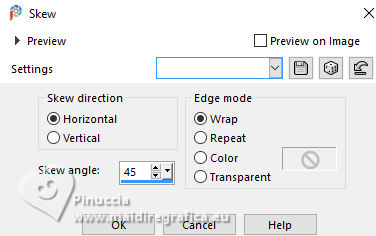
Effects>Geometric Effects>Skew.
22. Image>Mirror>Mirror Vertical (Image>Flip).
Change the Blend Mode of this layer to Screen and reduce the opacity to 50%.
23. Selections>Select All.
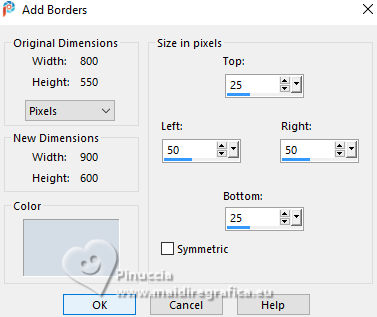
Image>Add Borders, symmetric not checked - foreground color.
24. Effects>Image Effects>Seamless Tiling, default settings.

25. Selections>Invert.
Effects>Art Media Effects>Brush Strokes, same settings.
Effects>Edge Effects>Enhance.
26. Effects>3D Effects>Drop Shadow, same settings.

Selections>Select None.
27. Effects>Image Effects>Seamless Tiling, horizontal checked.

28. Layers>New Raster Layer.
Flood Fill  with your background color. with your background color.
29. Layers>New Mask layer>From image
Open the menu under the source window
and select the mask NarahsMask_1847
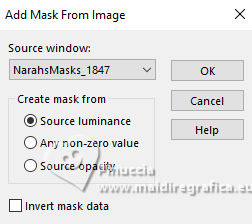
Layers>Merge>Merge Group.
30. Effects>3D Effects>Drop Shadow, same settings.

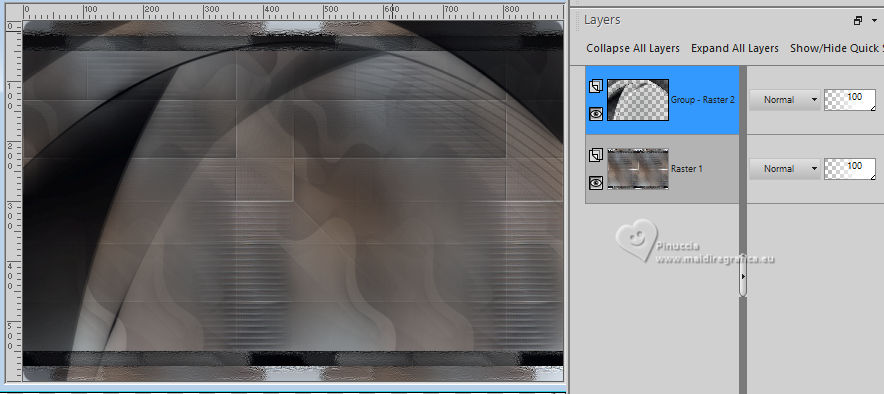
31. You should have this:
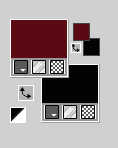
32. Set your foreground color with a different color: #5b0b15.
33. Layers>New Raster Layer.
Flood Fill  with your foreground color. with your foreground color.
34. Layers>New Mask layer>From image
Open the menu under the source window
and select the mask Narah_mask_0348
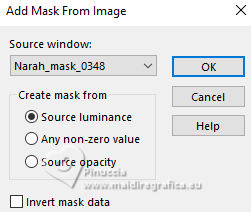
Layers>Merge>Merge Group.
35. Image>Mirror>Mirror Horizontal.
Effects>3D Effects>Drop Shadow, same settings.
36. Open the tube deco-richa-1 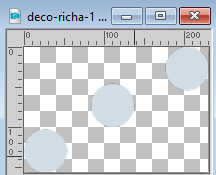
Edit>Copy.
Go back to your work and go to Edit>Paste as new layer.
37. K key to activate your Pick Tool 
Position X: 15,00 - Position Y: 7,00.

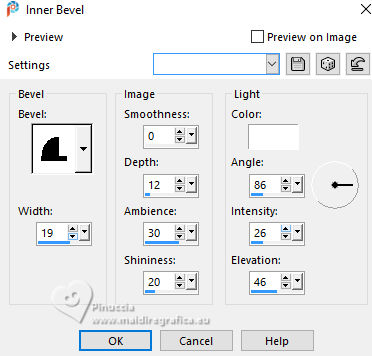
38. Effects>3D Effects>Inner Bevel.
39. Layers>Duplicate.
Adjust>Blur>Radial Blur.
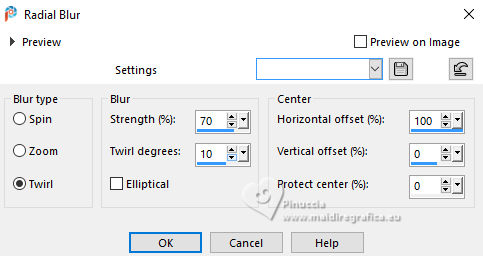
40. Layers>Arrange>Move Down.
Change the Blend Mode of this layer to Luminance.
41. Activate your top layer.
Effects>3D Effects>Drop Shadow, same settings.
42. Open the tube deco-richa-2 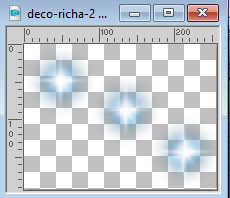
Edit>Copy.
Go back to your work and go to Edit>Paste as new layer.
43. K key to activate your Pick Tool 
Position X: 627,00 - Position Y: 28,00.

Effects>Edge Effects>Enhance More.
M key to deselect the Tool.
44. Layers>Merge>Merge visible.
45. Layers>Duplicate.
Effects>Geometric Effects>Perspective Horizontal.
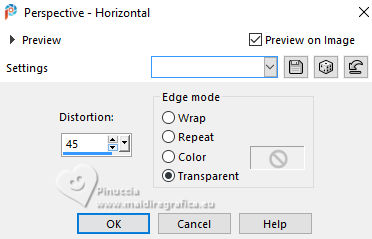
46. Effects>3D Effects>Drop Shadow, same settings.
47. Activate your bottom layer.
Adjust>Blur>Motion Blur.
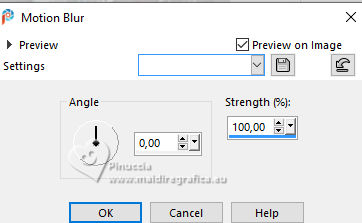
48. Effects>Edge Effects>Enhance More.
Image>Mirror>Mirror Vertical (Image>Flip).
49. Selections>Select All.
Image>Add Borders, same settings.
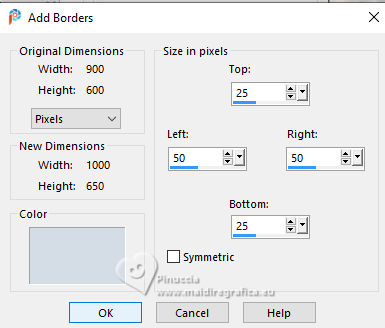
50. Effects>3D Effects>Drop Shadow, same settings.
Selections>Select None.
51. Image>Add Borders, 5 pixels, symmetric, background color.
52. Activate again the tube MS Lady1 and go to Edit>Copy.
Go back to your work and go to Edit>Paste as new layer.
Image>Resize, to 70%, resize all layers not checked.
53. K key to activate your Pick Tool 
Position X: 515,00 - Position Y: 16,00.

Effects>3D Effects>Drop Shadow, same settings.
54. Open the tube tekst-richa 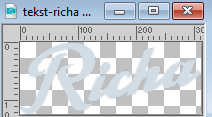
Edit>Copy.
Go back to your work and go to Edit>Paste as new layer.
Position X: 78,00 - Position Y: 464,00.

M key to deselect the Tool.
55. Image>Add Borders, 25 pixels, symmetric, foreground color.
56. Sign your work on a new layer.
57. Image>Add Borders, 1 pixel, symmetric, background color.
58. Image>Resize, 800 pixels width, resize all layers checked.
Save as jpg.
For the tubes of these versions thanks
Luz Cristina
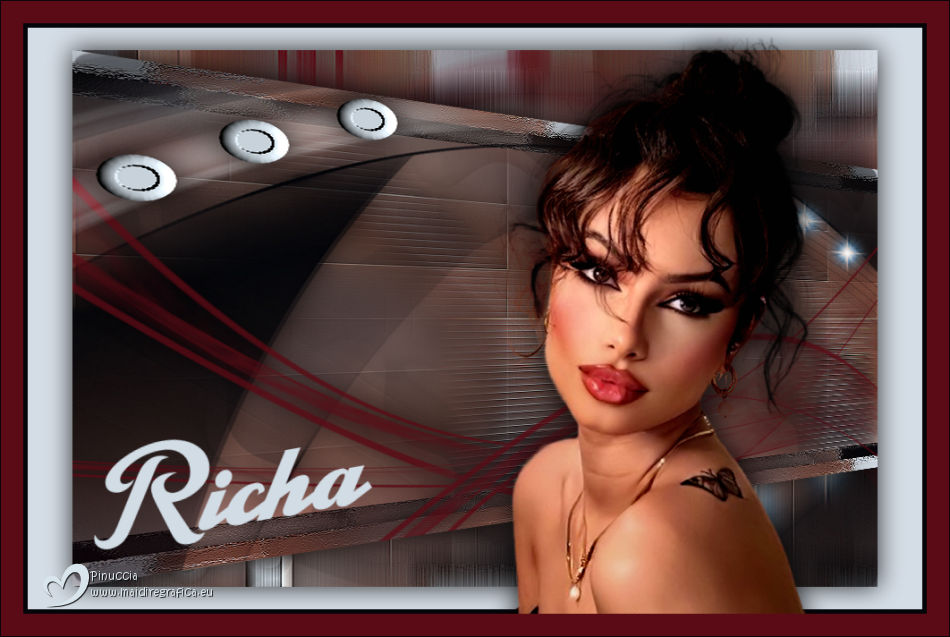
Renée
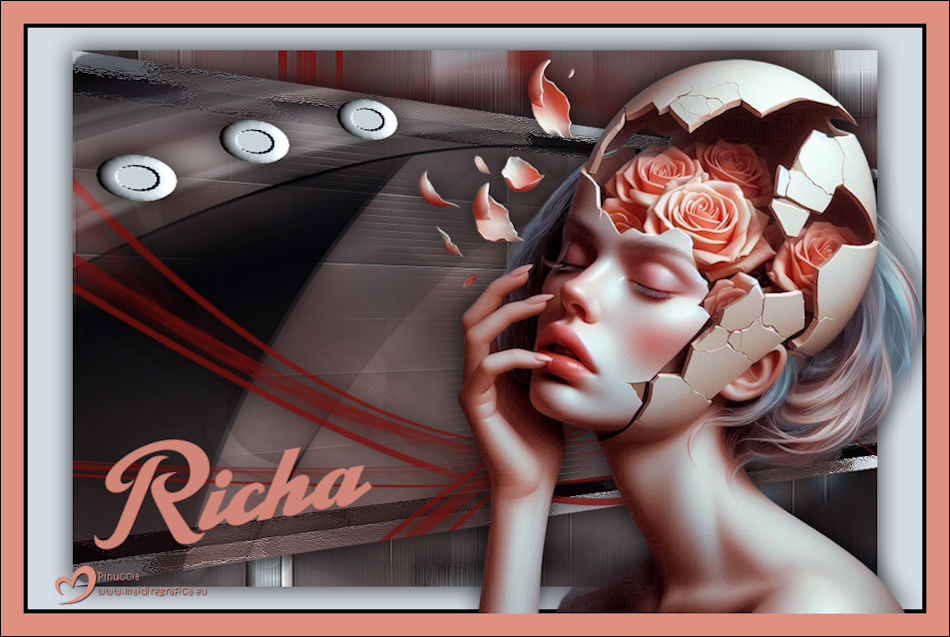

If you have problems or doubts, or you find a not worked link, or only for tell me that you enjoyed this tutorial, write to me.
7 June 2025

|

