|
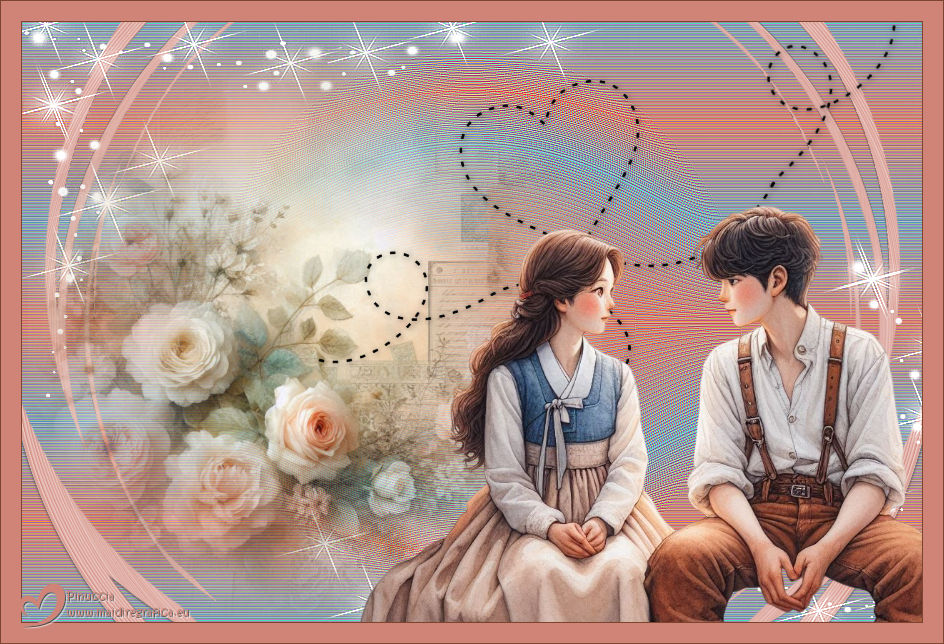
SWEET LOVE


Thanks Elaine for your invitation to translate your tutorials into english

This tutorial was written with PSP2020 and translated with PSPX9 and PSP2020, but it can also be made using other versions of PSP.
Since version PSP X4, Image>Mirror was replaced with Image>Flip Horizontal,
and Image>Flip with Image>Flip Vertical, there are some variables.
In versions X5 and X6, the functions have been improved by making available the Objects menu.
In the latest version X7 command Image>Mirror and Image>Flip returned, but with new differences.
See my schedule here
 italian translation here italian translation here
For this tutorial, you will need:
1 misted
1 tube
The rest of the material

(The links of the tubemakers here).

consult, if necessary, my filter section here
Mura's Meister - Perspective Tiling, Pole Transform qui

You can change Blend Modes according to your colors.
In the newest versions of PSP, you don't find the foreground/background gradient (Corel_06_029).
You can use the gradients of the older versions.
The Gradient of CorelX here

Copy the selection in the Selection Folders.
Open the mask in PSP and minimize it with the rest of the material.
1. Open a new transparent image 900 x 600 pixels.
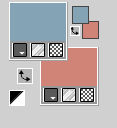
2. Choose two colors from your image; for me:
foreground color #84a3b5,
background color #d08477.
3. Set your foreground color to a Foreground/Background Gradient, style Linear.
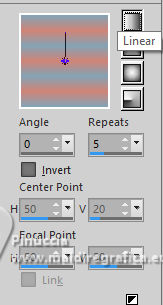
Flood Fill  the transparent image with your Gradient. the transparent image with your Gradient.
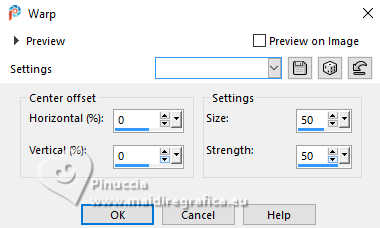
4. Effects>Distortion Effects>Warp.
5.Effects>Edge Effects>Enhance More - 2 times.
6. Layers>New Raster Layer.
Selections>Load/Save Selection>Load Selection from Disk.
Look for and load the selection #selectionT05
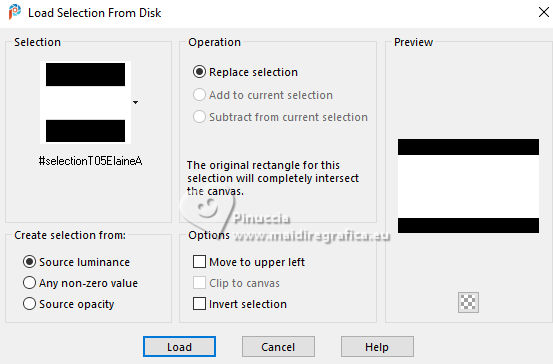
7. Flood Fill  the selection with one of your colors; the selection with one of your colors;
I used my background color #d08477.
8. Selections>Select None.
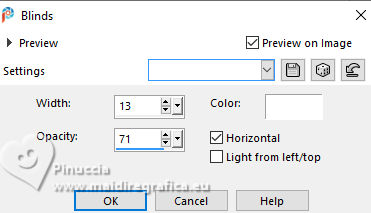
9. Effects>Texture Effects>Blinds.
10. Effects>Distortion Effects>Warp, same settings.

11. Activate your Selection Tool 
(no matter the type of selection, because with the custom selection your always get a rectangle)
clic on the Custom Selection 
and set the following settings.
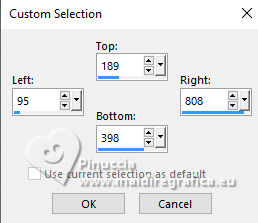
Press CANC on the keyboard 
Selections>Select None.
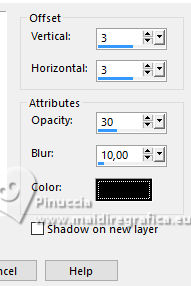
12. Effects>3D Effects>Drop Shadow.
13. Image>Resize, to 75%, resize all layers not checked.
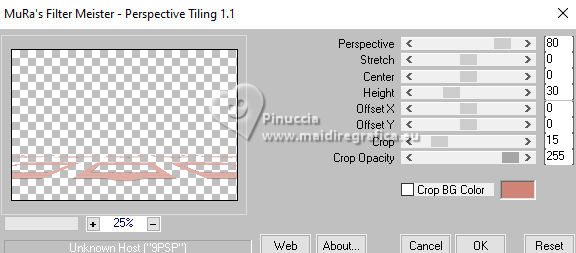
14. Effects>Plugins>Mura's Meister - Perspective Tiling.
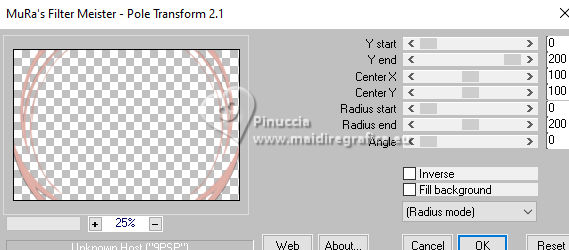
15. Effects>Plugins>Mura's Meister - Pole Transform.
16. Set your foreground color to white.
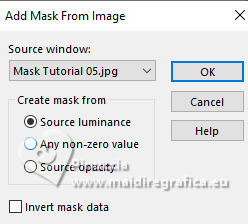
Layers>New Raster Layer.
Flood Fill  the layer with color white. the layer with color white.
Layers>New Mask layer>From image
Open the menu under the source window and you'll see all the files open.
Select the mask Mask Tutorial 05
Effects>Edge Effects>Enhance More.
Layers>Merge>Merge Group.
17. Open your misted and go to Edit>Copy.
Go back to your work and go to Edit>Paste as new layer.
Resize, if necessary.
18. Pick Tool  with these settings with these settings

19. Open Traçado coraçäo 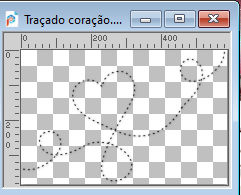
Edit>Copy.
Go back to your work and go to Edit>Paste as new layer.
Move  the tube to the right. the tube to the right.
20. Open your tube and go to Edit>Copy.
Go back to your work and go to Edit>Paste as new layer.
Move  the tube to the right. the tube to the right.
21. Image>Add Borders, 1 pixel, symmetric, dark color
Image>Add Borders, 20 pixels, symmetric, light color
Image>Add Borders, 1 pixel, symmetric, dark color
22. Sign your work and save as jpg.

 Your versions Your versions

Kika

Lynnette

If you have problems or doubts, or you find a not worked link, or only for tell me that you enjoyed this tutorial, write to me.
8 February 2026

|

