|
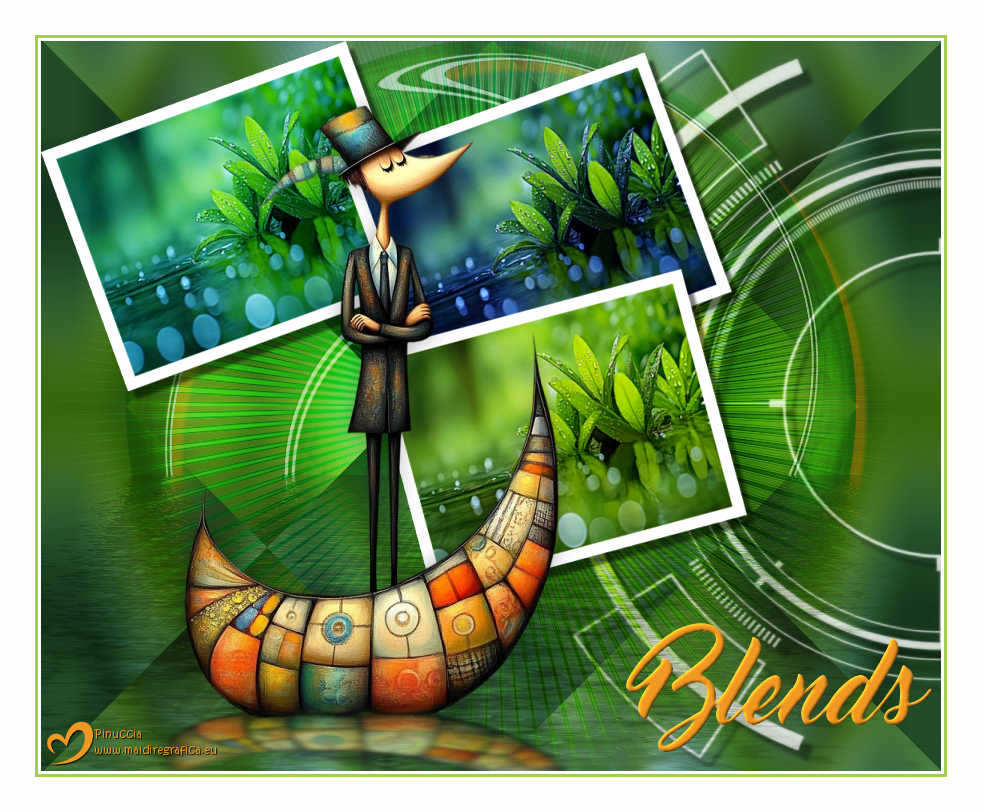
BLENDS


Thanks Estela for your invitation to translate your tutorials into english

This tutorial, created with PSP2022, was translated with PspX9 and 2020, but it can also be made using other versions of PSP.
Since version PSP X4, Image>Mirror was replaced with Image>Flip Horizontal,
and Image>Flip with Image>Flip Vertical, there are some variables.
In versions X5 and X6, the functions have been improved by making available the Objects menu.
In the latest version X7 command Image>Mirror and Image>Flip returned, but with new differences.
See my schedule here
 French Translation here French Translation here
 Your versions here Your versions here

For this tutorial, you will need:

For the tube thanks Renée
(The links of the tubemakers here).

consult, if necessary, my filter section here
Filters Unlimited 2.0 here
&<Bkg Designer sf10II> - DIS Refractor 2 - DIS Warp vertical (to import in Unlimited) here
VM Instant Art - Tripolis here
Graphics Plus - Vertical Mirror here
Flaming Pear - Flexify 2 here
Flaming Pear - Flood here
Mura's Seamless - Emboss at Alpha here
Alien Skin Eye Candy 5 Impact - Perspective Shadow here
Filters VM Instant Art, Graphics Plus and Mura's Seamless can be used alone or imported into Filters Unlimited.
(How do, you see here)
If a plugin supplied appears with this icon  it must necessarily be imported into Unlimited it must necessarily be imported into Unlimited

You can change Blend Modes according to your colors.

1. Open a new transparent image 900 x 730 pixels.
Selections>Select All.
2. Open the image Grafico 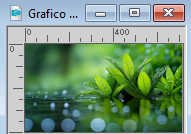
Edit>Copy.
Go back to your work and go to Edit>Paste into Selection.
Selections>Select None.
3. Adjust>Blur>Gaussian Blur - radius 30.

4. Activate your Selection Tool 
(no matter the type of selection, because with the custom selection your always get a rectangle)
clic on the Custom Selection 
and set the following settings.
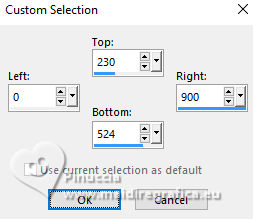
5. Selections>Promote Selection to Layer.
Selections>Select None.
Effects>Edge Effects>Enhance More.
6. Set your background color to white #ffffff.
Effects>Plugins>Filters Unlimited 2.0 - &<Bkg Designer sf10II> - DIS Refractor 2, default settings.
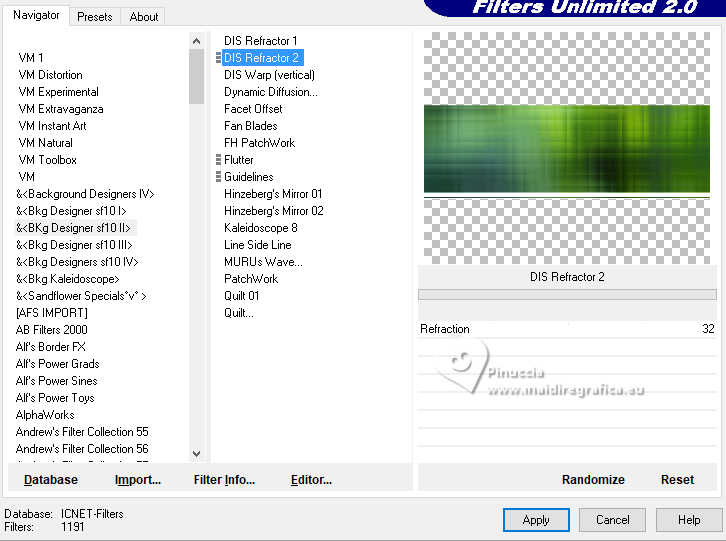
Layers>Duplicate.
Image>Mirror>Mirror Vertical (Image>Flip).
7. K key to activate your Pick Tool 
Position X: 0,00 - Position Y: 200,00

M key to deselect the Tool.
Layers>Merge>Merge Down.
8. Activate your bottom layer, Raster 1.
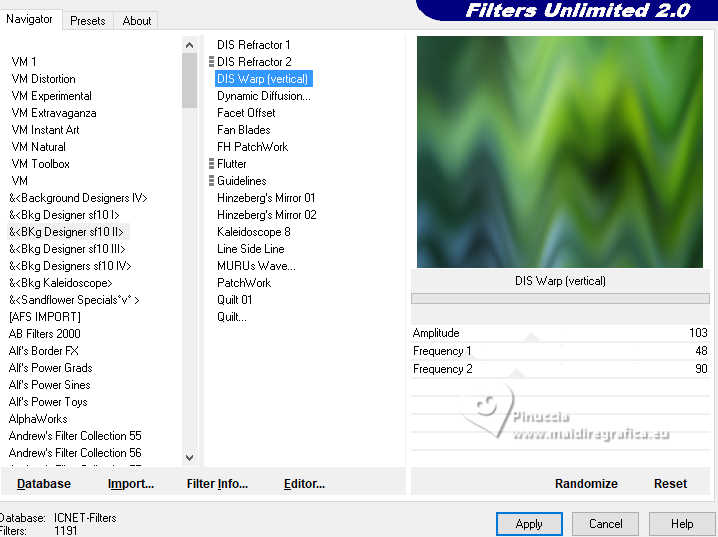
Effects>Plugins>Filters Unlimited 2.0 - &<Bkg Designer sf10II> - DIS Warp (vertical), default settings.
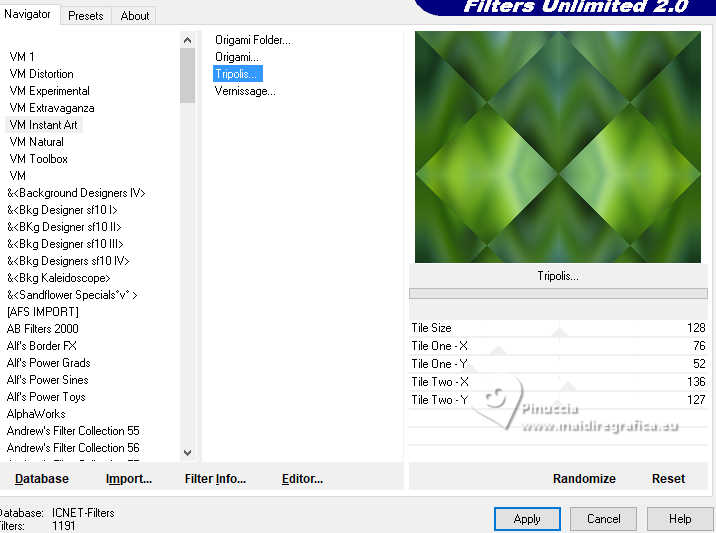
9. Effects>Plugins>Filters Unlimited 2.0 - VM Instant Art - Tripolis, default settings.
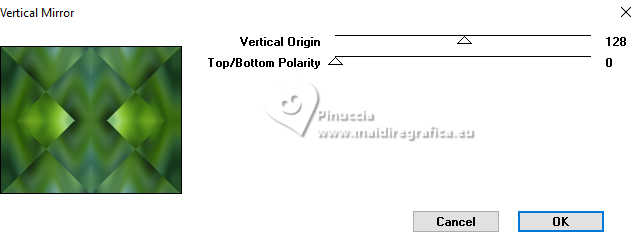
10. Effects>Plugins>Graphics Plus - Vertical Mirror, default settings.
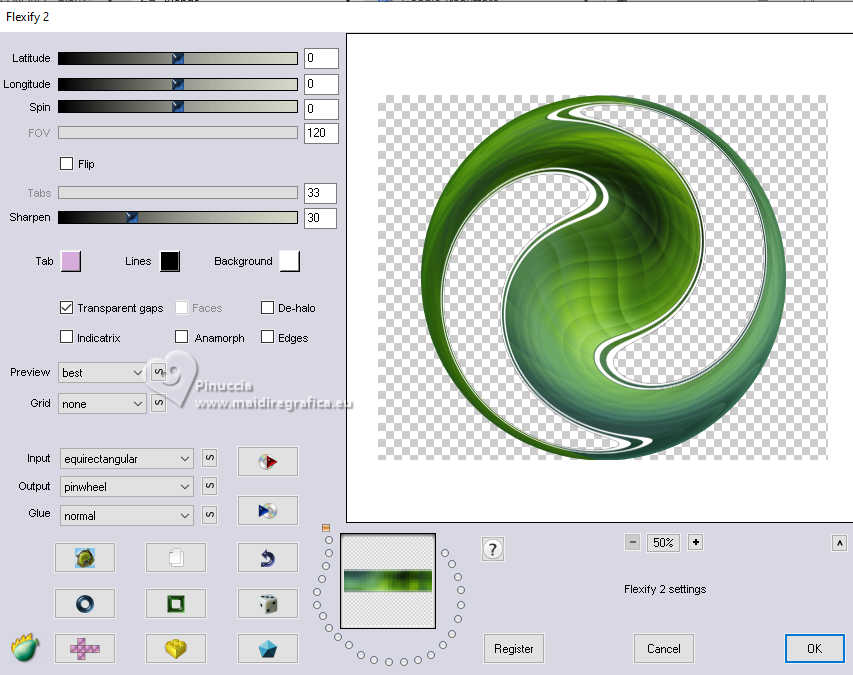
11. Activate your top layer.
Effects>Plugins>Flaming Pear - Flexify 2.
12. Effetcs>3D Effects>Drop Shadow, color #ef9822.
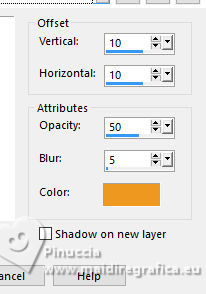
13. Effects>Plugins>Flaming Pear - Flood.
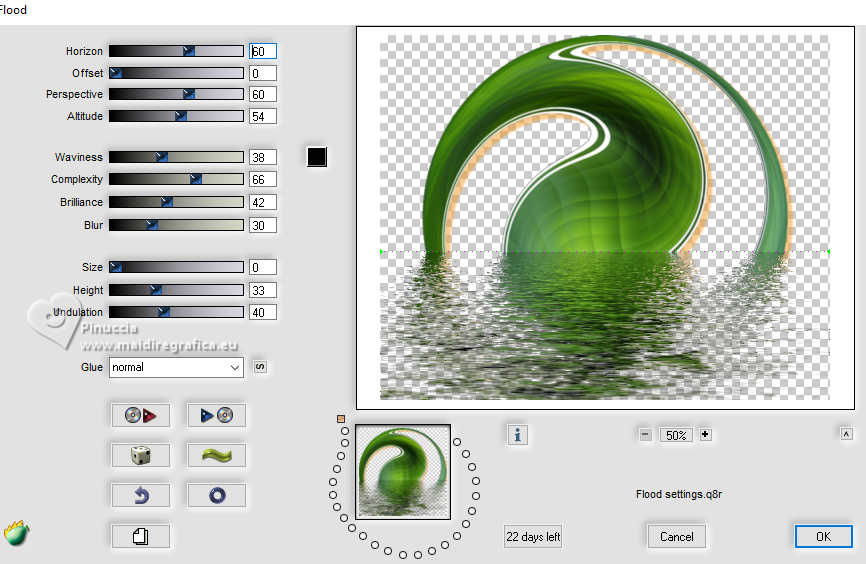
Change the Blend Mode of this layer to Hard Light and reduce the opacity to 55%.

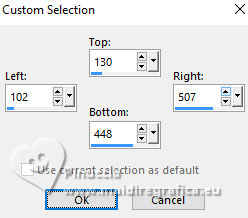
14. Custom Selection 
15. Layers>New Raster Layer.
Flood Fill  with your white background color. with your white background color.
16. Selections>Modify>Contract - 15 pixels.
The image Grafico is still in memory: Edit>Paste into Selection.
Adjust>Sharpness>Sharpen More.
Selections>Select None.
17. Layers>Duplicate - 2 times.
Image>Free Rotate - 20 degrees to left.
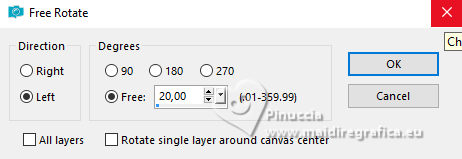
18. K key to activate your Pick Tool 
Position X: 7,00 - Position Y: 1,00

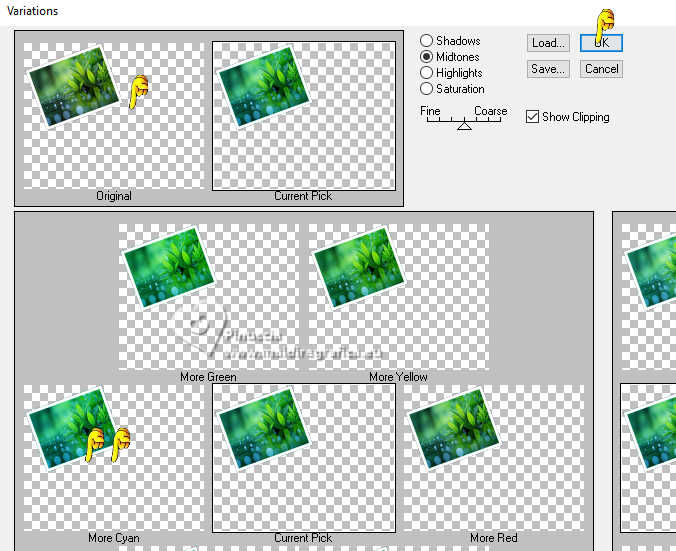
19. Effects>Plugins>Adjust - Variations:
click 1 time on Original to cancel any previous settings stored by the filter,
2 times on More Cyan and ok.
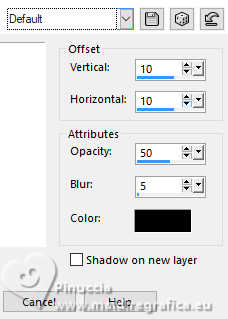
20. Effects>3D Effects>Drop Shadow, default settings.
21. Activate the layer Copy of Raster 2.
Image>Free Rotate, same settings

Position X: 381,00 - Position Y: 15,00.

Layers>Arrange>Move Up.
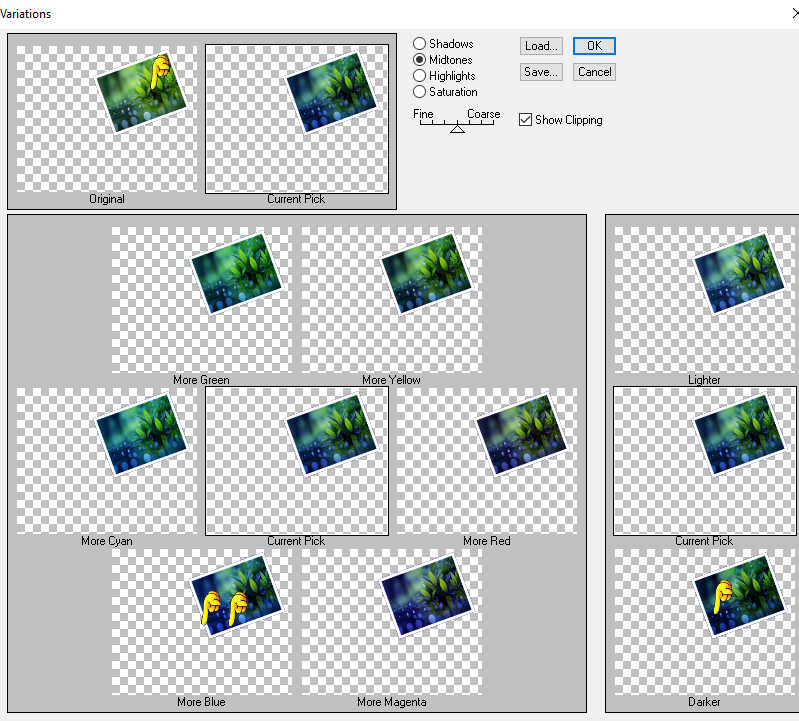
22. Effects>Plugins>Adjust - Variations:
click one time on Original, 2 times on More Blue, 1 time on Darker and ok.
23. Effects>3D Effects>Drop Shadow, default settings.

24. Activate the layer Raster 2.
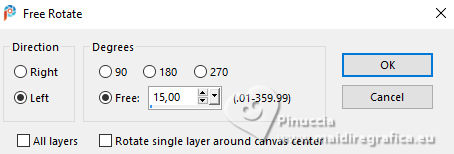
Image>Free Rotate - 15 degrees to left.
Layers>Arrange>Bring to Top.
Position X: 416,00 - Position Y: 286,00.

25. Effects>Plugins>Adjust - Variations:
click one time on Original, 2 times on More Yellow and ok.
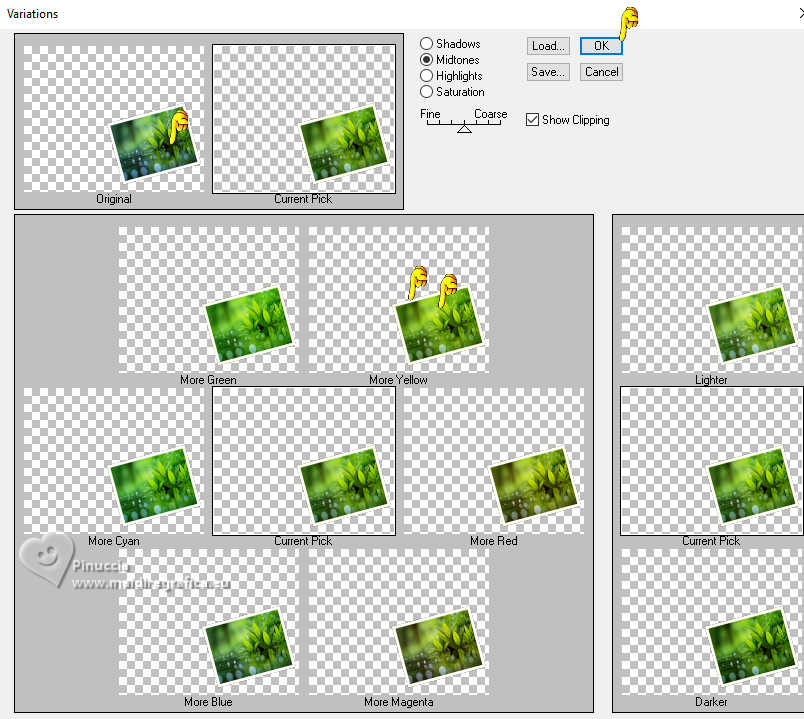
Effects>3D Effects>Drop Shadow, default settings.
26. Layers>Merge>Merge Down - 2 times.
Image>Resize, to 80%, resize all layers not checked.
27. Layers>Duplicate.
Layers>Arrange>Move Donw.
Adjust>Blur>Gaussian Blur - radius 30.

28. Effects>Distortion Effects>Spyky Halo.
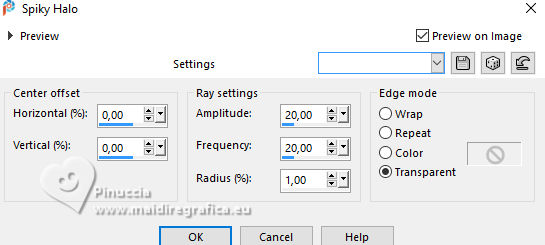
Change the Blend Mode of this layer to Overlay.
29. Activate your top layer.
Objects>Align>Top.
Objects>Align>Left.
30. Open EF-Blends_Deco_1 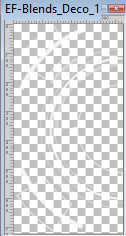
Edit>Copy.
Go back to your work and go to Edit>Paste as new layer.
Layers>Arrange>Move Down.
Objects>Align>Right.
31. Effects>Plugins>Mura's Seamless - Emboss at Alpha, default settings.
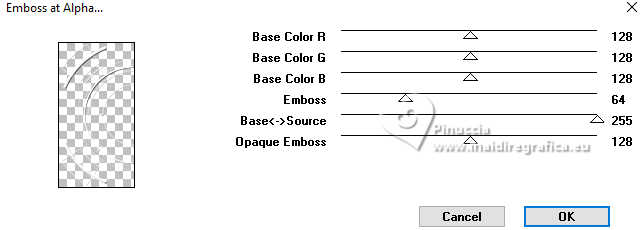
Effects>3D Effects>Drop Shadow, default settings.
32. Activate your top layer.
Open the tube Renee-TUBES-Octobre-2025-1 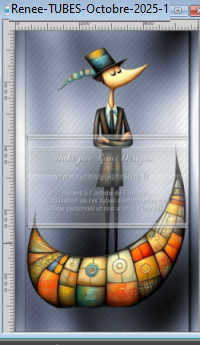
Edit>Copy.
Go back to your work and go to Edit>Paste as new layer.
Image>Resize, to 75%, resize all layers not checked.
Move  the tube to the left side. the tube to the left side.
33. Effects>3D Effects>Drop Shadow, color #000000.
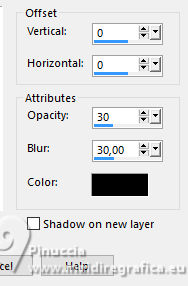
34. Effects>Plugins>Alien Skin Eye Candy 5 Impact - Perspective Shadow.
Preset Reflect in Front with these settings
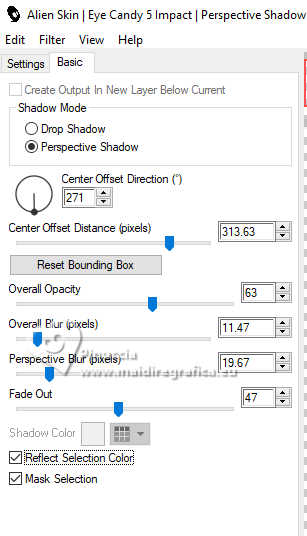
if necessary, you can use the tool of the Filter to adjust the shadow to your tube
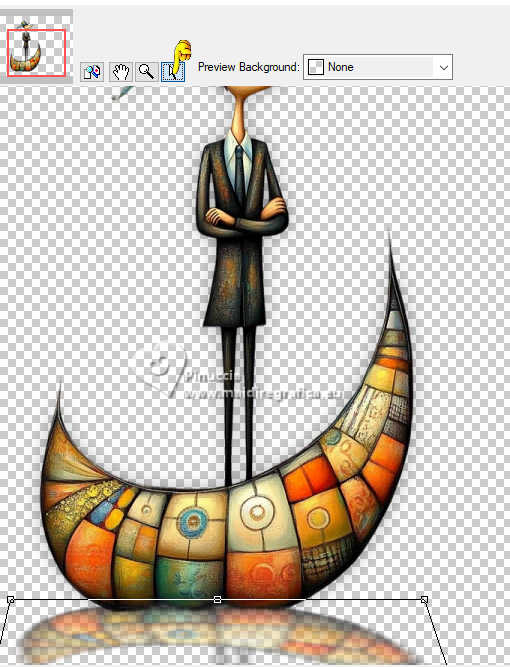
34. Your tag and the layers
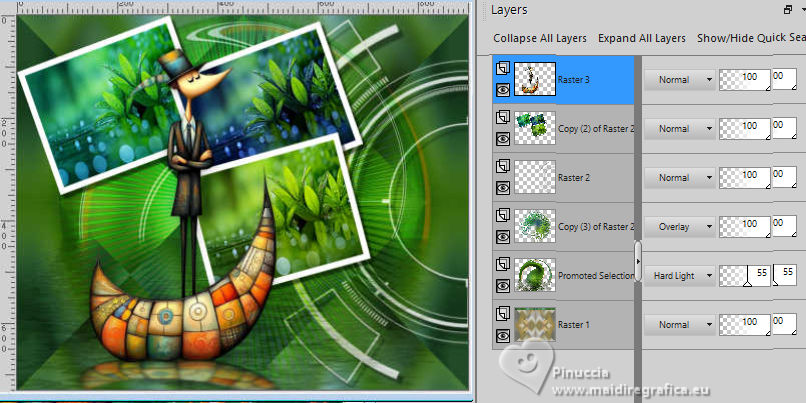
35. Image>Add Borders, 3 pixels, symmetric, color #fefefe.
Image>Add Borders, 3 pixels, symmetric, color #a1d047.
Image>Add Borders, 35 pixels, symmetric, color #fefefe.
36. Open the text Texto 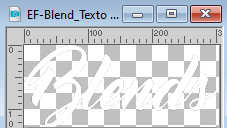
Edit>Copy.
Go back to your work and go to Edit>Paste as new layer.
Move  the text at the bottom right. the text at the bottom right.
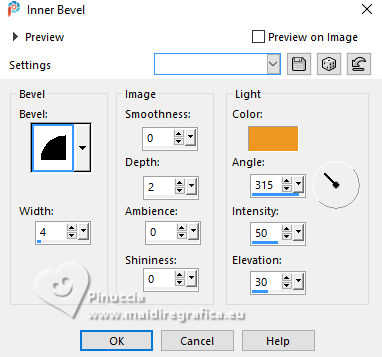
37. Effects>3D Effects>Inner Bevel, color to your liking.
38. Sign your work.
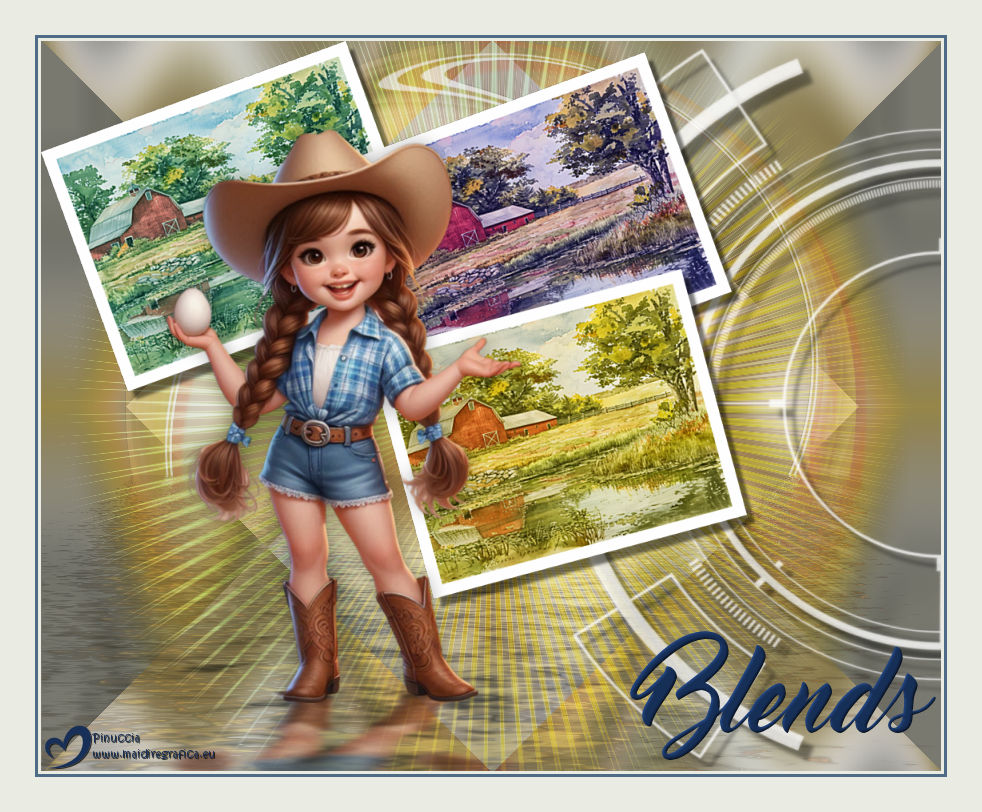
Layers>Merge>Merge All and save as jpg.
Tube is by MyTaggingAddiction. Thanks


If you have problems or doubts, or you find a not worked link,
or only for tell me that you enjoyed this tutorial, write to me.
28 October 2025

|

