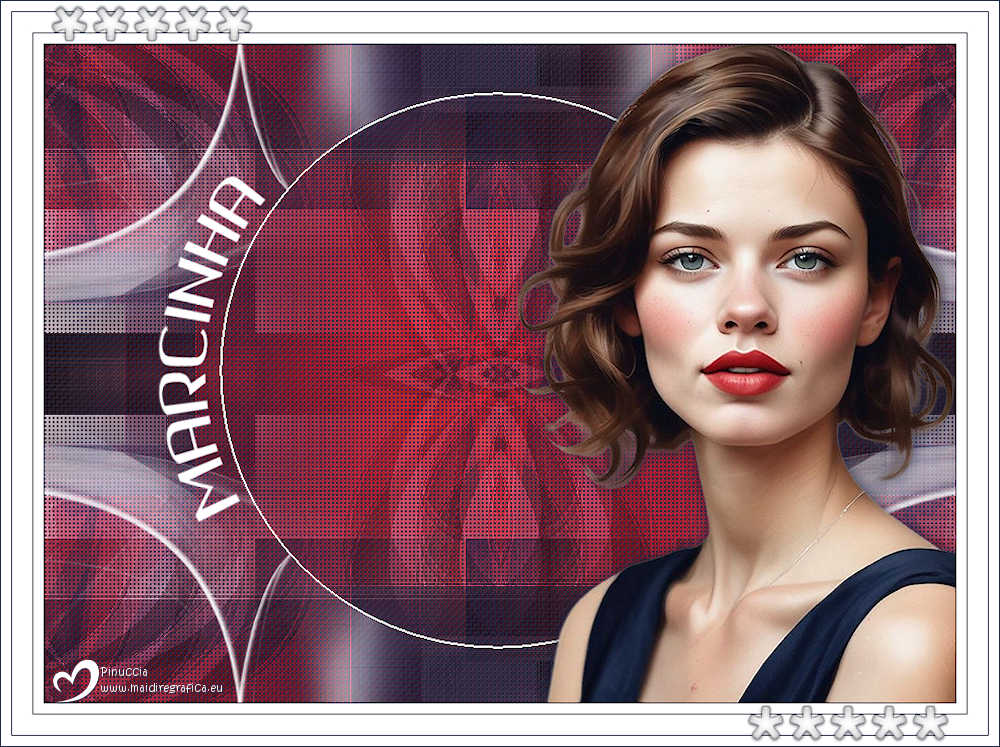
|
MARCINHA


Thanks Estela for your invitation to translate your tutorials into english

This tutorial, created with PSP2022, was translated with PspX7, but it can also be made using other versions of PSP.
Since version PSP X4, Image>Mirror was replaced with Image>Flip Horizontal,
and Image>Flip with Image>Flip Vertical, there are some variables.
In versions X5 and X6, the functions have been improved by making available the Objects menu.
In the latest version X7 command Image>Mirror and Image>Flip returned, but with new differences.
See my schedule here
 French Translation here French Translation here
 Your versions here Your versions here

For this tutorial, you will need:

Material by Estela Fonseca.
(The links of the tubemakers here).
*It is forbidden to remove the watermark from the supplied tubes, distribute or modify them,
in order to respect the work of the authors

consult, if necessary, my filter section here
Filters Unlimited 2.0 here
Toadies - *Sucking Toad* Bevel II.2, What are you, Weaver here
Xero - Artworx here
Filters Toadies can be used alone or imported into Filters Unlimited.
(How do, you see here)
If a plugin supplied appears with this icon  it must necessarily be imported into Unlimited it must necessarily be imported into Unlimited

You can change Blend Modes according to your colors.
In the newest versions of PSP, you don't find the foreground/background gradient (Corel_06_029).
You can use the gradients of the older versions.
The Gradient of CorelX here

Copy the preset in the Presets Folder.
Open the mask in PSP and minimize it with the rest of the material.
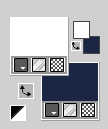
Set your foreground color to #d35059,
and your background color to #1c2743.
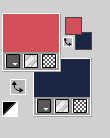
Set your foreground color to a Foreground/Background Gradient, style Radial.
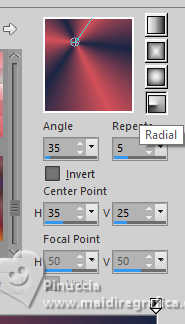
1. Open a new transparent image 900 x 650 pixels.
Flood Fill  the transparent image with your Gradient. the transparent image with your Gradient.
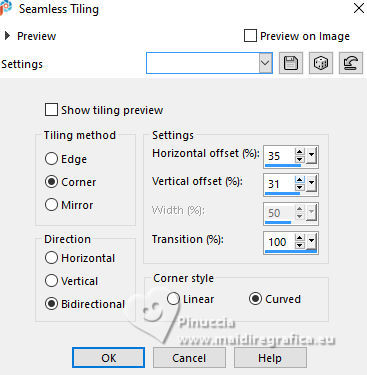
2. Effects>Image Effects>Seamless Tiling
3. Adjust>Blur>Gaussian Blur - radius 25.

4. Effets>Modules Externes>Toadies - *Sucking Toad* Bevel II.2.
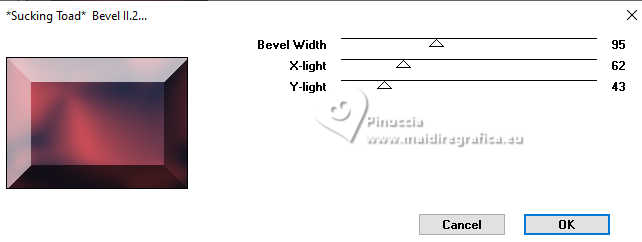
5. Effects>Image Effects>Seamless Tiling, last settings.

6. Effects>User Defined Filter - preset Double_Vision
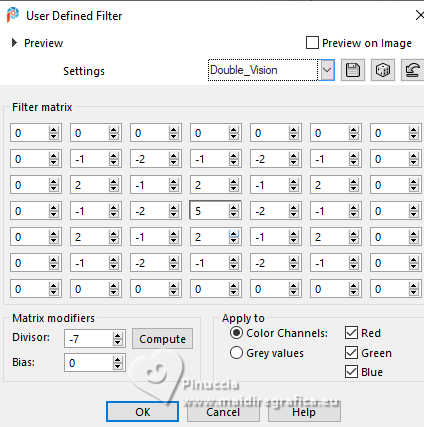
Adjust>Sharpness>Sharpen More.
7. Effets>Modules Externes>Xero - Artworx, default settings.
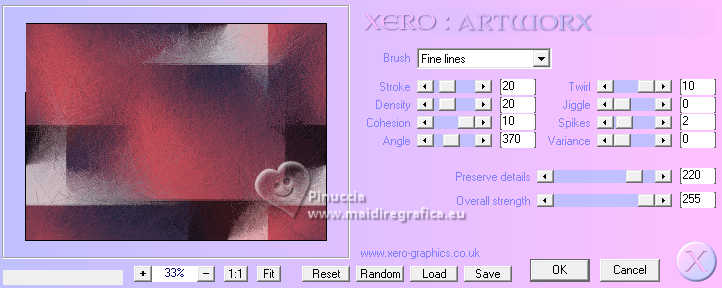
8. Selection Tool 
(no matter the type of selection, because with the custom selection your always get a rectangle)
clic on the Custom Selection 
and set the following settings.
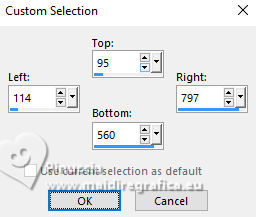
Selections>Promote Selection to Layer.
Keep selected.
9. Effects>Reflection Effects>Kaleidoscope.
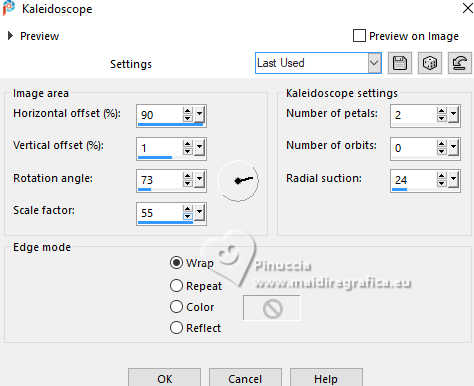
10. Selections>Modify>Select Selection Borders.
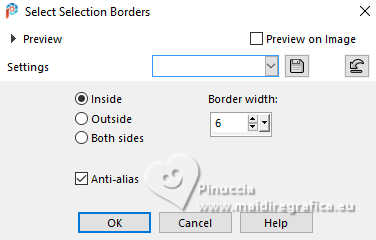
Effects>Edge Effects>Enhance.
Selections>Select None.
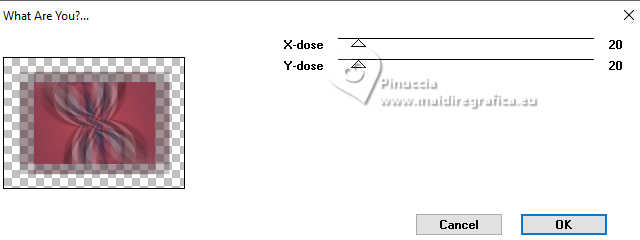
11. Effets>Modules Externes>Toadies - What are you
12. Activate your bottom layer, Raster 1.
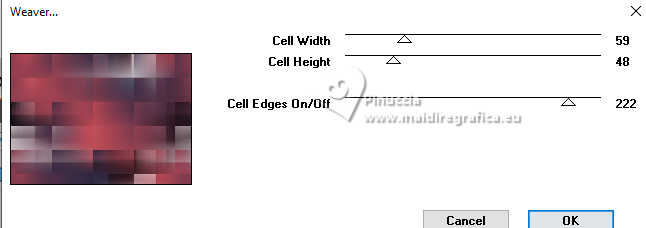
Effets>Modules Externes>Toadies - Weaver, default settings.
13. Activate your top layer.
Effects>Reflection Effects>Rotating Mirror.

14. Effects>Image Effects>Seamless Tiling, default settings.

Change the Blend Mode of this layer to Hard Light.
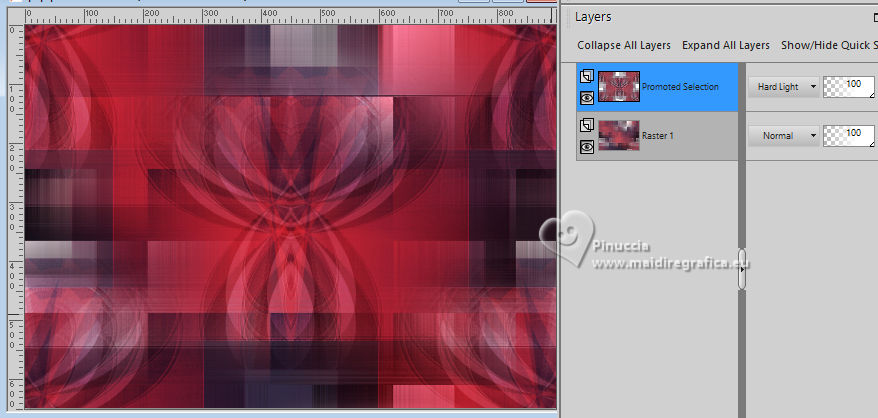
15. Layers>Merge>Merge Down.
16. Effects>Reflection Effects>Rotating Mirror.
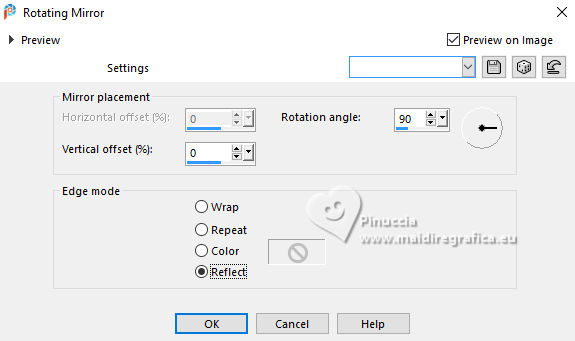
Adjust>Sharpness>Sharpen.
17. Effects>Texture Effects>Weave
weave color: foreground color
gap color: background color.
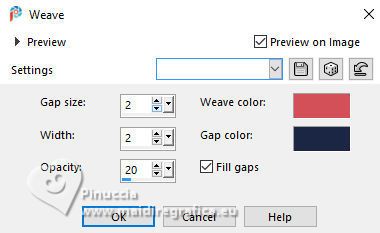
18. Set your foreground color to white.
Layers>New Raster Layer.
Flood Fill  the layer with the color white. the layer with the color white.
18. Layers>New Mask layer>From image
Open the menu under the source window and you'll see all the files open.
Select the mask EF-Marcinha_Mask.
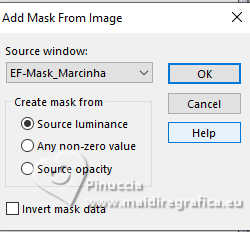
Layers>Merge>Merge Group.
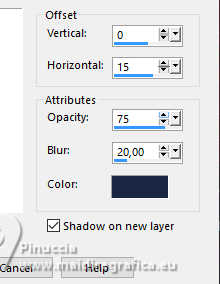
19. Effects>3D Effects>Drop Shadow, background color,
shadow on new layer checked.
20. Effets>Modules Externes>Toadies - Ommadawn, default settings.
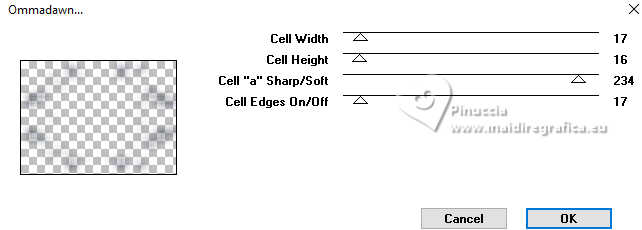
Change the Blend Mode of this layer to Screen.
21. Layers>Duplicate.
Change the Blend Mode of this layer to Dodge.
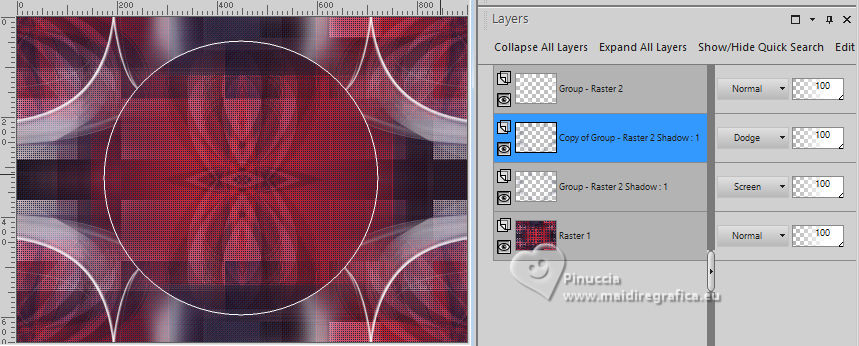
22. Activate your top layer.
Open the tube EF-Tube_600 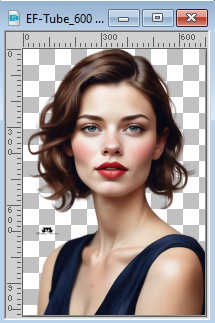
Edit>Copy.
Go back to your work and go to Edit>Paste as new layer.
Image>Resize, to 70%, resize all layers not checked.
23. K key to activate your Pick Tool 
Position X: 464,00 - Position Y: -1,00.

M key to deselect the Tool.
Adjust>Sharpness>Sharpen.
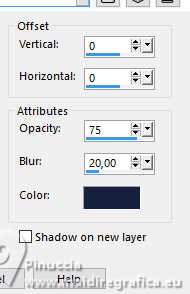
24. Effects>3D Effects>Drop shadow, color #17223e.
25. Image>Add borders, 1 pixel, symmetric, background color.
Image>Add borders, 10 pixels, symmetric, color white.
Image>Add borders, 1 pixel, symmetric, background color.
Image>Add borders, 20 pixels, symmetric, color white.
Image>Add borders, 1 pixel, symmetric, background color.
Image>Add borders, 10 pixels, symmetric, color white.
26. Open EF-Marcinha_Texto 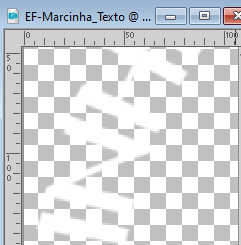
Edit>Copy.
Go back to your work and go to Edit>Paste as new layer.
Place  the text as below. the text as below.
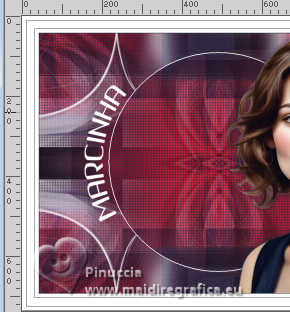
27. Open EF-Marcinha_Deco_1 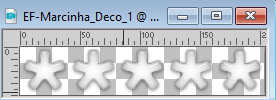
Edit>Copy.
Go back to your work and go to Edit>Paste as new layer.
Move  the tube at the bottom right. the tube at the bottom right.
28. Effects>3D Effects>Drop Shadow, color at your choice.
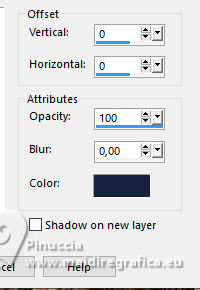
Layers>Duplicate.
Image>Mirror>Mirror vertical (Image>Flip).
Image>Mirror>Mirror horizontal (Image>Mirror).
29. Sign your work.
Image>Add borders, 1 pixel, symmetric, background color.
30. Image>Resize, 1000 pixels width, resize all layers checked.
Save as jpg.
For the tube of this version thanks Luz Cristina
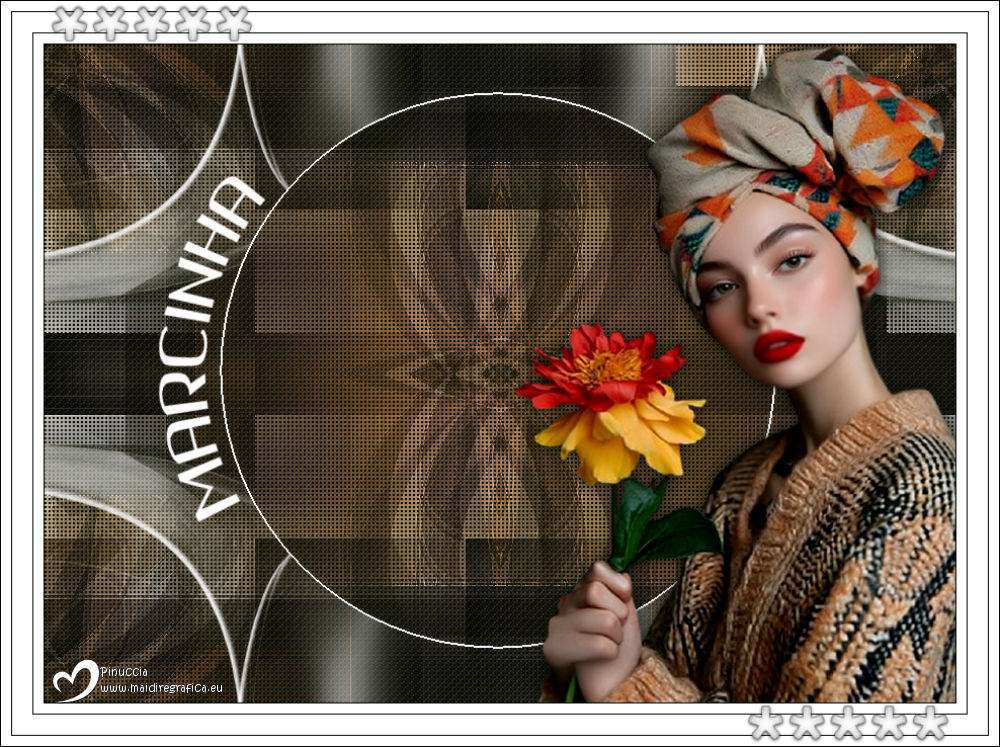


If you have problems or doubts, or you find a not worked link,
or only for tell me that you enjoyed this tutorial, write to me.
24 Februaty 2025

|

