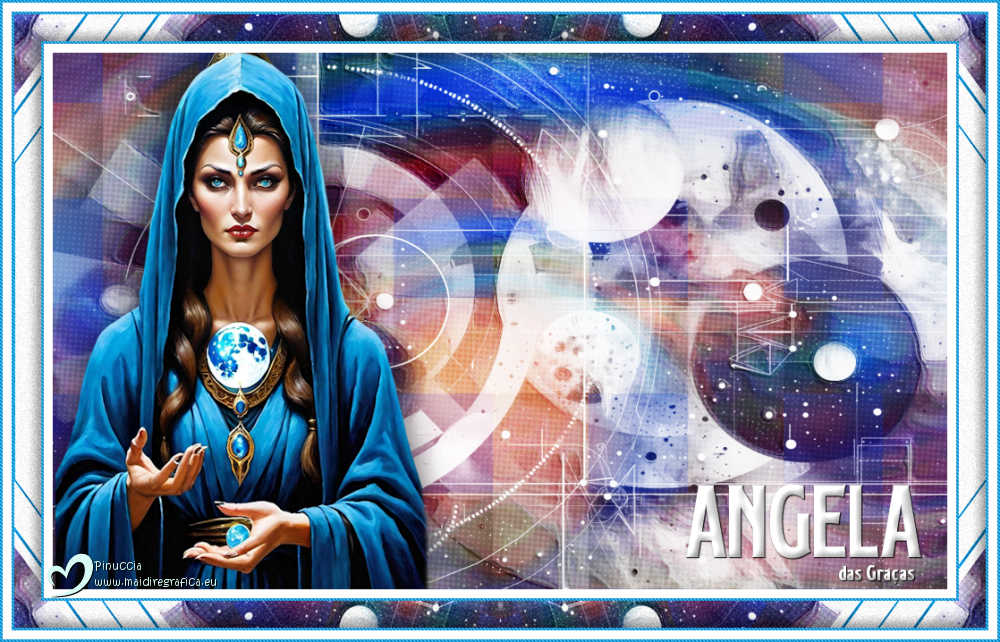
|
ANGELA DAS GRAÇAS


Thanks Estela for your invitation to translate your tutorials into english

This tutorial, created with PSP2022, was translated with PspX7, but it can also be made using other versions of PSP.
Since version PSP X4, Image>Mirror was replaced with Image>Flip Horizontal,
and Image>Flip with Image>Flip Vertical, there are some variables.
In versions X5 and X6, the functions have been improved by making available the Objects menu.
In the latest version X7 command Image>Mirror and Image>Flip returned, but with new differences.
See my schedule here
 French Translation here French Translation here
 Your versions here Your versions here

For this tutorial, you will need:

Material by Estela Fonseca (Images Pinterest).
(The links of the tubemakers here).
*It is forbidden to remove the watermark from the supplied tubes, distribute or modify them,
in order to respect the work of the authors

consult, if necessary, my filter section here
Filters Unlimited 2.0 here
Filter Factory Gallery A - Weave here
Penta.com - Jeans here
Filters Factory Gallery and Penta.com can be used alone or imported into Filters Unlimited.
(How do, you see here)
If a plugin supplied appears with this icon  it must necessarily be imported into Unlimited it must necessarily be imported into Unlimited

You can change Blend Modes according to your colors.

1. Open a new transparent image 1000 x 600 pixels.
Selections>Select All.
2. Open Grafico-1 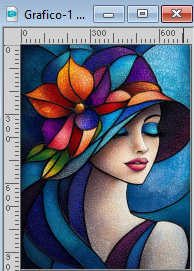
Edit>Copy.
Go back to your work and go to Edit>Paste into Selection.
Selections>Select None.
3. Effects>Image Effects>Seamless Tiling, default settings.

4. Adjust>Blur>Radial Blur
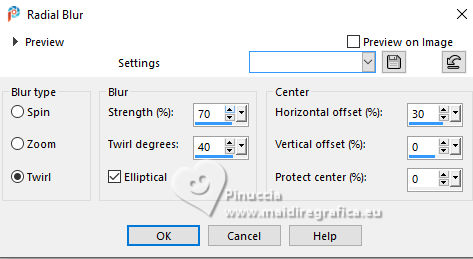
5. Adjust>Hue and Saturation>Vibrancy.
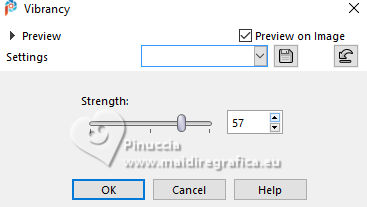
6. Effects>Edge Effects>Enhance.
Layers>Duplicate.
Image>Mirror>Mirror Horizontal.
Change the Blend Mode of this layer to Hard Light.
Layers>Merge>Merge Down.
7. Open EF-Angela_das_Gracas-Deco_1 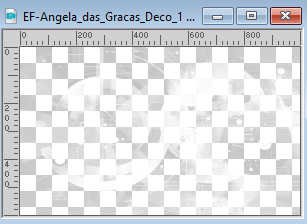
Edit>Copy.
Go back to your work and go to Edit>Paste as new layer.
8. Layers>Merge>Merge Down.
9. Effects>Texture Effects>Soft Plastic
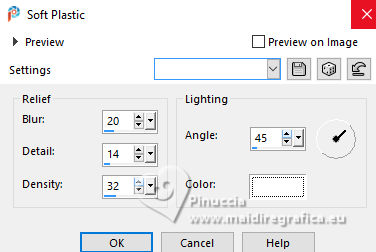
Change the Blend Mode of this layer to Soft Light.
10. Effects>Plugins>Filter Factory Gallery A - Weave
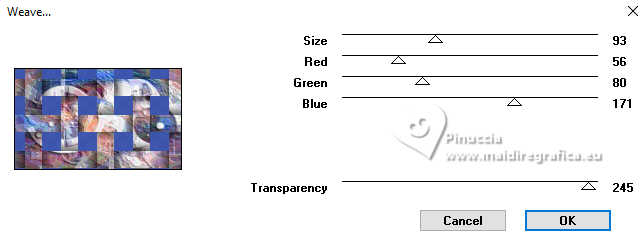
Ink: dark color of your image
11. Effects>Artistic Effects>Halftone.
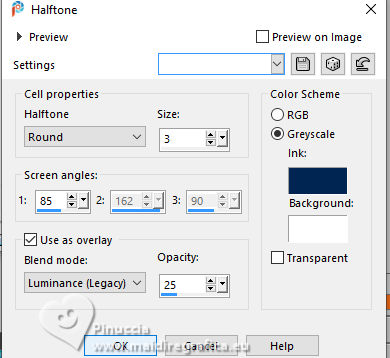
12. Open your main tube EF-Personagem 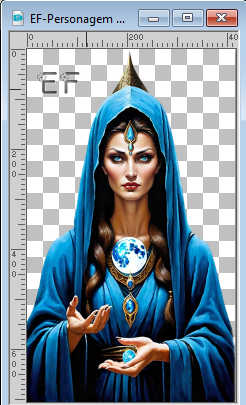
Erase the watermark and go to Edit>Copy.
Go back to your work and go to Edit>Paste as new layer.
Move  the tube to the left. the tube to the left.
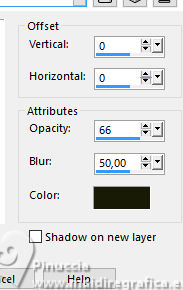
13. Effects>3D Effects>Drop shadow, color #000000.
14. Open EF-Angela_das_Gracas_Texto 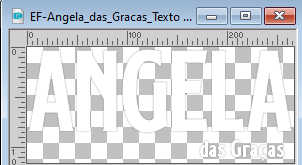
Edit>Copy.
Go back to your work and go to Edit>Paste as new layer.
Move  the tube at the bottom right. the tube at the bottom right.
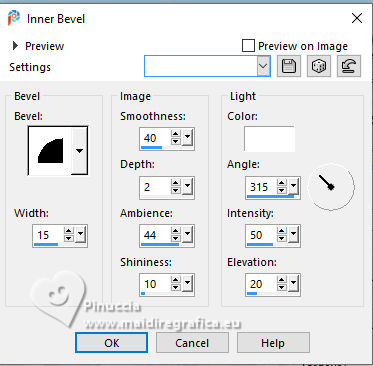
15. Effects>3D Effects>Inner Bevel.
16. Effects>3D Effects>Drop Shadow, color #000000.
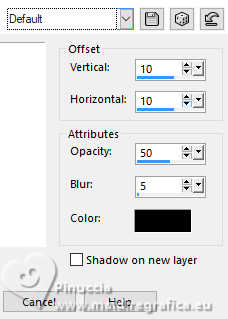
17. Image>Add Borders - 10 pixels, symmetric, color #ffffff.
Image>Add Borders - 3 pixels, symmetric, color #0581bb.
Image>Add Borders - 30 pixels, symmetric, color #ffffff.
Image>Add Borders - 3 pixels, symmetric, color #0581bb.
Image>Add Borders - 10 pixels, symmetric, color #ffffff.
18. Activate your Magic Wand Tool  , tolérance et progressivité 0, , tolérance et progressivité 0,
and click in the 30 pixels border to select it.
Effects>Reflection Effects>Kaleidoscope, default settings.
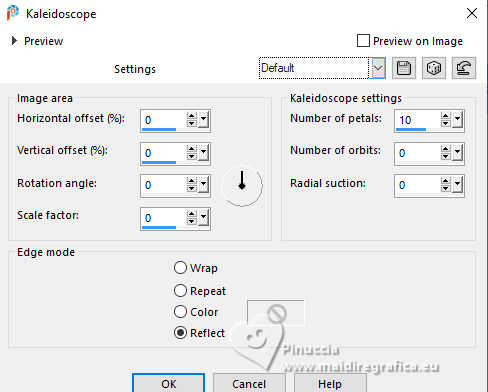
Effects>3D Effects>Inner Bevel, same settings.

Adjust>Add/Remove Noise>Add Noise.
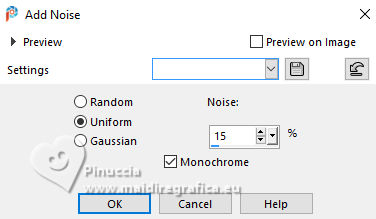
Selections>Select None.
16. Sign your work.
Image>Add Borders - 3 pixels, symmetric, color #0581bb.
Activate your Magic Wand Tool  , tolerance and feather 0, , tolerance and feather 0,
and click in the 3 pixels borders to select them.
Effects>Plugins>Penta.com - Jeans, default settings.

Selections>Select None.
Image>Resize, 1000 pixels width, resize all layers checked.
Save as jpg.
For the tube of these versions thanks
Virginia.

Tatty's Things


If you have problems or doubts, or you find a not worked link,
or only for tell me that you enjoyed this tutorial, write to me.
6 May 2025

|

