|
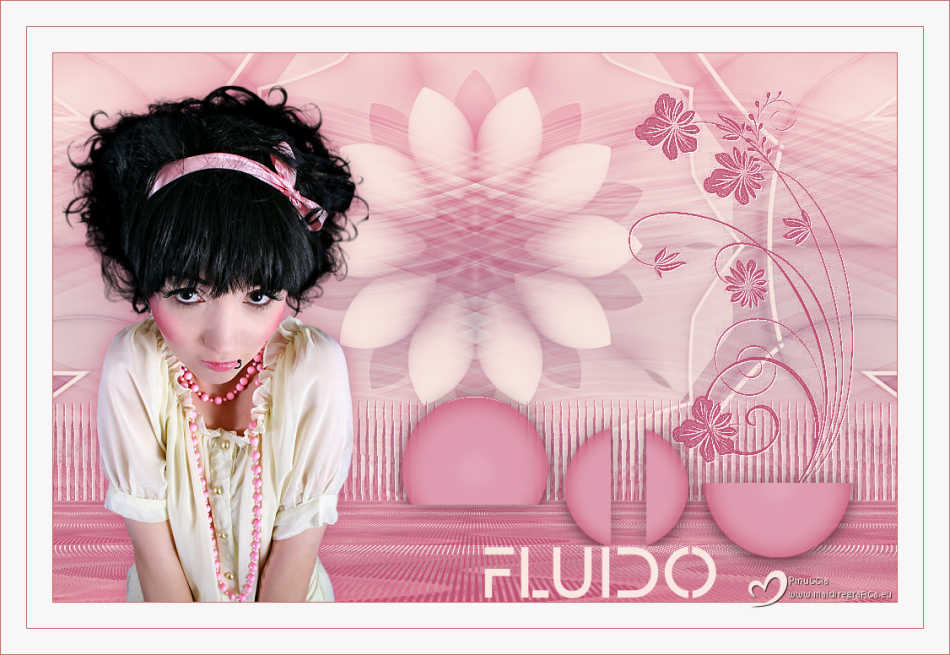
FLUIDO


Thanks Estela for your invitation to translate your tutorials into english

This tutorial, created with PSP2022, was translated with PspX7, but it can also be made using other versions of PSP.
Since version PSP X4, Image>Mirror was replaced with Image>Flip Horizontal,
and Image>Flip with Image>Flip Vertical, there are some variables.
In versions X5 and X6, the functions have been improved by making available the Objects menu.
In the latest version X7 command Image>Mirror and Image>Flip returned, but with new differences.
See my schedule here
 French Translation here French Translation here
 Your versions here Your versions here

For this tutorial, you will need:

Thanks for the tube Kitty.
The rest of the material is by Estela Fonseca.
(The links of the tubemakers here).
*It is forbidden to remove the watermark from the supplied tubes, distribute or modify them,
in order to respect the work of the authors

consult, if necessary, my filter section here
Filters Unlimited 2.0 here
VM Natural - Lakeside Reflection here
Graphics Plus - Vertical Mirror here
Simple - 4Way Averagehere
Mura's Meister - Perspective Tiling here
Filters VM Natural, Graphics Plus and Simple can be used alone or imported into Filters Unlimited.
(How do, you see here)
If a plugin supplied appears with this icon  it must necessarily be imported into Unlimited it must necessarily be imported into Unlimited

You can change Blend Modes according to your colors.

Copy the preset in the Presets Folder.
Open the mask in PSP and minimize it with the rest of the material.
1. Set your foreground color to the light color #f9e8e1,
and your background color to the dark color #be4e72.
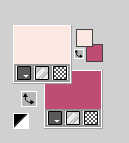
2. Open a new transparent image 1000 x 650 pixels.
Effects>Plugins>Mura's Meister - Cloud

Remember that this filter works with the colors of your material palette,
but it keeps in memory the first setting used after the the opening of Psp.
So, if you have already used the plugin, press Reset to be sure to have your colors.
The result of this effects is random, so it won't be the same as mine.
If you want to change the appearance of the clouds, click on the preview window,
until you'll see the result you like better.
3. Adjust>Hue and Saturation>Vibrancy.

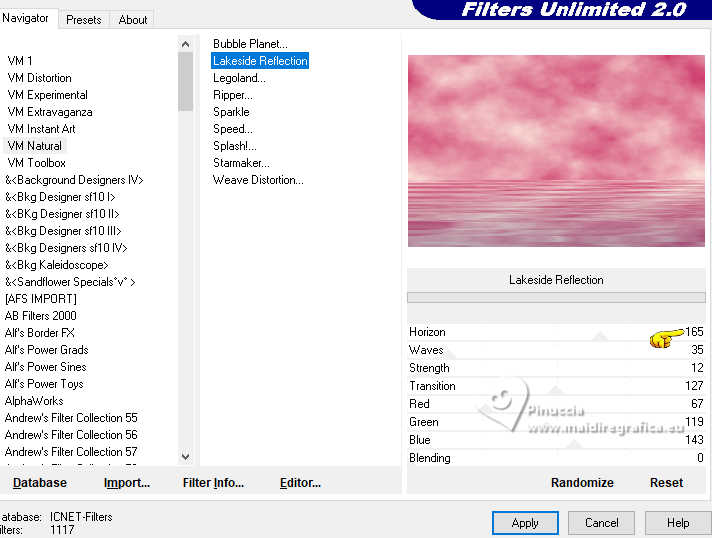
4. Effects>Plugins>Filters Unlimited 2.0 - VM Natural - Lakeside Reflection
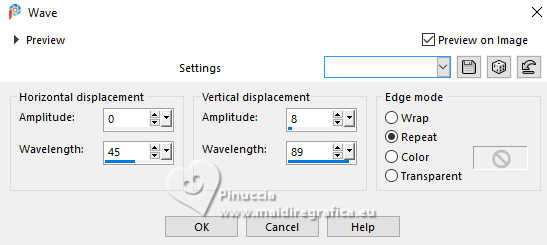
5. Effects>Distortion Effects>Wave
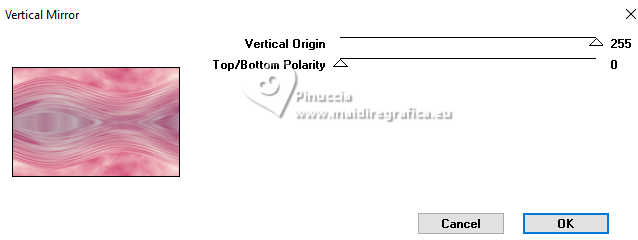
6. Effects>Plugins>Graphics Plus - Vertical Mirror.
7. Effects>Plugins>Simple - 4 Way Average.
Adjust>Sharpness>Sharpen More.
8. Layers>New Raster Layer.
Flood Fill  the layer with your light foreground color. the layer with your light foreground color.
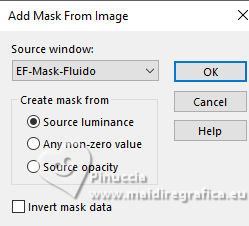
Layers>New Mask layer>From image
Open the menu under the source window and you'll see all the files open.
Select the mask EF-Mask-Fluido.
Layers>Merge>Merge Group.
Layers>Duplicate.
Layers>Merge>Merge Down.
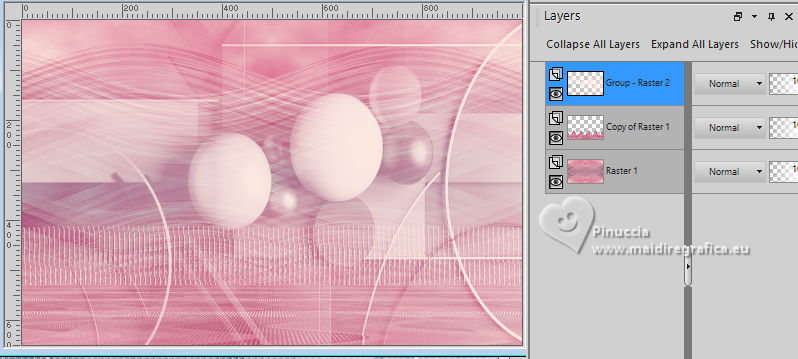
9. Close this layer.
Activate your bottom layer, Raster 1.
Layers>Duplicate.
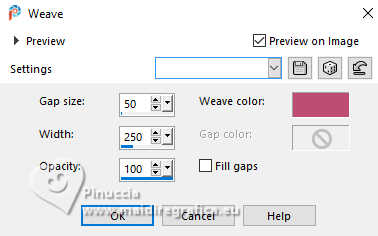
10. Effects>Texture Effects>Weave
weave color: foreground color.
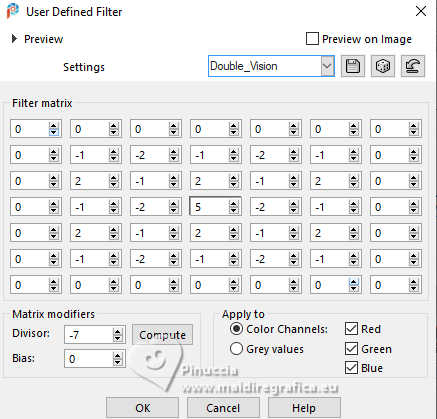
11. Effects>User Defined Filter - Double_Vision or set these settings
12. Effects>Plugins>Mura's Meister - Perspective Tiling
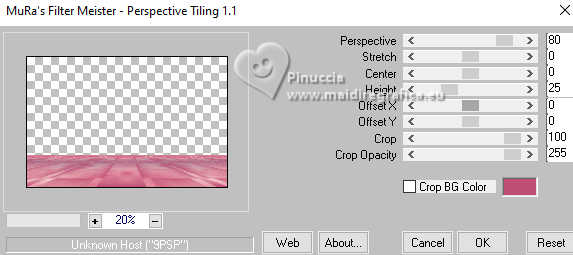
13. Effects>Distortion Effects>Wave
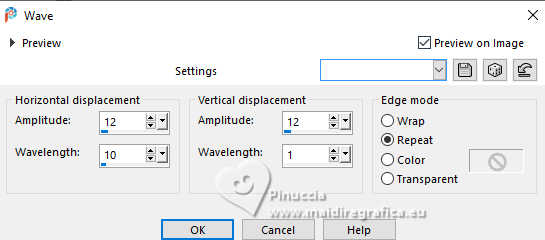
14. Selection Tool 
(no matter the type of selection, because with the custom selection your always get a rectangle)
clic on the Custom Selection 
and set the following settings.
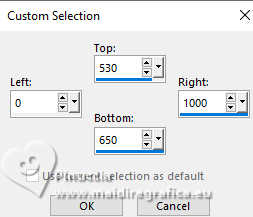
15. Effects>Plugins>Mura's Meister - Perspective Tiling, default settings - click on Reset
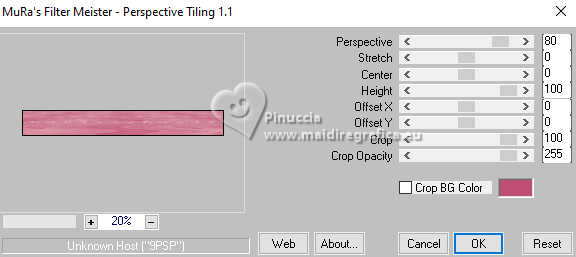
Selections>Select None.
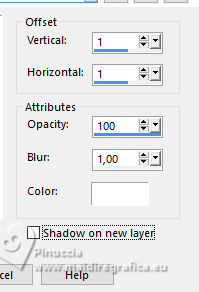
Effects>3D Effects>Drop Shadow, color #ffffff.
16. Open and activate your top layer.
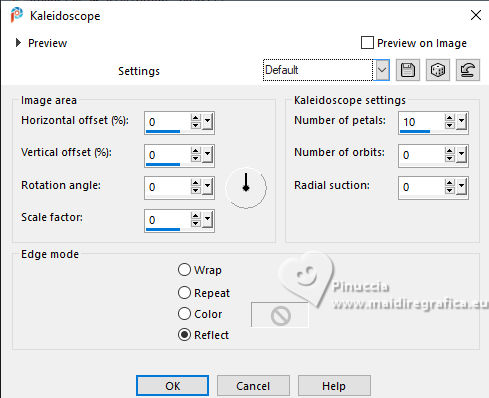
Effects>Reflection Effects>Kaleidoscope.
17. K key to activate your Pick Tool 
Position X: 0,00 - Position Y: -97,00.

Layers>Arrange>Move Down.
18. Activate again your top layer.
Open EF-Fluido-Deco_1 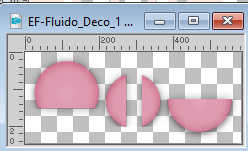
Edit>Copy.
Go back to your work and go to Edit>Paste as new layer.
Position X: 387,00 - Position Y: 382,00.

If necessary, colorize with your background color
19. Open EF-Fluido-Deco_2 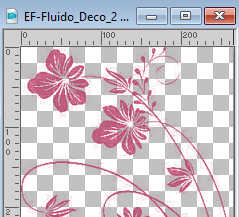
Edit>Copy.
Go back to your work and go to Edit>Paste as new layer.
Position X: 682,00 - Position Y: 45,00.

M key to deselect the Tool.
20. Effects>3D Effects>Drop shadow, same settings.

Layers>Arrange>Move Down.
21. Activate again your top layer.
Open your woman's tube Kitty_Slipring2642009... 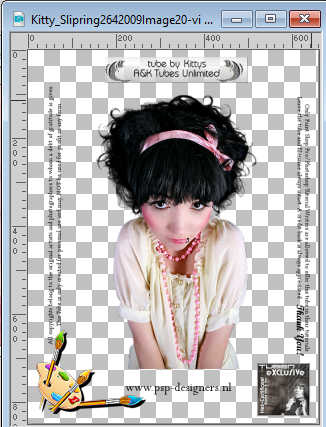
Erase the watermark and go to Edit>Copy.
Go back to your work and go to Edit>Paste as new layer.
Move  the tube to the left. the tube to the left.
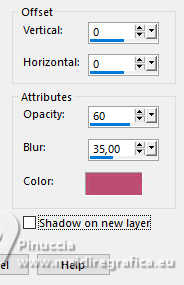
22. Effects>3D Effects>Drop Shadow, background color.
23. Open EF-Fluido-Texto 
Edit>Copy.
Go back to your work and go to Edit>Paste as new layer.
Place  the text to your liking. the text to your liking.
24. Image>Add borders, 1 pixel, symmetric, color #c36860.
Image>Add borders, 30 pixels, symmeetric, color #f9f6f7.
Image>Add borders, 1 pixel, symmetric, color #c36860.
Image>Add borders, 30 pixels, symmeetric, color #f9f6f7.
25. Sign your work.
Image>Add Borders, 1 pixel, symmetric, color #c36860.
26. Image>Resize, 850 pixels width, resize all layers checked.
Save as jpg.
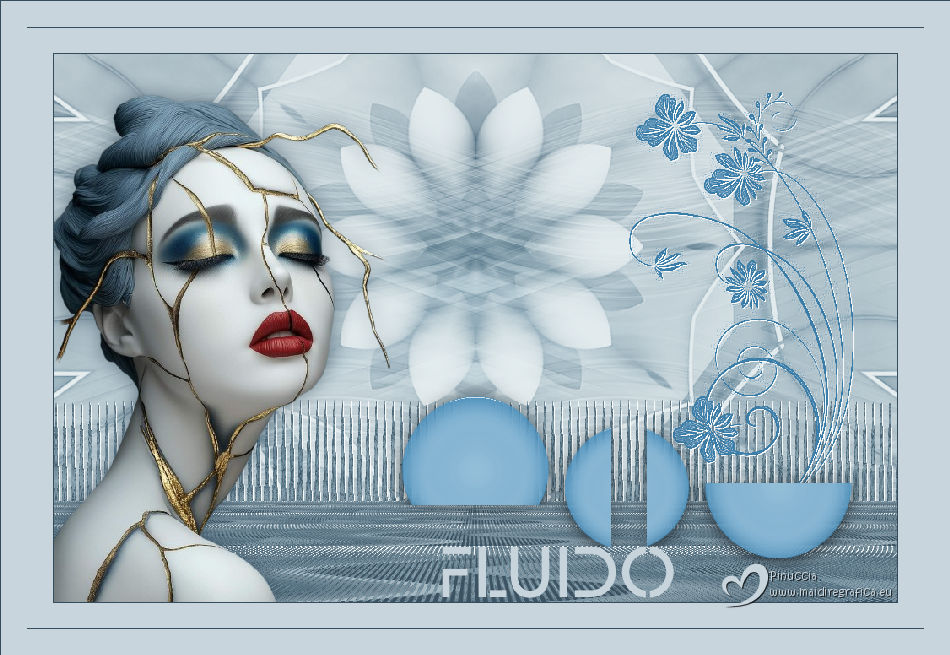
For the tube of this version thanks Renée

If you have problems or doubts, or you find a not worked link,
or only for tell me that you enjoyed this tutorial, write to me.
21 April 2025

|

