|
NATAL 2024


Thanks Estela for your invitation to translate your tutorials into english

This tutorial, created with PSP2022, was translated with PspX7, but it can also be made using other versions of PSP.
Since version PSP X4, Image>Mirror was replaced with Image>Flip Horizontal,
and Image>Flip with Image>Flip Vertical, there are some variables.
In versions X5 and X6, the functions have been improved by making available the Objects menu.
In the latest version X7 command Image>Mirror and Image>Flip returned, but with new differences.
See my schedule here
 French Translation here French Translation here
 Your versions here Your versions here

For this tutorial, you will need:

Material is by Estela Fonseca.
(The links of the tubemakers here).
*It is forbidden to remove the watermark from the supplied tubes, distribute or modify them,
in order to respect the work of the authors

consult, if necessary, my filter section here
Filters Unlimited 2.0 here
Funhouse - Angulate here
Carolaine and Sensibility - CS-HLines here
Filters Funhouse can be used alone or imported into Filters Unlimited.
(How do, you see here)
If a plugin supplied appears with this icon  it must necessarily be imported into Unlimited it must necessarily be imported into Unlimited

You can change Blend Modes according to your colors.

1. Open a new transparent image 1000 x 600 pixels.
Selections>Select All.
Open the image grafico_1 
Edit>Copy.
Go back to your work and go to Edit>Paste into Selection.
Selections>Select None.
2. Effects>Image Effects>Seamless Tiling, default settings.

3. Adjust>Blur>Gaussian Blur - radius 25.

4. Layers>Duplicate.
Image>Resize, to 80%, resize all layers not checked.
5. Effects>Image Effects>Seamless Tiling.

Effects>Edge Effects>Enhance More.
6. Activate the layer Raster 1.
Effects>Plugins>Filters Unlimited 2.0 - Funhouse - Angulate.
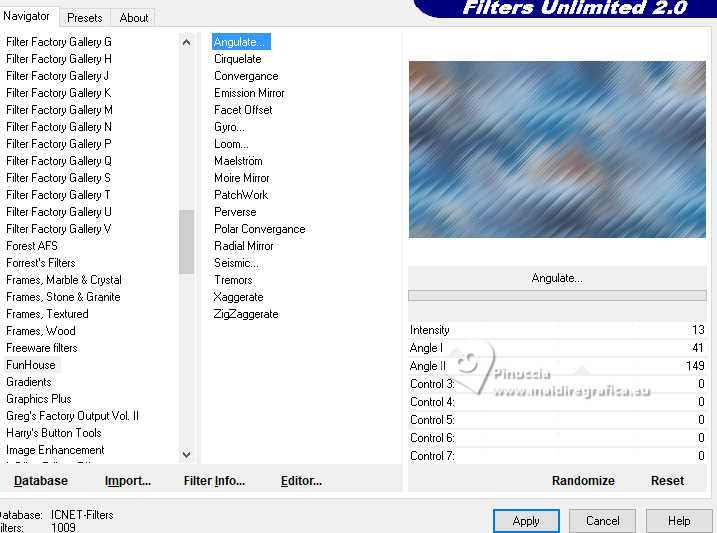
Effects>Edge Effects>Enhance More.
7. Adjust>Add/Remove Noise>Add Noise.
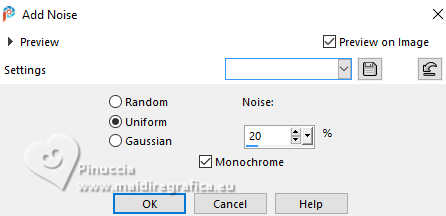
Adjust>Hue and Saturation>Vibrancy.
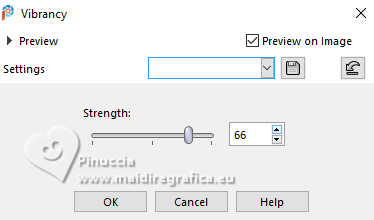
8. Activate your top layer.
Selection Tool 
(no matter the type of selection, because with the custom selection your always get a rectangle)
clic on the Custom Selection 
and set the following settings.

9. Layers>New Raster Layer.
Open the image Imagem_Natal_1 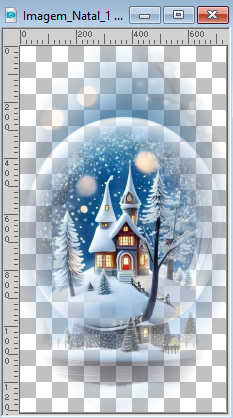
Edit>Copy.
Go back to your work and go to Edit>Paste into Selection.
Selections>Select None.
Adjust>Sharpness>Sharpen More.
10. Layers>Duplicate.
Image>Mirror>Mirror Horizontal.
Layers>Merge>Merge Down.
11. Adjust>Hue and Saturation>Vibrancy.

12. Open EF-Natal_2024_Texto 
Edit>Copy.
Go back to your work and go to Edit>Paste as new layer.
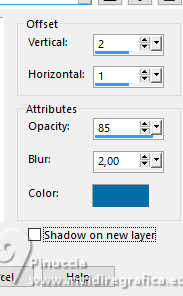
13. Effects>3D Effects>Drop Shadow, color #006da7.
14. Open the image Imagem_Natal_2.pspimage 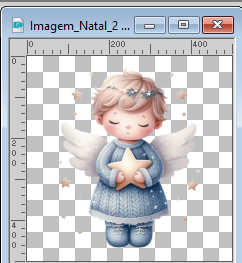
Edit>Copy.
Go back to your work and go to Edit>Paste as new layer.
15. Effects>3D Effects>Drop shadow, color #00549e.

16. Layers>Duplicate.
Activate the layer below of the original Raster 4
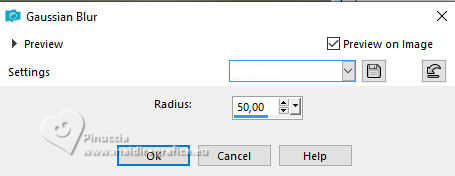
Adjust>Blur>Gaussian Blur - radius 50.
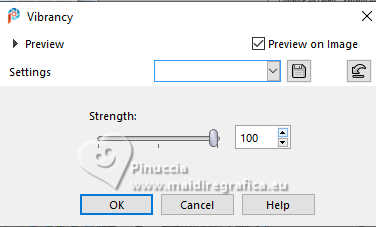
17. Adjust>Hue and Saturation>Vibrancy - 100 (or other, according to your image).
18. Effects>Plugins>Carolaine and Sensibility - CS-HLines.

Change the Blend Mode of this layer to Overlay.
19. Image>Add borders, 10 pixels, symmetric, color #ffffff.
20. Sign your work.
21. Image>Add borders, 1 pixel, symmetric, color #000000.
22. Image>Resize, 1000 pixels width, resize all layers checked.
Save as jpg.
For the tubes of these versions thanks
Wieskes
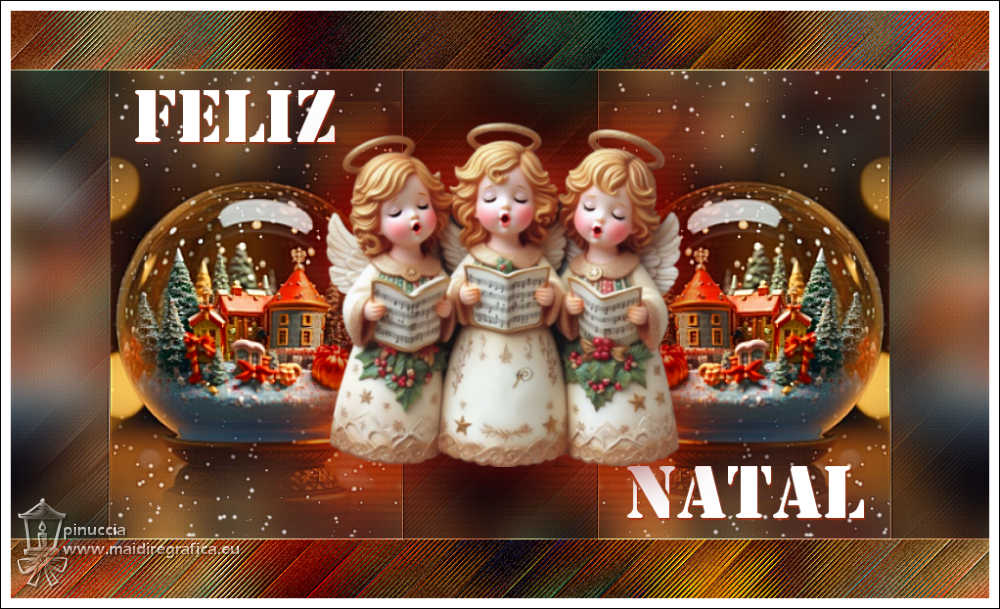
LoriM
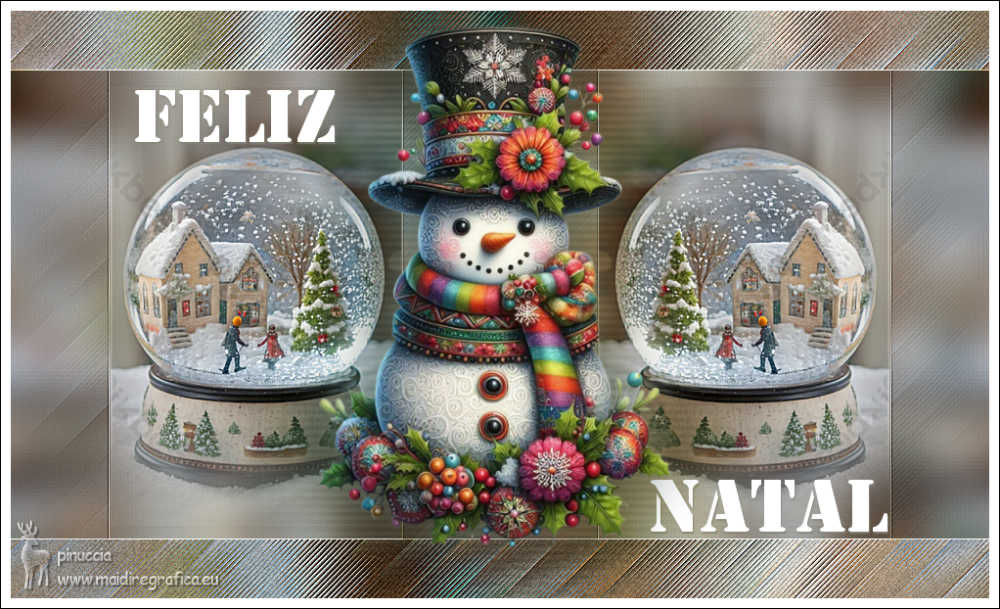

If you have problems or doubts, or you find a not worked link,
or only for tell me that you enjoyed this tutorial, write to me.
18 December 2024

|

