|
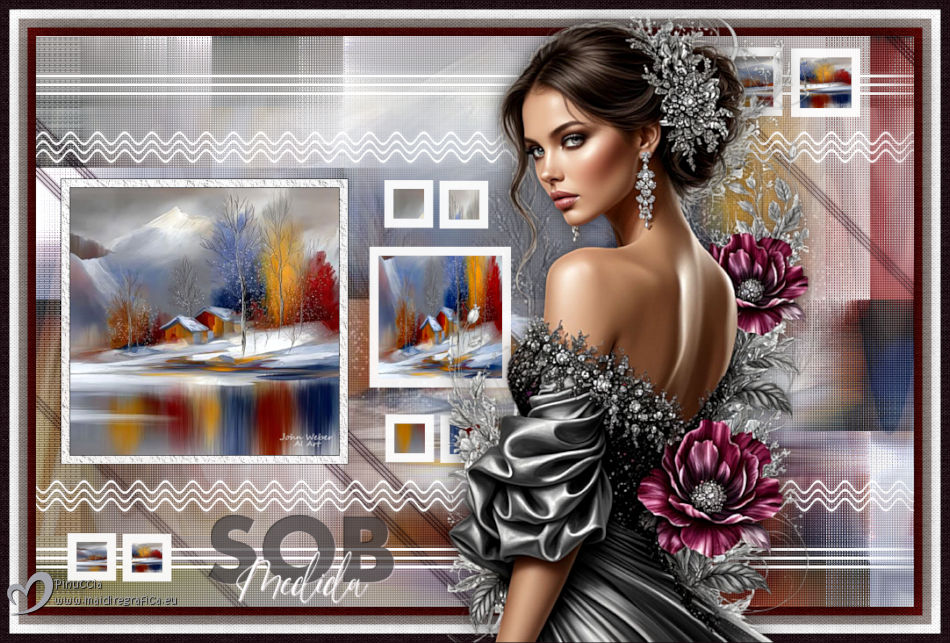
SOB MEDIDA
 CUSTOM-MADE CUSTOM-MADE
Thanks Estela for your invitation to translate your tutorials into english

This tutorial, created with PSP2022, was translated with PspX7, but it can also be made using other versions of PSP.
Since version PSP X4, Image>Mirror was replaced with Image>Flip Horizontal,
and Image>Flip with Image>Flip Vertical, there are some variables.
In versions X5 and X6, the functions have been improved by making available the Objects menu.
In the latest version X7 command Image>Mirror and Image>Flip returned, but with new differences.
See my schedule here
 French Translation here French Translation here
 Your versions here Your versions here

For this tutorial, you will need:

Image Pinterest.
Mask and Material EF.
(The links of the tubemakers here).

consult, if necessary, my filter section here
Filters Unlimited 2.0 here
&<Background Designers IV> - sf10 Diamond Mountian (to import in Unlimited) here
Mehdi - Sorting Tiles here
Penta.com - Color Dot here
L&K's - L&K's Katharina here
AAA Frame - Texture Frame here

You can change Blend Modes according to your colors.
Copy the selections in the Selections Folder.
Open the mask in PSP and minimize it with the rest of the material.
1. Open a new transparent image 1000 x 650 pixels.
Selections>Select All.
2. Open the image Gráfico-1 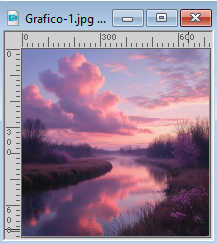
Edit>Copy.
Go back to your work and go to Edit>Paste into Selection.
Selections>Select None.
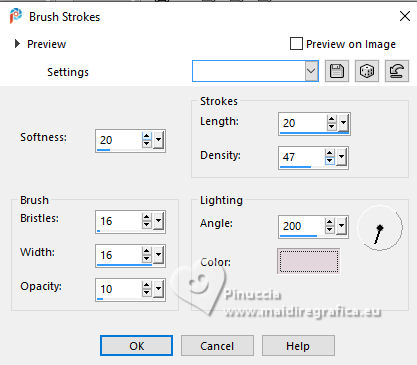
3. Effects>Art Media Effects>Brush Strokes.
color #e3d7dd
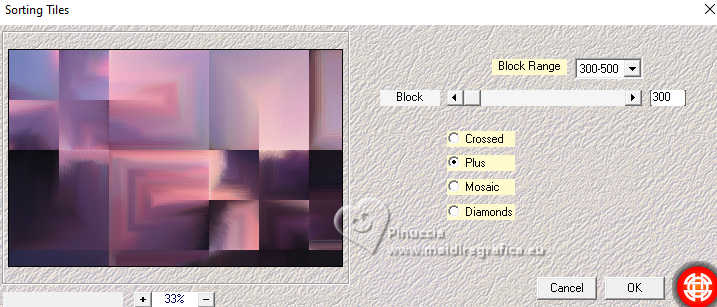
4. Effects>Plugins>Mehdi - Sorting Tiles
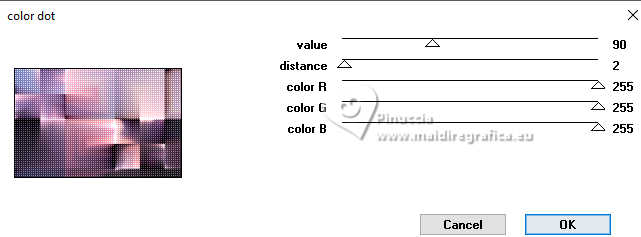
5. Effects>Plugins>Penta.com - Color Dot, default settings.
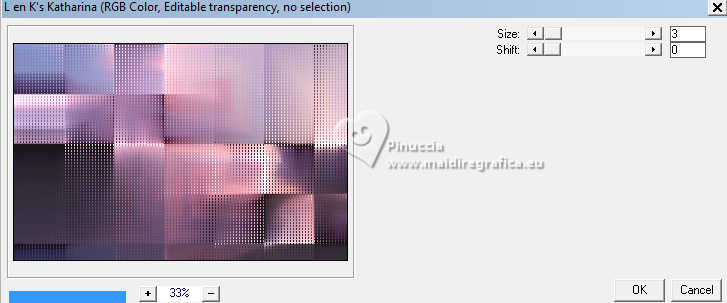
6. Effects>Plugins>L&K's - L&K's katharina.
7. Layers>Duplicate.
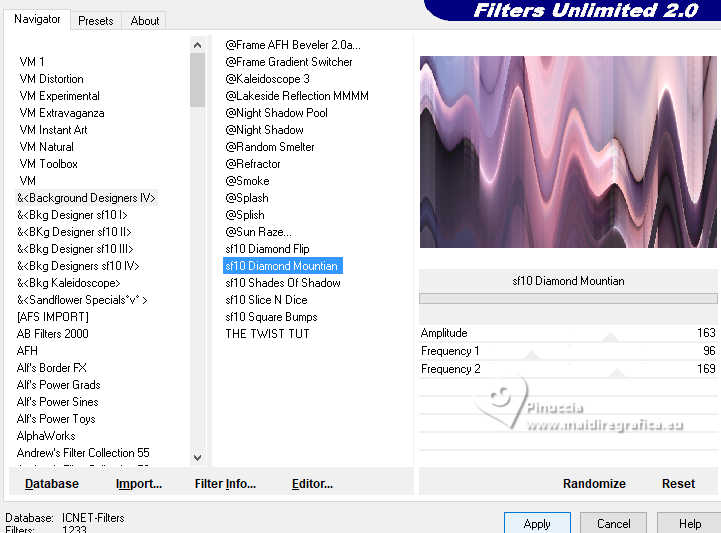
Effects>Plugins>Filters Unlmited 2.0 - &<Background Designers IV> - sf10 Diamond Mountian, default settings
8. Image>Resize, to 75%, resize all layers not checked.
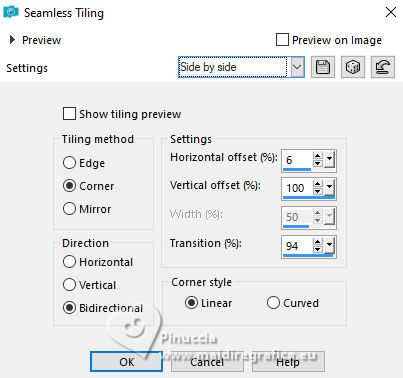
Effects>Image Effects>Seamless Tiling - Side by Side.
Change the Blend Mode of this layer to Soft Light
9. Open EF-Sob_Medida_Deco_1 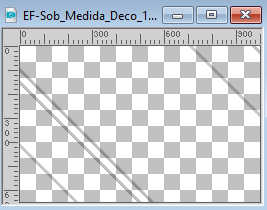
Edit>Copy.
Go back to your work and go to Edit>Paste as new layer.
for my example, I change the Blend Mode of this layer to Multiply
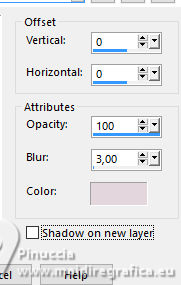
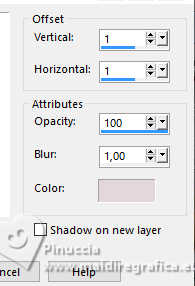
10. Effects>3D Effects>Drop Shadow, color #e3d7dd
11. Layers>New Raster Layer.
Set your foreground color to white #ffffff.
Flood Fill  the layer with color white #ffffff. the layer with color white #ffffff.
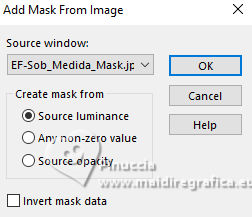
12. Layers>New Mask layer>From image
Open the menu under the source window and you'll see all the files open.
Select the mask EF-Sob_Medida_Mask
Layers>Merge>Merge Group.
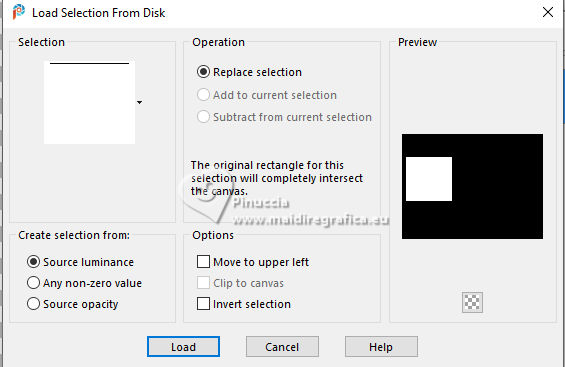
13. Selections>Load/Save Selection>Load selection from Disk.
Look for and load the selection Sob_Medida_1
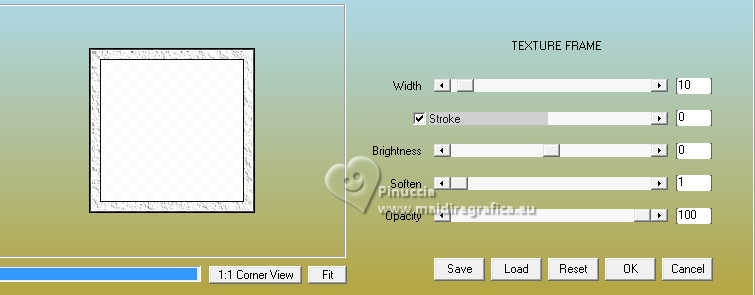
14. Effects>Plugins>AAA Frames - Texture Frame
15. Selections>Modify>Contract - 11 pixels.
Layers>New Raster Layer.
Activate again the image Grafico_1 and go to Edit>Copy.
Go back to your work and go to Edit>Paste into Selection.
Selections>Select None.
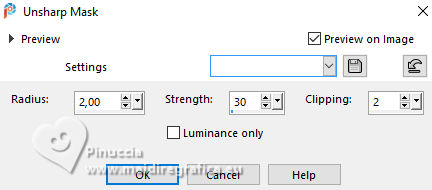
16. Adjust>Sharpness>Unsharp Mask
17. Activate the mask's layer, Group Raster 3.
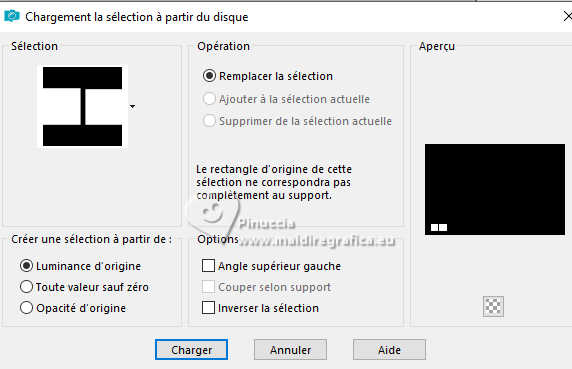
Selections>Load/Save Selection>Load selection from Disk.
Look for and load the selection Sob_Medida_2
18. Selections>Modify>Contract - 10 pixels.
Layers>New Raster Layer.
Edit>Paste into Selection (the image is still in memory).
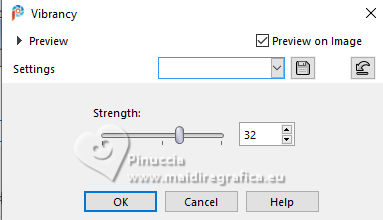
19. Adjust>Hue and Saturation>Vibrancy.
Selections>Select None.
20. Adjust>Sharpness>Unsharp Mask.
21. Activate the mask's layer, Group Raster 3.
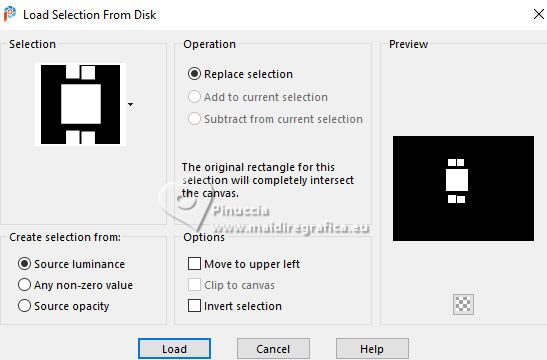
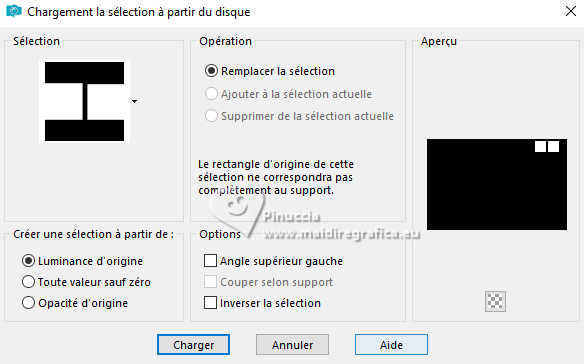
Selections>Load/Save Selection>Load selection from Disk.
Look for and load the selection Sob_Medida_3
22. Selections>Modify>Contract - 10 pixels.
Layers>New Raster Layer.
Edit>Paste into Selection (the image is still in memory).
Adjust>Sharpness>Sharpen.
Selections>Select None.
23. Activate again the mask's layer, Group Raster 3.
Selections>Load/Save Selection>Load selection from Disk.
Look for and load the selection Sob_Medida_4
24. Selections>Modify>Contract - 10 pixels.
Layers>New Raster Layer.
Edit>Paste into Selection (the image is still in memory).
Adjust>Sharpness>Sharpen.
Selections>Select None.
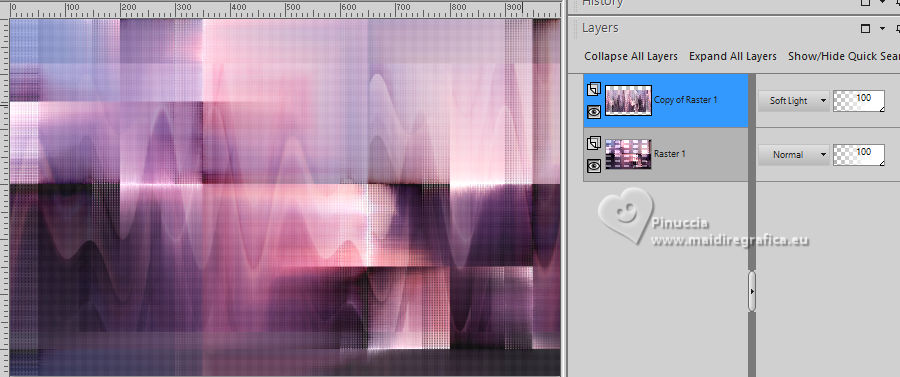
25. Activate your top layer.
Layers>Merge>Merge Down - 3 times.
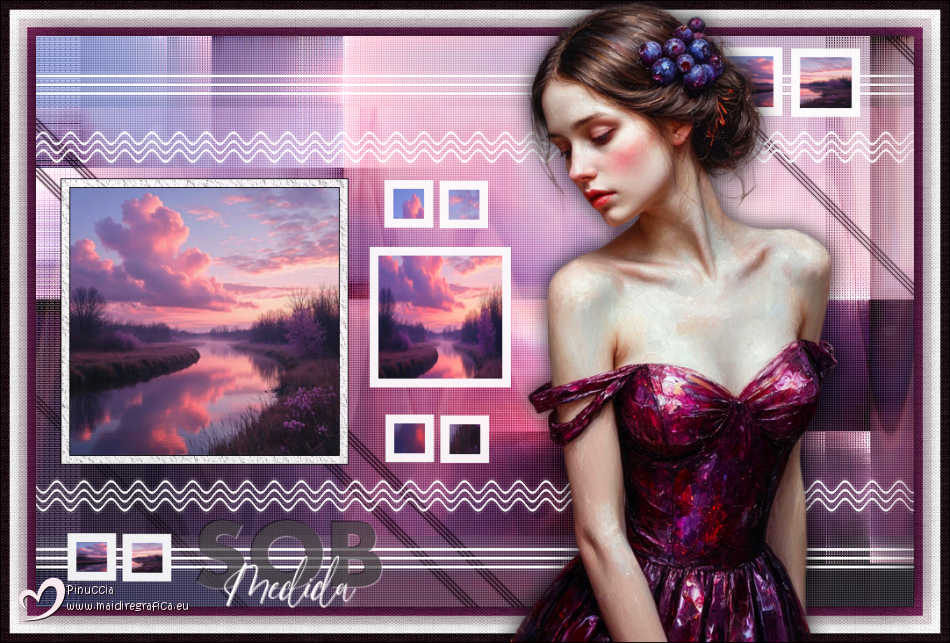
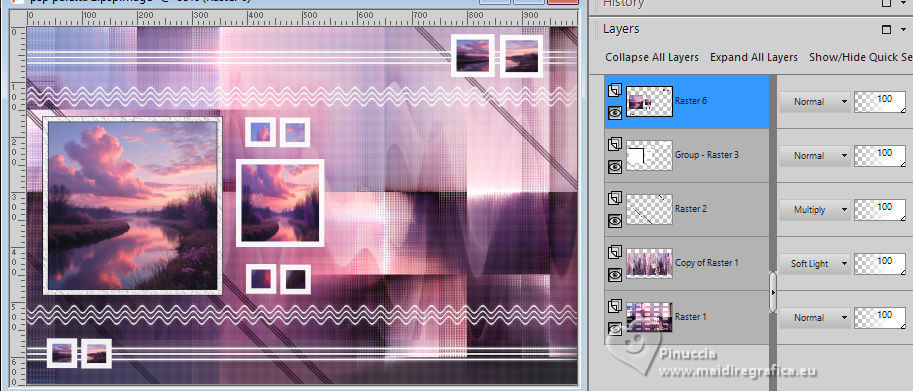
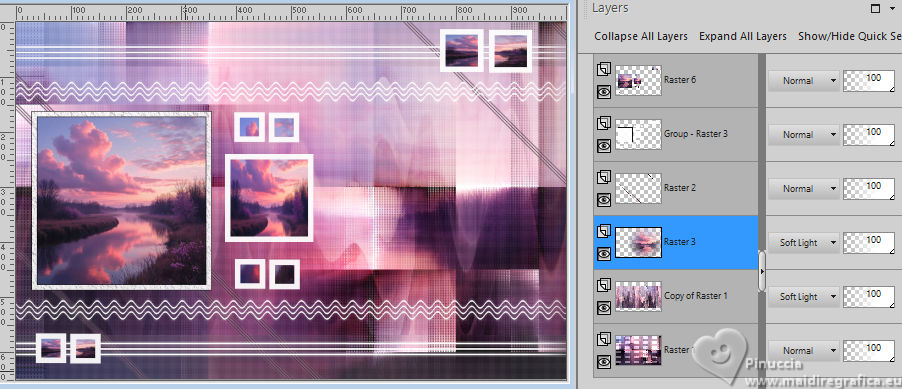
Result
26. Activate the layer Copy of Raster 1.
Open the misted Misted.png 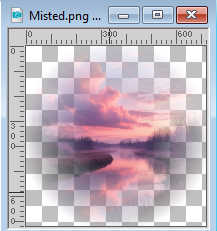
Edit>Copy.
Go back to your work and go to Edit>Paste as new layer.
Move  the tube to the right, or to your liking. the tube to the right, or to your liking.
Change the Blend Mode of this layer to Soft Light, opacity 100, or according to your tube.
(author's note: in my second version I set the opacity to 87)
translator's note: I only reduced the opacity to 80%.
27. Image>Add Borders, 10 pixels, symmetric, color #842a62  . .
Image>Add Borders, 10 pixels, symmetric, color #e3d7dd  . .
Image>Add Borders, 10 pixels, symmetric, color #ffffff.
Image>Add Borders, 10 pixels, symmetric, color #1e0c13  . .
28. Selections>Select All.
Selections>Modify>Contract - 40 pixels.
Selections>Invert.
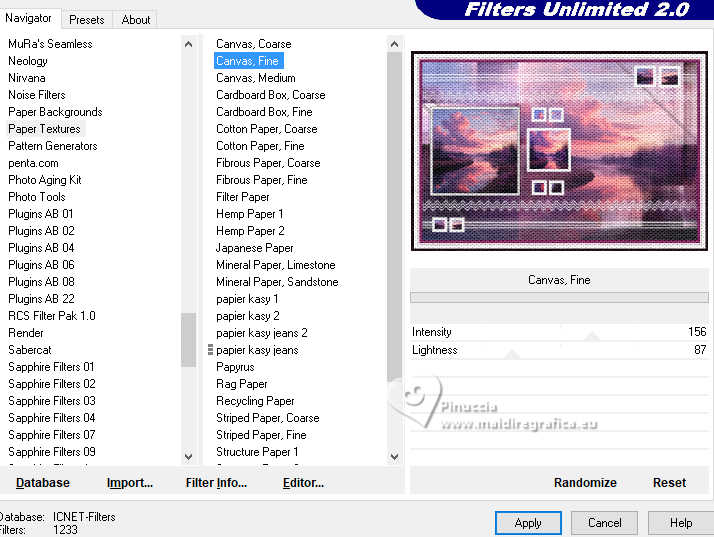
Effects>Plugins>Filters Unlmited 2.0 - Paper Texture - Canvas Fine, default settings.
29. Selections>Invert.
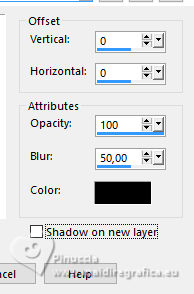
Effects>3D Effects>Drop Shadow, color #000000.
Selections>Select None.
30. Open EF-Sob_Medida_ Texto 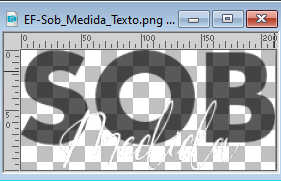
Edit>Copy.
Go back to your work and go to Edit>Paste as new layer.
Move the text to your liking.
31. Effects>3D Effects>Drop Shadow, color #e3d7dd.
32. Open the tube EF-Tube 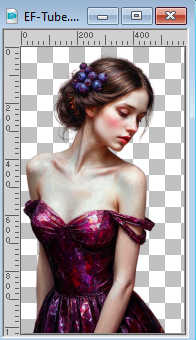
Edit>Copy.
Go back to your work and go to Edit>Paste as new layer.
Image>Resize, to 75%, resize all layers not checked.
Image>Mirror>Mirror Horizontal.
Move the tube to the right.
33. Effects>3D Effects>Drop Shadow, color #000000.

34. Sign your work.
Image>Add Borders, 1 pixel, symmetric, color black #000000.
Image>Resize, 850 pixels width, resize all layers checked.
Save as jpg.
Images from Pinterest

If you have problems or doubts, or you find a not worked link,
or only for tell me that you enjoyed this tutorial, write to me.
25 January 2026

|