LACE

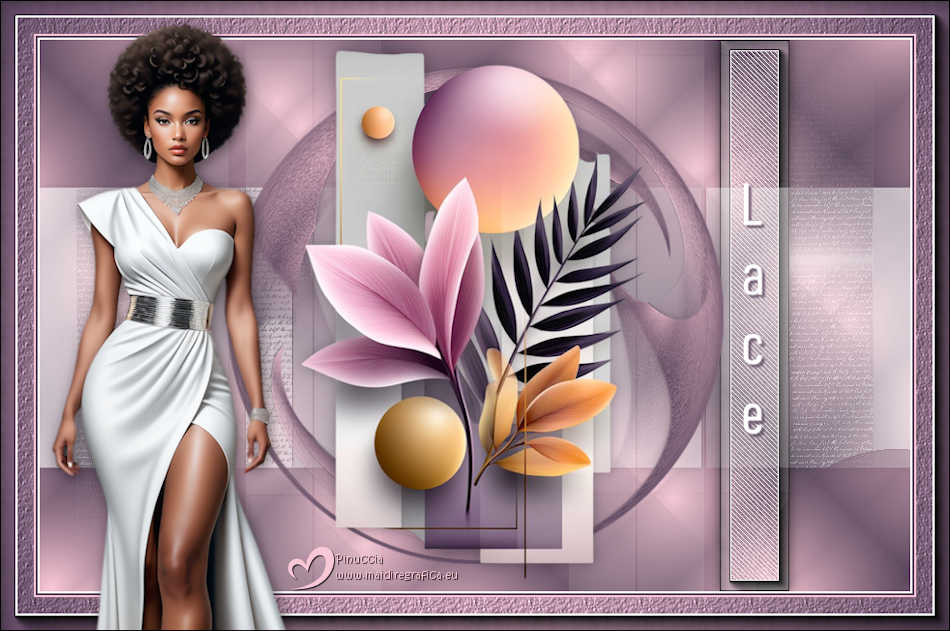
Thanks Carine for your invitation to translate

Clic and move the brush to follow the tutorial.

To print


|
This tutorial was translated with PSPX9 and PSP2020, but it can also be made using other versions of PSP.
Since version PSP X4, Image>Mirror was replaced with Image>Flip Horizontal,
and Image>Flip with Image>Flip Vertical, there are some variables.
In versions X5 and X6, the functions have been improved by making available the Objects menu.
In the latest version X7 command Image>Mirror and Image>Flip returned, but with new differences.
See my schedule here
 italian translation here italian translation here
 your versions here your versions here
Necessary

Thanks for the tube Kamil and for the mask Beatrice.
(The links of the tubemakers here).

consult, if necessary, my filter section here
Filters Unlimited 2.0 here
Simple - Diamonds here
Flaming Pear - Flexify 2 here
Filter Factory Gallery M - Faceter here
AP [Innovations] - Lines SilverLining here
AAA Frames - Foto Frame here
Filters Simple and Factory Gallery can be used alone or imported into Filters Unlimited.
(How do, you see here)
If a plugin supplied appears with this icon  it must necessarily be imported into Unlimited it must necessarily be imported into Unlimited

You can change Blend Modes according to your colors.
In the newest versions of PSP, you don't find the foreground/background gradient (Corel_06_029).
You can use the gradients of the older versions.
The Gradient of CorelX here

Copy the Texture Lace in the Textures Folder.
Copy the selection in the Selections Folder.
Open the mask in PSP and minimize it with the rest of the material.
1. Open a new transparent image 900 x 570 pixels.
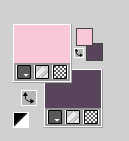
Set your foreground color to #fac7d6,
and your background color to #58455b.
2. Set your background color to a Foreground/Background Gradient, style Sunburst.
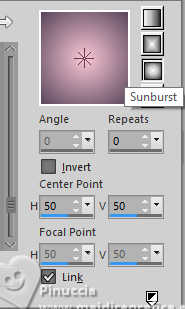
Flood Fill  the transparent image with your Gradient. the transparent image with your Gradient.
3. Effects>Plugins>Filter Factory Gallery M - Faceter, default settings
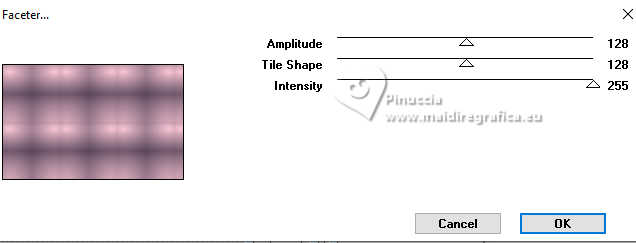
4. Effects>Plugins>Simple - Diamonds.
This Effect works without window: result:

5. Selections>Load/Save Selection>Load Selection from Disk.
Look for and load the selection SelectionA-1
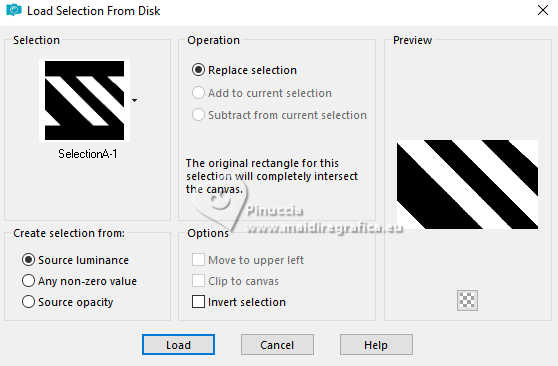
Selections>Promote Selection to Layer.
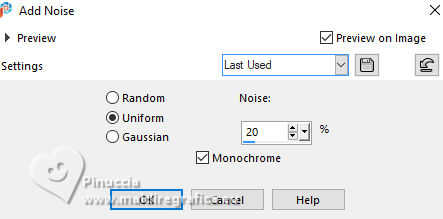
6. Adjust>Add/Remove Noise/Add Noise.
Adjust>Sharpness>Sharpen.
Selections>Select None.
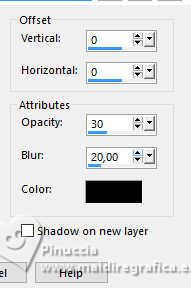
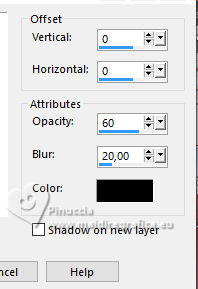
7. Effects>3D Effects>Drop Shadow, color black.
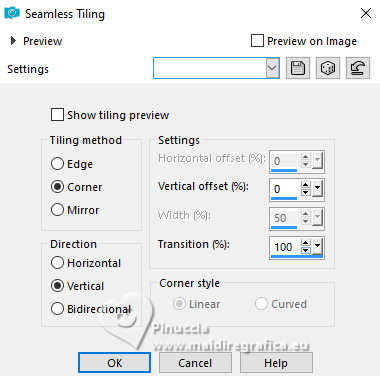
8. Effects>Image Effects>Seamless Tiling.
9. Effects>Plugins>Flaming Pear - Flexify 2.

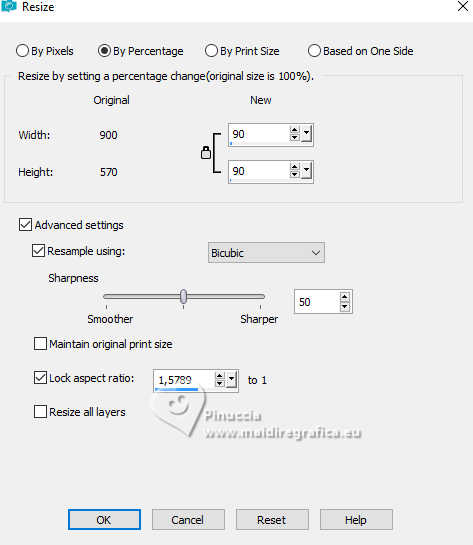
10. Image>Resize, to 90%, resize all layers not checked.
Adjust>Sharpness>Sharpen.
11. Open the tube Felinec31 Deco Aout-25-1 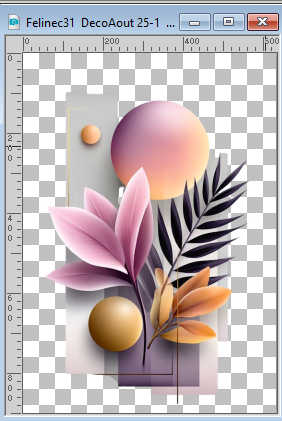
Edit>Copy.
Go back to your work and go to Edit>Paste as new layer.
Image>Resize, to 70%, resize all layers not checked.
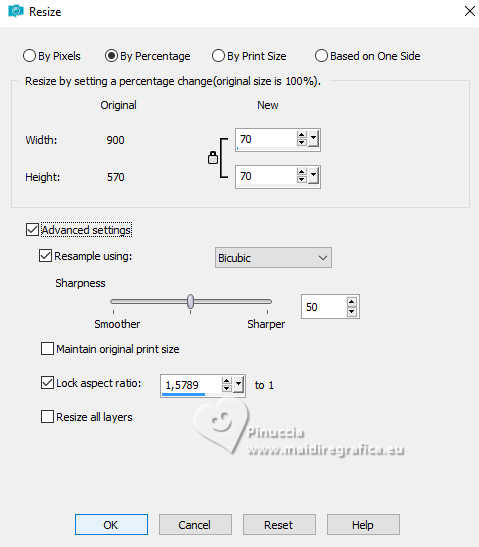
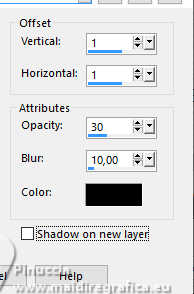
12. Effects>3D Effects>Drop Shadow, last settings.

13. Activate the layer Raster 1.
Layers>New Raster Layer.
set your foreground color to the color white.
Flood Fill  the layer with the color white. the layer with the color white.
14. Layers>New Mask layer>From image
Open the menu under the source window and you'll see all the files open.
Select the mask Mask_09_GB_2019

Layers>Merge>Merge Group.
15. To erase the watermark of the mask:
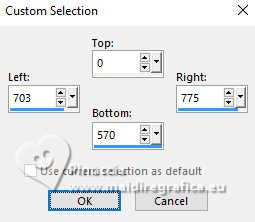
Activate your Selection Tool 
(no matter the type of selection, because with the custom selection your always get a rectangle)
clic on the Custom Selection 
and set the following settings.
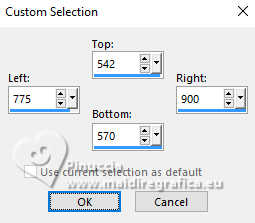
Press CANC on the keyboard 
Selections>Select None.
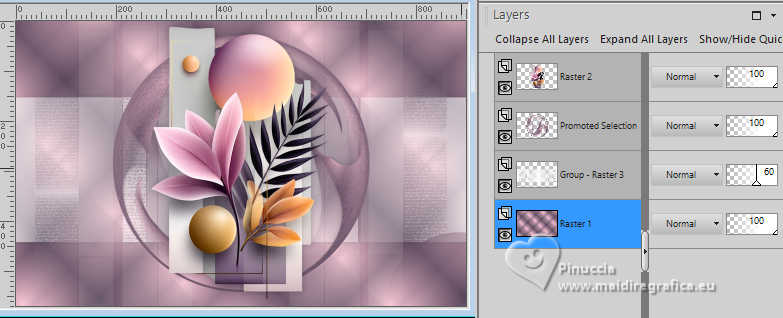
16. Reduce the opacity of this layer to 60%.
Adjust>Sharpness>Sharpen.
17. Effects>3D Effects>Drop Shadow, color black.
18. Activate the layer Raster 1.
Custom Selection 
Selections>Promote Selection to Layer.
19. Adjust>Add/Remove Noise/Add Noise, last settings.

20. Effects>Plugins>AP [Innovations] - Lines SilverLining.
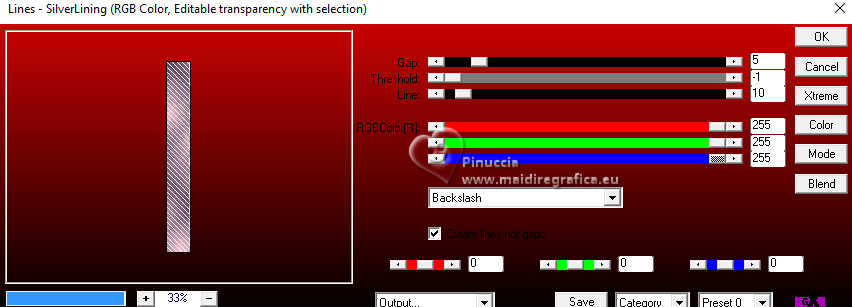
21. Effects>Plugins>AAA Frames - Foto Frame.
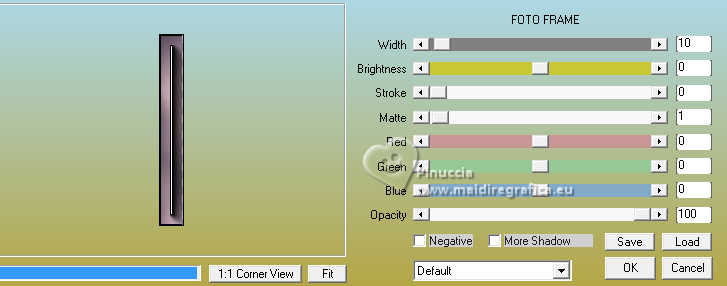
Selections>Select None.
22. Effects>3D Effects>Drop Shadow, color black.
23. Set your foreground color to the initial color and Gradient.
Image>Add Borders, 2 pixels, symmetric, color white.
Image>Add Borders, 2 pixels, symmetric, background color.
Image>Add Borders, 2 pixels, symmetric, foreground color.
24. Selections>Select All.
Image>Add Borders, 35 pixels, symmetric, color white.
Selections>Invert.
Flood Fill  the selection with your Gradient. the selection with your Gradient.
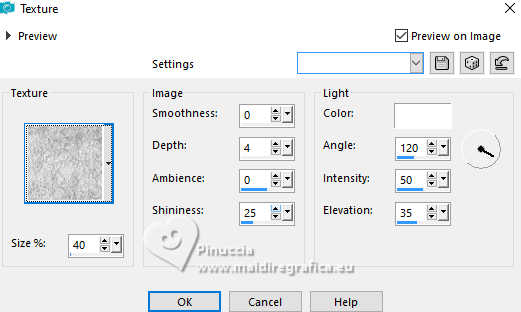
25. Effects>Texture Effects>Texture - select the texture Lace
26. Effects>Plugins>AAA Frames - Foto Frame.

Selections>Select None.
27. Open the tube KamilTube-5071 
Erase the watermark and go to Edit>Copy.
Go back to your work and go to Edit>Paste as new layer.
Image>Resize, to 85%, resize all layers not checked.
28. Activate your Pick Tool 
Position X: 53,00 - Position Y: 24,00.

29. Effects>3D Effects>Drop Shadow, color black.
30. Open the text Texte Lace 
Edit>Copy.
Go back to your work and go to Edit>Paste as new layer.
Position X: 768,00 - Position Y: 189,00.

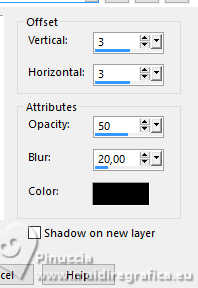
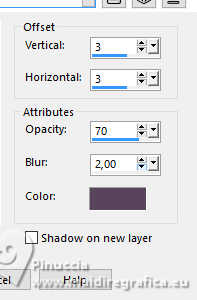
31. Effects>3D Effects>Drop Shadow, background color.
32. Sign your work.
Image>Resize, 950 pixels width, resize all layers checked.
Save as jpg.
For the tubes of this version thanks Felinec31


If you have problems or doubts, or you find a not worked link, or only for tell me that you enjoyed this tutorial, write to me.
8 Agosto 2025

|

