|
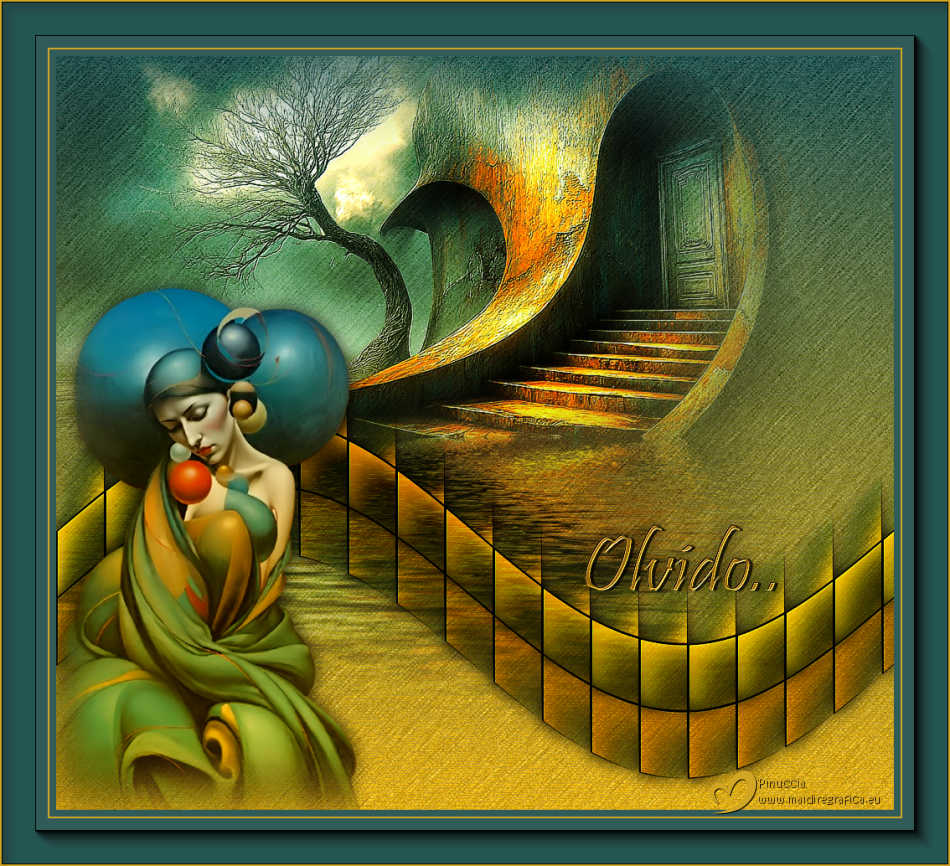
OLVIDO
 FORGOT FORGOT

Thanks Luz Cristina for your invitation to translate your tutorials into english

This tutorial, created with PSP9, was translated with PspX9 and PSP2020, but it can also be made using other versions of PSP.
Since version PSP X4, Image>Mirror was replaced with Image>Flip Horizontal,
and Image>Flip with Image>Flip Vertical, there are some variables.
In versions X5 and X6, the functions have been improved by making available the Objects menu.
In the latest version X7 command Image>Mirror and Image>Flip returned, but with new differences.
See my schedule here
 French Translation here French Translation here
 Your versions here Your versions here

For this tutorial, you will need:

(you find here the links to the material authors' sites)

consult, if necessary, my filter section here
Filters Unlimited 2.0 here
Toadies - Plain Mosaic Blur here
FM Tile Tools - Saturation Emboss here
Mura's Meister - Perspective Tiling here
Flaming Pear - Flood here
Artistiques - Pastels here
AAA Frames - Foto Frame here
Filters Toadies can be used alone or imported into Filters Unlimited.
(How do, you see here)
If a plugin supplied appears with this icon  it must necessarily be imported into Unlimited it must necessarily be imported into Unlimited

You can change Blend Modes according to your colors.
In the newest versions of PSP, you don't find the foreground/background gradient (Corel_06_029).
You can use the gradients of the older versions.
The Gradient of CorelX here

Open the mask in PSP and minimize it with the rest of the material.
1. Open a new transparent image 1000 x 900 pixels.
2. Set your foreground color to #d1a624,
and your background color to #315b59.
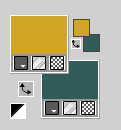
Set your foreground color to a Foreground/Background Gradient, style Linear.
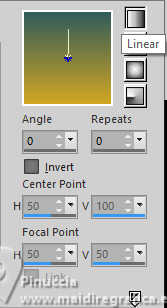
Flood Fill  the transparent image with your Gradient. the transparent image with your Gradient.
3. Layers>Duplicate.
4. Effects>Plugins>Mura's Meister - Perspective Tiling.
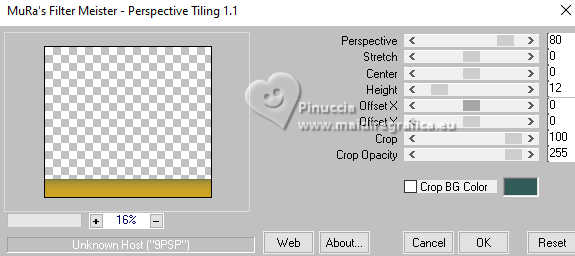
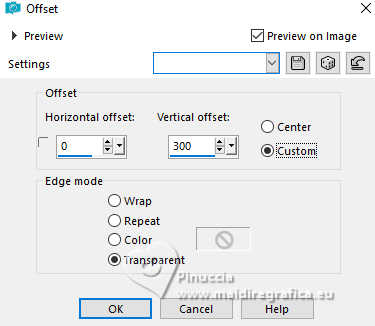
5. Effects>Image Effects>Offset.
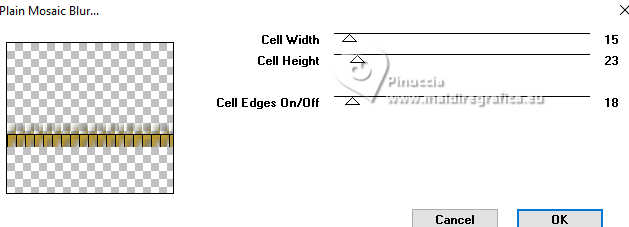
6. Effects>Plugins>Toadies - Plain Mosaic Blur.
7. Effects>Edge Effects>Erode (optional).
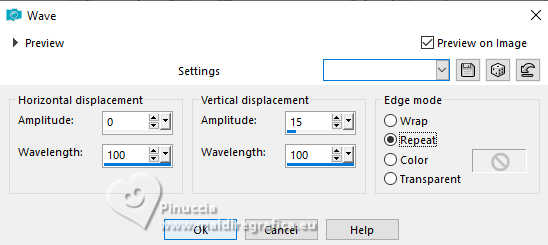
8. Effects>Distortion Effects>Wave.
9. Effects>3D Effects>Drop Shadow, color black.

10. Change the Blend Mode of this layer to Hard Light.
11. Effects>Plugins>FM Tile Tools - Saturation Emboss

12. Layers>Duplicate.
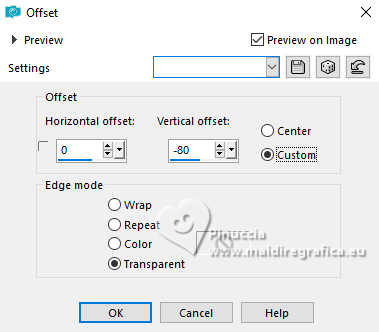
13. Effects>Image Effects>Offset.
Change the Blend Mode of this layer to Multiply
(optional, for your free version, choose a Blend Mode to your liking).
14. Open the misted Misted-LuzCristina 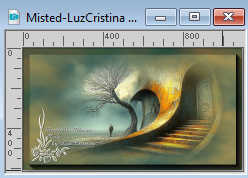
Edit>Copy.
Go back to your work and go to Edit>Paste as new layer.
15. Effects>Image Effects>Offset.
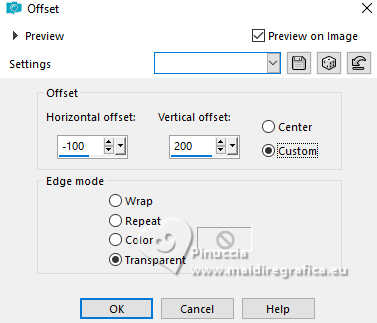
optional, in your free you cand move the tube to your liking)
16. Layers>Arrange>Move Down - 2 times, over the background layer.
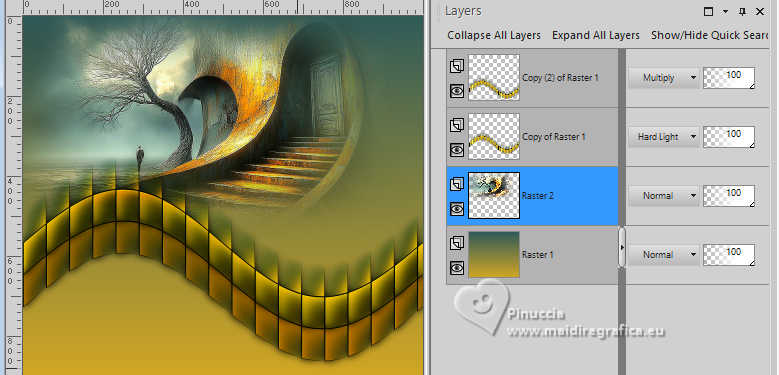
Change the Blend Mode of this layer to Hard Light
(in your free to your liking).
17. Effects>Plugins>Flaming Pear - Flood
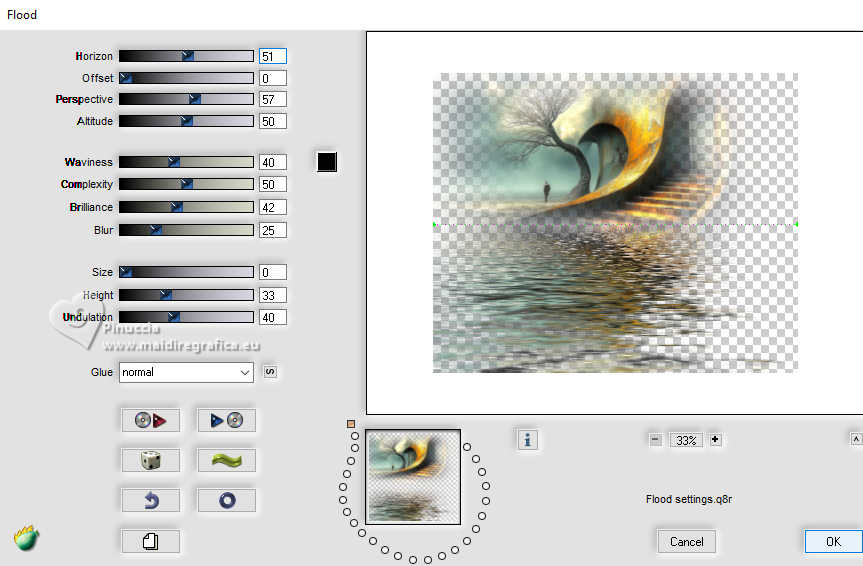
in your free, adjust Horizon according to your misted
18. Layers>New Mask layer>From image
Open the menu under the source window and you'll see all the files open.
Select the mask Marge topfade.
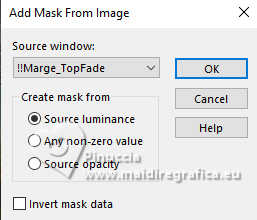
Layers>Duplicate, to apply the mask 2 times.
Layers>Merge>Merge Group.
19. Activate the layer Raster 1.
Adjust>Add/Remove Noise>Add Noise.
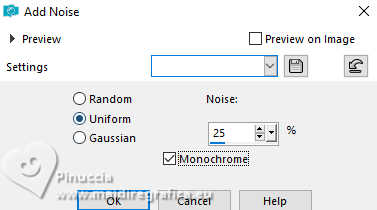
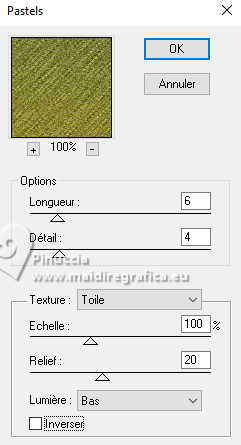
20. Effects>Plugins>Artistiques - Pastels
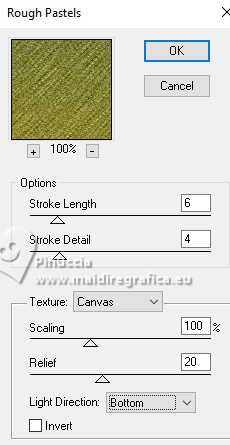
if you use the english version, the result doesn't change
Effects>Plugins>Artistic - Rough Pastel
21. Activate your top layer.
Open the tube Tube-LuzCristina 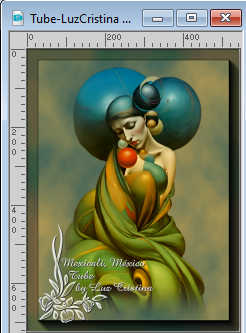
Edit>Copy.
Go back to your work and go to Edit>Paste as new layer.
Move  the tube to the left side. the tube to the left side.
Effects>3D Effects>Drop Shadow, same settings.
22. Ouvrir le text texto 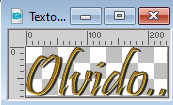
Edit>Copy.
Go back to your work and go to Edit>Paste as new layer.
Move  the tube to your liking or see my example. the tube to your liking or see my example.
Effects>3D Effects>Drop Shadow, same settings.
23. Image>Add Borders, 8 pixels, symmetric, dark color.
Image>Add Borderes, 2 pixels, symmetric, light color.
Image>Add Borders, 55 pixels, symmetric, color black #000000.
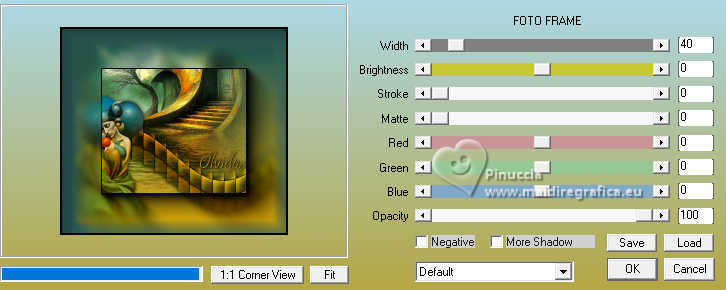
24. Effects>Plugins>AAA Frames - Foto Frame.
25. Image>Add Borders, 2 pixels, symmetric, light color.
Sign your work.
Image>Resize, to 84%, resize all layers checked.
Save as jpg.
For the tubes of this versions thanks


If you have problems or doubts, or you find a not worked link,
or only for tell me that you enjoyed this tutorial, write to me.
15 Octobre 2025

|
 FORGOT

 FORGOT