|
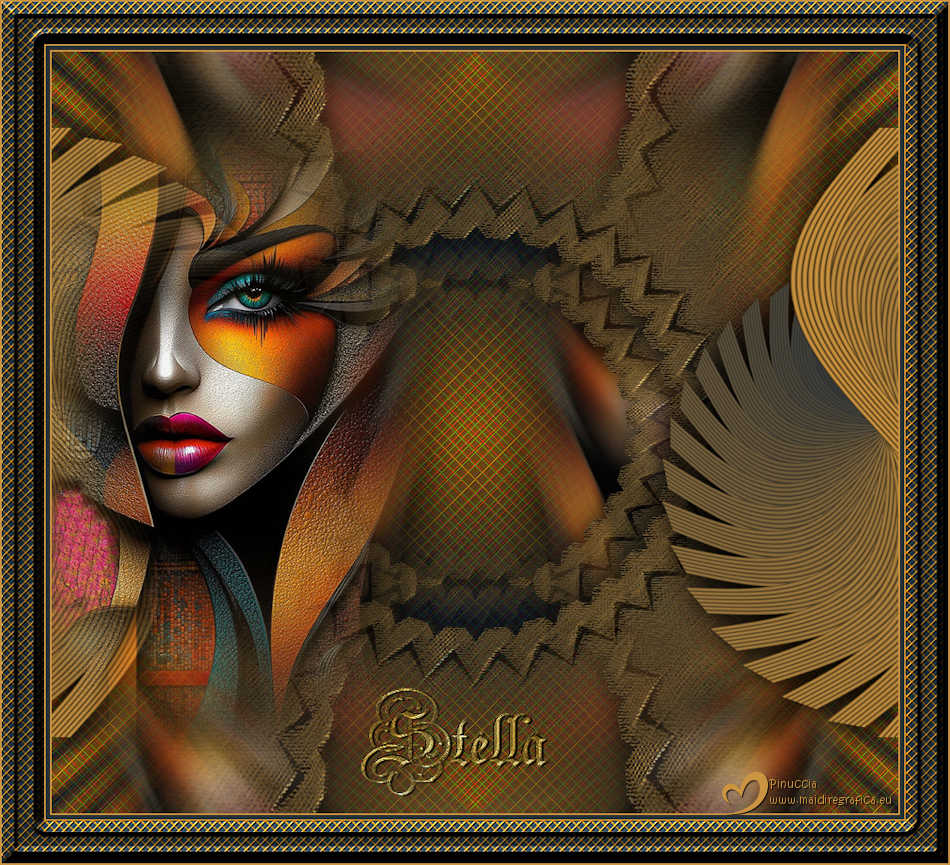
TUTORIAL STELLA


Thanks Luz Cristina for your invitation to translate your tutorials into english

This tutorial, created with PSP9, was translated with PspX9 and PSP2020, but it can also be made using other versions of PSP.
Since version PSP X4, Image>Mirror was replaced with Image>Flip Horizontal,
and Image>Flip with Image>Flip Vertical, there are some variables.
In versions X5 and X6, the functions have been improved by making available the Objects menu.
In the latest version X7 command Image>Mirror and Image>Flip returned, but with new differences.
See my schedule here
 French Translation here French Translation here
 Your versions here Your versions here

For this tutorial, you will need:

Tube by Luz Cristina
(you find here the links to the material authors' sites)

consult, if necessary, my filter section here
Filters Unlimited 2.0 here
&<Bkg Designer sf10I> - Center Mirror (à importer dans Unlimited) here
Andrew's Filter 23 - Cross Ways here
FM Tile Tools - Saturation Emboss here
Mura's Seamless - Stripe of Cylinder here
Simple - Left Right Wrap here
Mura's Meister - Copies here
VM Distortion - Kaleidoscope here
Filters Andrews, VM Distortion, Simple and Mura's Seamless can be used alone or imported into Filters Unlimited.
(How do, you see here)
If a plugin supplied appears with this icon  it must necessarily be imported into Unlimited it must necessarily be imported into Unlimited

You can change Blend Modes according to your colors.
In the newest versions of PSP, you don't find the foreground/background gradient (Corel_06_029).
You can use the gradients of the older versions.
The Gradient of CorelX here

Open the mask in PSP and minimize it with the rest of the material.
1. Open a new transparent image 1000 x 900 pixels.
2. Set your foreground color to #ca9441,
and your background color to #283036.
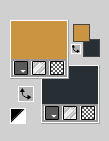
Set your foreground color to a Foreground/Background Gradient, style Sunburst.
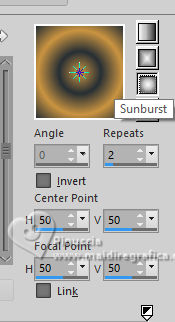
Flood Fill  the transparent image with your Gradient. the transparent image with your Gradient.
3. Effects>Plugins>Filters Unlimited 2.0 - &<Bkg Designer sf10I> - Center Mirror.
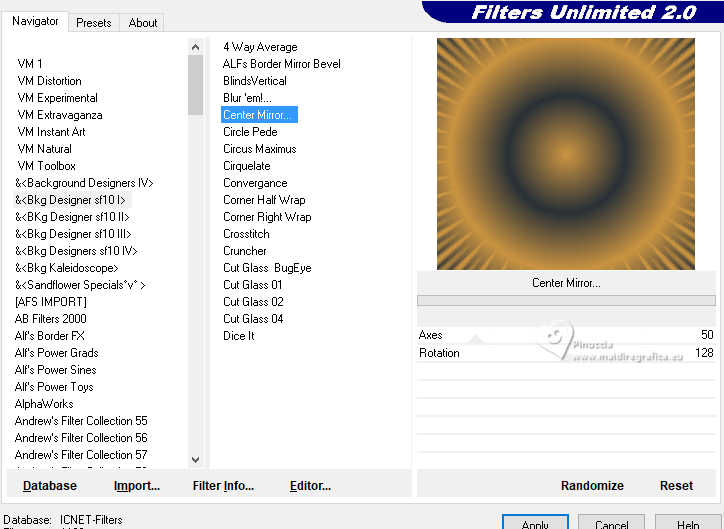
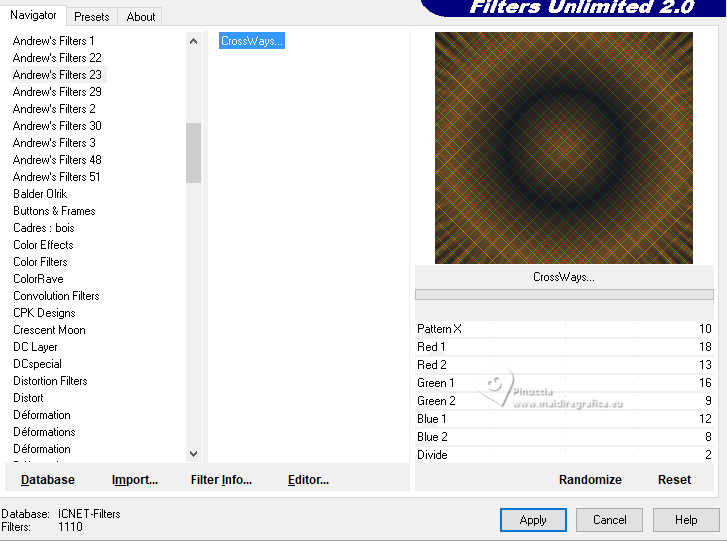
4. Effects>Plugins>Filters Unlimited 2.0- Andrew's Filter 23 - Cross Ways
5. Effects>Plugins>FM Tile Tools - Saturation Emboss, default settings.

6. Adjust>Brightness and Contrast>Clarify
(optional for your version.
Since my image is dark, I will lighten it with this step)
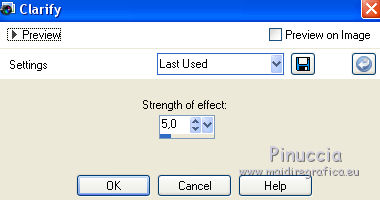
This function is found up to the PSP12 version (this tutorial was created with PSP9)
From the Corel14 version, we find:
-Adjust>Brightness and Contrast>Fill Light/Clarity,
to brighten dark areas and adjust clarity
-Adjust>Brightness and Contrast>Local Tone Mapping, to improve depth and clarity.
Both functions are different from the previous Clarifier
And Hue and Saturation>Vibrancy, to boost the color of the least saturated parts of an image.
Choose the settings according to your colors.
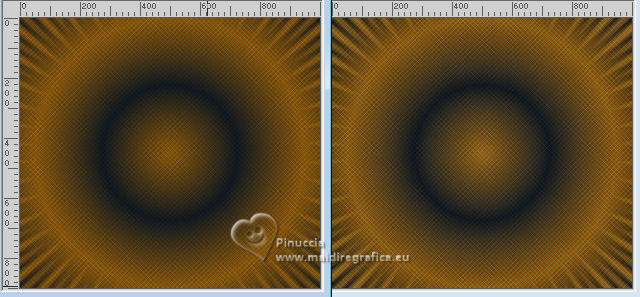
Here below before and after the old Clarifier
7. Set your foreground color to Color.
Layers>New Raster Layer.
Flood Fill  the layer with your light foreground color. the layer with your light foreground color.
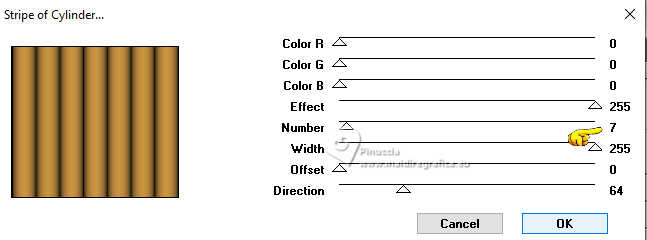
8. Effects>Plugins>Mura's Seamless - Stripe of Cylinder.
9. Effects>Geometric Effects>Perspective vertical.

Image>Mirror>Mirror vertical (Image>Flip).
Effects>Geometric Effects>Perspective Vertical, same settings.

10. Effects>Distortion Effects>Wave.
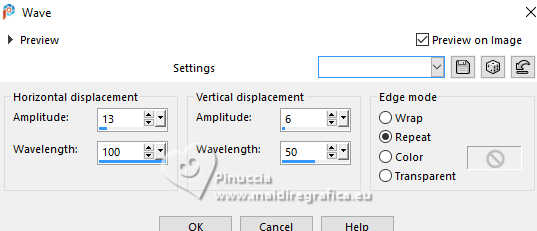
11. Image>Resize, to 80%, resize all layers not checked.
12. Effects>Plugins>Mura's Meister - Copies.
note: with these settings BG color has its importance:
before to change the settings, click on Reset to have your background color
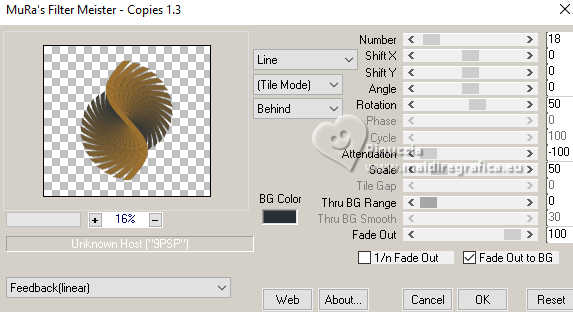
13. Effects>Plugins>Left Right Wrap.
This effect works without window; result

14. Effects>3D Effects>Drop Shadow, color black.
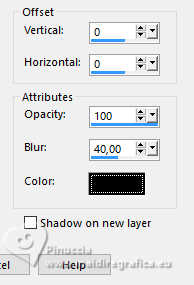
15. Layers>Duplicate.
Effects>Plugins>VM Distortion - Kaleidoscope.
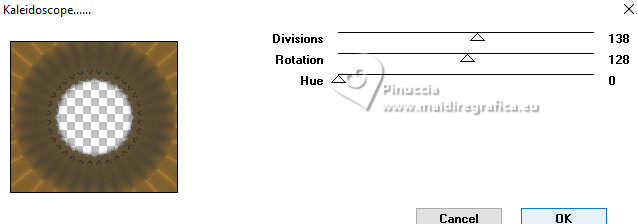
16. Layers>New Mask layer>From image
Open the menu under the source window and you'll see all the files open.
Select the mask 20-21
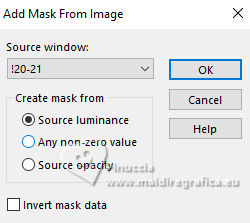
Layers>Duplicate - 2 times, to apply the mask 3 times.
Layers>Merge>Merge Group.
Layers>Arrange>Move Down.
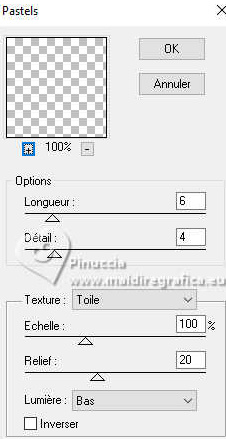
17. Effects>Plugins>Artistiques - Pastels
if you use the english version (the result doesn't change):
Effects>Plugins>Artistic - Rough Pastel
18. Layers>Duplicate.
Layers>Arrange>Move Down.
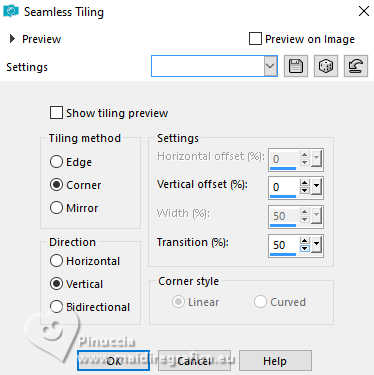
19. Effects>Image Effects>Seamless Tiling.
20. Effects>Distortion Effects>Pinch.

21. Open the misted 9006-LuzCristina 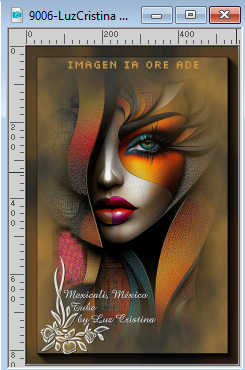
Edit>Copy.
Go back to your work and go to Edit>Paste as new layer.
Layers>Arrange>Bring to Top.
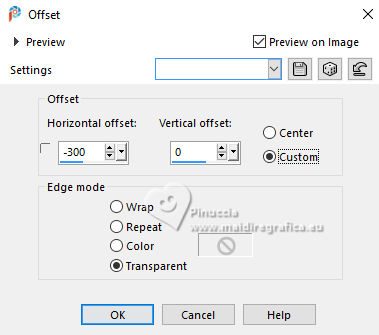
22. Effects>Image Effects>Offset.
23. Layers>Duplicate.
Layers>Arrange>Move Down.
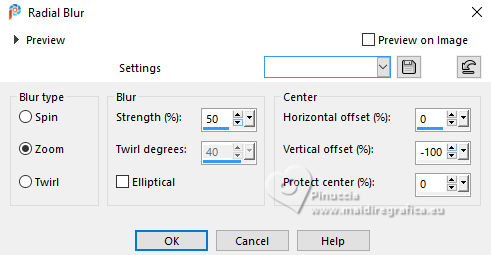
24. Adjust>Blur>Radial Blur.
25. Effects>Reflection Effects>Rotating Mirror.

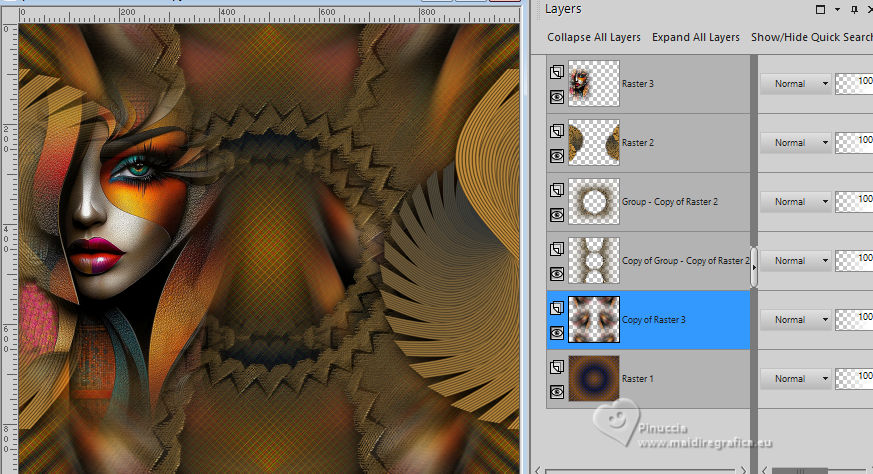
26. Move this layer over the layer Raster 1:
Layers>Arrange>Send to Bottom and Layers>Arrange>Move up.
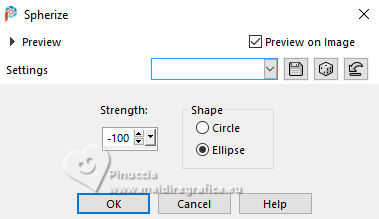
27. Effects>Geometric Effects>Spherize.
28. Effects>Image Effects>Seamless Tiling, default settings (optional).

(to give more color to the image).
Resultat
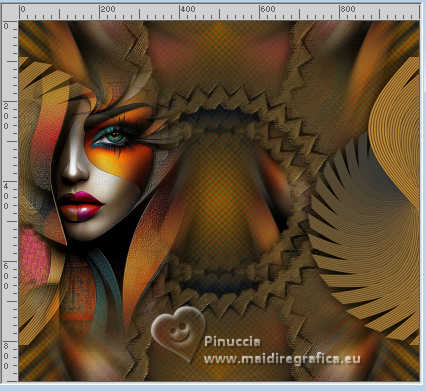
29. Image>Add borders, 2 pixels, symmetric, light color.
Image>Add borders, 5 pixels, symmetric, dark color.
Image>Add borders, 2 pixels, symmetric, light color.
Image>Add borders, 50 pixels, symmetric, dark color.
30. Activate your Magic Wand Tool  , tolerance and feather 0, , tolerance and feather 0,
click on the last border to select it.
31. Effects>Artistic Effects>Halftone - with your colors
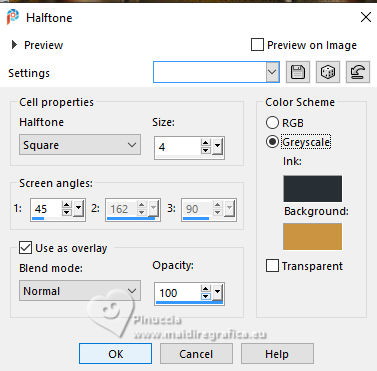
32. Effects>Plugins>FM Tile Tool - Saturation Emboss - 2 times (optional).

33. Effects>3D Effects>Inner Bevel.
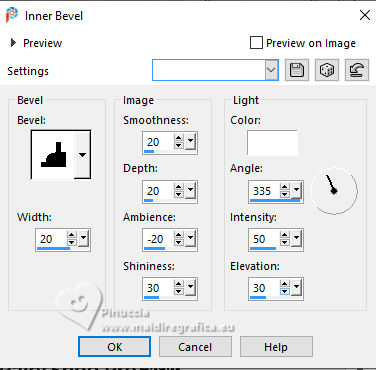
34. Image>Add borders, 2 pixels, symmetric, light color.
Selections>Select None.
35. Open the text Texto 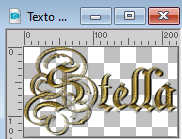
Edit>Copy.
Go back to your work and go to Edit>Paste as new layer.
Move  the text to your liking. the text to your liking.
36. Layers>Merge>Merge visible.
Image>Resize, to 84%, resize all layers checked.
37. Sign your work on a new layer.
Layers>Merge>Merge All and save as jpg.
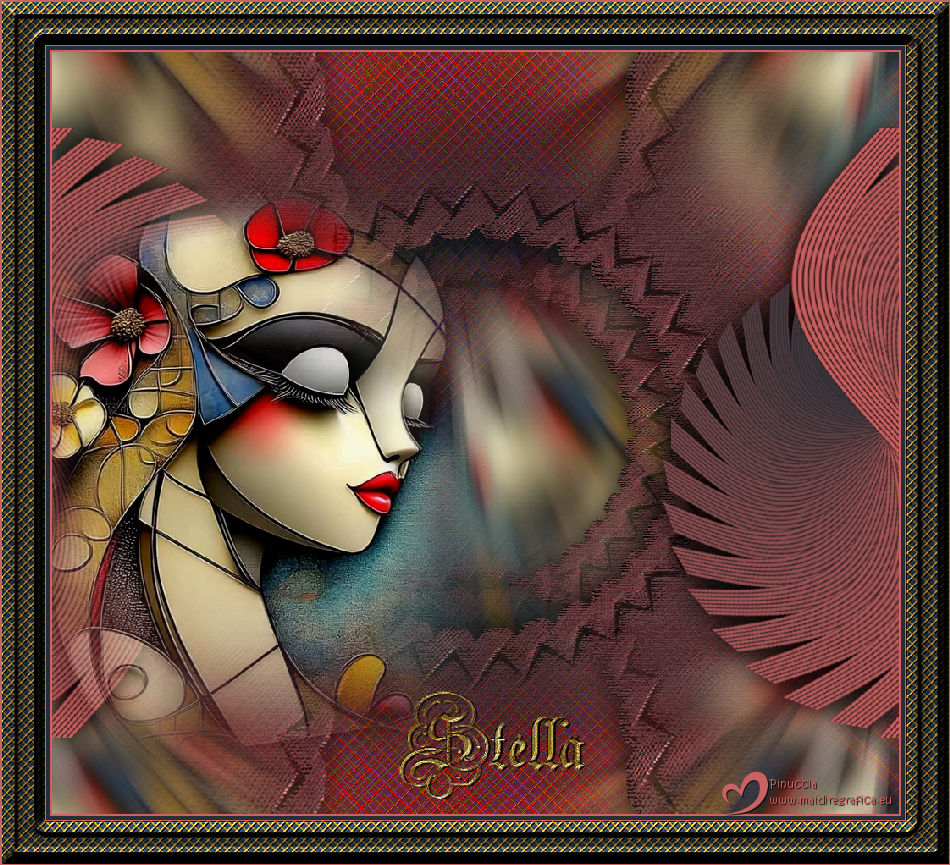
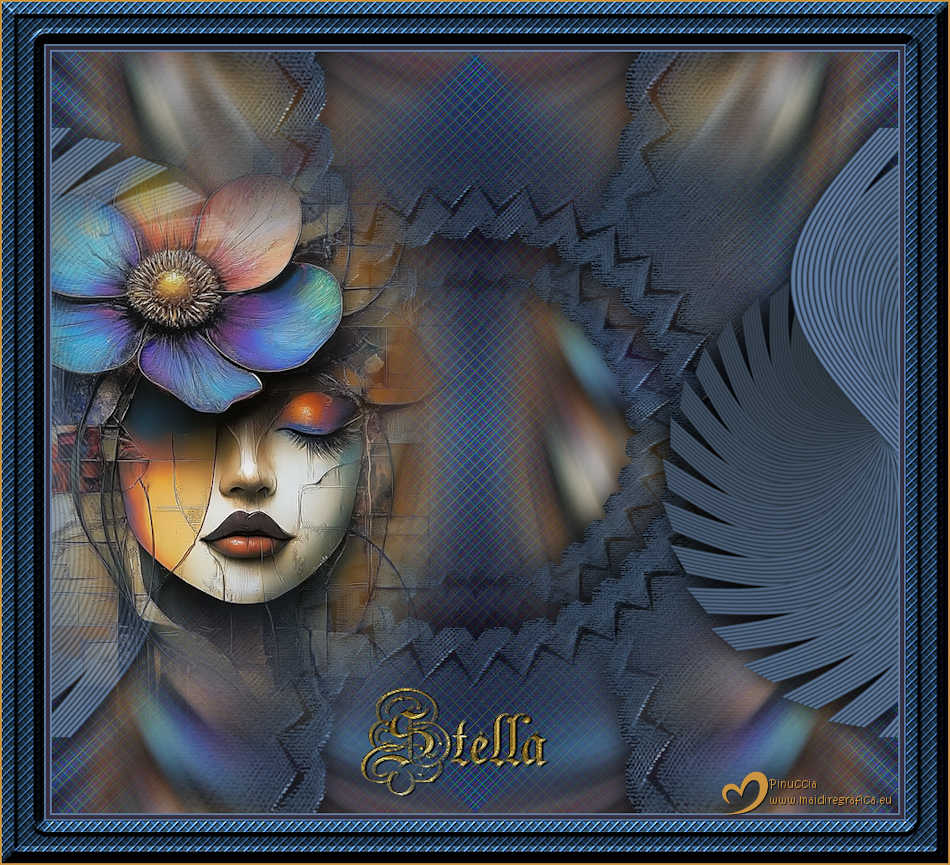


If you have problems or doubts, or you find a not worked link,
or only for tell me that you enjoyed this tutorial, write to me.
8 April 2025

|

