|
GIORGIA

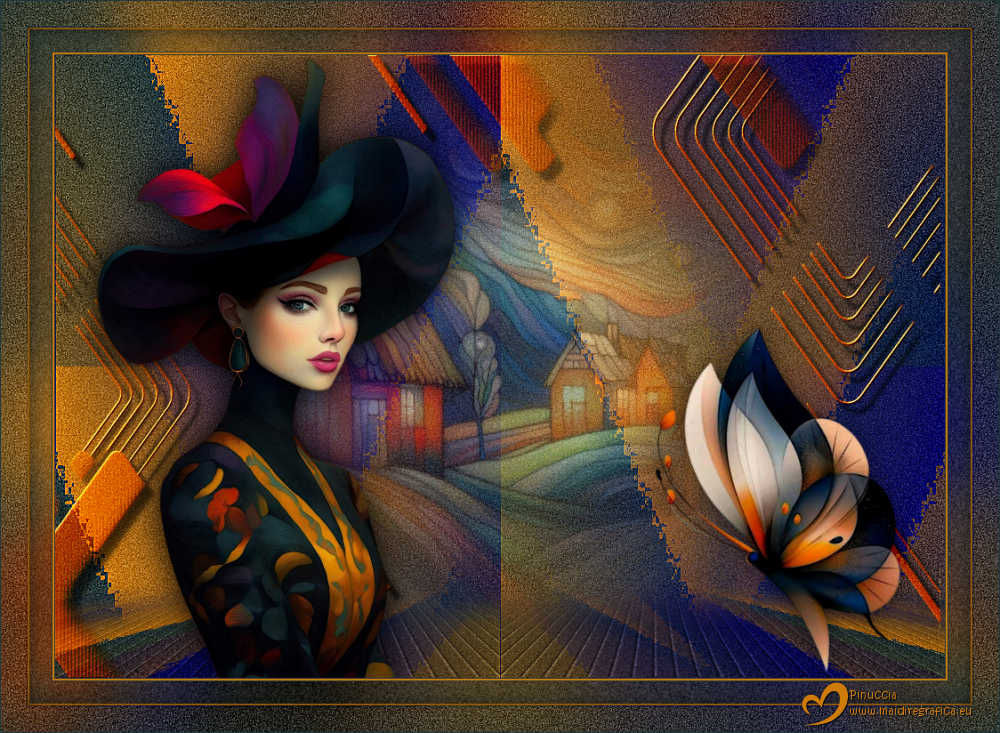
Thanks Maria José for your invitation to translate your tutorial

This tutorial has been translated with PSPX9 and PSP2020, but it can also be made using other versions of PSP.
Since version PSP X4, Image>Mirror was replaced with Image>Flip Horizontal,
and Image>Flip with Image>Flip Vertical, there are some variables.
In versions X5 and X6, the functions have been improved by making available the Objects menu.
In the latest version X7 command Image>Mirror and Image>Flip returned, but with new differences.
See my schedule here
 French translation here French translation here
 your versions here your versions here
For this tutorial, you will need:

Images Pinterest.
Tubes by Maria José
(you find here the links to the material authors' sites)

consult, if necessary, my filter section here
Filters Unlimited 2.0 here
Funhouse - PatchWork here
AP 01 [Innovations] - Mirror-Reflections, Mirror-BothSide here
Mura's Seamless - Emboss at Alpha here
Simple - Quick Tile here
Mura's Meister - Perspective Tiling here
Filters Funhouse, Mura's Seamless and Simple can be used alone or imported into Filters Unlimited.
(How do, you see here)
If a plugin supplied appears with this icon  it must necessarily be imported into Unlimited it must necessarily be imported into Unlimited

You can change Blend Modes according to your colors.
In the newest versions of PSP, you don't find the foreground/background gradient (Corel_06_029).
You can use the gradients of the older versions.
The Gradient of CorelX here

The texture Corel_15_012 (Squares) is standard in PSP.
If you don't find it in your PSP, copy the supplied texture in your Textures Folder.
Open the mask in PSP and minimize it with the rest of the material
Choose 2 colors to your liking.
For the example:
Set your foreground color to the dark color #20383c
and your background color to the light color #cf7b08.
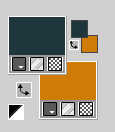
Set your foreground color to a Foreground/Background Gradient, style Radial.
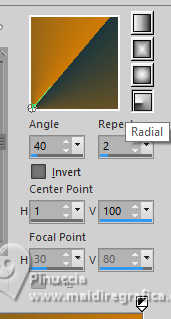
1. Open a new transparent image 1000 x 700 pixels.
Flood Fill  the transparent image with your Gradient. the transparent image with your Gradient.
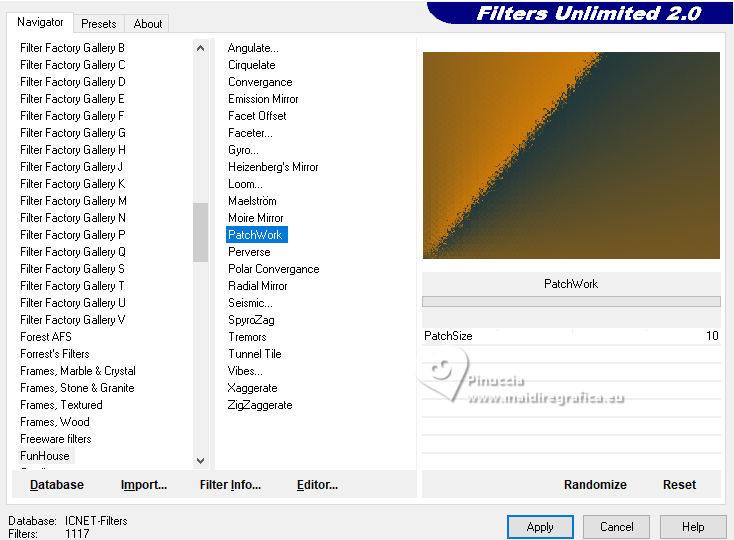
2. Effects>Plugins>Filters Unlimited 2.0 - Funhouse - PatchWork
3. Effects>Plugins>AP 01 [Innovations] - Mirror Reflections
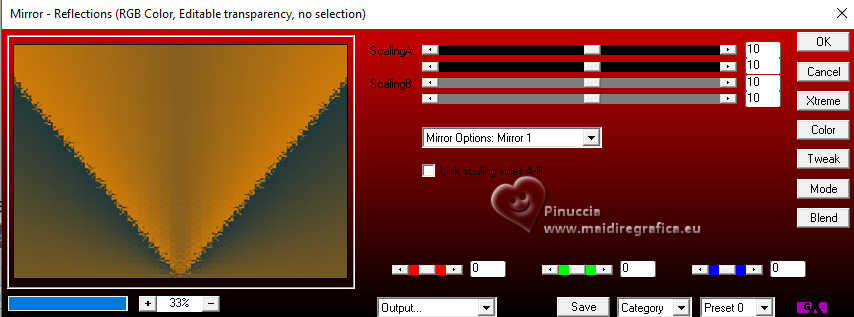
4. Effects>Plugins>AP 01 [Innovations] - Mirror-BothSides
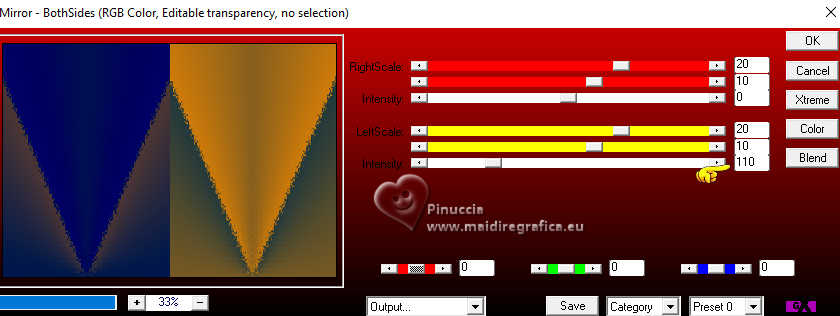
the setting Intensity is for this tutorial; change to your liking, if necessary
****
Some friends reported not finding these effects in the AP01 Innovations filter.
If you unzipped the filtre that I add before my translation,
you will find this:
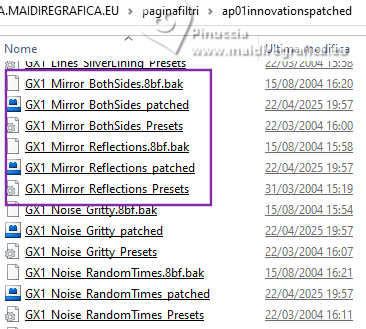
Add the folder in the File Paths and you will have the effects
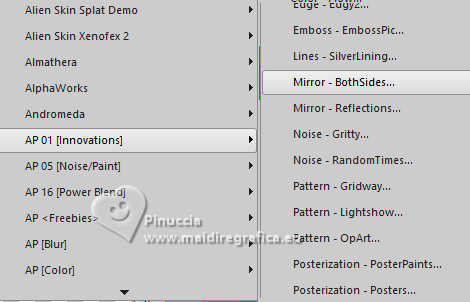
If you still do not see the effects, probably in the File Paths there are previous folders of this filter,
that must be deleted.
Remember that when you delete a filter from the Paths, you can always add it again if necessary.
******
5. Adjust>Add/Remove Noise>Add Noise.
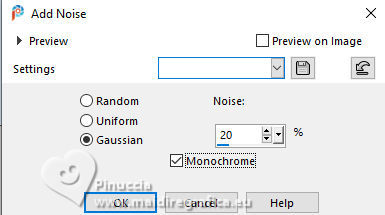
6. Adjust>Sharpness>Sharpen More.
7. Effects>Plugins>Simple - Quick Tile.
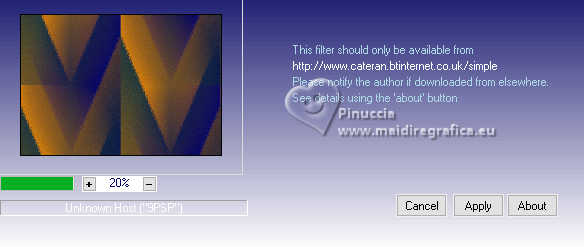
8. Layers>Duplicate.
Effects>Texture Effects>Texture - select the texture Squares (Corel_15_012)
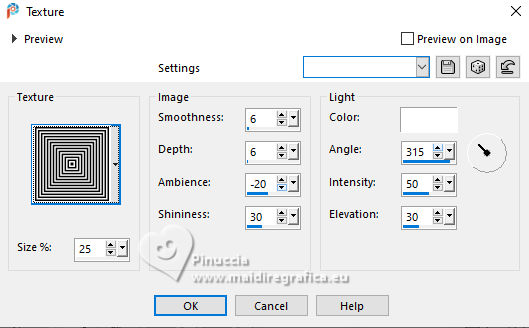
9. Effects>Plugins>Mura's Meister - Perspective Tiling.
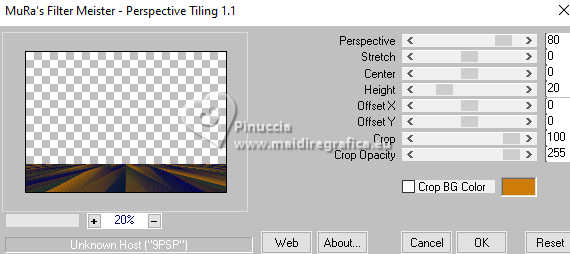
10. Effects>Reflection Effects>Rotating Mirror, default settings.

11. Activate your Magic Wand Tool  , tolerance 0 and feather 80, , tolerance 0 and feather 80,
and click in the transparent part to select it.
Press +/-15 fois CANC on the keyboard.
Selections>Select none.
don't forget to set again the feather to 0
12. Open the misted misted-color-MJ 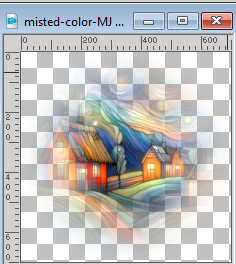
Edit>Copy.
Go back to your work and go to Edit>Paste as new layer.
Reduce the opacity of this layer to 55%, or according to your misted.
13. Layers>New Raster Layer.
Flood Fill  the layer with your light background color. the layer with your light background color.
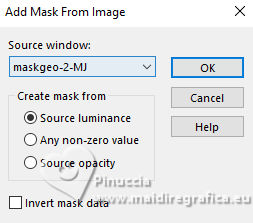
14. Layers>New Mask layer>From image
Open the menu under the source window and you'll see all the files open.
Select the mask mask-geo-2-MJ.
Layers>Merge>Merge Group.
15. Effects>Plugins>Mura's Seamless - Emboss at Alpha, default settings.
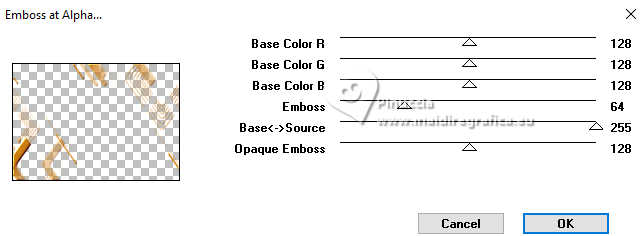
Change the Blend Mode of this layer to Hard Light.
16. Effects>3D Effects>Drop Shadow, default settings.
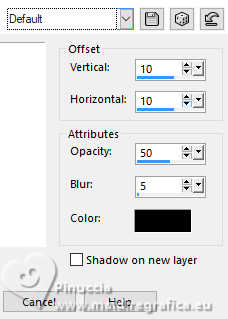
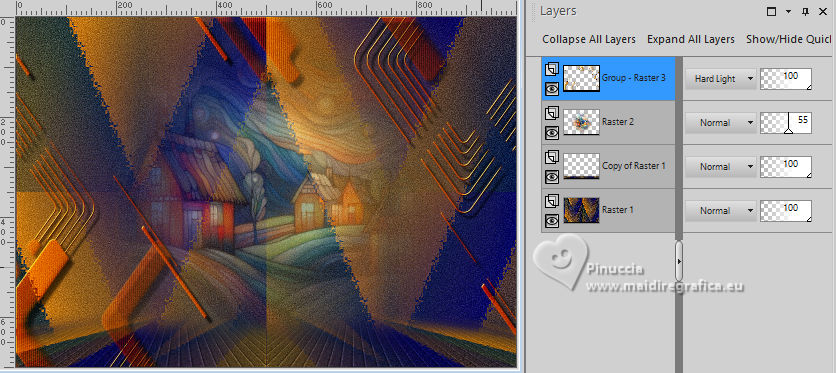
Your tag and the layers - adapt Blend Mode and opacity according to your work
17. Open your woman's tube tube-MJ 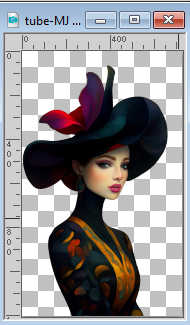
Edit>Copy.
Go back to your work and go to Edit>Paste as new layer.
Image>Resize, to 61%, resize all layers not checked.
Move  the tube to the left side. the tube to the left side.
Effects>3D Effects>Drop Shadow, at your choice.
18. Open the deco tube deco-MJ 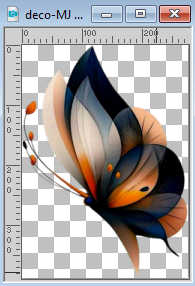
Edit>Copy.
Go back to your work and go to Edit>Paste as new layer.
Move  the tube at the bottom right. the tube at the bottom right.
Effects>3D Effects>Drop Shadow, at your choice.
19. Activate the layer Group-Raster 3.
K key to activate your Pick Tool 
Position X: -5,00 - Position Y: 0,00

M key to deselect the Tool.
20. Image>Add borders, 1 pixels, symmetric, dark foreground color.
Image>Add borders, 2 pixels, symétrique, light background color.
Image>Add borders, 1 pixel, symétrique, dark foreground color.
21. Selections>Select All.
Edit>Copy
If necessary, for caution Edit>Paste as new image, and minimize it
Image>Add borders, 25 pixels, symmetric, color white.
22. Selections>Invert.
Edit>Paste into Selection - the image minimized at step 21.
23. Adjust>Blur>Gaussian Blur - radius 30.

24. Adjust>Add/Remove Noise>Add Noise, same settings.

Selections>Select None.
Image>Add borders, 2 pixels, symmetric, light background color.
Selections>Select All.
25. Image>Add borders, 30 pixels, symmetric, color white.
26. Selections>Invert.
Edit>Paste into Selection - the minimized image is still in memory.
27. Adjust>Blur>Gaussian Blur - radius 30.

28. Adjust>Add/Remove Noise>Add Noise, same settings.

29. Adjust>Sharpness>Sharpen More.
30. Effects>3D Effects>Drop shadow, color black.

Selections>Select None.
31. Sign your work on a new layer.
Image>Add borders, 1 pixel, symmetric, dark foreground color.
32. Layers>Merge>Merge All.
Image>Resize, 1000 pixels width, resize all layers checked.
Save as jpg.
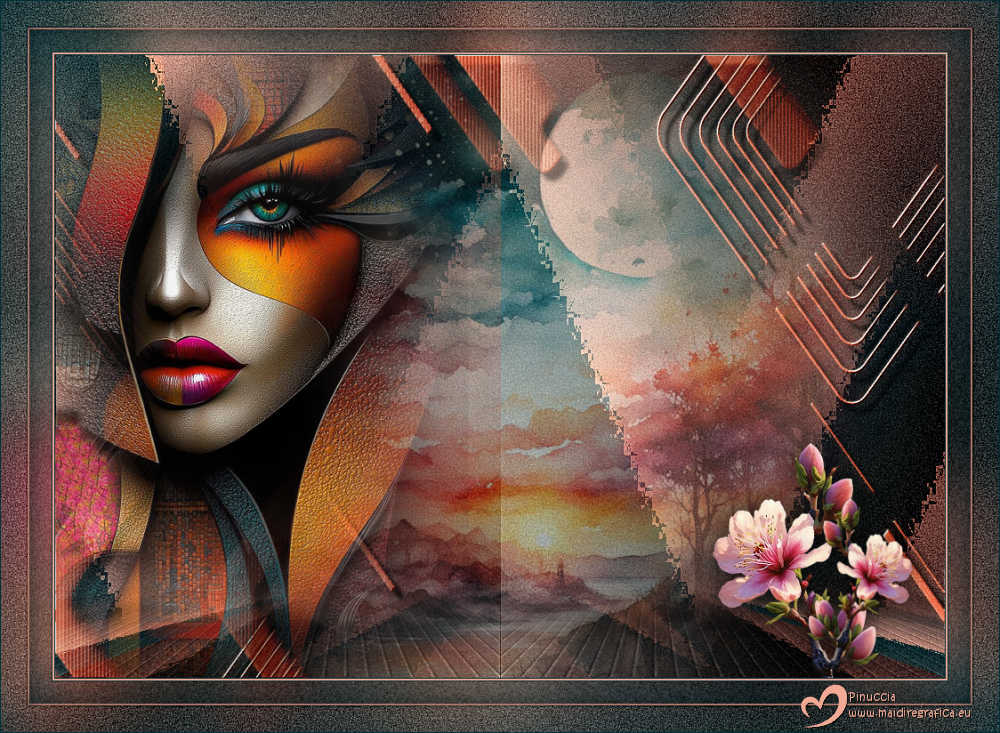
For the tubes of this version thanks Luz Cristina, Lady Valella and Wieskes

If you have problems or doubts, or you find a not worked link,
or only for tell me that you enjoyed this tutorial, write to me.
21 April 2025

|


