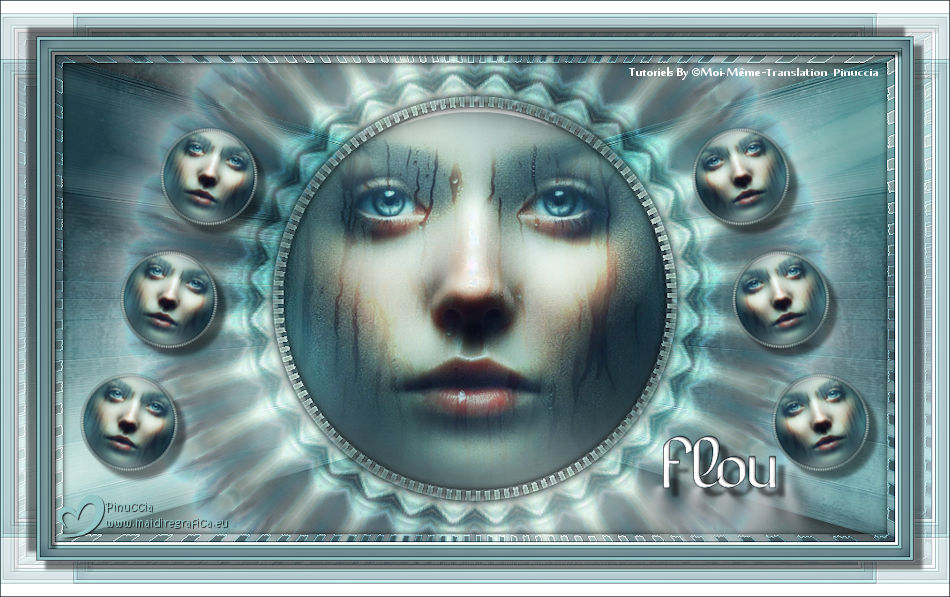
|
FLOU


Thanks Irene for the invitation to translate your tutorials

This tutorial was written with PSPX8 and translated with PSPX9 and PSP2020, but it can also be made using other versions of PSP.
Since version PSP X4, Image>Mirror was replaced with Image>Flip Horizontal,
and Image>Flip with Image>Flip Vertical, there are some variables.
In versions X5 and X6, the functions have been improved by making available the Objects menu.
In the latest version X7 command Image>Mirror and Image>Flip returned, but with new differences.
See my schedule here
 italian translation here italian translation here
 your versions here your versions here

For this tutorial, you will need:

Material by Moi-Même
Don't use for other tutorials.
(The links of material creators here).

consult, if necessary, my filter section here
Filters Unlimited 2.0 here
&< Bkg Designer sf10I> - Cruncher (da importare in Unlimited) here
VM Distortion - Center Mirror, Broken Mirror, Kaleidoscope here
FM Tile Tools - Blend Emboss, Saturation Emboss here
Mura's Meister - Copies here
Alien Skin Eye Candy 5 Impact - Glass here
Filters VM Distortion can be used alone or imported into Filters Unlimited.
(How do, you see here)
If a plugin supplied appears with this icon  it must necessarily be imported into Unlimited it must necessarily be imported into Unlimited

You can change Blend Modes according to your colors.
In the newest versions of PSP, you don't find the foreground/background gradient (Corel_06_029).
You can use the gradients of the older versions.
The Gradient of CorelX here
Copy the preset  in the folder of the plugin Alien Skin Eye Candy 5 Impact>Settings>Glass. in the folder of the plugin Alien Skin Eye Candy 5 Impact>Settings>Glass.
One or two clic on the file (it depends by your settings), automatically the preset will be copied in the right folder.
why one or two clic see here

Open the mask in PSP and minimize it with the rest of the material.
If you have problems with the Alpha Channel,
open a new transparent image 950 x 550 pixels, and use the selections from disk.
1. Choose two colors from your background image.
foreground color #93c6c6,
background color #193642.
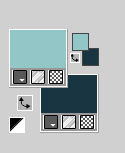
2. Open Canal_alpha_dans le flou
This image, that will be the basis of your work, is not empty,
but contains the selections saved to alpha channel.
Selections>Select All.
2. Open the image Fond_Paysage flou_Aigen MM 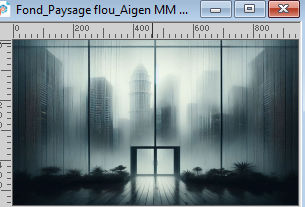
Edit>Copy.
Go back to your work and go to Edit>Paste into Selection.
Selections>Select None.
3. Effects>Plugins>FM Tile Tools - Saturation Emboss, default settings.

Nota: if your colors are bright enough, do instead:
FM Tile Tools, Blend emboss, default
Adjust>Blur>Radial Blur.
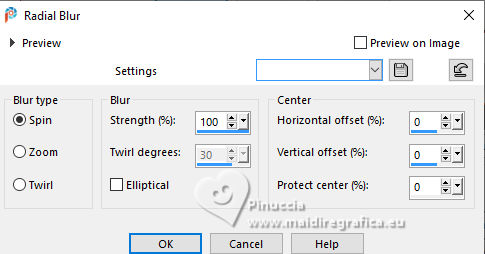
Note: depending on the landscape image chosen the effect may be different,
you can use mine and color it as you wish.
Effects>Plugins>Filters Unlimited 2.0 - VM Distortion - Center Mirror.
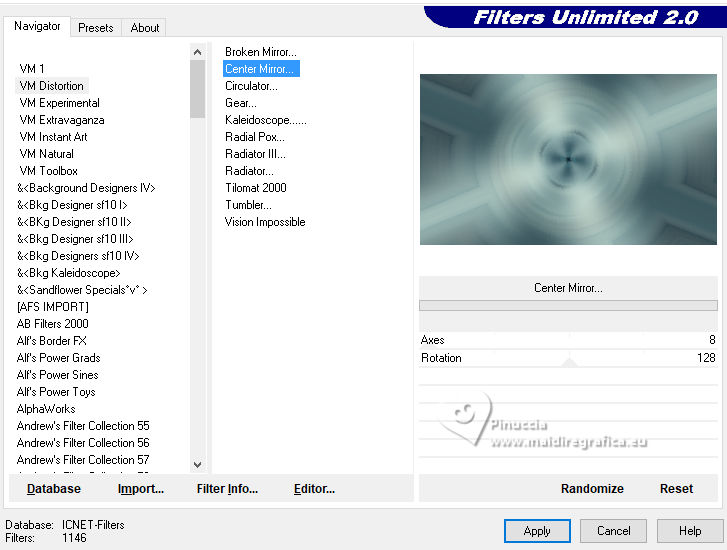
4. Selections>Load/Save Selection>Load Selection from Alpha Channel.
The selection Sélection #1 is immediately available. You just have to click Load.
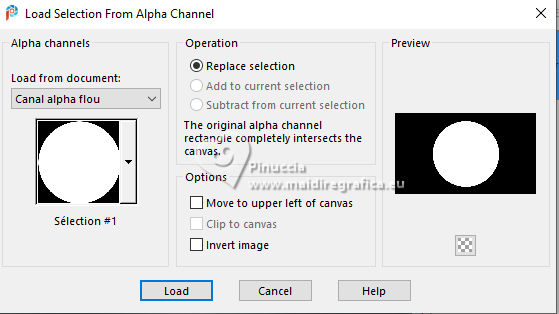
Selections>Promote Selection to Layer.
Adjust>Blur>Gaussian Blur - radius 10.

Layers>New Raster Layer.
Selections>Select All.
Open the image Buée sur visage_AIgen MM 
Edit>Copy.
Go back to your work and go to Edit>Paste into Selection.
Keep selected.
5. Layers>New Mask layer>From image
Open the menu under the source window and you'll see all the files open.
Select the mask 20 20
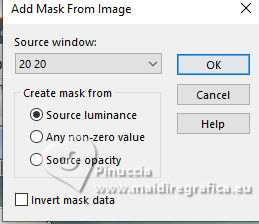
Layers>Duplicate.
Layers>Merge>Merge Group.
Change the Blend Mode of this layer to Hard Light.
Keep always selected.
6. Layers>New Raster Layer.
Optional, if you want use the supplied tube déco glass 
Effects>Plugins>alien Skin Eye Candy 5 Impact - Glass.
Select the preset Flou MM
Basic: Glass Color: white.
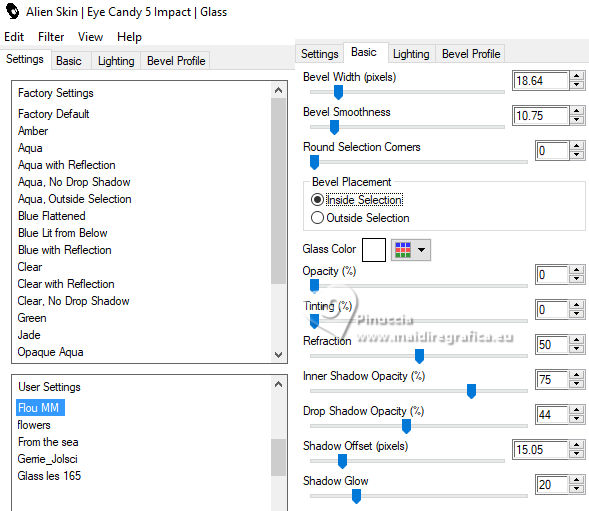
or open the tube déco glass.
Edit>Copy.
Go back to your work and go to Edit>Paste into Selection.
Keep again selected.
7. Activate your background layer, Raster 1.
Selections>Modify>Select Selection Borders.
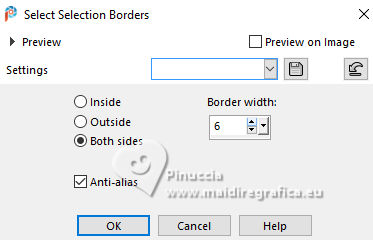
Selections>Promote Selection to Layer.
Keep selected.
Layers>Arrange>Bring to Top.
Effects>Plugins>Filters Unlimited 2.0 - VM Distortion - Broken Mirror.
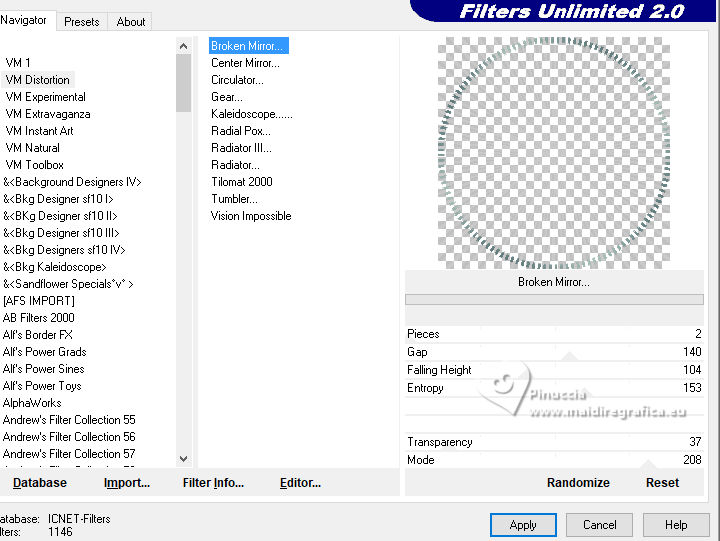
Adjust>Sharpness>Sharpen More.
Effects>3D Effects>Drop Shadow, color black.
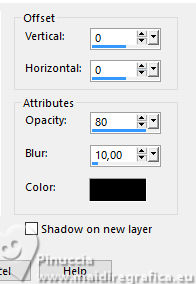
Selections>Select None.
8. Close the layer Raster 1.
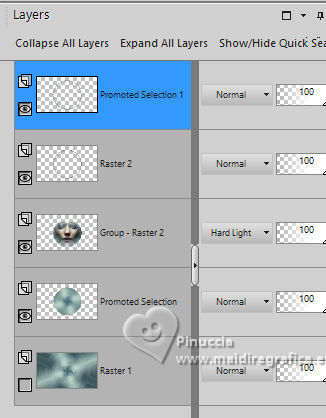
Layers>Merge>Merge visible.
9. Open and activate the layer Raster 1.
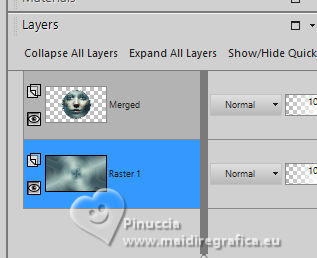
Layers>Duplicate.
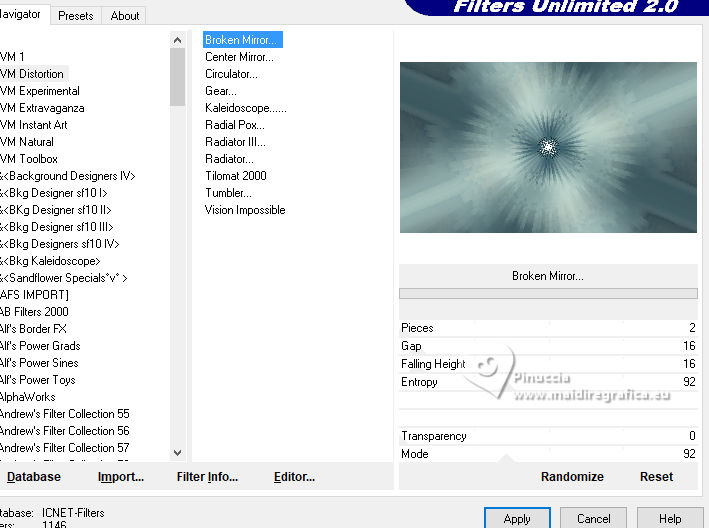
Effects>Plugins>Filters Unlimited 2.0 - VM Distorsion, Broken Mirror.
Effects>Edge Effects>Enhance.
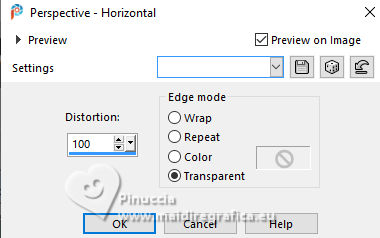
Effects>Geometric Effects>Perspective horizontal.
10. Layers>Duplicate.
Image>Mirror>Mirror horizontal.
Selections>Load/Save Selection>Load Selection from Alpha Channel.
Open the selections menu and load the selection Sélection 2
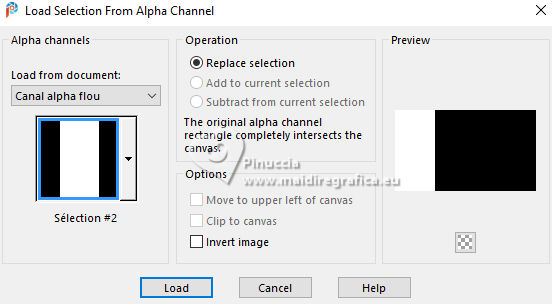
Press CANC on the keyboard 
Selections>Select None.
11. Layers>Merge>Merge Down.
Change the Blend Mode of this layer to Overlay.
Effects>Plugins>FM Tile Tools - Blend Emboss, default settings.

Effects>3D Effects>Drop Shadow, color black.
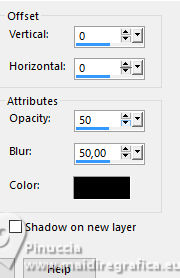
12. Activate your top layer.
Layers>Duplicate.
Image>Resize, to 30%, resize all layers not checked.
Don't move.
Effects>Plugins>Mura's Meister - Copies.
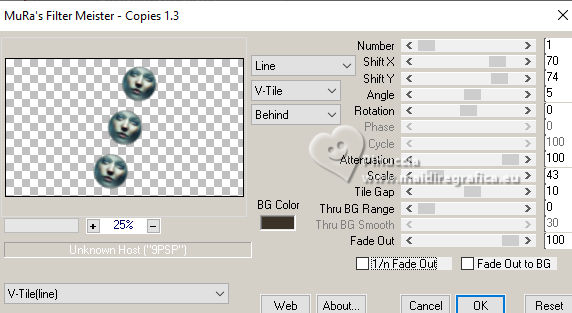
Image>Resize, to 80%, resize all layers not checked.
K key to activate your Pick Tool 
Position X: 27,00 - Position Y: 80,00.

M key to deselect the Tool.
13. Layers>Duplciate.
Image>Mirror>Mirror horizontal.
Again Layers>Duplicate.
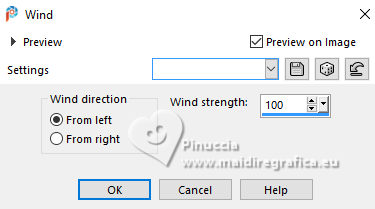
Effects>Distortion Effects>Wind - from right, strength 100.
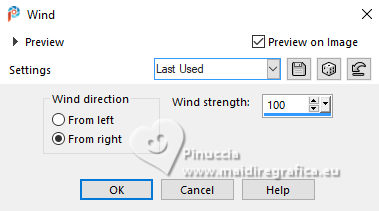
Effects>Distortion Effects>Wind - from left, strength 100.
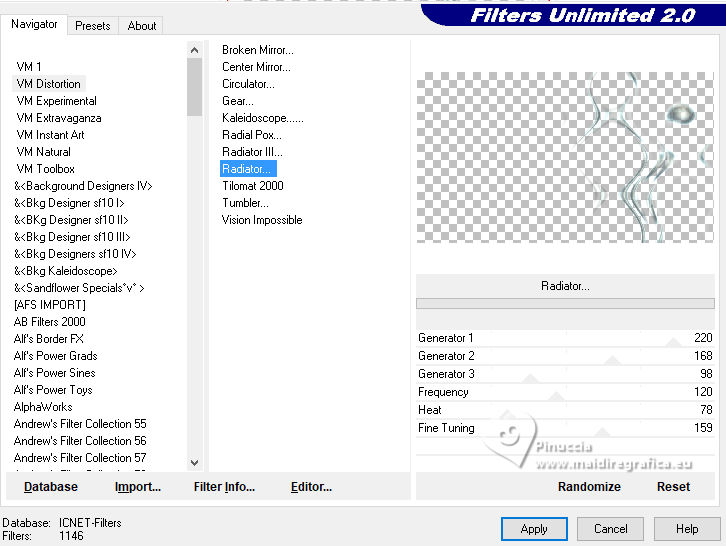
Effects>Plugins>Filters Unlimited 2.0 - VM Distortion - Radiator
14. Layers>Duplicate.
Image>Mirror>Mirror Horizontal.
Image>Mirror>Mirror Vertical (Image>Flip).
Layers>Merge>Merge Down.
Layers>Arrange>Move Down - 3 times.
Image>Resize, to 80%, resize all layers not checked.
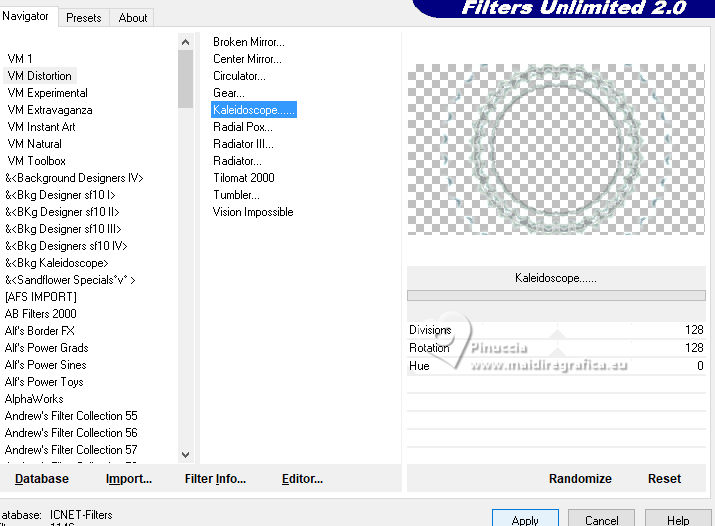
Effects>Plugins>Filters Unlimited 2.0 - VM Distortion - Kaleidoscope.
Change the Blend Mode of this layer to Overlay (or according to your colors).
Activate your top layer.
Layers>Arrange>Move Down.
16. Layers>Duplicate.
Effects>Distortion Effects>Wind - from right, strength 100.

Effects>Distortion Effects>Wind - from left, strength 100.

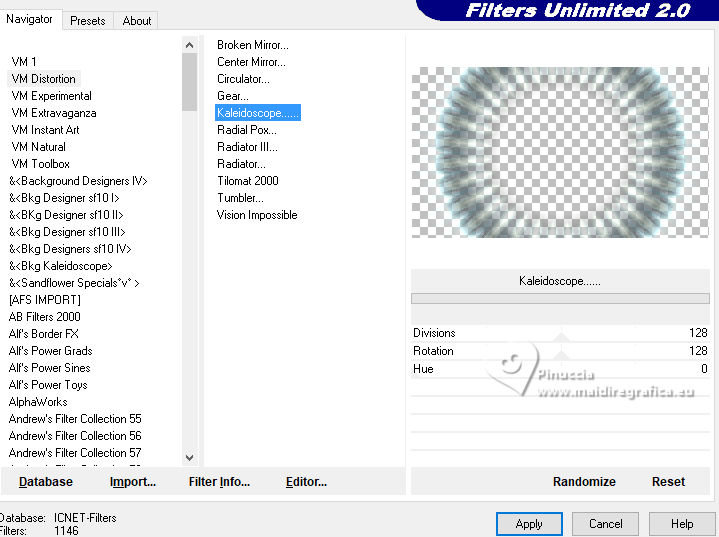
Effects>Plugins>Filters Unlimited 2.0 - VM Distorsion - Kaleidoscope.
Layers>Arrange>Move Down.
17. Activate your top layer.
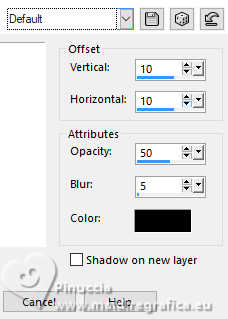
Effects>3D Effects>Drop Shadow, default settings.
18. Activate your background layer, Raster 1.
Selections>Select All.
Selections>Modify>Contract - 8 pixels.
Selections>Invert.
Selections>Promote Selection to Layer.
Layers>Arrange>Bring to Top.
Effects>Plugins>Filters Unlimited 2.0 - VM Distortion - Broken Mirror.
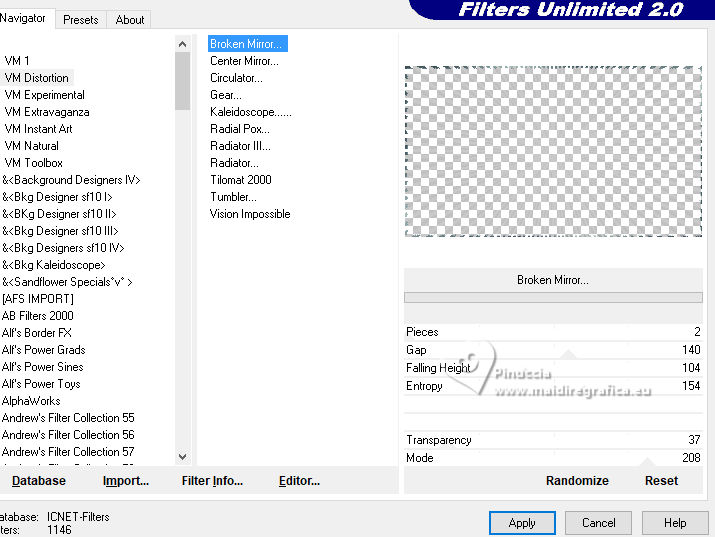
Effects>Edge Effects>Enhance.
Effects>3D Effects>Drop Shadow, color black.

Selections>Select None.
19. Activate again your background layer, Raster 1.
Open déco flou 
Edit>Copy.
Go back to your work and go to Edit>Paste as new layer.
Don't move it.
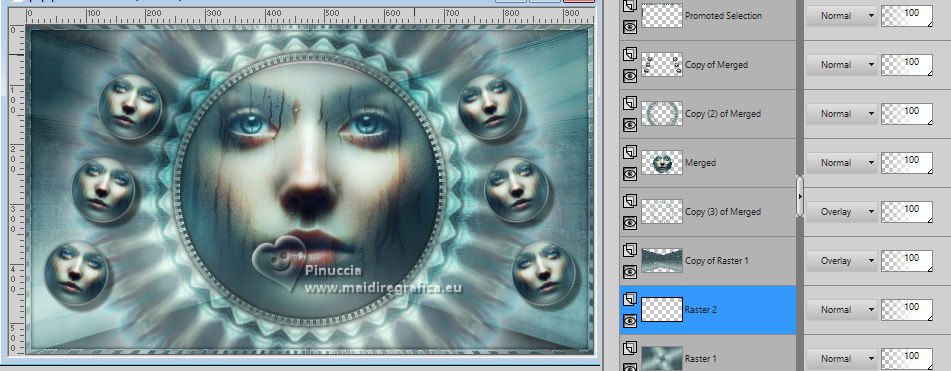
Your tag and the layers
20. Image>Add Borders, 1 pixel, symmetric, background color.
Image>Add Borders, 3 pixels, symmetric, color white.
Image>Add Borders, 1 pixel, symmetric, background color.
Image>Add Borders, 3 pixels, symmetric, foreground color.
Image>Add Borders, 1 pixel, symmetric, background color.
Selections>Select All.
Edit>Copy (for caution: Edit>Paste as new image).
21. Go back to your work.
Image>Add Borders, 8 pixels, symmetric, color white.
Selections>Invert
Edit>Paste into Selection (the memorized image).
Adjust>Blur>Gaussian Blur - radius 10

Effects>3D Effects>Drop Shadow, default settings.

Selections>Select None.
Image>Add Borders, 1 pixel, symmetric, background color.
Image>Add Borders, 3 pixels, symmetric, foreground color.
Image>Add Borders, 1 pixel, symmetric, background color.
Selections>Select All.
23. Image>Add Borders, 40 pixels, symmetric, color white.
Selections>Invert.
Effects>Plugins>Filters Unlimited 2.0 - &<Bkg Designer sf10I> - Cruncher, default settings.

Effects>Plugins>FM Tile Tools - Saturation Emboss, default settings.
Selections>Invert.
Effects>3D Effects>Drop Shadow, last settings.

Repeat Drop Shadow, vertical and horizontal -10.
Selections>Select None.
24. Open titre 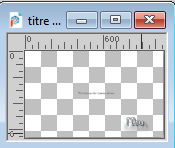
Erase the watermark and go to Edit>Copy.
Go back to your work and go to Edit>Paste as new layer.
Move  the text as in my example. the text as in my example.
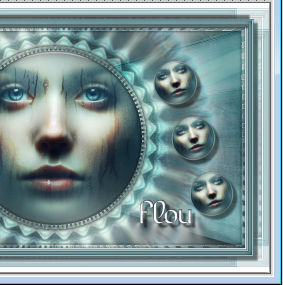
(if necessary, change the Blend Mode of this layer to Luminance (Legacy)).
25. Sign your work on a new layer.
Add the author the translator's watermarks.
Image>Add Borders, 1 pixel, symmetric, background color.
Image>Resize, 950 pixels width, resize all layers checked.
Save as jpg.
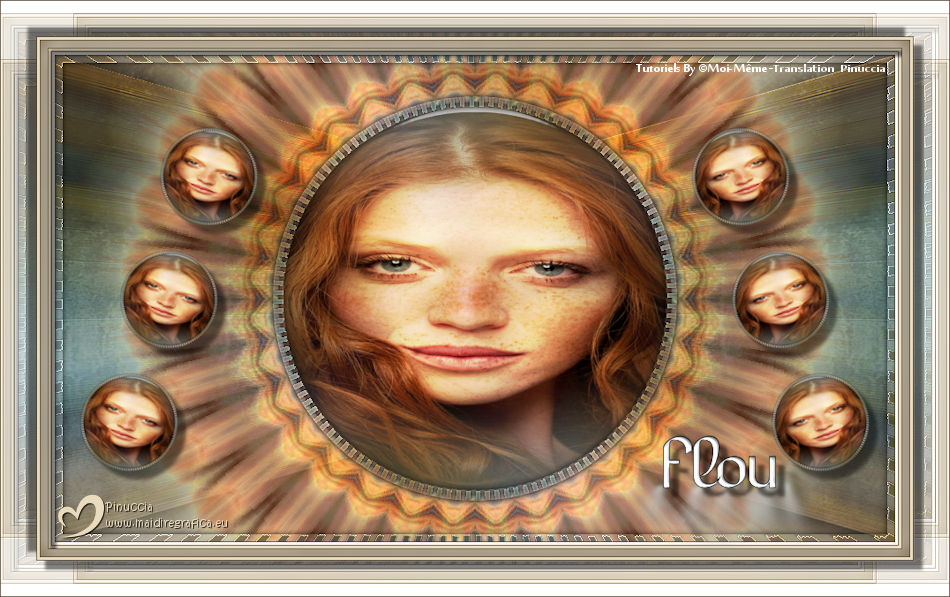

If you have problems or doubts, or you find a not worked link,
or only for tell me that you enjoyed this tutorial, write to me.
16 June2025

|

