|
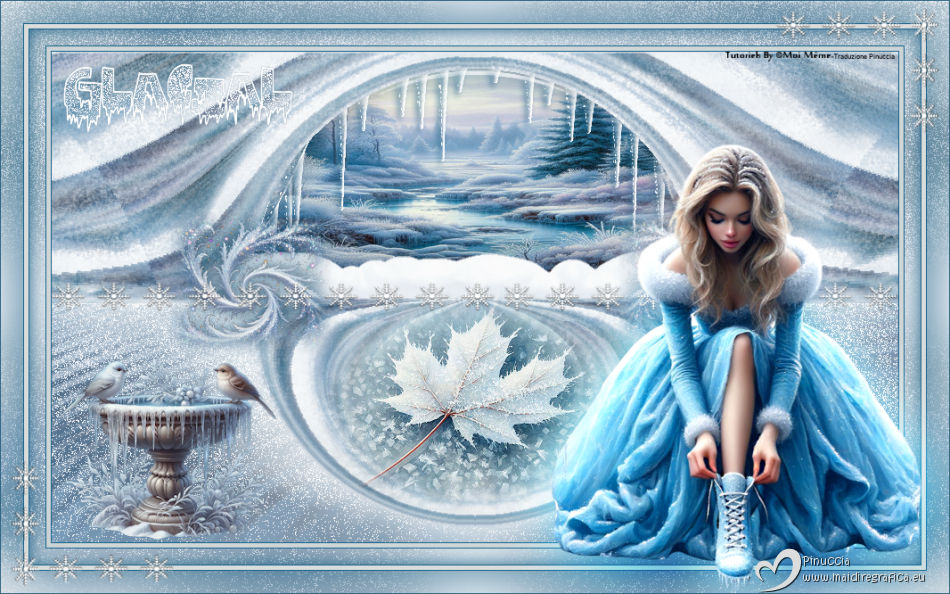
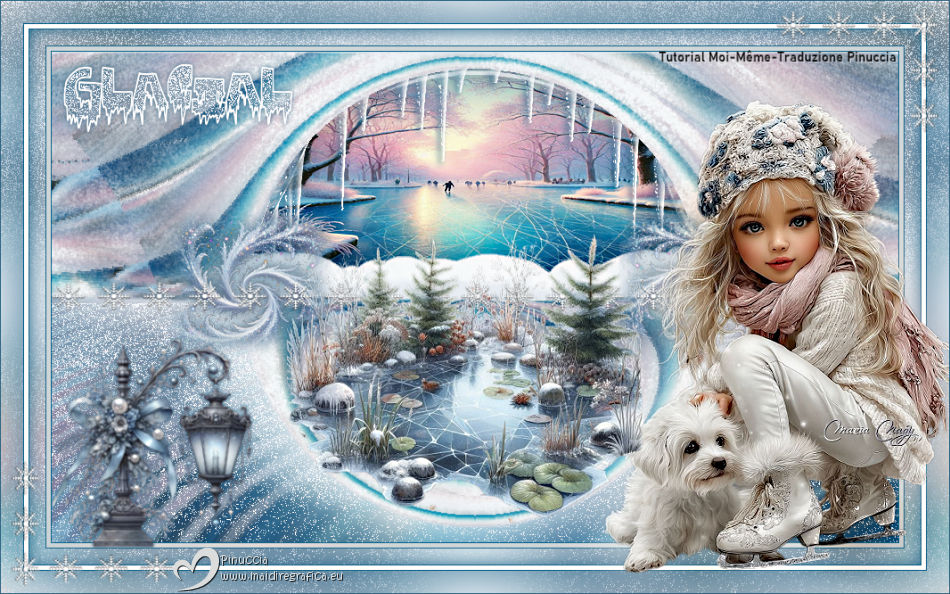
GLACIAL


Thanks Irene for the invitation to translate your tutorials

This tutorial was written with PSPX8 and translated with PSPX9 and PSP2020, but it can also be made using other versions of PSP.
Since version PSP X4, Image>Mirror was replaced with Image>Flip Horizontal,
and Image>Flip with Image>Flip Vertical, there are some variables.
In versions X5 and X6, the functions have been improved by making available the Objects menu.
In the latest version X7 command Image>Mirror and Image>Flip returned, but with new differences.
See my schedule here
 italian translation here italian translation here
 your versions here your versions here
For this tutorial, you will need:
Thanks for the tubes Cat Dana, Silvie, Addictive Pleasures.
The rest of the material is by Moi-Même
(don't use for other tutorials)
Other theme's tubes qui
(The links of material creators here).

consult, if necessary, my filter section here
Filters Unlimited 2.0 here
Distort - Turn Your Inside Outside here
Distortion Filters - Splash 2 (to import in Unlimited) here
(Splash 2 effect is in the material)
Mura's Seamless - Emboss at Alpha here
Mura's Meister - Perspective Tiling here
Alien Skin Eye Candy 5 Nature - Snow Drift here
Alien Skin Eye Candy 5 Impact - Glass here
Filters Mura's Seamless can be used alone or imported into Filters Unlimited.
(How do, you see here)
If a plugin supplied appears with this icon  it must necessarily be imported into Unlimited it must necessarily be imported into Unlimited

You can change Blend Modes according to your colors.
If you have problems with the Alpha Channel,
open a new transparent image 950 x 550 pixels, and use the selections from disk.
Set your foreground color to #2d6281,
and your background color to #ffffff.
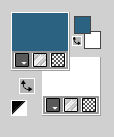
Color 3 #dbdddc
1. Open Canal_alpha Glacial 2
This image, that will be the basis of your work, is not empty,
but contains the selections saved to alpha channel.
Selections>Select All.
Open the landscape FrostedBeginnings-paper7 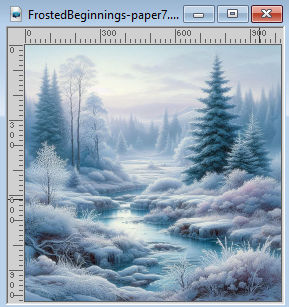
Edit>Copy.
Minimize the tube
Go back to your work and go to Edit>Paste into Selection.
Selections>Select None.
2. Effects>Plugins>Mura's Seamless - Emboss at Alpha, default settings.
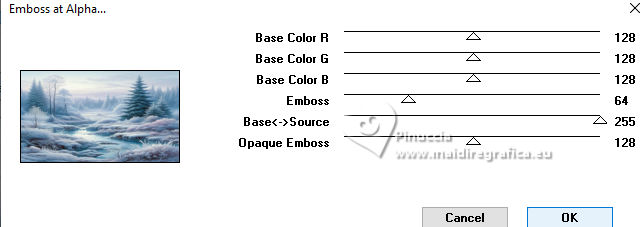
Effects>Plugins>Alien Skin Eye Candy 5 Nature - Snow Drift, preset Dusting,Moderate
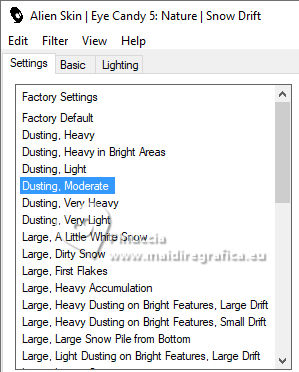
Effects>Edge Effects>Enhance.
Adjust>Blur>Radial Blur.
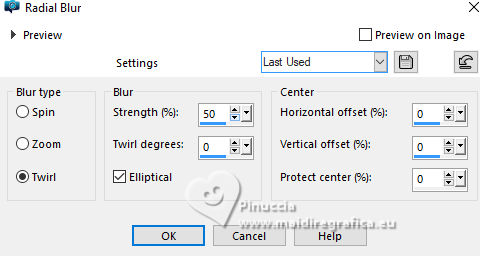
Effects>Edge Effects>Enhance More.
3. Layers>Duplicate.
Effects>Plugins>Mura's Meister - Perspective Tiling.
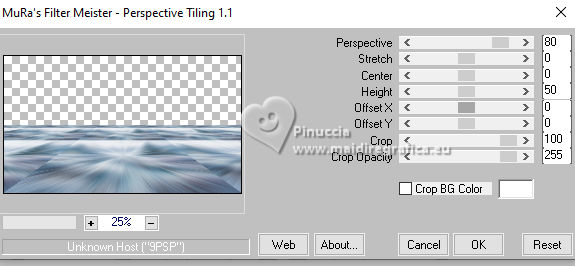
Effects>Plugins>Filters Unlimited 2.0 - Distort - Turn Your Inside Outside
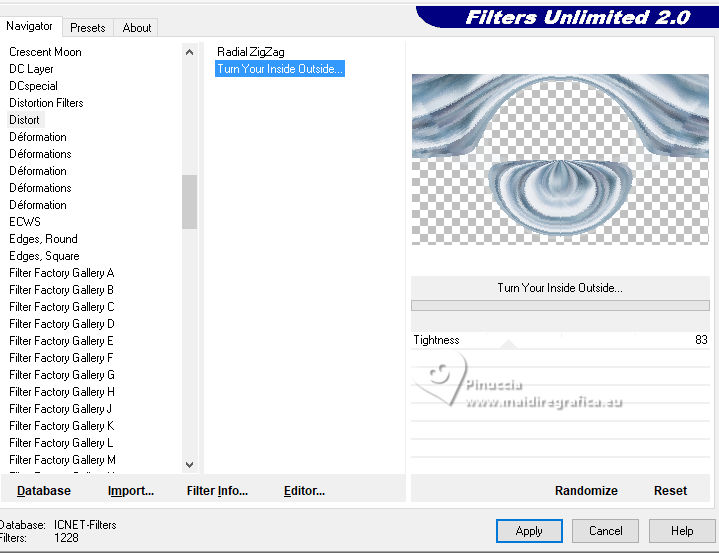
Effects>Plugins>Alien Skin Eye Candy 5 Nature - Snow Drift, preset Large First Flakes
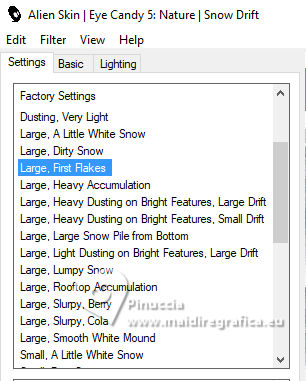
4. Selections>Load/Save Selection>Load Selection from Alpha Channel.
The selection Sélection #1 is immediately available.
You just have to click Load.
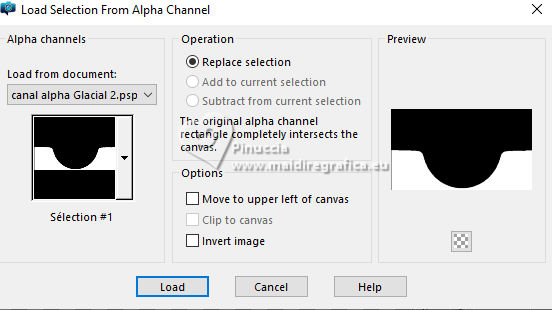
Press 3 times CANC on the keyboard 
Selections>Select None.
Effects>3D Effects>Drop Shadow, color white, shadow on new layer checked.
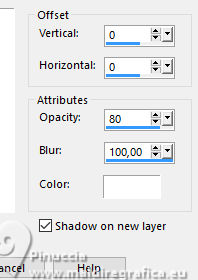
Stay on the shadow's layer.
Change the Blend Mode of this layer to Screen.
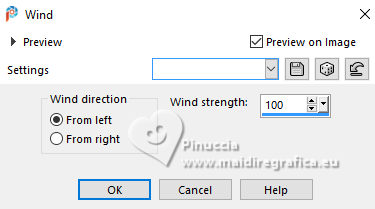
Effects>Distortion Effects>Wind - from right, strength 100.
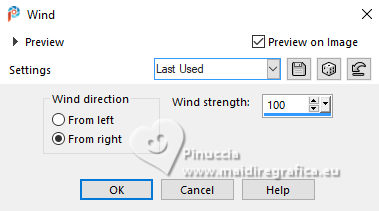
Effects>Distortion Effects>Wind - from left, strength 100.
5. Activate the layer above.
Open déco icicles arche 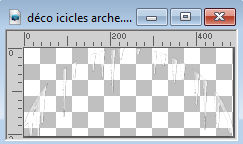
Edit>Copy.
Go back to your work and go to Edit>Paste as new layer.
K key to activate your Pick Tool 
Position X: 233,00 - Position Y: 19,00.

M key to deselect the Tool.
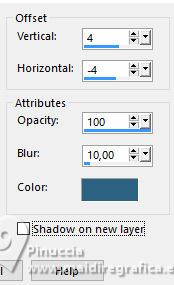
Effects>3D Effects>Drop Shadow, foreground color,
shadow on new layer not checked.
6. Activate the layer below.
Layers>New Raster Layer.
Selections>Load/Save Selection>Load Selection from Alpha Channel.
Open the selections menu and load the selection sélection 2
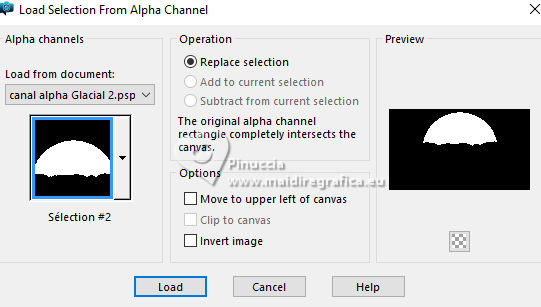
Selections>Modify>Expand - 3 pixels.
Activate again the landscape FrostedBeginnings-paper7.
Edit>Copy.
Go back to your work and go to Edit>Paste into Selection.
Adjust>Sharpness>Sharpen.
Layers>Arrange>Move Down.
Keep selected.
7. Layers>New Raster Layer.
Effects>Plugins>Alien Skin Eye Candy 5 Impact - Glass.
Glass color: white
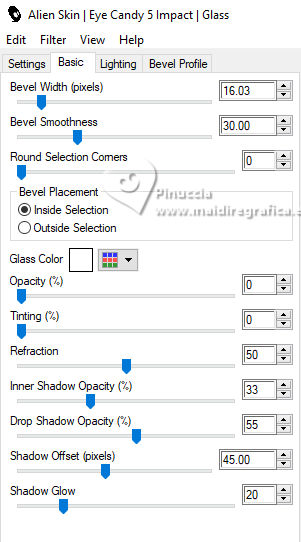
Selections>Select None.
8. Activate the layer Raster 1.
Adjust>Blur>Gaussian Blur - radius 30.

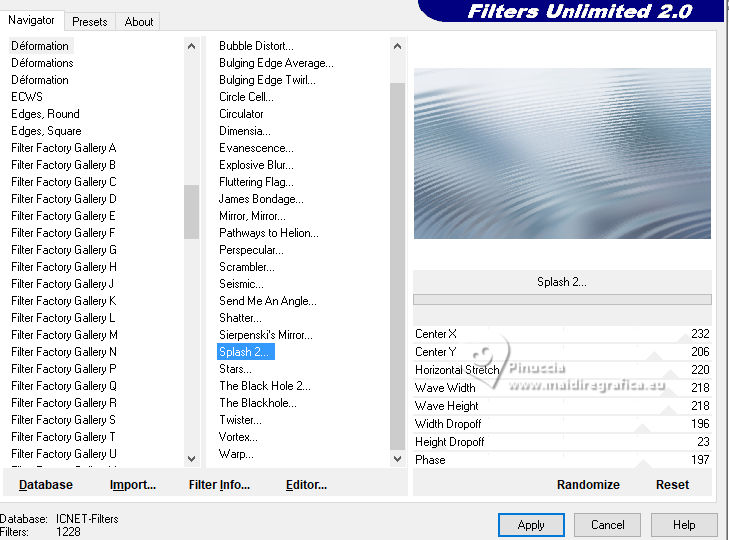
Effects>Plugins>Filters Unlimited 2.0 - Déformation - Splash 2, default settings.
9. Open déco givre MM 
Edit>Copy.
Minimize the tube: you'll use it later.
Go back to your work and go to Edit>Paste as new layer.
K key to activate your Pick Tool 
Position X: 0,00 - Position Y: 282,00.

Change the Blend Mode of this layer to Dissolve and reduce the opacity to 60%.
10. Activate your top layer.
Open the misted 2025 12 09 hiver Cat Dana 3 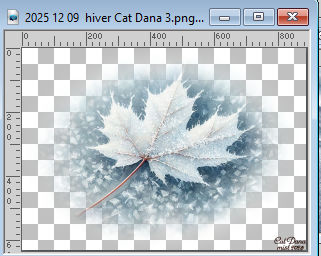
Erase the watermark and go to Edit>Copy.
Go back to your work and go to Edit>Paste as new layer.
Image>Resize, to 45%, resize all layers not checked.
K key to activate your Pick Tool 
Position X: 271,00 - Position Y: 250,00.

Adjust>Sharpness>Sharpen.
Open the tube Magic_Glitter_Snow_Winter_Deco 7DE... 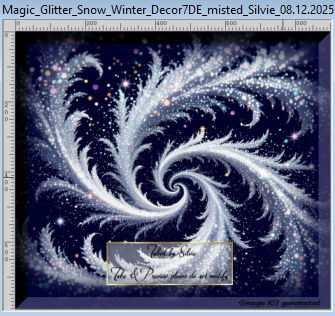
Edit>Copy.
Go back to your work and go to Edit>Paste as new layer.
Image>Resize, to 20%, resize all layers not checked.
Position X: 133,00 - Position Y: 180,00.

M key to deselect the Tool.
Layers>Duplicate.
Image>Mirror>Mirror Horizontal.
Layers>Merge>Merge Down.
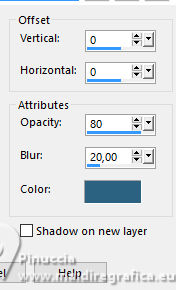
Effects>3D Effects>Drop Shadow, foreground color.
12. Open déco étoiles centre_MM 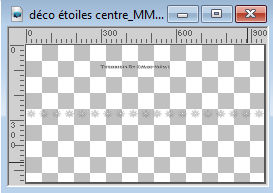
Erase the watermark and go to Edit>Copy.
Go back to your work and go to Edit>Paste as new layer.
Position X: -2,00 - Position Y: 257,00.

M key to deselect the Tool.
Note: according to your tube, you may select and erase the stars that bother you.
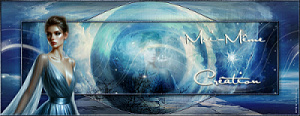
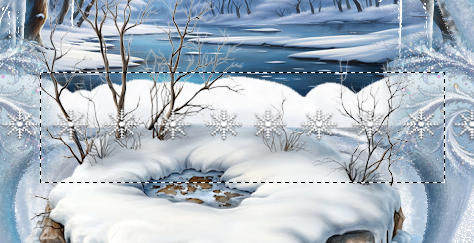
Example of the second version by Moi-Même
13. For the borders, set your background color with the color 3 #dbdddc.
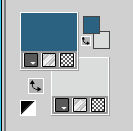
Image>Add Borders, 1 pixel, symmetric, foreground color.
Image>Add Borders, 5 pixels, symmetric, color 3 #dbdddc.
Image>Add Borders, 1 pixel, symmetric, foreground color.
Selections>Select All.
13. Image>Add Borders, 50 pixels, symmetric, color white.
Effects>Image Effects>Seamless Tiling, default settings.

Selections>Invert.
Adjust>Blur>Gaussian Blur - radius 30.

Layers>New Raster Layer
Activate again the tube déco givre and go to Edit>Copy.
Go back to your work and go to Edit>Paste into Selection.
Change the Blend Mode of this layer to Dissolve and reduce the opacity to 60%.
Layers>Merge>Merge Down.
The next selection will replace the previous one.
15. Selections>Select All.
Selections>Modify>Contract - 25 pixels.
Effects>3D Effects>Drop Shadow, foreground color.
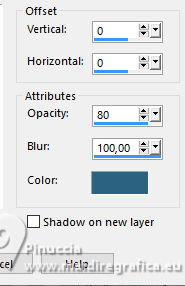
Keep selected.
16. Layers>New Raster Layer.
Flood Fill  the selection with your foreground color. the selection with your foreground color.
Selections>Modify>Contract - 1 pixel.
Flood Fill  the selection with your background color (color 3). the selection with your background color (color 3).
Selections>Modify>Contract - 5 pixels.
Flood Fill  the selection with your foreground color. the selection with your foreground color.
Selections>Modify>Contract - 1 pixel.
Press CANC on the keyboard 
Keep selected.
17. Layers>New Raster Layer.
Effects>3D Effects>Cutout, foreground color.
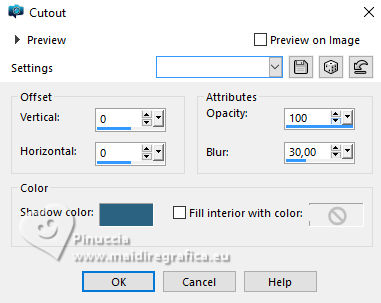
Selections>Select None.
Activate the layer below.
Effects>3D Effects>Drop Shadow, same settings.
18. Layers>Merge>Merge visible.
Adjust>Hue and Saturation>Vibrancy (if necessary, according to your colors).
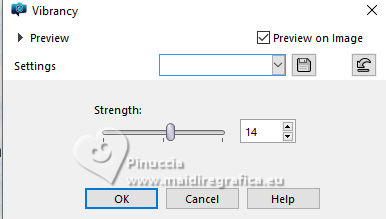
Note: adjust the Position of your tubes according to your work.
Open the tube Glacial-personnage_AIgen by MM 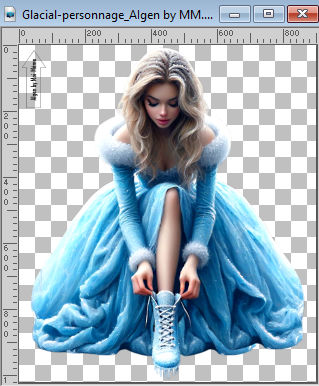
Erase the watermark and go to Edit>Copy.
Go back to your work and go to Edit>Paste as new layer.
Image>Resize, to 50%, resize all layers not checked.
K key to activate your Pick Tool 
Position X: 618,00 - Position Y: 160,00.

20. Layers>Duplicate.
Activate the layer below.
Adjust>Blur>Gaussian Blur - radius 30.

Change the Blend mode of this layer to Hard Light.
21. Activate your top layer.
Open titre 
Edit>Copy.
Go back to your work and go to Edit>Paste as new layer.
Position X: 70,00 - Position Y: 70,00.

Effects>3D Effects>Drop Shadow, foreground color.

21. Apri FrostedBeginnings-birdtable4-redimensionné 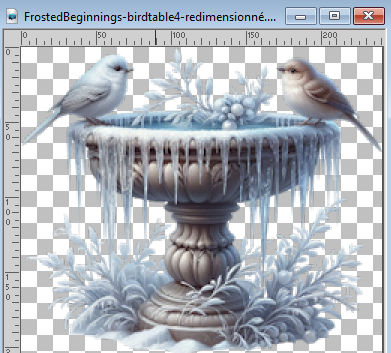
Edit>Copy.
Go back to your work and go to Edit>Paste as new layer.
Position X: 68,00 - Position Y: 399,00.

Tasto M per deselezionare lo strumento.
Effects>3D Effects>Drop Shadow, same settings.
22. Open coinsMM 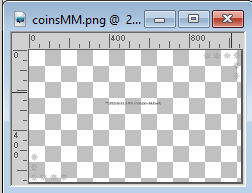
Erase the watermark and go Edit>Copy.
Go back to your work and go to Edit>Paste as new layer.
Don't move it.
23. Sign your work on a new layer.
Add author and translator watermarks.
24. Image>Add Borders, 1 pixel, symmetric, foreground color.
Image>Resize, 950 pixels width, resize all layers checked.
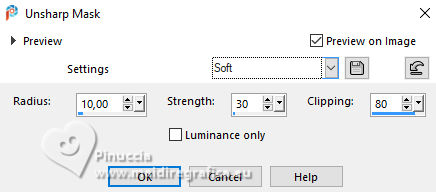
Adjust>Sharpness>Unsharp Mask - Soft
Save as jpg.
Version with mon tube (from Pinterest) and scraps elements by Tundra's Gleam

If you have problems or doubts, or you find a not worked link,
or only for tell me that you enjoyed this tutorial, write to me.
13 January 2026

|

