|
METAMORPHOSE


Thanks Irene for the invitation to translate your tutorials

This tutorial was written with PSPX8 and translated with PSPX9 and PSP2020, but it can also be made using other versions of PSP.
Since version PSP X4, Image>Mirror was replaced with Image>Flip Horizontal,
and Image>Flip with Image>Flip Vertical, there are some variables.
In versions X5 and X6, the functions have been improved by making available the Objects menu.
In the latest version X7 command Image>Mirror and Image>Flip returned, but with new differences.
See my schedule here
 italian translation here italian translation here
 your versions here your versions here

For this tutorial, you will need:

Material by Moi-Même
For the mask thanks Silvie.
Other theme's tubes here
(The links of material creators here).

consult, if necessary, my filter section here
Filters Unlimited 2.0 here
AP [Lines] - Lines SilverLining here
&<Bkg Designer sf10I> - 4Way Average, Corner Half Wrap (to import in Unlimited here
Mura's Meister - Copies here

You can change Blend Modes according to your colors.
In the newest versions of PSP, you don't find the foreground/background gradient (Corel_06_029).
You can use the gradients of the older versions.
The Gradient of CorelX here

To work, a brush must consist of two files:
the BrushTip file and the file of the same name with the extension Corel PSP brush
See my notes on brushes here
For the brush to work, both files must be copied to the Brushes folder.
The supplied brush BrushTip_papillon mariposaMM doesn't work,
because it is missing the second file, and using it will only show a black circle.
You can use the two files I added to a pennello-brush complet
folder, to put in the Brushes Folder,
or copy/paste as new layer the PNG file BrushTip papillon mariposaMM
Open the mask in PSP and minimize it with the rest of the material.
If you have problems with the Alpha Channel,
open a new transparent image 950 x 550 pixels, and use the selection from disk.
Colors.

Set your foreground color with the color 1 #d97591,
and your background color with the color 2 #6a2037.
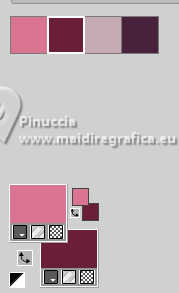
color 3 #c5abb2
color 4 #4a223c
additional color white
Set your foreground color to a Foreground/Background Gradient, style Linear.
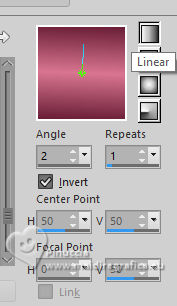
1. Open Canal_alpha_Métamorphose
This image, that will be the basis of your work, is not empty,
but contains a selection saved to alpha channel.
Activate your Selection Tool 
(no matter the type of selection, because with the custom selection your always get a rectangle)
clic on the Custom Selection 
and set the following settings.
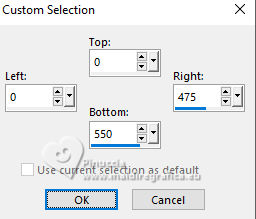
Flood Fill  the selection with your Gradient. the selection with your Gradient.
Keep selected.
2. Selections>Invert.
Set your foreground color to the color 3 #c5abb2
and your background color to the color 4 #4a223c
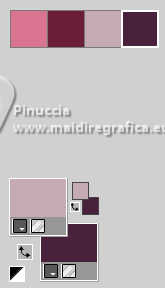
Keep the Gradient with the previous settings.
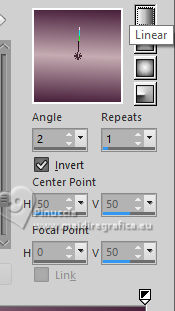
Flood Fill  the selection with your Gradient. the selection with your Gradient.
Selections>Select None.
3. Effects>Distortion Effects>Wave.
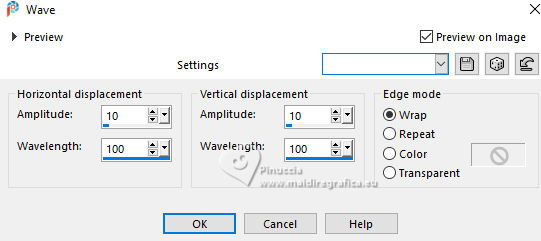
Layers>Duplicate.
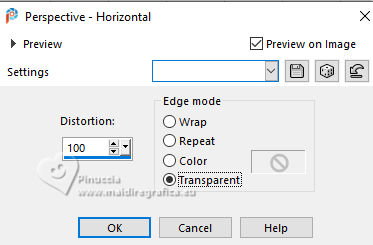
Effects>Geometric Effects>Perspective Horizontal.
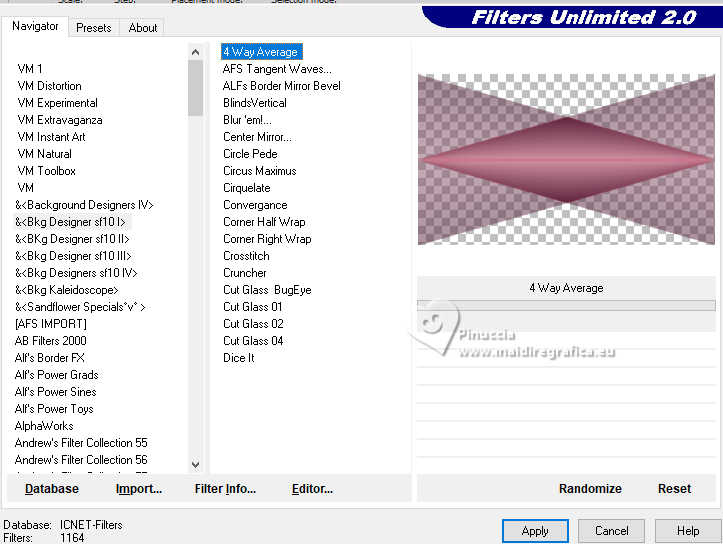
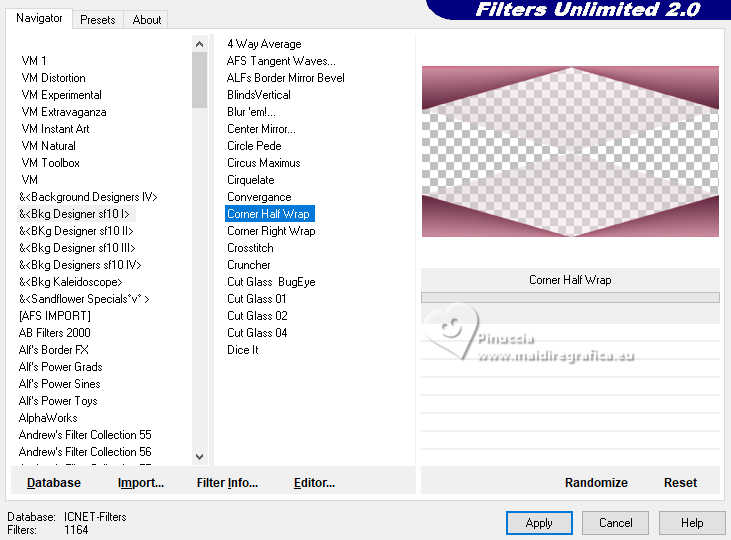
Effects>Plugins>Filters Unlimited 2.0 - &<Bkg Designer sf10I> - 4 Way Average.
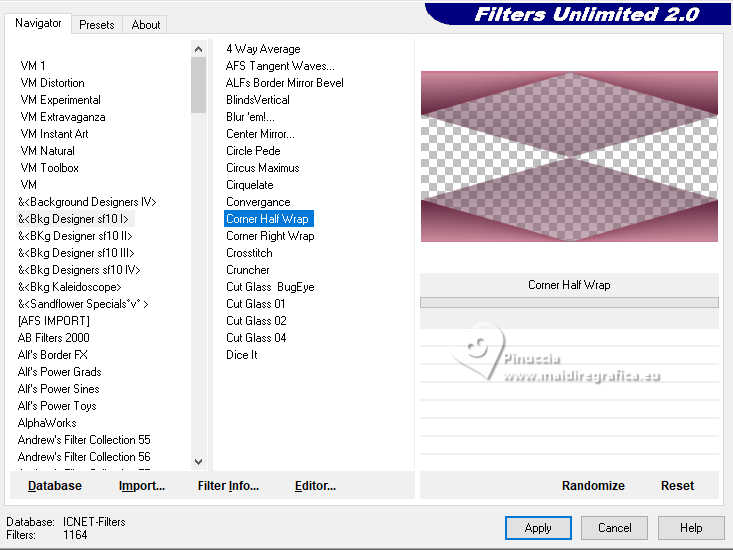
Effects>Plugins>Filters Unlimited 2.0 - &<Bkg Designer sf10I> - Corner Half Wrap.
****
Note: The version of Unlimited used in the original tutorial is 2.0.3.
Some filters may produce different results than version 2.0.
For this translation, I used version 2.0.0; for the Italian translation, I used 2.0 version.
Italian Translation
Effects>Plugins>Filters Unlimited 2.0 - &<Bkg Designer sf10I> - 4-Way Average.
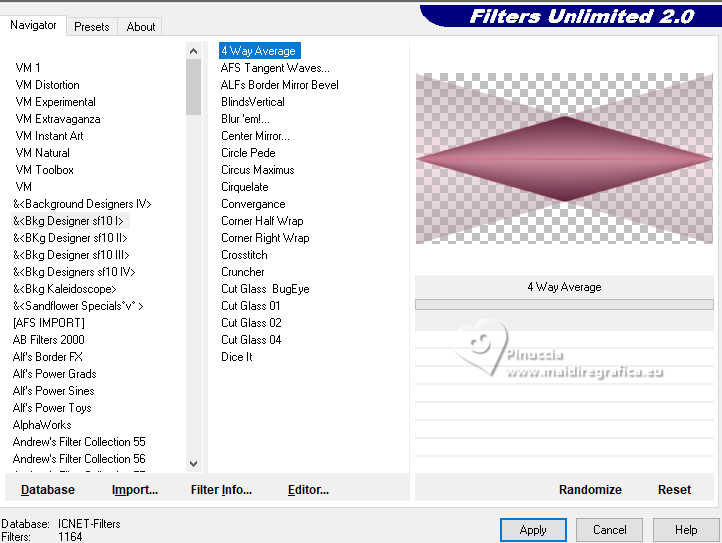
Effects>Plugins>Filters Unlimited 2.0 - &<Bkg Designer sf10I> - Corner Half Wrap.
Below are the results of the two versions: 2.0 on the left - 2.0.3 on the right.
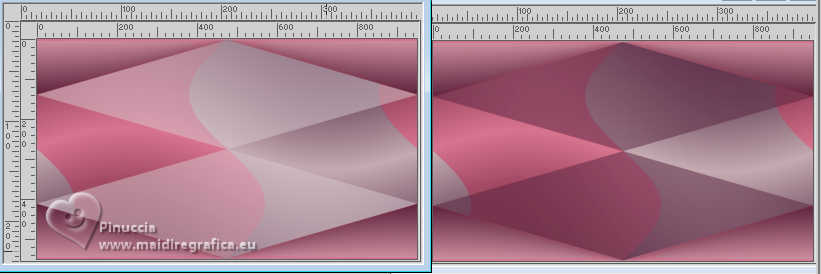
At the bottom of the tutorial is the result with Unlimited 2.0.
****
4. Activate your background layer.
Layers>Duplicate.
Image>Mirror>Mirror Horizontal.
Change the Blend Mode of this layer to Soft Light.
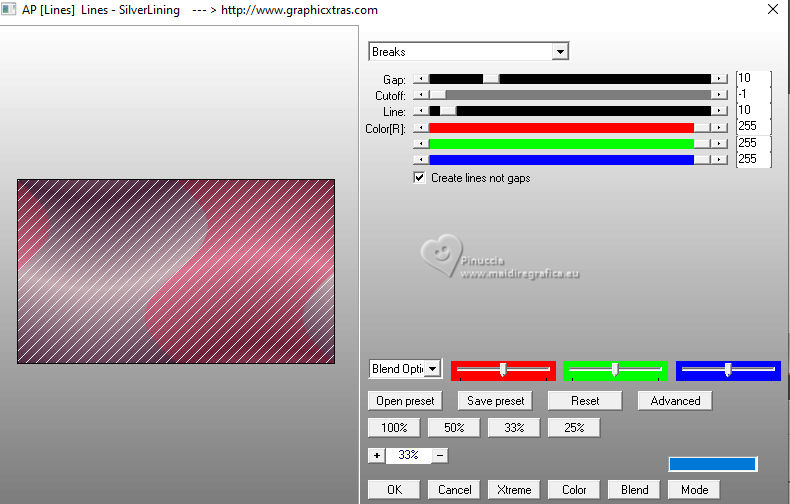
Effects>Plugins>AP [Lines] - Lines SilverLining.
5. Activate your top layer.
Layers>New Raster Layer.
if necessary, use the png brush in the material
Activate your Brush Tool 
look for and select the brush pennello tutorial Metamorphose, size 100.

Apply the brush clicking with your right button to use your background color 4 #4a223c.
K key to activate your Pick Tool 
Position X: 424,00 - Position Y: 230,00.

M key to deselect the Tool.
6. Layers>Duplicate.
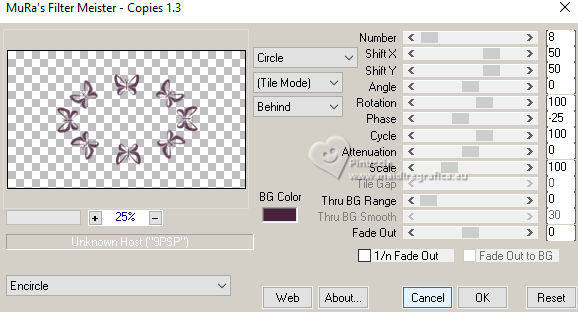
Effects>Plugins>Mura's Meister - Copies.
Change the Blend Mode of this layer to Hard Light and reduce the opacity to 80%.
Effects>Texture Effects>Weave
weave color: white
gap color: black
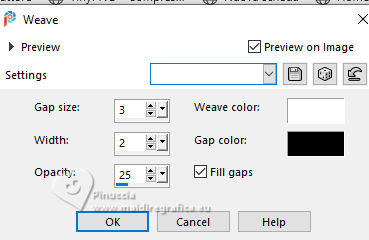
Effects>3D Effects>Inner Bevel.
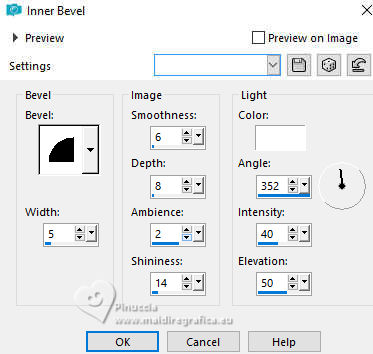
Effects>Image Effects>Seamless Tiling, default settings.

7. Activate the layer below.
Effects>3D Effects>Inner Bevel, same settings.
Effects>3D Effects>Drop Shadow, color 2 #6a2037.
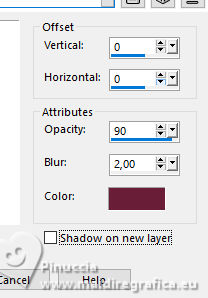
K key to activate your Pick Tool 
Position X: 423,00 - Position Y: 224,00.

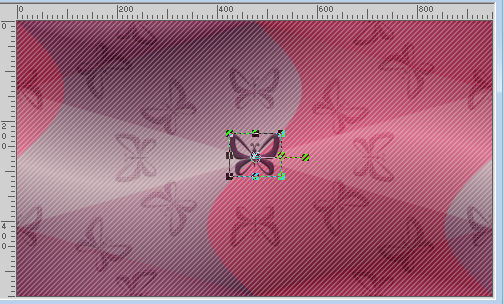
M key to deselect the Tool.
8. Activate the layer Copy of Raster 1.
Layers>New Raster Layer.
Selections>Load/Save Selection>Load Selection from Alpha Channel.
The selection Sélection #1 is immediately available.
You just have to click Load.
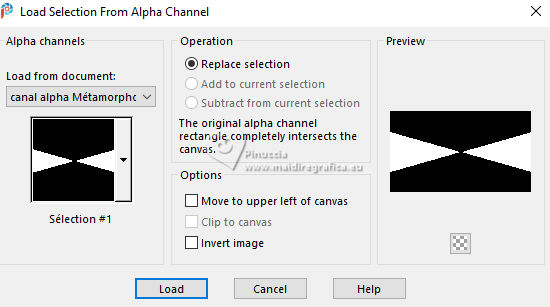
Open the image Paysage Mariposa 1_AigenMM 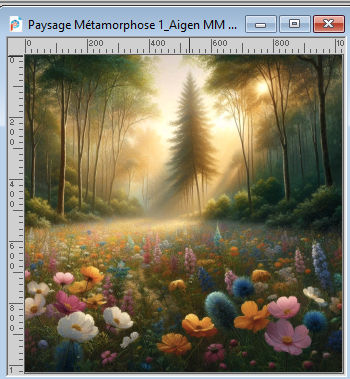
Edit>Copy.
Go back to your work and go to Edit>Paste into Selection.
Change the Blend Mode of this layer to Overlay (or other, according to your colors).
Keep selected.
9. Layers>New Raster Layer.
Effects>3D Effects>Cutout - color black.
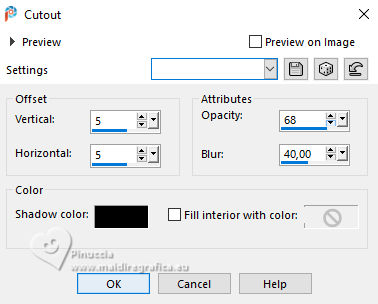
Layers>New Raster Layer.
Effects>3D Effects>Chisel - color 2 #6a2037
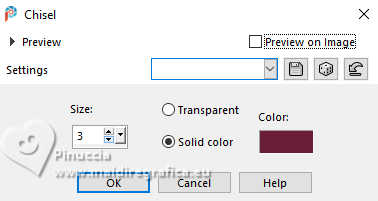
Effects>Edge Effects>Enhance.
Layers>Merge>Merge Down - 2 times
Selections>Select None.
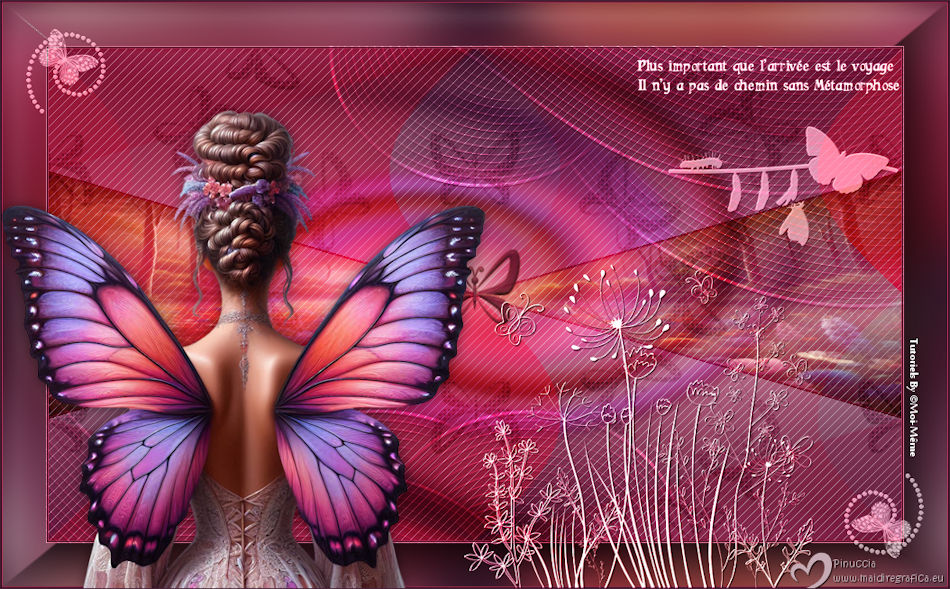
Your tag and the layers
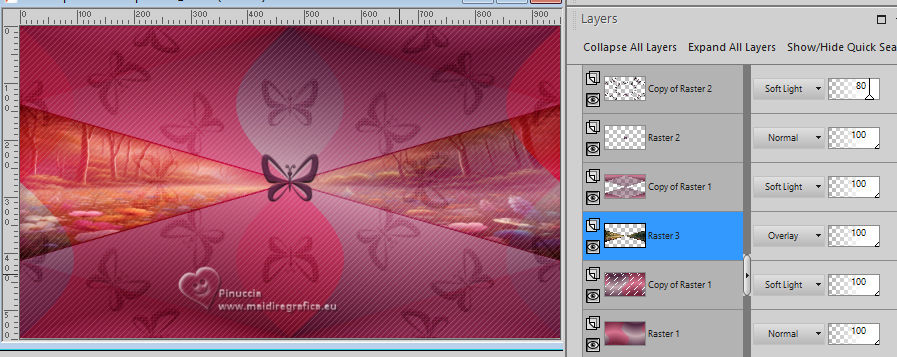
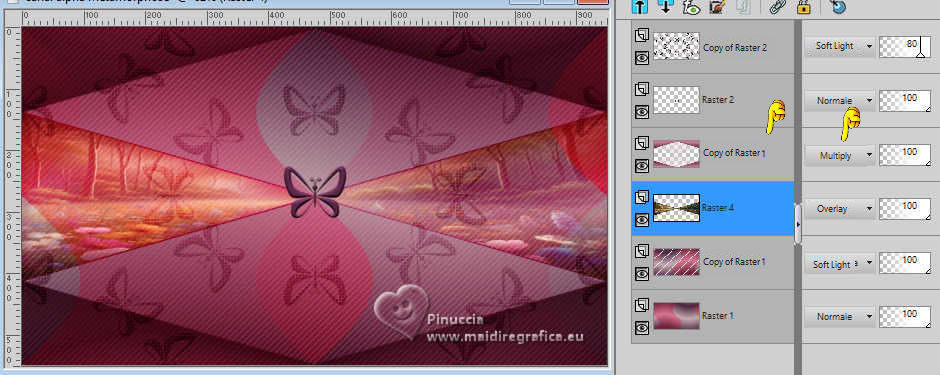
Note: For the translation with Unlimited 2.0 version,
I changed the Blend Mode of the layers with the Unlimited's effects to Multiply.
10. Activate your top layer.
Layers>New Raster Layer.
Selections>Select All.
Selections>Modify>Contract - 2 pixels.
Effects>3D Effects>Chisel, same settings.
Selections>Invert.
Effects>Edge Effects>Enhance.
Selections>Select None.
11. Image>Add Borders, 1 pixel, symmetric, color 1 #d97591.
Set your foreground color to white.
Layers>New Raster Layer.
Flood Fill  the layer with color white. the layer with color white.
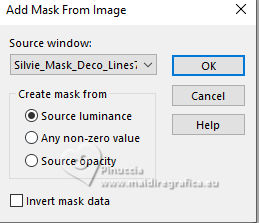
Layers>New Mask layer>From image
Open the menu under the source window and you'll see all the files open.
Select the mask Silvie_Mask_Deco_Lines7UZ
Layers>Merge>Merge Group.
Effects>3D Effects>Drop Shadow, color 4 #4a223c.
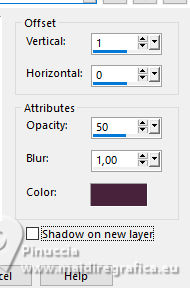
Edit>Repeat Drop Shadow.
Change the Blend Mode of this layer to Overlay.
12. Selections>Select All.
Image>Add Borders, 50 pixels, symmetric, color 4 #4a223c.
Effects>Image Effects>Seamless Tiling, default settings.

Selections>Invert.
Adjust>Blur>Gaussian Blur - radius 30.

Open the tube pour cadre MétamorphoseMM 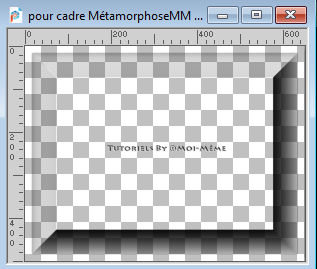
Erase the watermark and go to Edit>Copy.
Go back to your work and go to Edit>Paste into Selection.
Selections>Select None.
12. Layers>New Raster Layer.
Selections>Select All.
Selections>Modify>Contract - 2 pixels.
Effects>3D Effects>Chisel, same settings.

Selections>Select None.
Effects>Edge Effects>Enhance.
Layers>Merge>Merge Down.
13. Open the tube Femme Métamorphose 1_AIgen MM 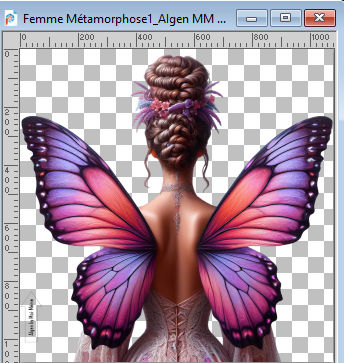
Erase the watermark and go to Edit>Copy.
Go back to your work and go to Edit>Paste as new layer.
Image>Resize, to 50%, resize all layers not checked.
(adapt to your tube)
Layers>Duplicate.
Activate the layer below of the original.
Adjust>Blur>Gaussian Blur - radius 30.

Effects>Distortion Effects>Twirl.
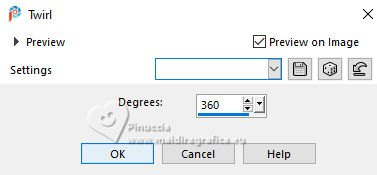
Change the Blend Mode of this layer to Overlay, or other, according to your colors.
14. Activate the layer above of the copy.
Move  the tube at the bottom left (or according to your tube): the tube at the bottom left (or according to your tube):
Objects>Align>Bottom
Objects>Align>Left.
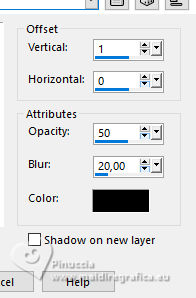
Effects>3D Effects>Drop Shadow, color black.
15. Activate the layer below.
Open the tube déco 1 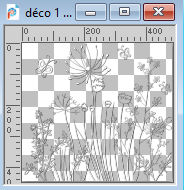
Edit>Copy.
Go back to your work and go to Edit>Paste as new layer.
Image>Resize, to 80%, resize all layers not checked.
Pick Tool (K) 
Position X: 514,00 - Position Y: 293,00.

M key to deselect the Tool.
Change the Blend Mode of this layer to Luminance.
16. Activate your top layer.
Open titre 
Erase the watermark and go to Edit>Copy.
Go back to your work and go to Edit>Paste as new layer.
Effects>3D Effects>Drop shadow, color 4 #4a223c.

Change the blend Mode of this layer to Luminance (legacy).
17. Sign your work.
Add the author and translator's watermarks.
18. Image>Add Borders, 1 pixel, symmetric, color 4 #4a223c.
Image>Resize, 950 pixels width, resize all layers checked.
Save as jpg.
Example with the Unlimited 2.0 version
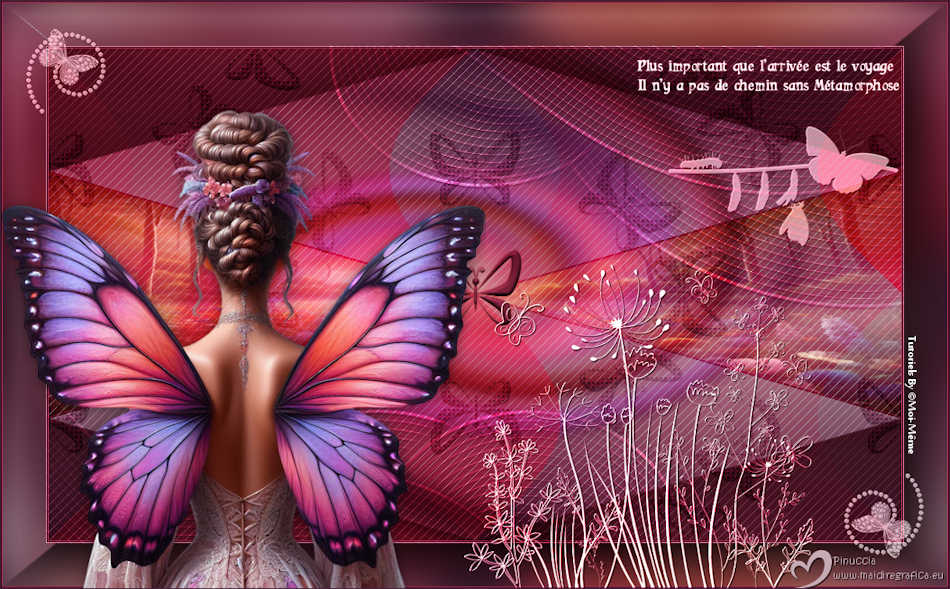
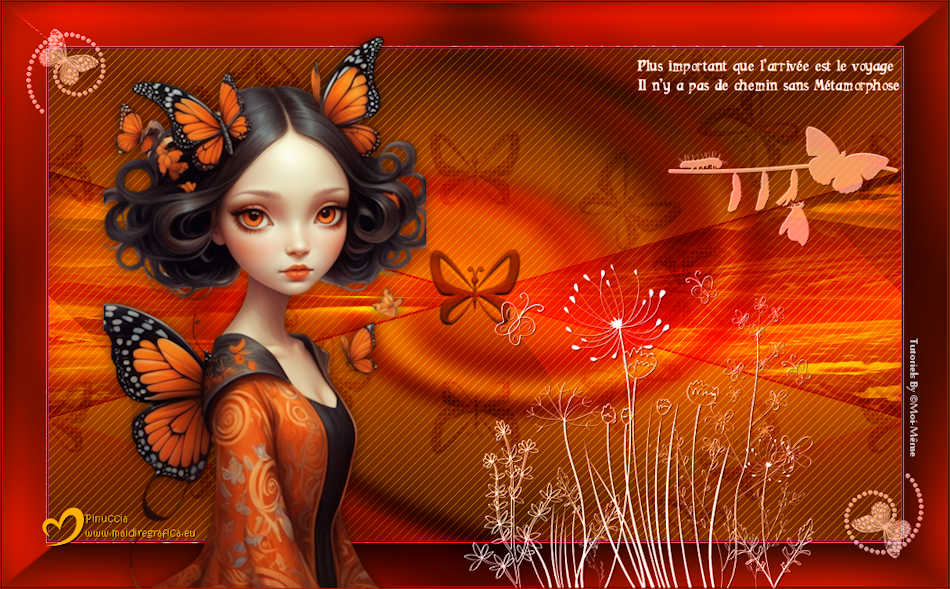
Version with my tube from an image of Pinterest

If you have problems or doubts, or you find a not worked link,
or only for tell me that you enjoyed this tutorial, write to me.
1 September 2025

|

