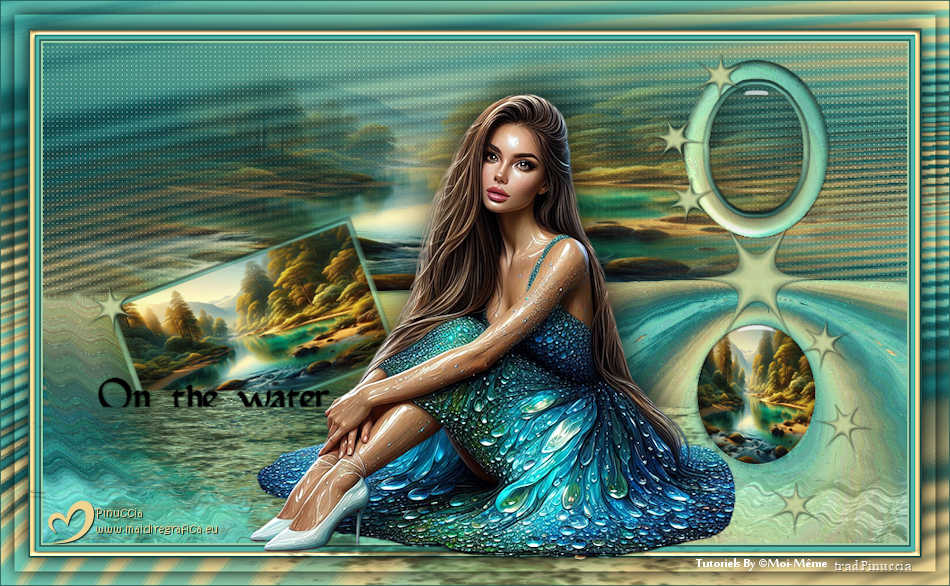
|
SUR L'EAU


Thanks Irene for the invitation to translate your tutorials

This tutorial was written with PSPX8 and translated with PSPX9 and PSP2020, but it can also be made using other versions of PSP.
Since version PSP X4, Image>Mirror was replaced with Image>Flip Horizontal,
and Image>Flip with Image>Flip Vertical, there are some variables.
In versions X5 and X6, the functions have been improved by making available the Objects menu.
In the latest version X7 command Image>Mirror and Image>Flip returned, but with new differences.
See my schedule here
 italian translation here italian translation here
 your versions here your versions here

For this tutorial, you will need:

For the tubes and the mask thanks Colybrix and Narah.
The rest of the material is by Moi-Même
(The links of material creators here).

consult, if necessary, my filter section here
Filters Unlimited 2.0 here
Mehdi - Vibrations 1.1. here
Balder Olrik - Mirror Y here
AP [Lines] - Lines SilverLining here
Alien Skin Eye Candy 5 Impact - Glass here
Flaming Pear - Flood 2 here
Filters Balder Olrik can be used alone or imported into Filters Unlimited.
(How do, you see here)
If a plugin supplied appears with this icon  it must necessarily be imported into Unlimited it must necessarily be imported into Unlimited

You can change Blend Modes according to your colors.
In the newest versions of PSP, you don't find the foreground/background gradient (Corel_06_029).
You can use the gradients of the older versions.
The Gradient of CorelX here
Copy the preset  in the folder of the plugin Alien Skin Eye Candy 5 Impact>Settings>Glass. in the folder of the plugin Alien Skin Eye Candy 5 Impact>Settings>Glass.
One or two clic on the file (it depends by your settings), automatically the preset will be copied in the right folder.
why one or two clic see here
Copy the preset for Flood in a folder at your choice.
If you prefer, you can import it from the folder of the material, when you'll need it.

Open the mask in PSP and minimize it with the rest of the material.
If you have problems with the Alpha Channel,
open a new transparent image 950 x 550 pixels, and use the selections from disk.
Choose the colors from your tube.

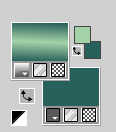
Set your foreground color with the color 1 #a4d2a8,
and your background color with the color 2 #29615b.
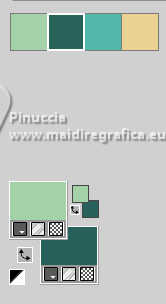
color 3 #51b5a7
color 4 #ecd292
color 5 white
Set your foreground color to a Foreground/Background Gradient, style Linear.
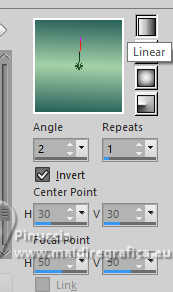 
1. Open Canal_alpha_ Sur l'eau
This image, that will be the basis of your work, is not empty,
but contains the selections saved to alpha channel.
Flood Fill  the transparent image with your Gradient. the transparent image with your Gradient.
2. Effects>Plugins>Mehdi - Vibrations 1.1.
This filter use the colors of your palette:
The first is your background color, the second is your foreground color.
Change the last two colors created by the filtre:
the third with color 3 #51b5a7 and the fourth with #ecd292.

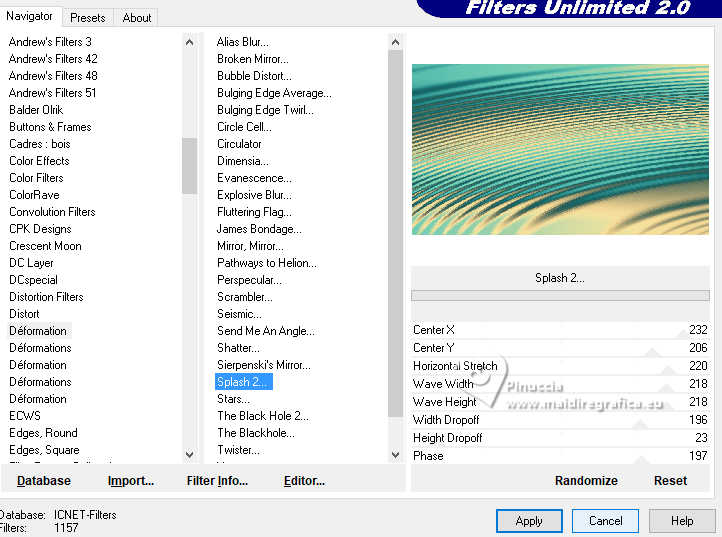
Effects>Plugins>Filters Unlimited 2.0 - Déformation - Splash 2, default settings.
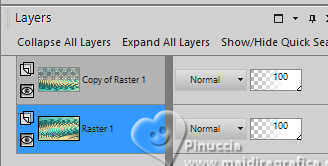
3. Layers>Duplicate.
Effects>Plugins>Filters Unlimited 2.0 - Balder Olrik - Mirror Y, default settings.

Selections>Load/Save Selection>Load Selection from Alpha Channel.
The selection Sélection #1 is immediately available.
You just have to click Load.

Effects>Plugins>AP [Lines] - Lines SilverLining.

Selections>Select None.
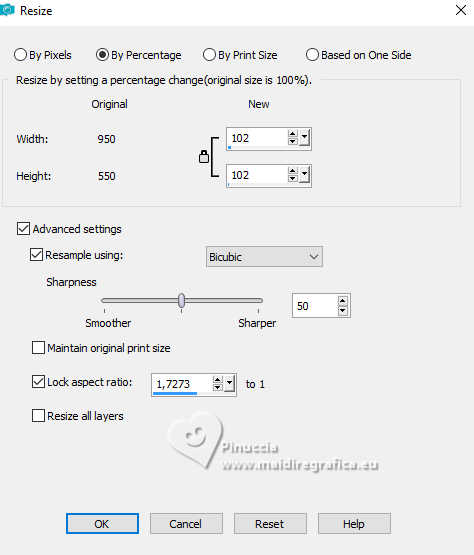
Image>Resize, to 102%, resize all layers not checked.
4. Activate the layer Raster 1.
Selections>Select All.
Image>Crop to Selection.
5. Activate your top layer, Copy of Raster 1.
Selections>Load/Save Selection>Load Selection from Alpha Channel.
Load again the selection Sélection #1

Selections>Invert.
Selections>Promote Selection to Layer.
Effects>Artistic Effects>Enamel, color 3 #51b5a7
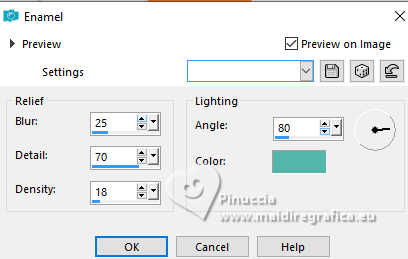
Selections>Select None.
Stay on this layer.
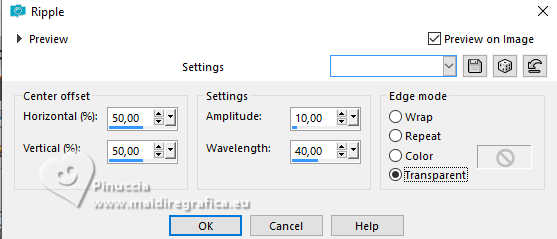
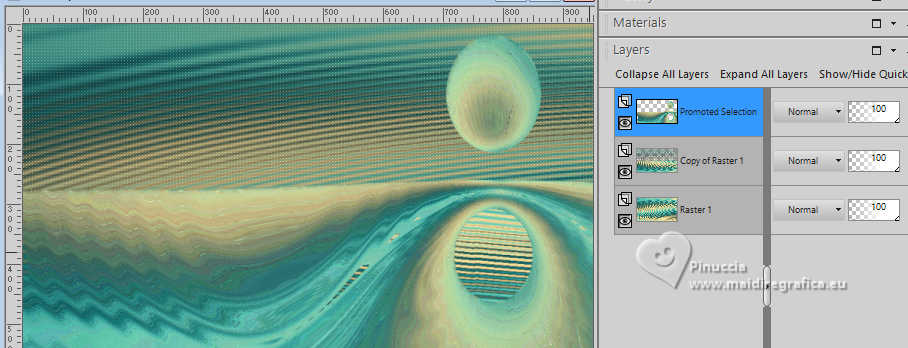
6. Effects>Distortion Effects>Ripple.
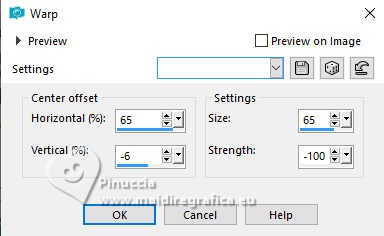
Effects>Distortion Effects>Warp.
7. Layers>New Raster Layer.
Selections>Load/Save Selection>Load Selection from Alpha Channel.
Open the selections menu and load the selection sélection #2
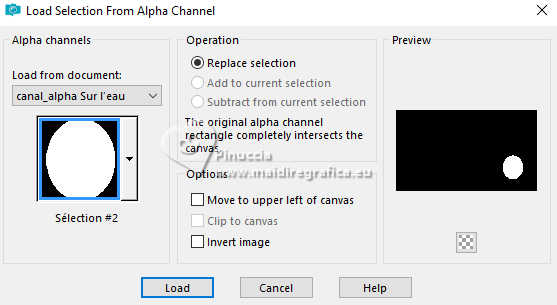
Open the image Forêt et rivière_AIGEN MM 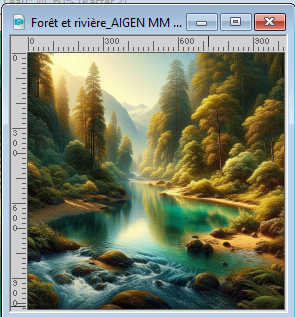
Edit>Copy.
Go back to your work and go to Edit>Paste into Selection.
Adjust>Sharpness>Sharpen.
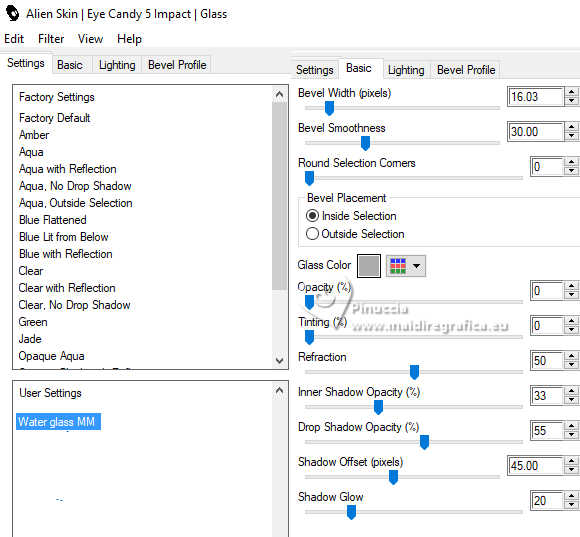
Effects>Plugins>Alien Skin Eye Candy 5 Impact - Glass.
select the preset Water glass MM
Basic: Glass color: #acacac.
Layers>Arrange>Move Down.
Selections>Select None.
8. Layers>New Raster Layer.
Selections>Load/Save Selection>Load Selection from Alpha Channel.
Load again the selection Sélection #1

Edit>Paste into Selection (the landscape is still in memory).
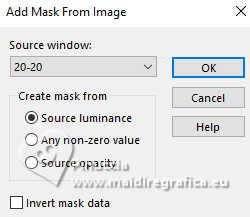
Layers>New Mask layer>From image
Open the menu under the source window and you'll see all the files open.
Select the mask 20-20.
Layers>Merge>Merge Group.
Selections>Select None.
9. Activate your top layer, Promoted Selection.
Selections>Load/Save Selection>Load Selection from Alpha Channel.
Open the selections menu and load the selection sélection #3
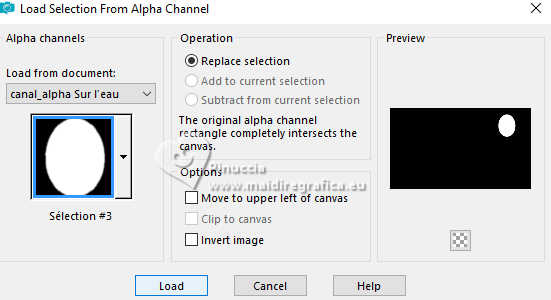
Press CANC on the keyboard 
Selections>Select None.
10. Layers>New Raster Layer.
Selections>Load/Save Selection>Load Selection from Alpha Channel.
Open the selections menu and load the selection sélection #4
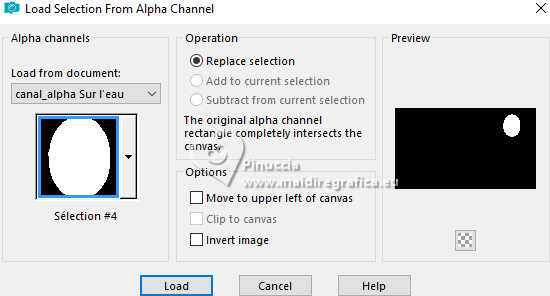
Selections>Modify>Select Selection Borders.
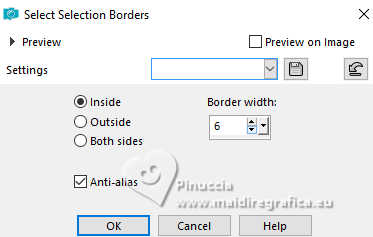
Flood Fill  the selection with your Gradient. the selection with your Gradient.
Effects>3D Effects>Inner Bevel.
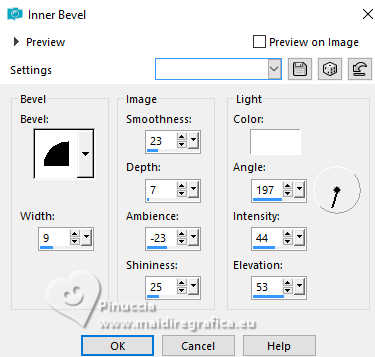
Selections>Select None.
Stay on this layer.
11. Selections>Load/Save Selection>Load Selection from Alpha Channel.
Open the selections menu and load the selection sélection #5
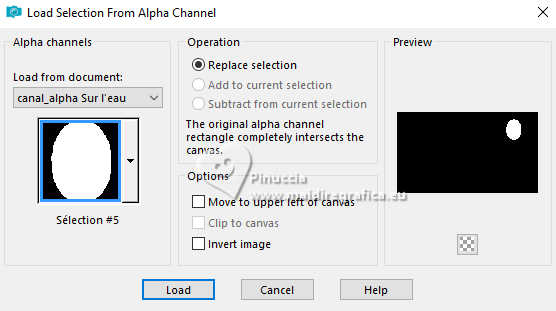
Effects>Plugins>Alien Skin Eye Candy 5 Impact - Glass, same settings.
Selections>Select None.
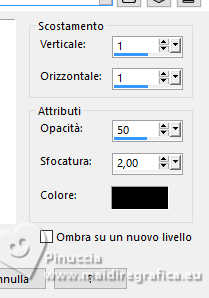
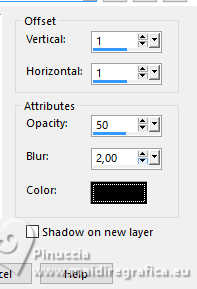
Effects>3D Effects>Drop Shadow, color black.
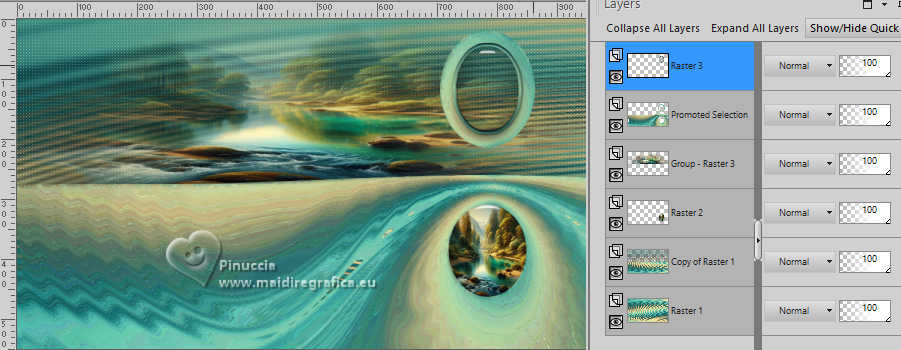
12. Activate the layer below, Promoted Selection.
Selections>Load/Save Selection>Load Selection from Alpha Channel.
Open the selections menu and load the selection sélection #6
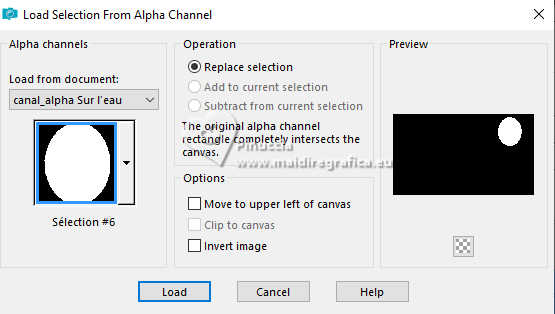
Effects>3D Effects>Inner Bevel, same settings.

Selections>Select None.
Effects>3D Effects>Drop Shadow, same settings.
Result:
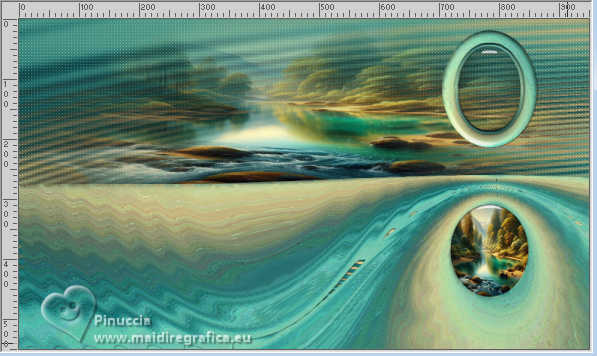
13. Activate your background layer.
Edit>Copy.
Edit>Paste as new image.
Work on this image.
14. Layers>Duplicate.
Image>Resize, to 30%, resize all layers not checked.
Activate your Magic Wand Tool  , tolerance and feather 0, , tolerance and feather 0,
and click in the transparent part to select it.
Selections>Invert.
Layers>New Raster Layer.
Selections>Modify>Select Selection Borders, same settings.

Flood Fill  the selection with your Gradient. the selection with your Gradient.
Effects>3D Effects>Inner Bevel, same settings.

Selections>Select None.
Select the inside of the frame with your Magic Wand Tool 
Selections>Modify>Expand - 2 pixels.
Layers>New Raster Layer.
Activate again the landscape Forêt et rivière_AIGEN MM
(It is no longer in memory since you copied the background layer in step 13)
Edit>Copy.
Go back to your second work and go to Edit>Paste into Selection.
Selections>Select None.
Layers>Arrange>Move Down.
Adjust>Sharpness>Sharpen.
Activate your top layer.
Layers>Merge>Merge Down - 2 times.
Edit>Cut.
Leave the background image (raster 1) aside for later use.
15. Go back to your main work.
Activate the top layer.
Edit>Paste as new layer.
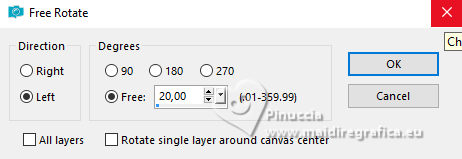
Image>Free Rotate - 20 degrees to left.
K key to activate your Pick Tool 
Position X: 69,00 - Position Y: 190,00.

Effects>Plugins>Flaming Pear - Flood 2.
Attention: this preset was created with Flood 2.
If you use the previous version of the filter, it will not work.
Click on the red arrow and look for the preset in the folder where you saved it.
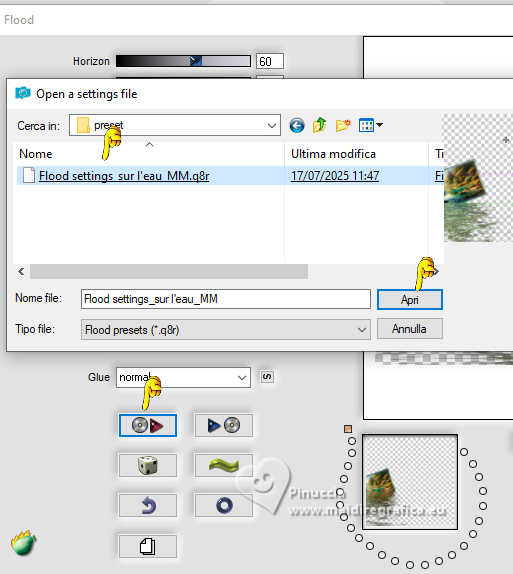
These are the settings: foreground color
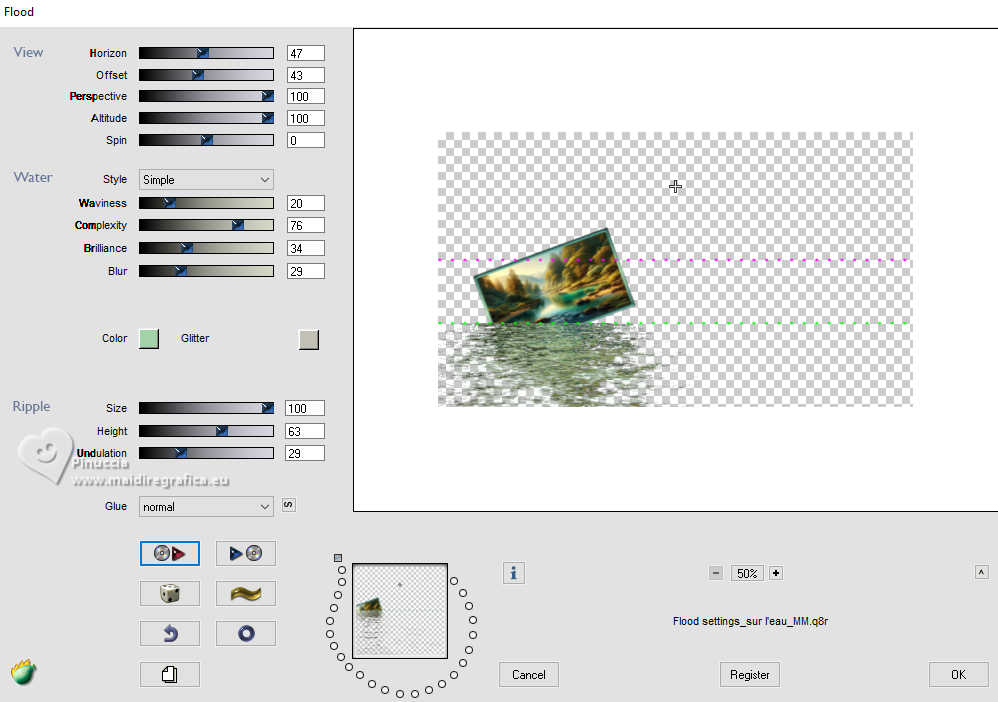
Stay on this layer.
16. Selections>Select All.
Selections>Float.
Selections>Defloat.
Selections>Modify>Feather - 20 pixels.
Selections>Invert.
Press CANC on the keyboard.
Selections>Select None.
Say on this layer.
17. Layers>Duplicate.
Adjust>Blur>Gaussian Blur - radius 20.

Change the Blend Mode of this layer to Overlay.
Layers>Arrange>Move Down.
18. Activate your top layer.
Adjust>Sharpness>Sharpen.
Open déco étoiles 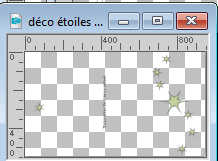
Erase the watermark and go to Edit>Copy.
Go back to your work and go to Edit>Paste as new layer.
If necessary: colorize according to your colors,
p.e. with your Color to Target Tool  , ,
right or left button depending on the color
Adjust>Sharpness>Sharpen.
Pick Tool (K) 
Position X: 17,00 - Position Y: -1,00.

19. Activate the layer Promoted Selection (the 5th from the top)
Open déco ondulation 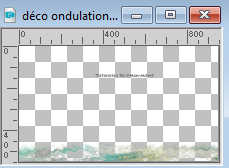
Erase the watermark and go to Edit>Copy.
Go back to your work and go to Edit>Paste as new layer.
Objects>Align>Bottom,
or Pick Tool (K) 
Position X: 0,00 - Position Y: 449,00.

M key to deselect the Tool.
Change the Blend Mode of this layer to Luminance (legacy).
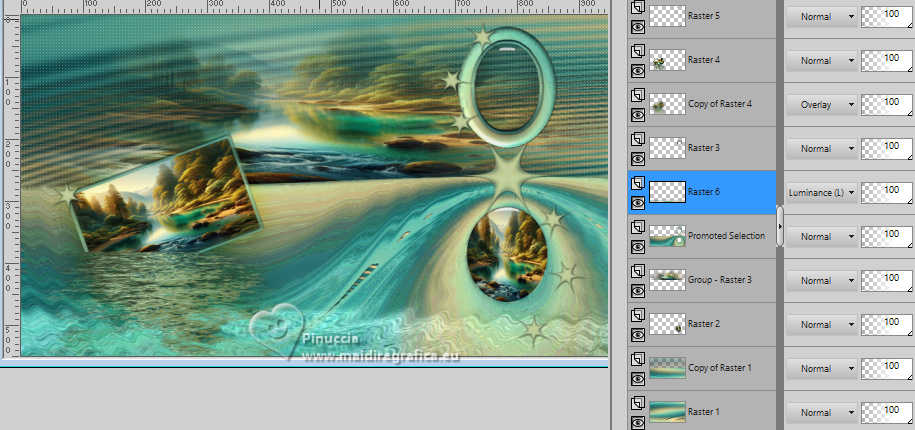
20. Image>Add Borders, 2 pixels, symmetric, foreground color.
Image>Add Borders, 2 pixels, symmetric, background color.
Image>Add Borders, 5 pixels, symmetric, color 3 #51b5a7.
Image>Add Borders, 5 pixels, symmetric, color 4 #ecd292.
Image>Add Borders, 2 pixels, symmetric, background color.
Selections>Select All.
21. Image>Add Borders, 30 pixels, symmetric, color white.
Selections>Invert.
Activate the background image you have minimized and activate the layer Raster 1.
Edit>Copy.
Go back to your work and go to Edit>Paste into Selection.
Selections>Invert.
Effects>3D Effects>Drop Shadow, color black.

Selections>Select None.
22. Activate your Magic Wand Tool 
and click in the border of the color 3 to select it.
Effects>3D Effects>Inner Bevel, same settings.

Effects>3D Effects>Drop Shadow, color black

Selections>Select All.
Selections>Modify>Contract - 15 pixels.
Effects>3D Effects>Drop Shadow, color black.

Selections>Select None.
23. Open the tube Water Lady 2_AIgen MM 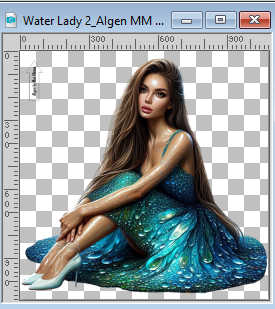
Erase the watermark and go to Edit>Copy.
Go back go your work and go to Edit>Paste as new layer.
Image>Resize, to 50%, resize all layers not checked.
Pick Tool (K) 
Position X: 273,00 - Position Y: 100,00.

M key to deselect the Tool.
Adjust>Sharpness>Sharpen.
Layers>Duplicate.
24. Activate the layer below.
Adjust>Blur>Gaussian Blur - radius 20.

Change the Blend Mode of this layer to Multiply and reduce the opacity to 80%.
Effects>Plugins>Flaming Pear - Flood, same settings.
25. Open titre 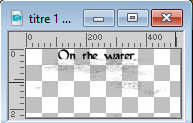
Edit>Copy.
Go back to your work and go to Edit>Paste as new layer.
Pick Tool (K) 
Position X: 0,00 - Position Y: 413,00.

M key to deselect the Tool.
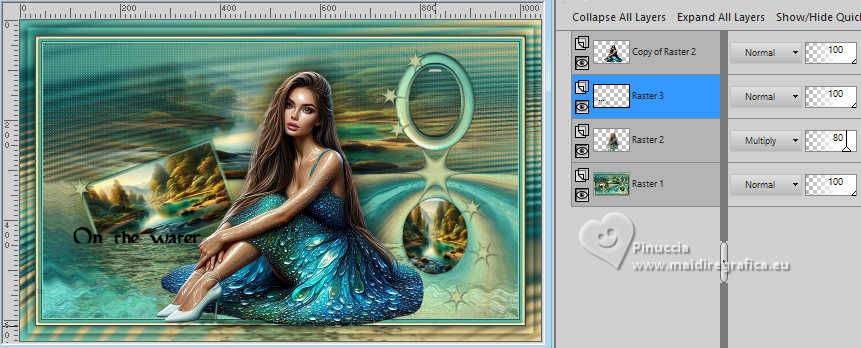
26. Activate your top layer.
Sign your work.
Add the author and translator's watermarks.
27. Image>Add Borders, 1 pixel, symmetric, background color.
Image>Resize, 950 pixels width, resize all layers checked.
Save as jpg.


If you have problems or doubts, or you find a not worked link,
or only for tell me that you enjoyed this tutorial, write to me.
14 August 2025

|

